If you want to set up a home studio without a lot of financial investment, then DIY photography backdrop stands can be a great choice. It won't take you a lot of time and effort to make such a backdrop stand yourself. Below, you will learn how to make a backdrop stand for less than $10 and in just 10 minutes.
Necessary materials:
Cut list:
Note that 10-feet 3/4-inch PVC pipes are the most common. Cutting off the length you need for the structure, you will have some remnants of the pipe. If you manage to buy a 5-foot pipe, then you get less leftover after cutting 16-inch pieces.
Remember that end caps, T pieces, and elbows must be of the “slip” type. The “threaded” options are not suitable in our case as they do not slide onto the PVC pipe.
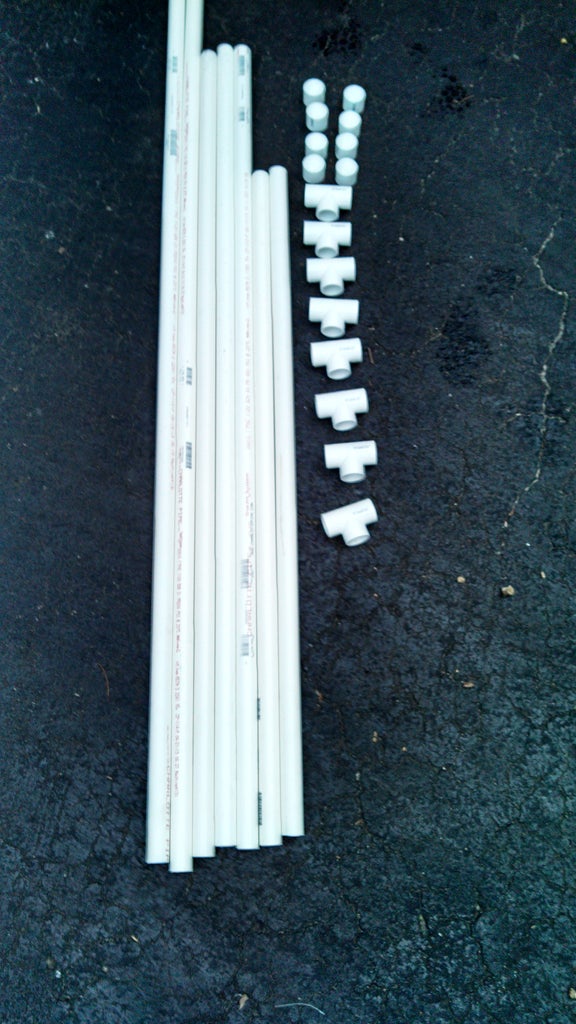
You can use a pipe cutter or handy dandy miter saw. I used the latter option and everything was simple and fast.
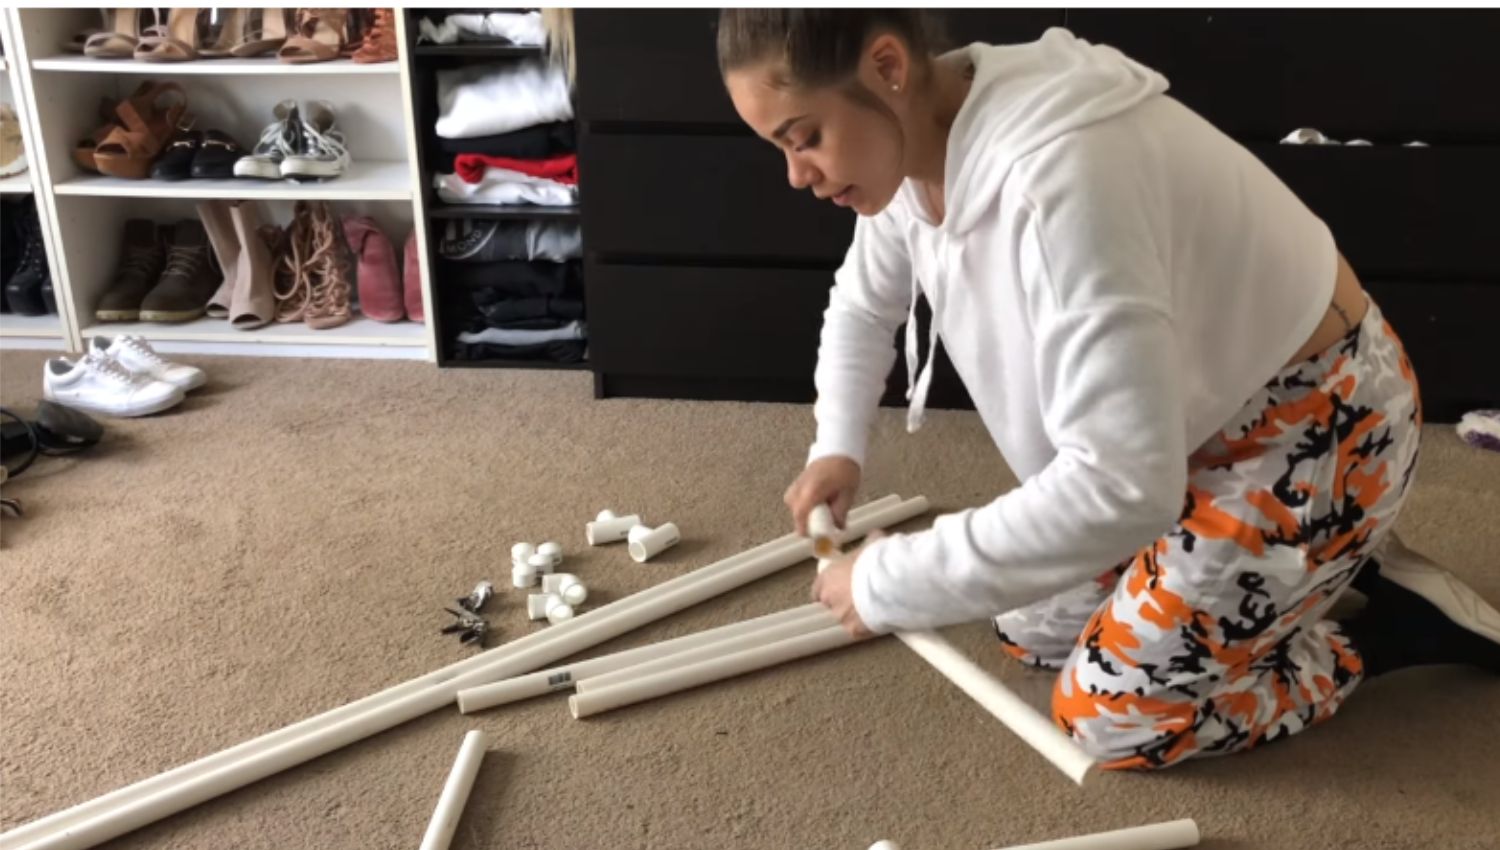
Start with legs for your DIY photography backdrop stand. Take a T-piece and attach two 12" pieces on the opposite sides. Cover each end with an end cap.
Then, take a 30-inch piece and attach it to the stand leg. Connect another T-element. Do the same for the second leg. Now, add 54" pieces to each side of the stand legs using the two T-pieces in the center.

Next, we move on to the top of our construction. You need to attach a 54" piece to the two side 30" pieces. Use 2 elbow pieces to connect these parts. This homemade backdrop stand is great for twin-size sheets. You can simply throw it over the top of the structure and it will not slip. However, if you decide to use fabrics, you will have to attach it so that it does not fall off.

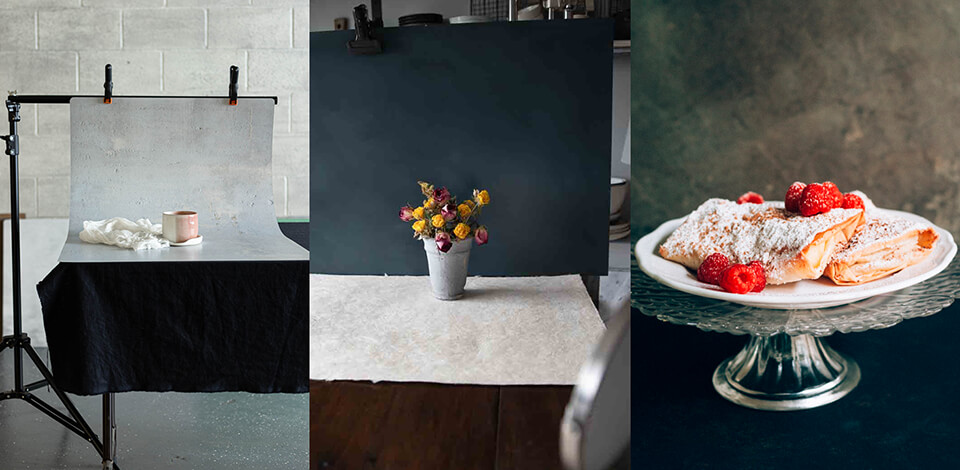
With the help of such a stand, you can take excellent product images as well as succeed in portrait photography without spending a lot of money on it.
Remember that this is still a home photography studio, not a professional one with quality light sources. You may have lighting problems or even a lack of creative photo ideas.

Experiment with low-key lighting to bring your subject into focus. To achieve the desired effect, you need to use a backdrop that is 3 or more stops darker than the light. Use grids to prevent the light from hitting the backdrop. This is very important for low-key lighting techniques.
By the way, you can also create DIY photography lighting if you don't have enough money for professional equipment or just love to do everything yourself.
You can use your DIY photography backdrop stands for taking pictures with a shallower depth of field. As a result, you will get a blurred backdrop. This method works great with various backdrops and allows you to draw viewers’ attention towards your subject. You can also use product photography backdrops to bring your wildest ideas to life.

Make your own backdrop stand and try different options for lighting, backgrounds, shooting angles and so on. It will allow you to take unique pictures. You can create the background yourself (for example, by painting or drawing it) or use bedsheets, curtains, and other materials.
By the way, if you like to make photography gear by yourself, you can also learn how to make DIY gimbal.

You can enhance your photos with just a few clicks using these free Ps actions. With them, you can correct lighting, increase contrast, add or change colors or shades. This action pack is designed for product images, but they look good with street and portrait photos too. You can apply them if you are a Photoshop CS3-CS6 or Creative Cloud user.
You can enhance your photos in RAW and JPEG formats with this free bundle. However, if you are short on time and have tons of photos to edit, I recommend contacting a professional product retouching service to get flawless pictures and have more time for shooting.