ND filters are made of darkened glass pieces that minimize the amount of light getting to the lens. Even if you use a DIY ND filter, you can take dynamic shots or add some blur while keeping your main object in focus.
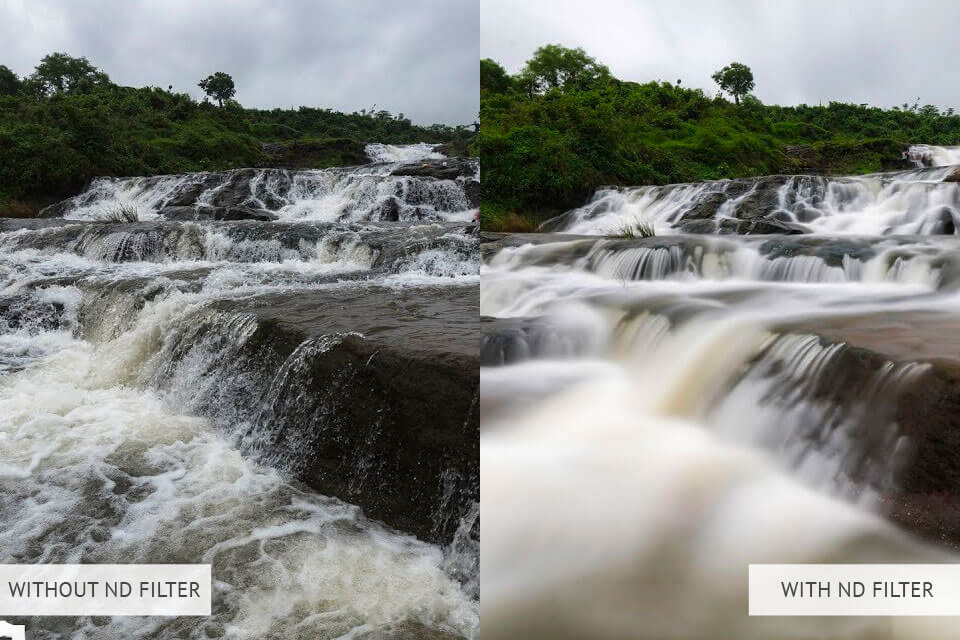
Neutral density filters are preferred by landscape photographers, including those who capture waves or waterfalls.
As ND filters cost at least $100, it makes sense to build them by yourself if you are on a tight budget. In this detailed tutorial, we will walk you through all the steps of the process to help you build an ND filter without wasting much money.
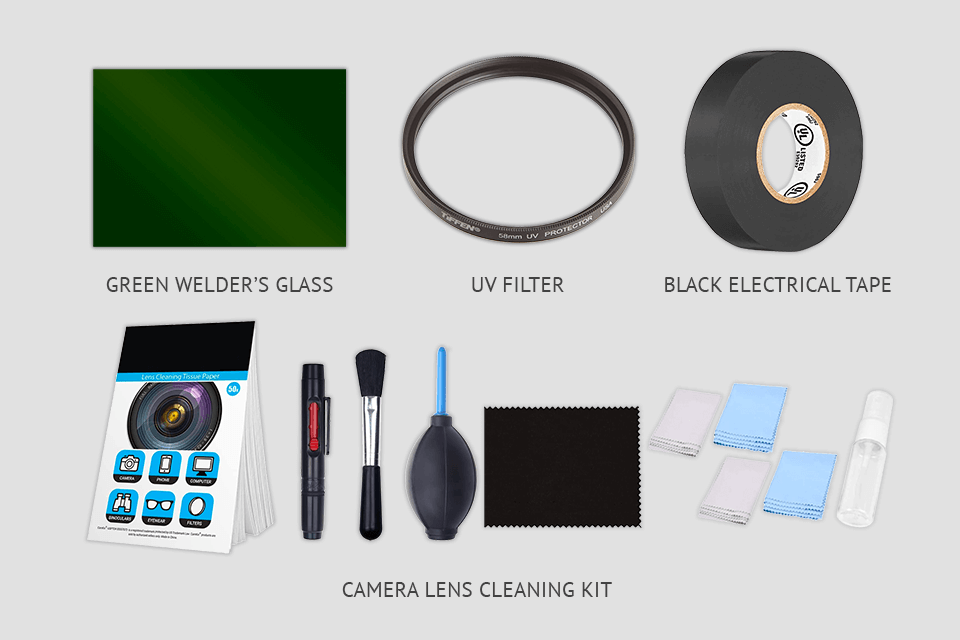
In case you want to build an affordable neutral-density filter, you can use a piece of welding glass to reduce the amount of light. When building such filters, you need to consider the color differences and combine different pieces of glass by yourself. It will allow you to build a perfect ND filter for doing landscape photography. To build a new filter, use such materials
To create an ND filter, find a piece of welding glass typically used in helmets. You can purchase replacement glass for a helmet or buy welding glass pieces of different sizes. Using them, you can create various filters for landscape photography.
If you have a welding supply store nearby, make sure to go there to see what it has to offer. You will need to use a 4.5 x 5.25 glass piece, as this size is sufficient for covering camera lenses. The glass piece might have different grades, like 4, 5, 6, 8, 10, 11, 12, and 14. The higher the number, the denser and darker the glass piece is.
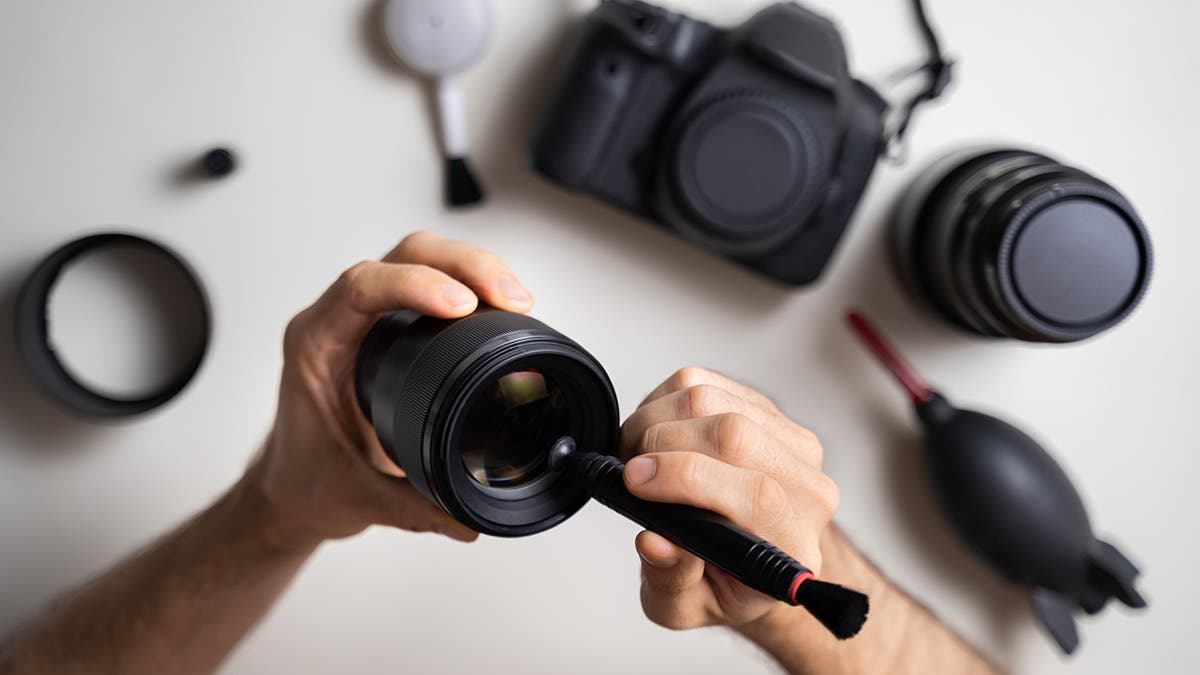
To clean the glass surface, make sure to use a camera lens cleaning kit. Using it, you can clean your spare filter.
Continue by cleaning the front element and the welding glass. It’s important not to damage the packaging of the latter. You can use it for the ND filter you are going to create.
Center a UV filter you are going to use on the welder’s glass. Keep in mind that its threaded side should not be against the welder’s glass.
After doing this, you need to attach the UV filter to the welder’s glass using electrical tape. As this filter is round-shaped, it’s better to use short pieces of tape to firmly fix it in place. I recommend you use dark tape to minimize light leaks.
Before attaching the filter to your lens, create the right composition in the frame and focus on the object that you want to capture. Landscape photographers always take this step before mounting the welder’s glass to get the desired result.
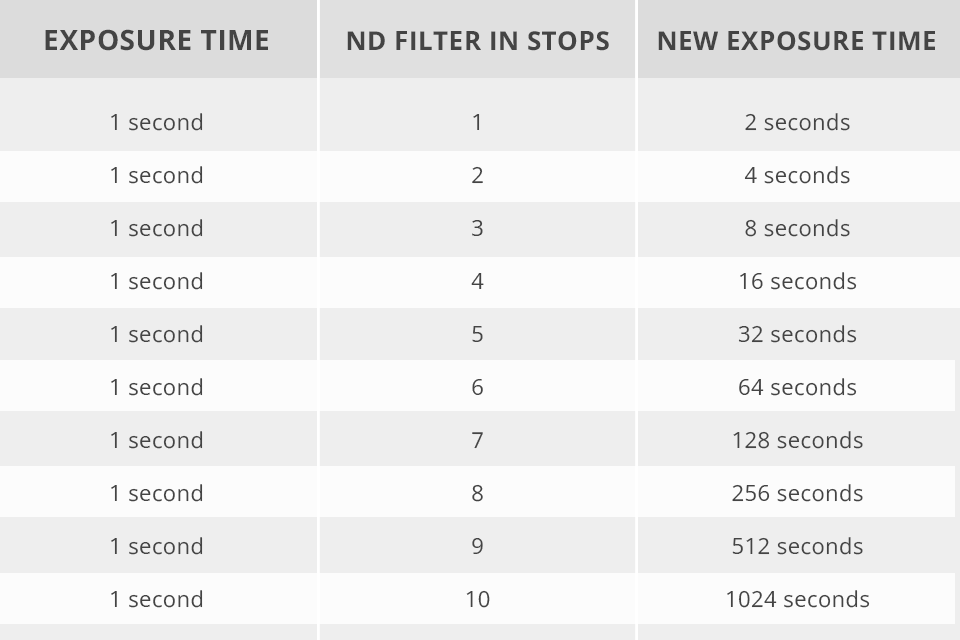
After focusing on your object, switch to manual focus. You may also fix the focus ring using a piece of tape to ensure that it will stay in the same position. As the homemade neutral density filter will reduce the amount of light getting to the camera’s sensor by 10 stops, you can lower the shutter stop by the same value as well.
Regardless of a model of the camera for landscape photography you are using, you are likely to adjust the shutter speed using 1/3 stop increments. It means that every 3 clicks you make will be equal to 1 stop.

If you followed all the steps described allow, you should already have a 10-stop ND filter. You can screw it to the lens for landscape photography. It can be attached in the same way you screw a diffusion filter. Keep in mind that different filters block different amounts of light. This is why it is important to test the one you have to see how much light it actually blocks.
You can minimize this effect by following several simple steps. Before taking photos, make sure not to stack filters with a wide-angle lens. If you want to take pictures using CPL or ND filters, don’t use a UV filter. It’s also important to select the right ND filter instead of stacking several of them together.
Yes, as it affects autofocus, it’s important to turn it off when using these filters. For instance, if you prefer using a dense DIY ND filter, you might notice some issues with your camera when trying to focus. Because of this, you might take a blurry photo.
In case you are interested in long exposure photography, I advise you to buy 3, 6, and 10-stop filters. Landscape photographers who take long-exposure photos will benefit from using these filters the most.
With an ND filter, photographers can use wide-aperture lenses on sunny days without worrying about overexposing their photos. They enable you to make the aperture and depth of field shallower and use selective focus effects when working in different lighting situations even if the shutter speed of your camera is insufficient.