
By relying on the best practices for Amazon product images, you can be 75% certain that you’ve already sold your product, as most users base their decisions on image quality. A proper photo can do wonders for your profitability as long as you comply with all of Amazon’s requirements.
Below, we will address what you need to know about taking high-quality pictures for Amazon. By the end of this article, you'll understand what you need to meet and exceed Amazon's product photo requirements.
It’s vital to ensure the product photos are unique and that you either took them yourself or received them from a trustworthy source, as it’s forbidden to use images from other sellers. To create a photo for Amazon listing without breaking any rules, you can go with one of three options:

By hiring a special agency, you (typically) send the product to their studio and receive the photos within a couple of days. Using this option almost always guarantees your chance at high quality. However, you'll need to pay for them to do it.
Photo agencies can take care of product pictures for Amazon using all desired photo types. For example, most agencies can take lifestyle pictures showing how your products are used.
Most Amazon Sellers lack the budget to do this, so putting any money into photography is questionable. You might not even have to pay for any photographers with option number two.

DIY (Do It Yourself) photography is one way to put on the mantle of the professional photographer yourself. This option is excellent if you want to learn how to take pictures and develop a new skill set.
Amazon tries to make this easy by offering the portable foldable photo studio box. But you won't receive the same benefit when photographing large products.
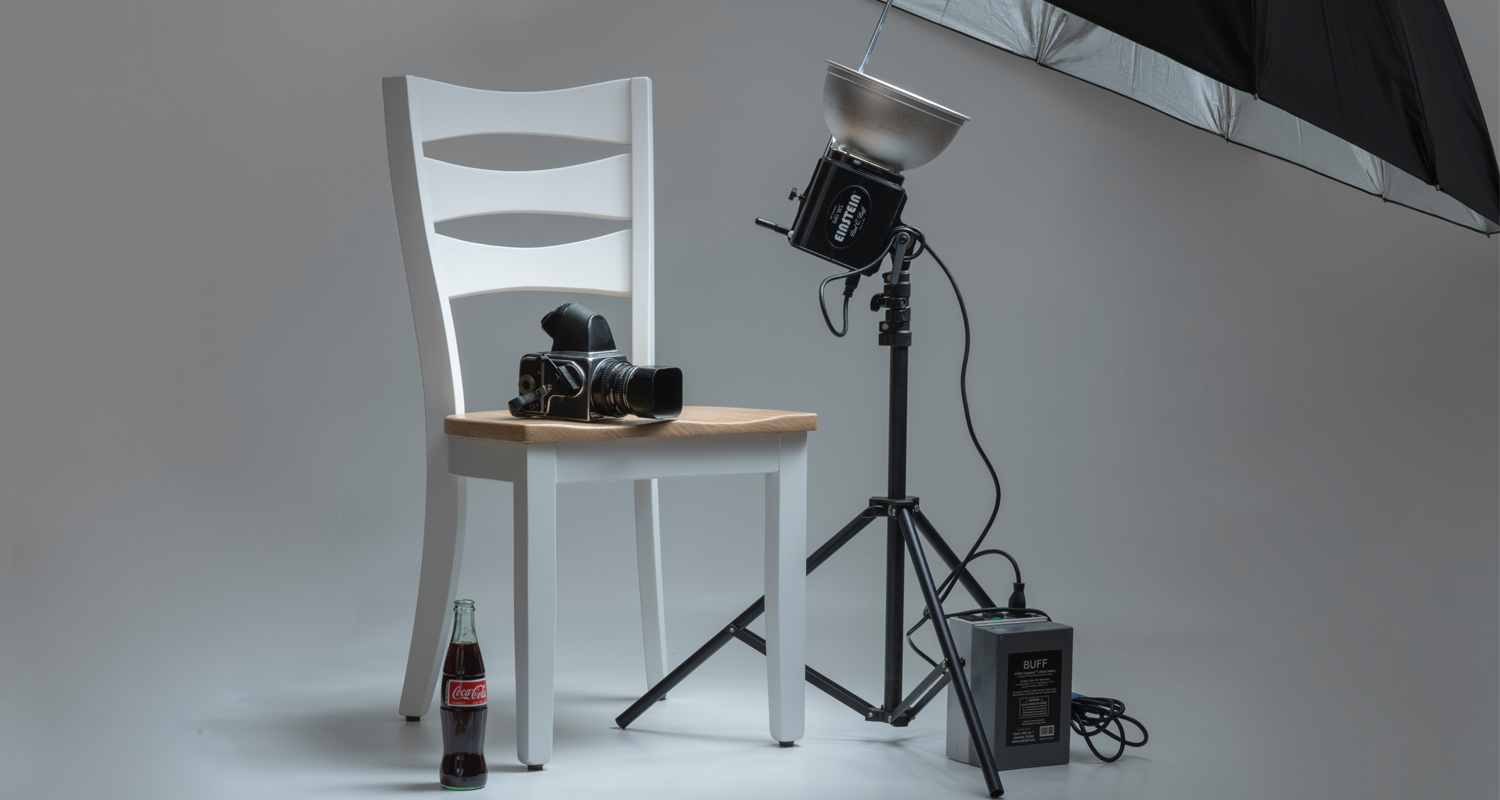
In this case, you'll need the following items:
Those who sell more oversized products will have to learn about natural light, often purchasing a light stand (or two) trying to get their image right. Along with buying the best digital camera, this often sets you back a few hundred dollars.
You can use your phone camera and upload using the Amazon Seller app, but your image might not meet Amazon's minimum requirements if you didn’t study the iPhone product photography guide carefully enough. Still, if you plan on becoming a long-term Amazon seller, this can save you a great deal of money.
As the largest eCommerce platform globally, Amazon product photography is a large industry. Knowing about this, many suppliers have a few Amazon listing images available.
The problem with relying on your supplier for photography comes back to quality. You cannot guarantee that their photo will meet Amazon's technical or contextual requirements, which we will discuss later.
There is no harm in asking, however, and you might end up saving time and money if they have something available. Often, you might want to supplement their catalog with something of your own.
Knowing how you plan on taking the photo is half the battle. The other half is understanding the technical aspects of uploading images to Amazon. When it comes to meeting Amazon image requirements, you need to be aware of two major categories:
Technical requirements (including size, file type, image quality, and the number of pixels).
Contextual conditions (including background type, composition, and image categories).
Following all of these photo requirements will enable you to meet Amazon's needs and optimize your listing page for image quality. Consider this to be anin-depth guide on making money on Amazon using high-quality images.
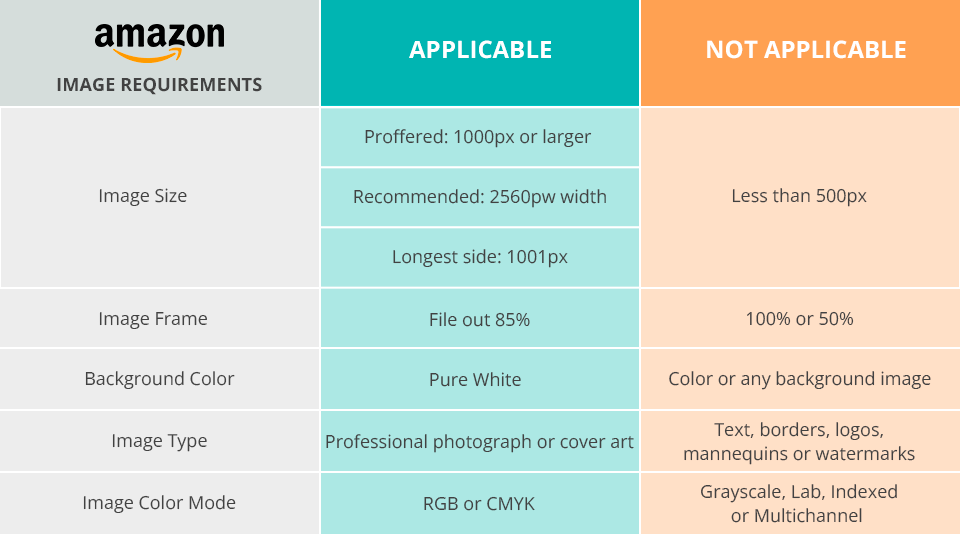
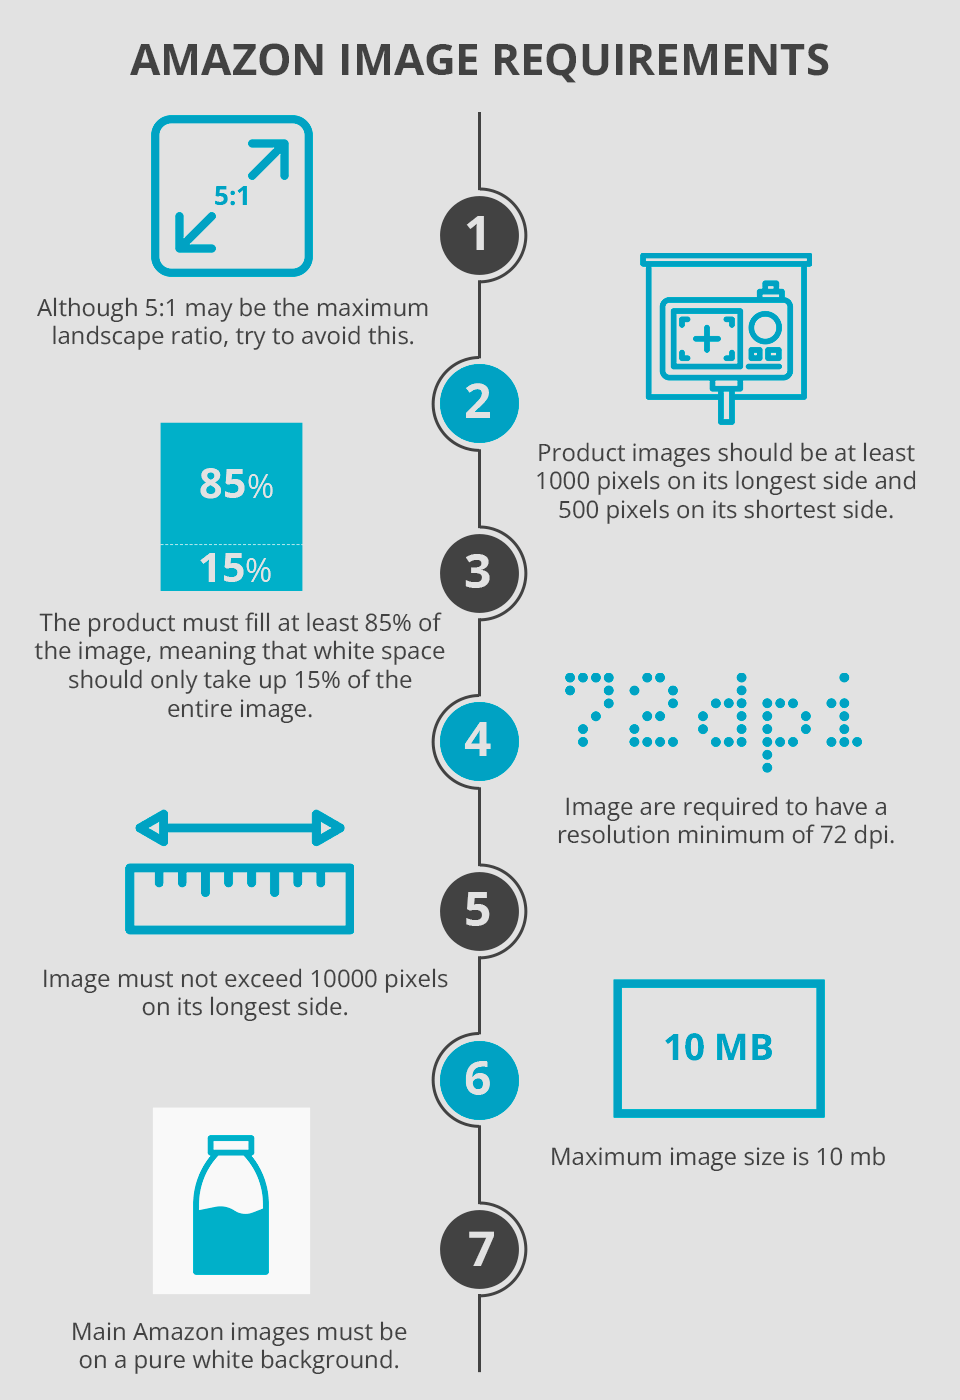
When it comes to technical requirements, Amazon likes to keep things straightforward. Technical requirements are all based on specific numbers, so you'll want to follow them closely.
The Amazon Search Bar provides all of the research you will need. You will also see references to Amazon's official product image requirement guide.
Here's a roundup of the essential tips you need to know about:
Amazon also has specific file naming rules that must follow this formula:
ASIN + Variant Code. Variant codes are four digits and inform Amazon of the image type used. For example B10000001.MAIN.jpg
Here is a list of the most common variant codes:
Site standards for all product images include the obvious: the image needs to be relevant, match the product title, and make it clear you are selling the product photographed. Uploading a picture of your dog when you sell a bread maker won't help you (even if it is cute).
Most of these contextual requirements apply to the main image, which has specific requirements related to its context of being a primary image. Here are the necessities you need to be aware of:
Outside of the primary image, contextual rules get a bit more understanding. Here are some additional areas to keep an eye out for:
Amazon listing photos can include everything from infographics, products in use, and accessories as long as you make it clear that each image has the product.
If you want to sell clothing on Amazon, things get more unusual. Clothing must meet all of the requirements of the main product image save for three essential notes:
Amazon sellers should know that clothing includes a parent ASIN (Amazon Standard Identification Number) and multiple child ASINs. The ASIN is Amazon's product identifier that makes your product unique compared to others.
Child ASINs are variants of the main product, which typically vary in clothing size and color. You will need a main image for each variant with different colors showing accurately per variant. So, if someone is expecting a blue shirt, the variant page needs to show a blue shirt.
Alternate views of clothing show the model at different angles. In many cases, these variants are required to accept your listing. The idea is to ensure that the buyer sees your clothes from multiple angles, giving them a good understanding of how the product will look.
Here are some other clothing-based tips to take:
Clothing is unique, so we hope that this guide gives you a good idea of where to start.
Once you’ve studied all the main rules that you have to follow when adding photos on Amazon, it’s time to also learn the best practices for Amazon product images that will help you sell more efficiently. Don’t forget to also check out the other 20 product photography tips that will elevate your business even further.
The key to taking good Amazon product photos is remembering that the subject has to occupy at least 85% of the entire image. The product has to be clearly visible even on the tiniest screens (for instance, smartphones) without requiring the customer to use the zoom feature.

It’s important to remember that Amazon offers you 7 image slots to show off your product and it’s vital you use all of them. Show your products from different angles, in use, provide a video overview, add infographics that feature additional information about the product, etc.

One of the best practices for Amazon product images is to use lifestyle photos. This means you should showcase your product in action. For instance, if it’s a drone for filming, show it in use, record a brief clip and edit the video (such an action can also be displayed in a photo as long as it meets Amazon requirements). Another useful tip is to use product photography props to make your images more interesting.
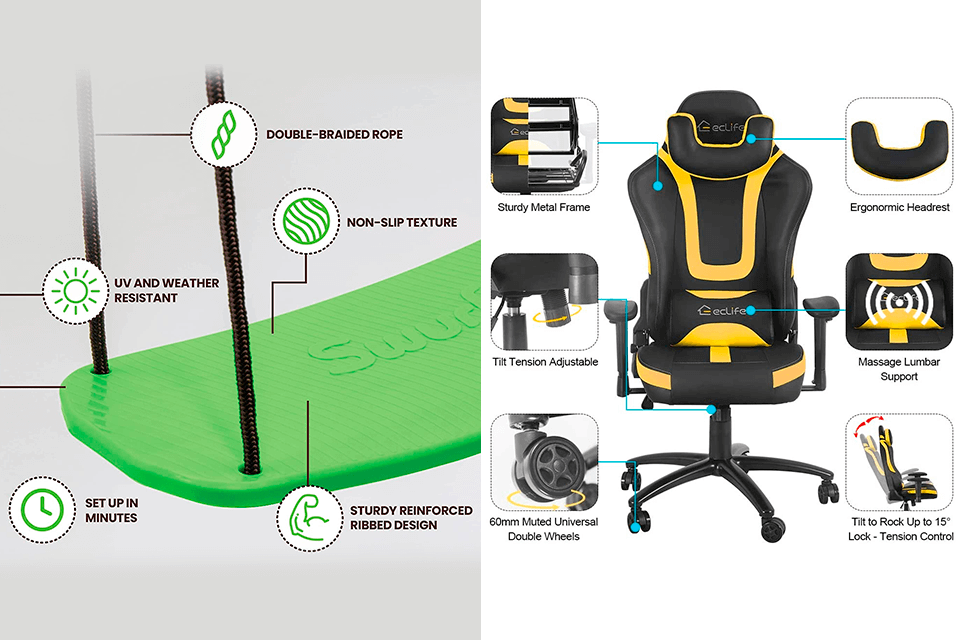
Highlight relevant information about the product by adding it to your photos. The use of coordinated fonts and colors can help you establish the signature look of your brand on Amazon. For instance, you can provide the main specifications of your product, for example, whether it has shock or weather resistance, its size, and materials or ingredients.
You can also add important details that describe the capabilities of the product, for instance, if it’s a child swing, then you can provide the maximum supported weight specification straight on the photo.

I stumbled upon this technique when visiting product photography classes. It aims to show the buyer the efficiency of the product using a side-by-side comparison. For instance, if you're selling a hand-strengthening exercise machine, you can show 2 before/after photos to ensure the results and potential benefits are instantly visible.
You can learn how to add image to Amazon product description by following these steps:
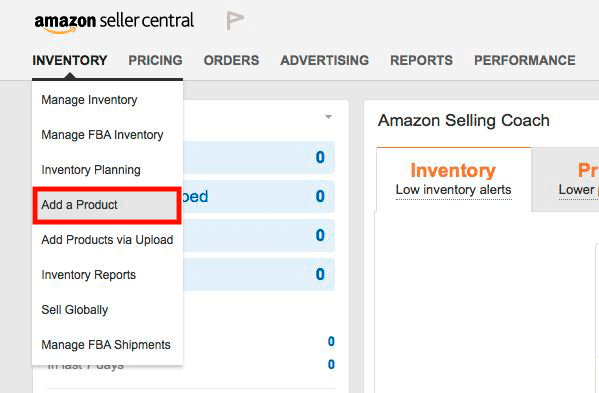
Click "Add a Product" under the "Manage Inventory" menu and choose "Create a New Product."
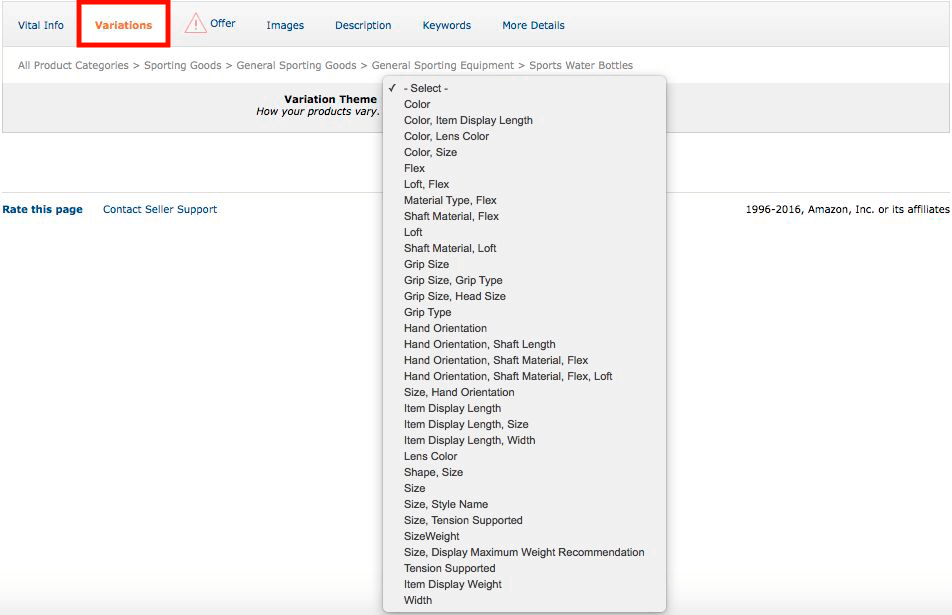
Fill in product information (PIM) as always until you reach the "Add Images" tab.
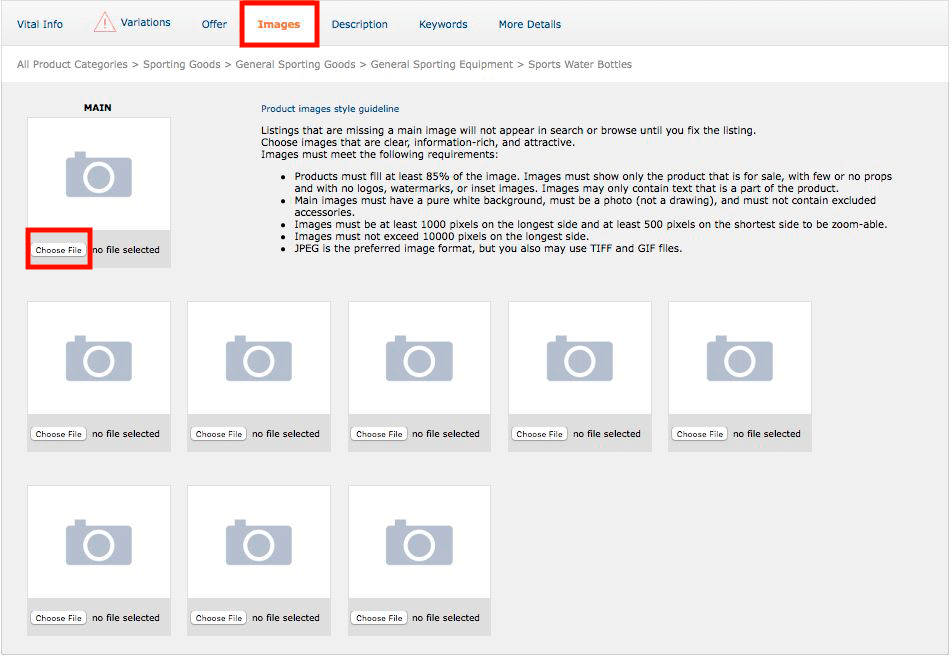
Click the tab and select "Browse."
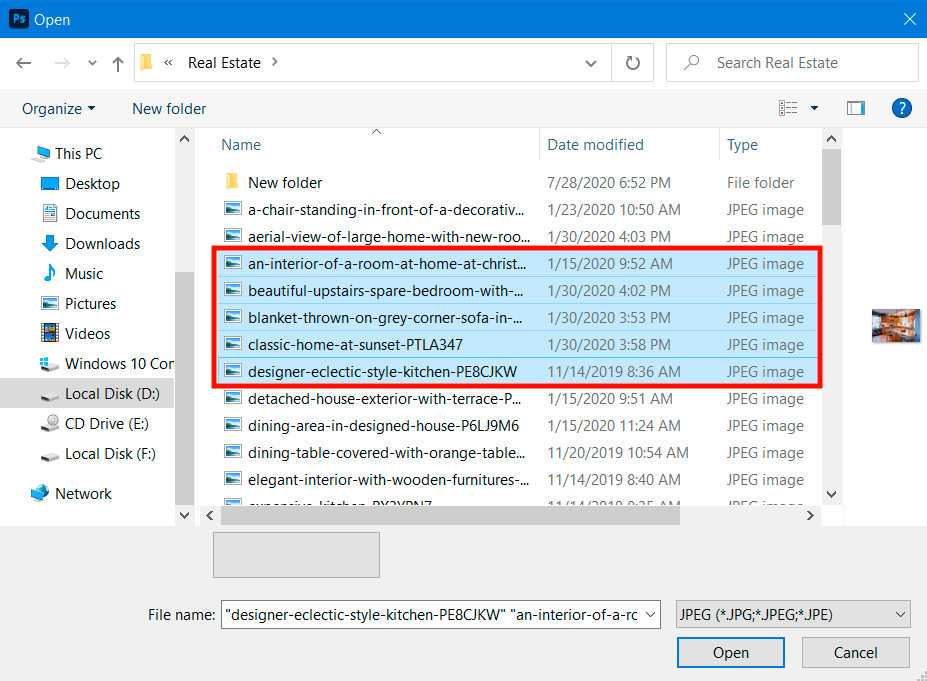
Highlight all the images you want to upload. Know that the main image is in the top-left area.
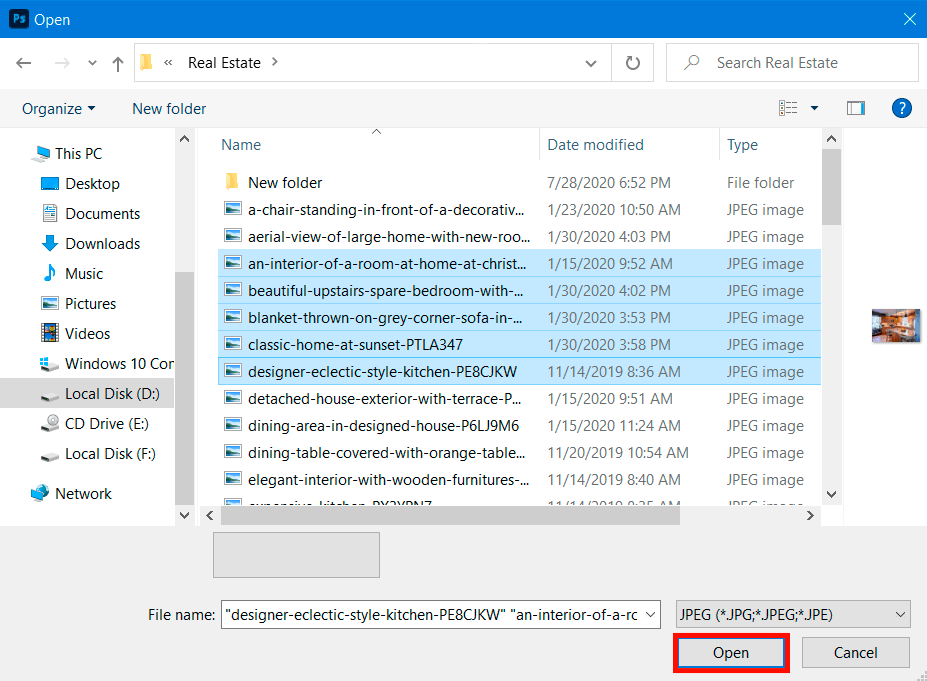
Select "Open"

Click "Save and Finish" to add your image
If you want to add a new image to existing inventory, follow these steps:
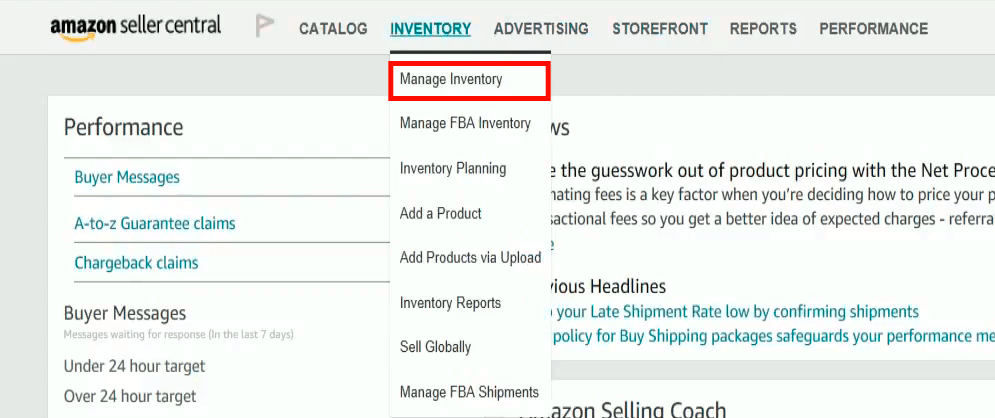
Under "Manage Inventory", choose edit for the product you wish to modify.

Select "Manage Images" and go to the "Images" tab.
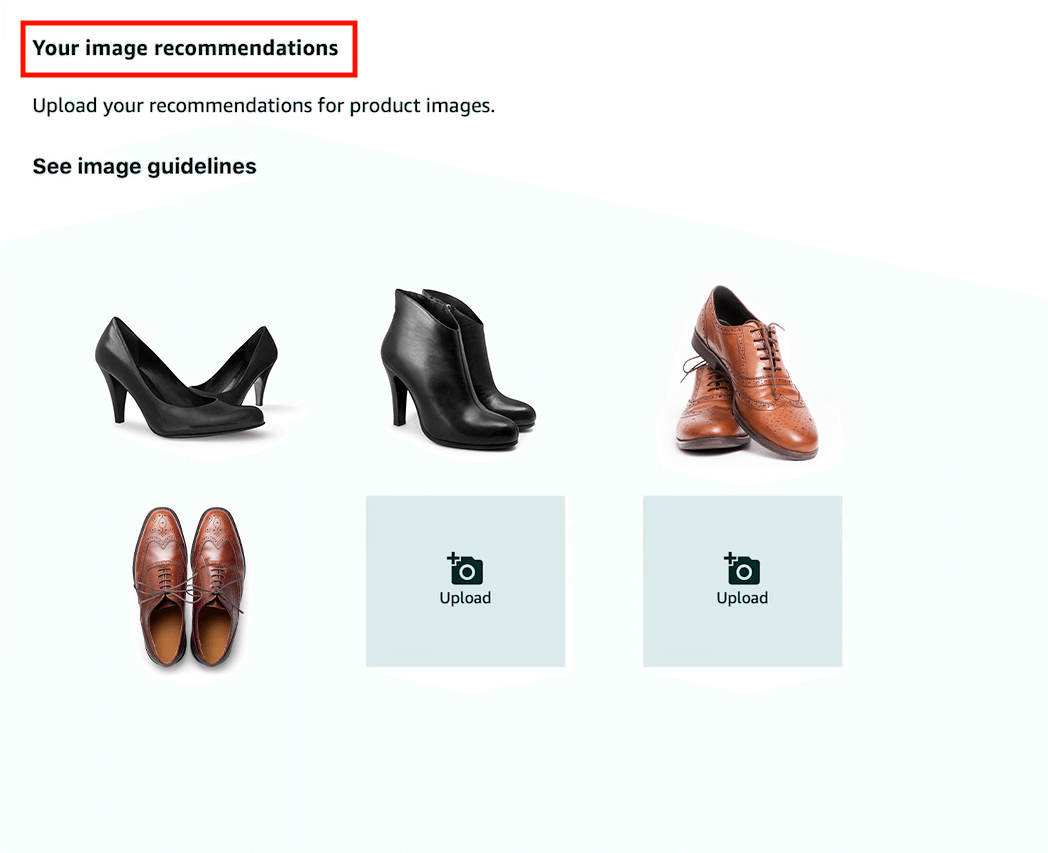
Scroll down until you see an upload button (usually under "Your Image Recommendations").
Click upload for any empty slot and browse your computer from the pop-up until you find your image.
To replace the main picture, you need to ensure that the upper-left-hand image is replaced.
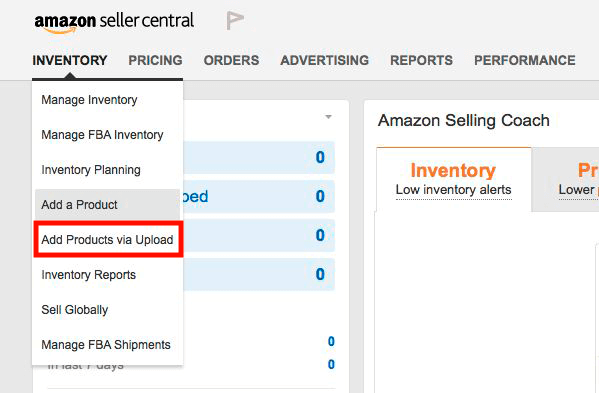
If you have a professional selling plan, you can upload product data in bulk. To start, you'll need to select a suitable inventory file template.
You will either need to select the "Product Creation and Matching" file or the "Inventory Updates" file, which either allows you to replace or update all inventory data.
Taking quality Amazon listing images can be tricky at first, but it becomes second nature over time. With a bit of practice (and a lot of file uploads), you'll be able to handle Amazon's requirements without issue. With this knowledge, your store has greater potential.
To ensure all of your product pictures for Amazon meet their minimum requirements, check out our product photo editing services. A high-quality photo can be a big difference between a low and a high conversion rate. Besides, to ramp up your sales, you need to use professional tools.