20 Insect Photography Tips for Photographers
When you purchase through affiliate links on our site, we may earn a commission. Here’s how it works.

Taking a good insect photo may seem rather complicated. However, if you follow these basic tips, you can figure out how to take nice images from the first try. Insect photography opens a world of beautiful structures and colors. This article contains all the necessary info for you to learn and demonstrate first-class results.
20 Insect Photography Tips
Insects photography requires following certain rules, one of which is having good lighting conditions. Also, a photographer needs to move as slowly as possible in order not to frighten the insect. Read on and learn more tips which will help you upgrade your insect photography skills.
1. Be Careful!
While taking macro insects photos, mind that the insect can bite/sting you. If it happens, keep calm and follow these steps:
STEP 1. Remove the stinger without squeezing the venom sac.
STEP 2. Disinfect the bite site.
STEP 3. Apply a cold compress on the area.
If you know which insect has bitten you, it will be easier for you to understand what you need to do to help yourself. For example, if you were stung by a bee, you need to carefully remove the stinger without touching the venom sac.
If you squeeze a stinger out of the skin, then it is possible to damage the venom sac and venomous toxin will spread faster through the body. Wash the area of the bite with soap and water gently to neutralize bee venom.
Next, you need to disinfect the bite site. You can use any antiseptic. Do not scratch the affected area as it can result in spreading the toxin through the body and increase the risk of infection. A cold compress will help relieve pain and reduce swelling.
Then, I recommend drinking an antihistamine, even if you do not have any allergic reaction. Drink as much as possible until the swelling reduces. Don’t drink alcohol, it will only increase swelling.
2. Shoot in the Morning
A good time for insect macro photography is the morning as the insects are still asleep and less active. Before the insects wake up, you have enough time to take an array of shots.
In the morning, the lighting conditions are not so perfect, but I advise you starting out before sunrise. Thus, you will have enough time to find the insects as well as set up your camera.
If you are planning to shoot a specific insect species, do a research in advance to find the closest place the insects inhabit. In case there aren’t any dewdrops in the summer morning, then use free Photoshop overlays to add drops to the object and make the photo more realistic.
3. Shoot Insects in Motion
Shooting insects in motion is rather difficult since they move quickly. To avoid blur in the photo, set a fast shutter speed approximately 1/250 or use the flash as it will allow you to get a sharp insect photograph.
Mount the camera on a tripod or use the remote control, self-timer, or a removable cable for shooting, because when you press the shutter button, you will cause motion, which will be visible in the image.
4. Use Transparent Reflectors
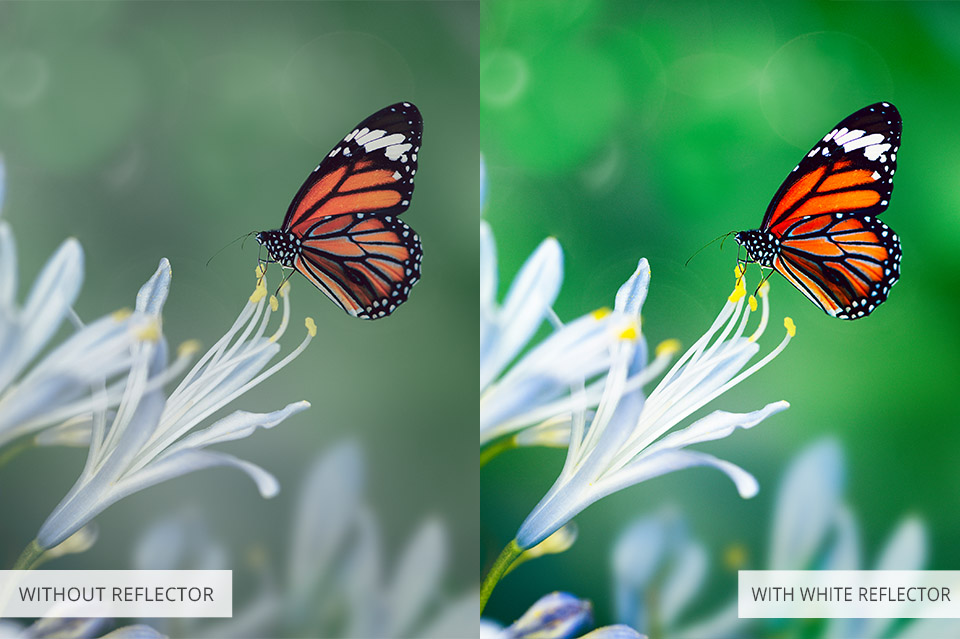
A transparent reflector or diffuser is made of translucent fabric which reflects and scatters the light that passes through it. In other words, a transparent light board is used to soften the light.
Using a translucent diffuser while taking insects photographs, you remove the shadows from the background and direct a soft light to the front main objects.
- Learn more about the types of reflector boards and what they are used for.
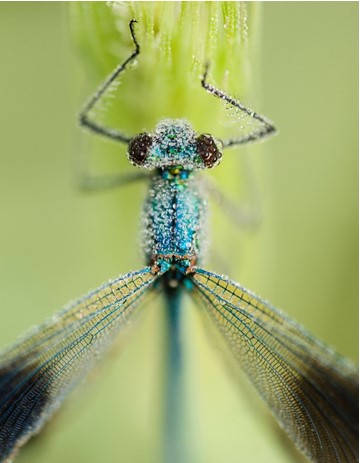
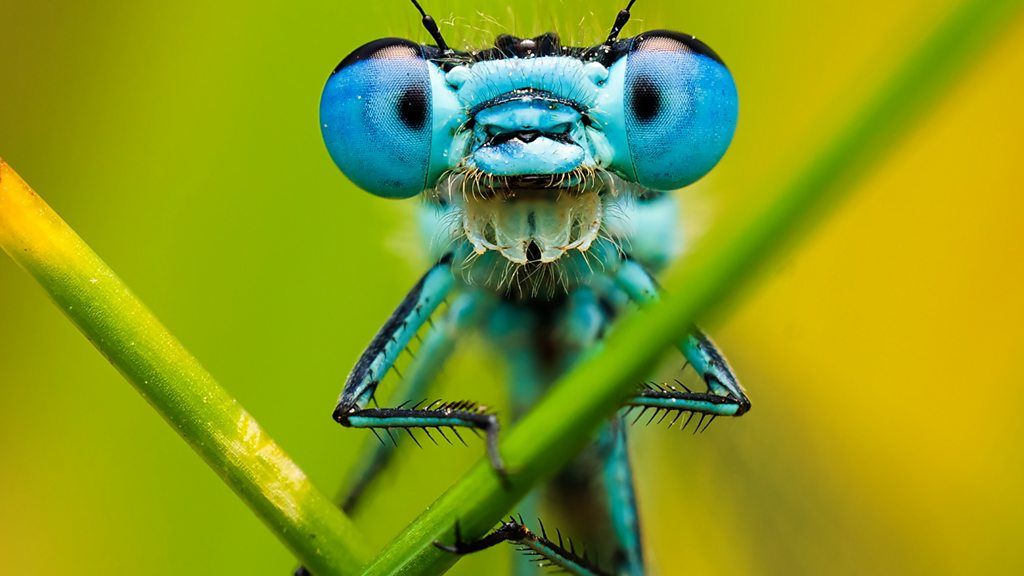
5. Use Creative Angles
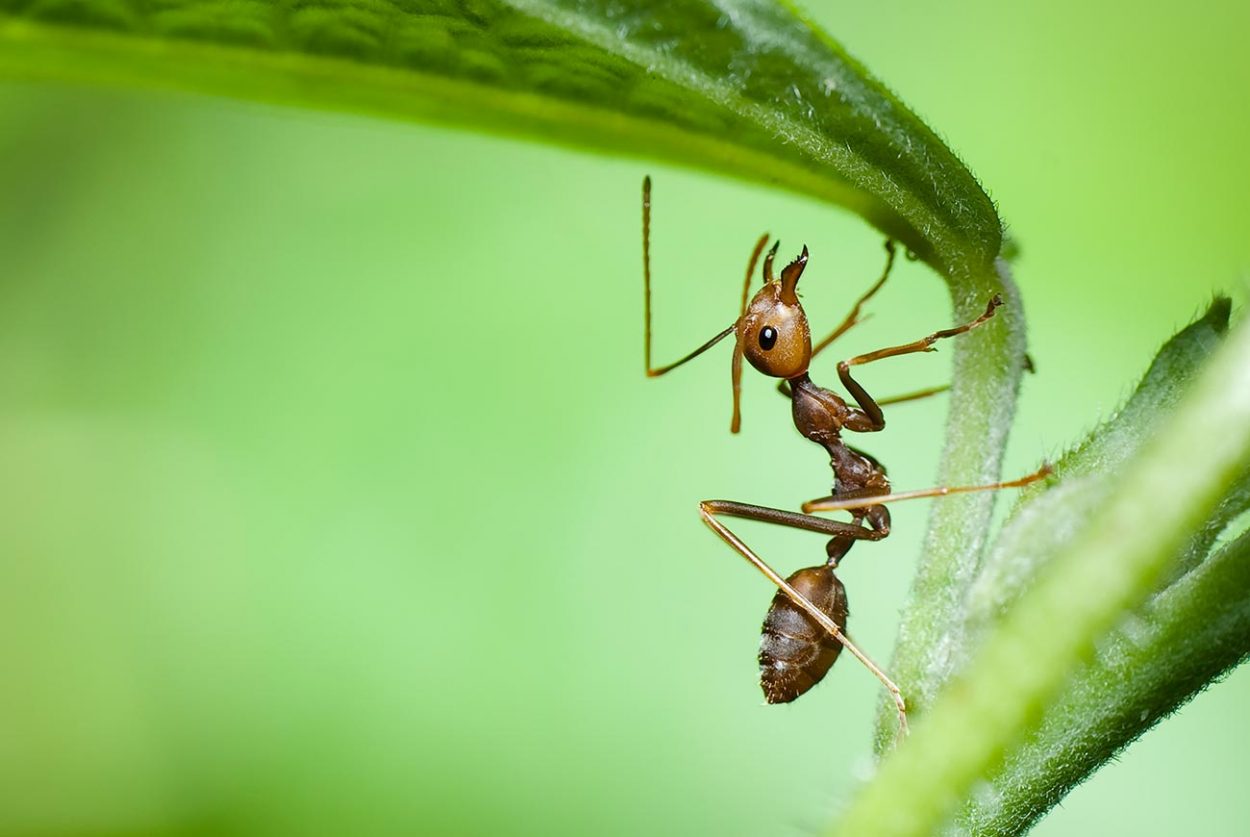
Use your imagination to take creative insects photographs. You can slowly and quietly go up to the insect to take a picture from an interesting angle. A variegated flower or another bright plant will perfectly complement the photo.
The brighter the flower, the more attractive it looks to bugs and this can help you find them. You can get close to insects living in hard-to-reach places with the help of a drone. One of the best drones I have ever worked with is DJI Mavic 2 Pro.
- Check out more about the best drones for photography.
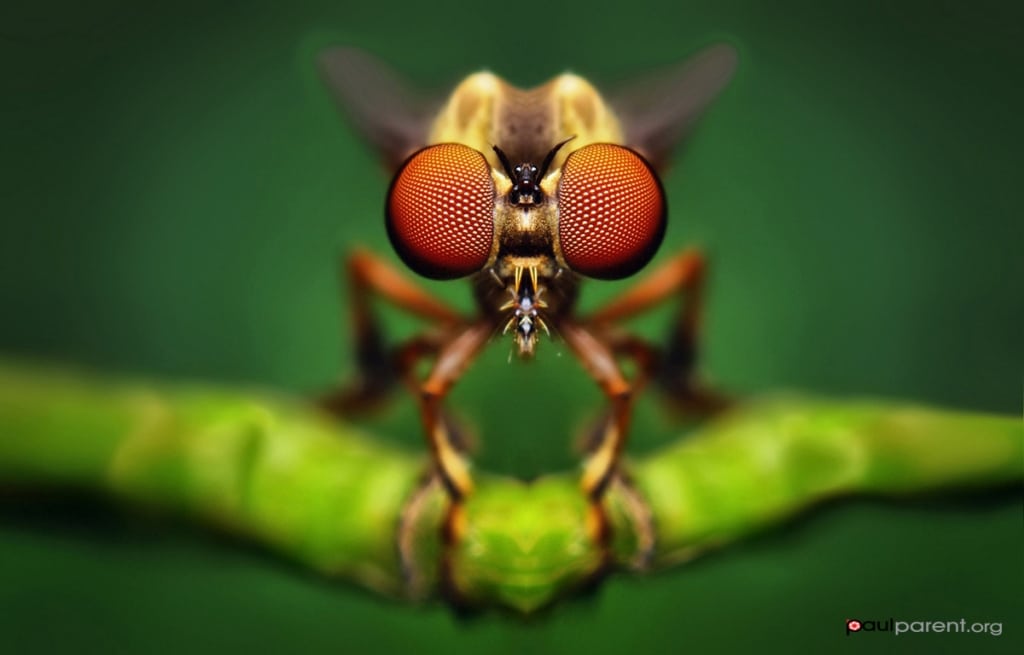
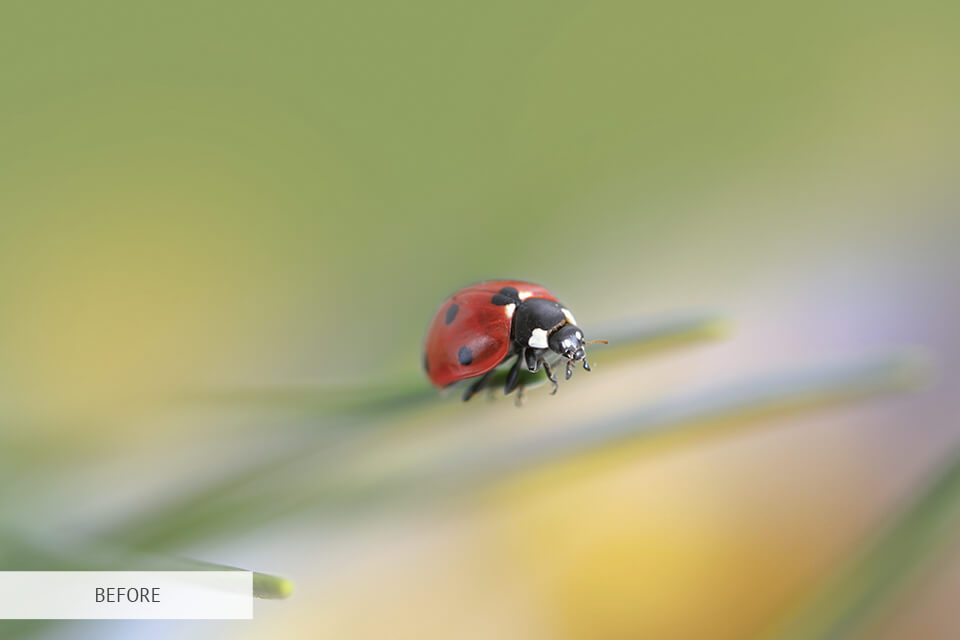
6. Keep the Insect in Focus

One of the methods to isolate an insect from the background is to use a shallow depth of field. The depth of field is determined by the aperture value. Another technique that I use is photographing an object, using bright lighting against a dark background.
If you shoot a well-lit subject with a fill flash, then the dark background will look almost black. To get the best focus for bug photography, I recommend using Canon EOS 5D MARK IV. It features a 30.4-megapixel full-frame CMOS sensor with photosensitive elements that are divided into pairs of photodiodes to ensure fast focusing.
- Learn about other DSLR cameras.
7. Use Depth of Field
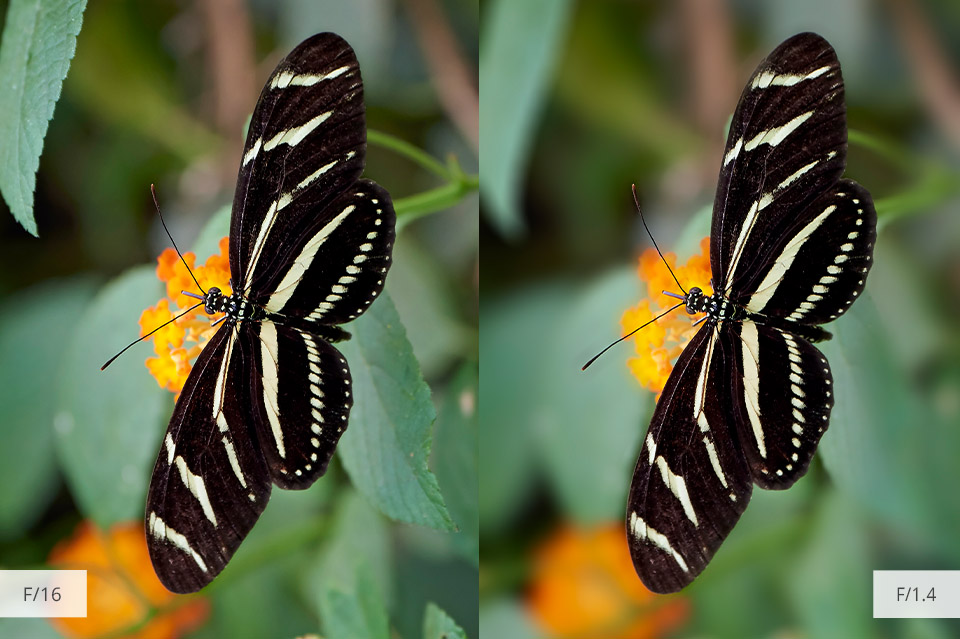
The depth of field or DOF is a particular distance between the objects that look sharp. If objects are sharp at a far distance, this is called deep depth of field. If the distance between the sharp objects is small, this is called shallow depth of field.
To shoot insects, use a shallow DOF (depth of field) to isolate the insect from the background. The best macro lens for insect macrophotography is Sony 100mm f/2.8 macro.
- Learn more about these aperture and depth of field basics.
8. Photograph Insects in Action
Like people, each insect has a daily routine. For example, spiders weave a cobweb every day to catch food there. This is a great opportunity for you to take an amazing shot. While working, bugs are very active, so it’s better to use the sports mode for shooting.
Thus, you will be able to capture interesting moments without blurring the image. You will probably have to lie in the mud for half a day to get one successful shot of the butterfly wings in motion, so you should be patient. When practicing insect photography, you need to play a waiting game and rely on your instincts.
9. Bright Colors

Doing insect photography, think about using a flash otherwise the sharpness area will be narrow. Adding more lighting will result in a smooth picture without a darkened surface. This happens, because a flash accentuates the insects’ details, without highlighting dark parts.
Alternatively, you can bring the insect into the room and place it onto a multi-colored flower to create a better composition. In most cases, even a regular built-in retractable flash of cheap DSLR cameras can work well, but if you want to show the whole riot of colors in your insect photograph, take advantage of a special flash, for example, Canon Speedlite 600EX II – RT.
- Have a look at this list and select the best camera flash for your needs.
10. Try Photographing in the Daytime

Photographing insects during the day may be a challenging task, because in this period they are most active, so you have to try hard to get sharp insects photographs. Most bugs are highly dependent on the ambient temperature.
That is why it is better to choose a cool day for shooting, because it is the ideal weather to track and shoot insects. Autumn and spring are best suited for daytime insect photography, especially cloudless, gloomy days.
The clouds will scatter bright sunlight and eliminate harsh shadows, like a lightbox.
11. Practice Evening Insect Photography

Early and late evening is also a good time to practice bug photography, as insects are usually going to rest and try to find an overnight stay. At this time, the golden shades of sunset will complement your pictures, which will make the photo warmer and more pleasant to look at.
You have the possibility to get more dramatic lighting in your shots, which can be artistically shaped if you use a gold reflector board. When the insect is resting and is absolutely motionless, you have enough time to photograph it from an interesting angle. But be careful not to frighten the tiny creature!
- Read this shooting at night guide to learn what camera settings to use at this period.
12. Use the Macro Lens at 100mm

The first rule of insect macro photography is to focus on the object as close as possible. That’s why, you need to buy a macro lens with a focal length of 10mm.
I use Canon EF 100mm f/2.8L IS USM to photograph at a scale of 1:1. This means that the object in real life is of the same size as on the camera sensor.
While doing macro photography insects, you can use a tripod to get a clearer picture. Again, be very quiet not to scare the bug off.
13. Best Place in the USA

You may find lots of insects in coniferous forests, but I’d like to tell you about more extraordinary species. Tussock butterflies live in the mixed fir forests of North America. These are small gray or brown moths.
Their larvae are very hairy and about an inch in length. The butterfly is brown and red, with characteristic dots. You can photograph it from above, focusing on its wings, or from the side showing the length of the wings.
Another bright and fascinating butterfly in the coniferous forests is the Zygaenidae. They are very colorful and easy to notice. The size varies from 4 to 5 cm. The largest representatives of this group have a wingspan of 0.6 mm.
You can see these butterflies both in the daytime and at dusk. Only some Zygaenidae look for light sources at night, flying to the windows, to light bulbs or lanterns. If you find them near the light source, you can really take captivating macro insects photos.
14. Take Photos when the Insects Are Sleeping

A nice chance to take insects photographs is when the bug is sleeping. Thus you have enough flexibility in terms of angles; just be careful while moving and set your camera to the silent mode, otherwise, it will be a pity to miss several cool frames because the insect wakes up and gets away.
If it is possible, you can even mount your camera on a tripod, thus getting ultra-crisp shots. Probably, you will be photographing sleeping insects at night, so using a light ring is a smart decision.
A regular flash won’t do in this case, as intermittent sparks will disturb an insect, while a light ring provides smooth and constant illumination. You can even zoom insects, to accentuate certain details.
15. Explore the Location
Before grabbing your camera to photograph insects, you need to explore the location. Learn as much about the area as you can – what insects live there, where they spend most of the time, etc.
Besides, you need to think about the best shooting angles in advance. There are some micro-conditions that can drastically affect your insect photography results.
- Soil type
- Light and shadows
- Wind influence
- The presence of lowlands and uplands (relief features)
- Temperature differences and precipitation
Once you learn the territory like the back of your hand, you will be able to use all its specifics to your advantage.
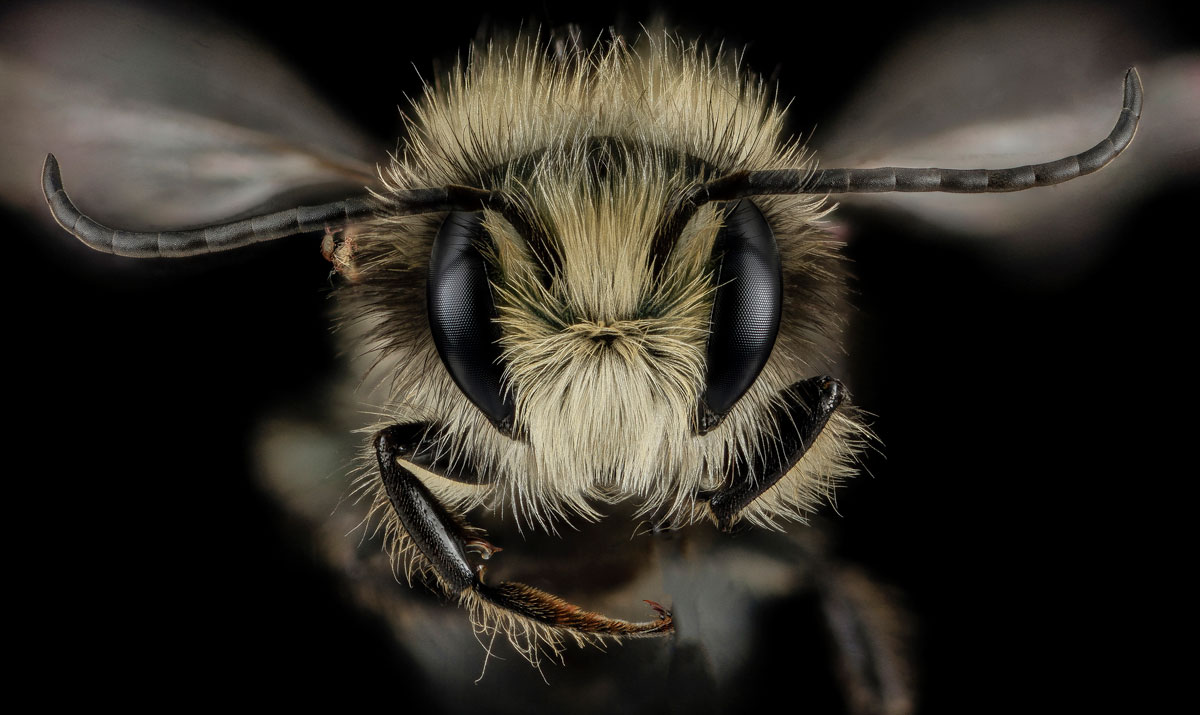
16. The Best Insect to Photograph

The most photogenic insects are bees, butterflies and dragon-flies as they can gracefully fly and hover in the air like a little hummingbird. Similar to other insects, they are very active in the daytime, so you can get really emotion-evoking and appealing photos of an insect working or having a bite.
You can find dragon-flies near water bodies such as lakes, ponds, brooks and swamps. They do not move away because they need water to lay eggs.
Butterflies are one of the most bewitching insects. Their unusual patterns attract many insect photography enthusiasts. Butterflies are active in a warm period, such as spring and summer. They like sunny places, so find a meadow with wild flowers and go there to take colorful images of butterflies.
If you want to photograph bees, just build a special house for them on your balcony or in a summer house. You can take nice pictures of bees working, gathering nectar, resting, flying, sitting on flowers from the end of spring till the beginning of autumn.
17. Recommended Camera Settings
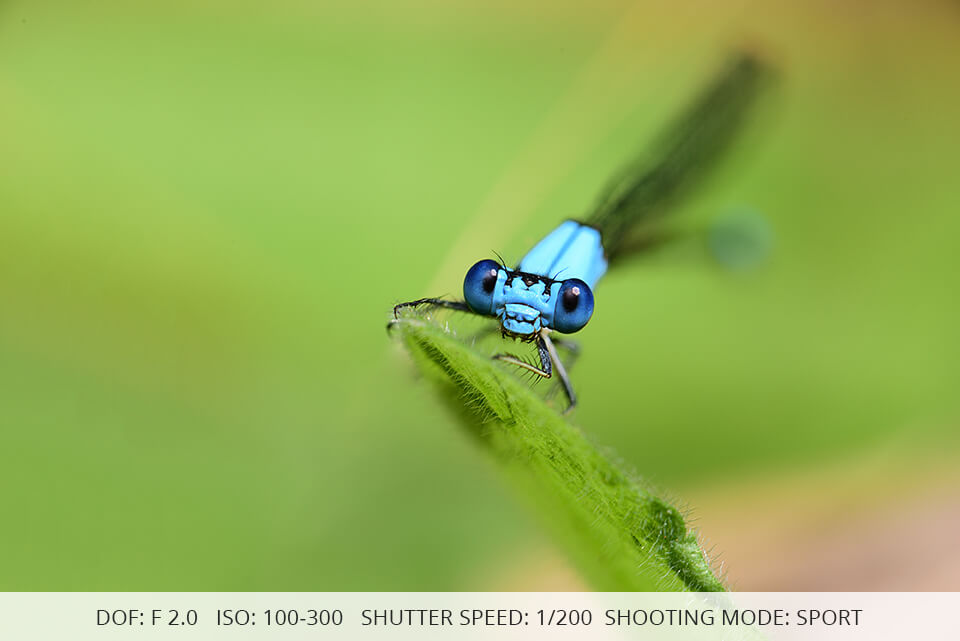
Doing macro insect photography, you need to concentrate viewers’ attention solely on the object and a neutral background will greatly serve this purpose. You should use a shallow depth of field, usually f/2.8, and a relatively short shutter speed.
To capture fast-moving objects like bees, dragon-flies and butterflies, you’d better switch to the Sports mode. The ideal ISO settings are 100-400 in bright sunlight.
18. Use a 65mm Macro Lens
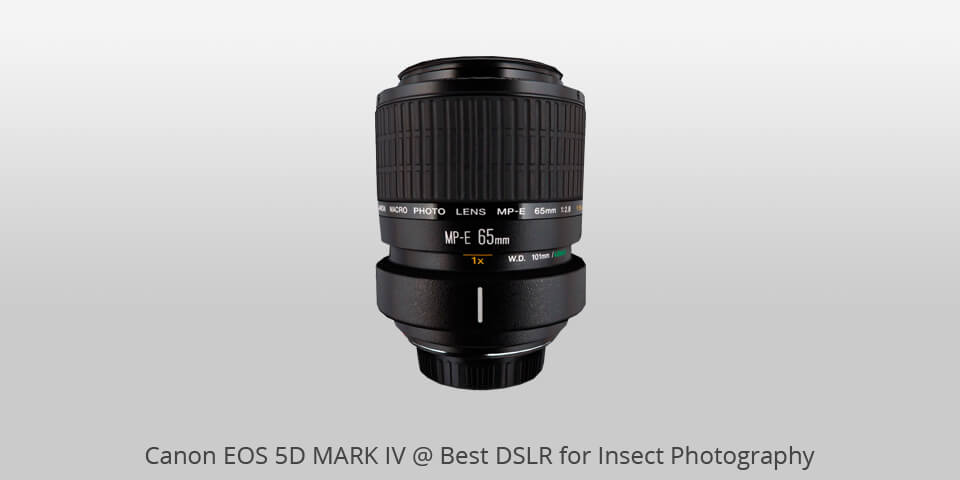
Equipment plays a very important role in insect macrophotography. To take high-quality insect pictures, you need a special macro lens that allows you to zoom in an object without decreasing the quality of the photo.
As for macro lenses, I can advise you getting the Canon MP-E 65mm F/2.8. It is a very special model, because it can shoot on a macro scale from 1: 1 to 1: 5, namely, to make the object five times bigger.
19. Choose a DSLR camera
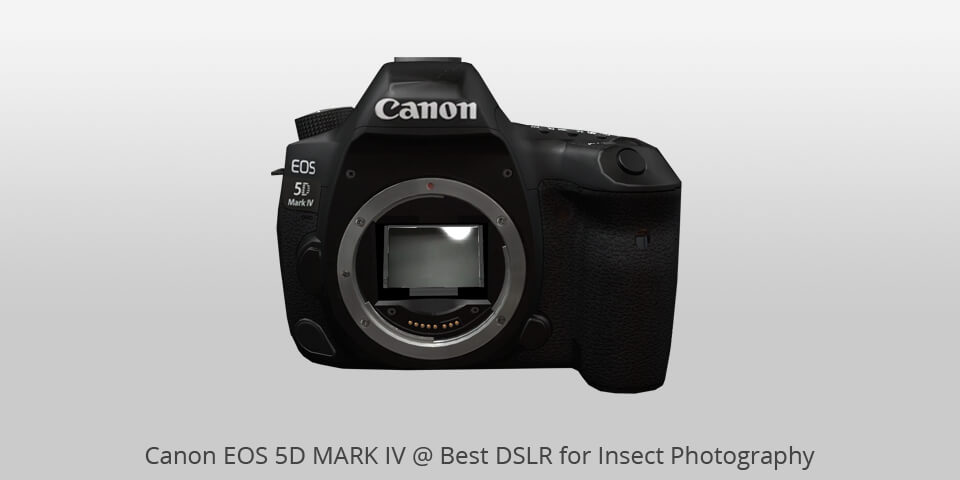
It is difficult to name the best camera for insect photography, but DSLRs surpass regular compact cameras, though they cost more. The main advantage of DSLR cameras is the ability to use interchangeable optics without restrictions.
Moreover, you can practice macro insect photography and other special types of shooting through optical instruments (a microscope and a telescope). As I have already mentioned, my regular partner is Canon EOS 5D MARK IV.
20. Place a Camera on a Tripod
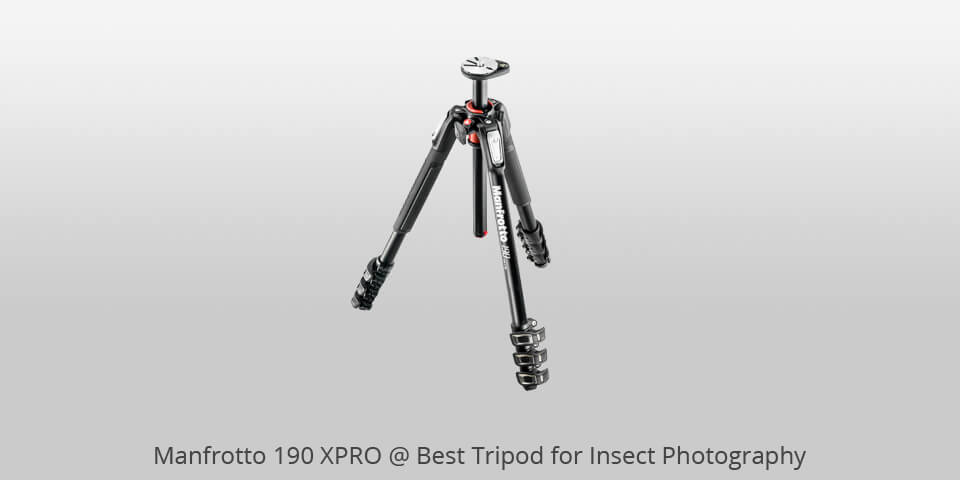
Having a tripod in your kit can eliminate many problems. When the depth of field is very small or you need to shoot in a macro mode, the image quality may suffer a lot. Thus photographing from hand is unreasonable and, in some cases, it’s simply impossible.
So if you want to get decent insects photography results, you’d better mount your camera on a tripod. The minimum height is your win-win option, since, in most cases, the object is on the ground or on a low level.
- View more good tripods for DSLR.
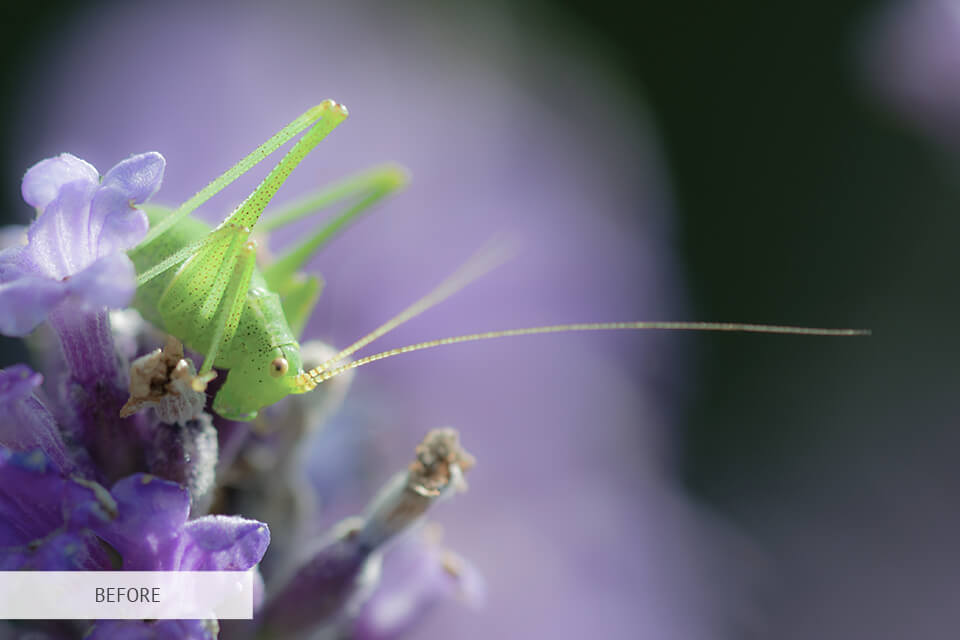
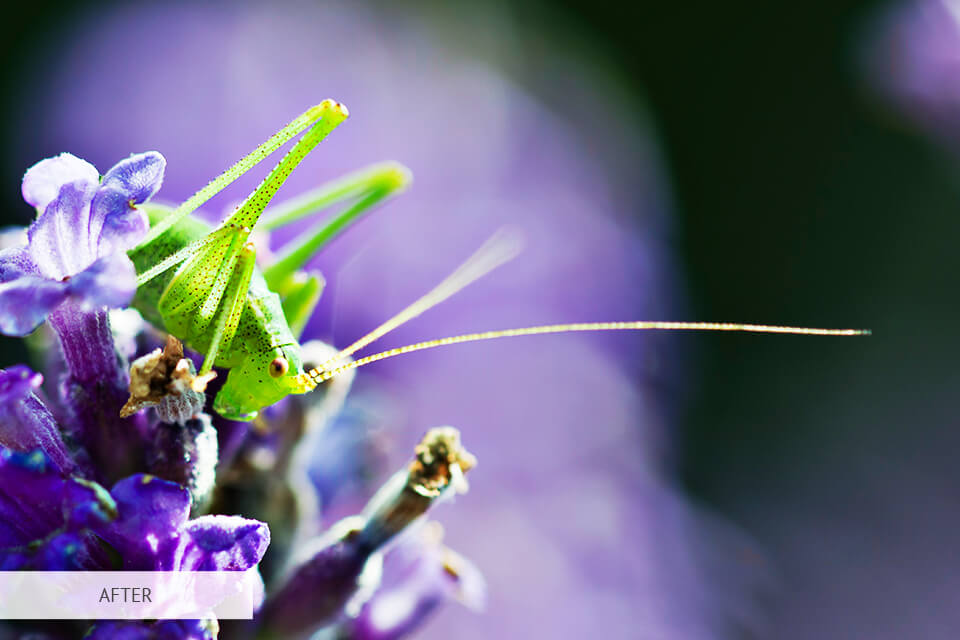
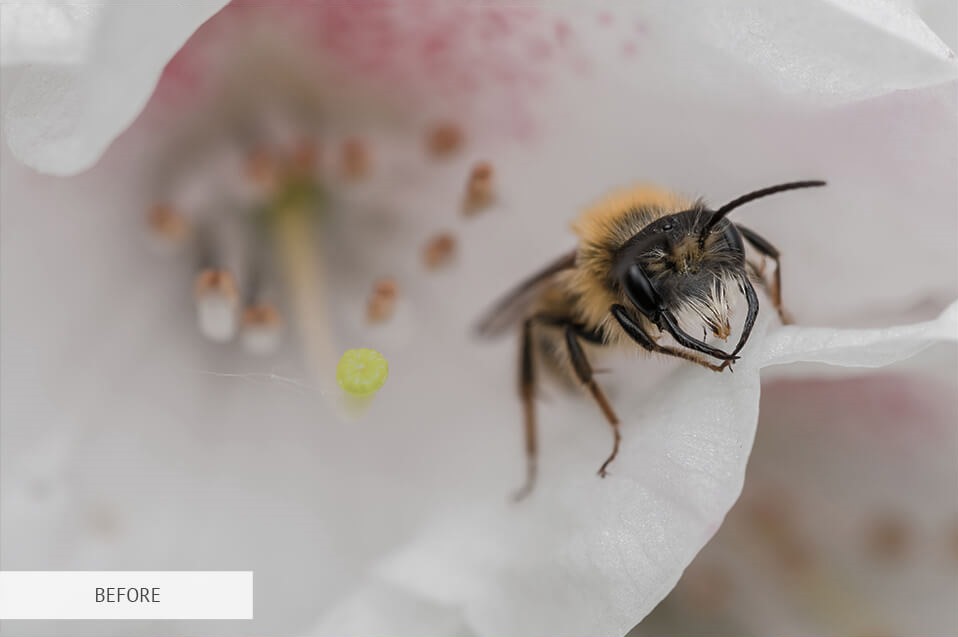
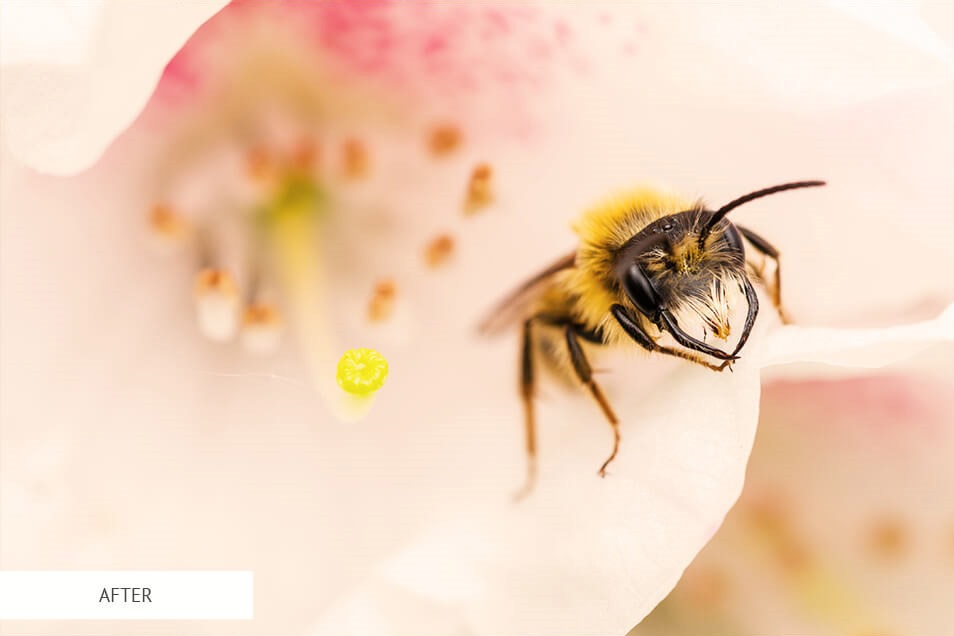
Freebies for Insect Photography Editing
Using these Photoshop and Lightroom plug-ins, you can improve your insects photographs in a matter of clicks. Test them and see how naturally they can refine your images.
Sunset Film
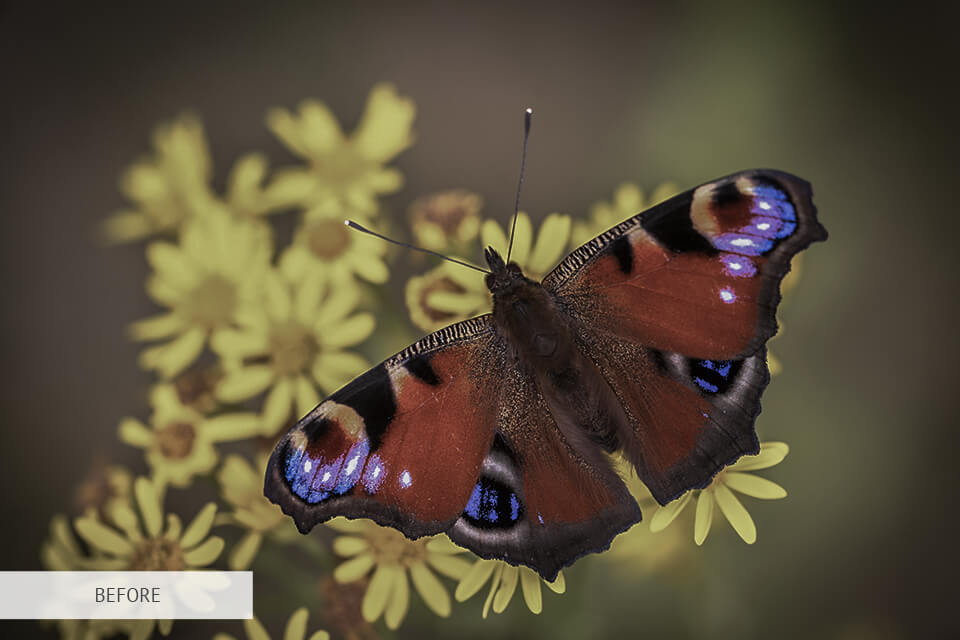
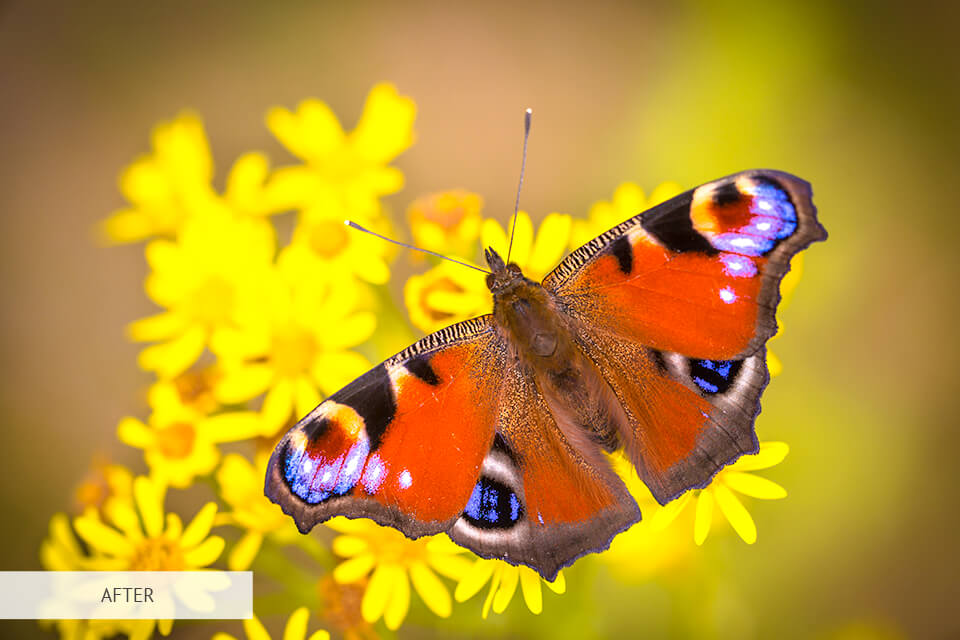
You can use this free Lr preset for any photography genre, the insect one included. It helps you add deep tones to your shot and make the picture even more mesmerizing.
Matte

The preset makes your picture warmer with matte touches. This works great for almost any image, especially the one taken at the sunset.
HDR
This action will help you accentuate green and blue colors prevailing in your image. This is a perfect plug-in for landscape, wildlife and seascape shots.
Autumn Contrast
If your image lacks contrast, use this action. It will also add warm shades, thus converting your shot into an eye-pleasing picture.
Sun Splash
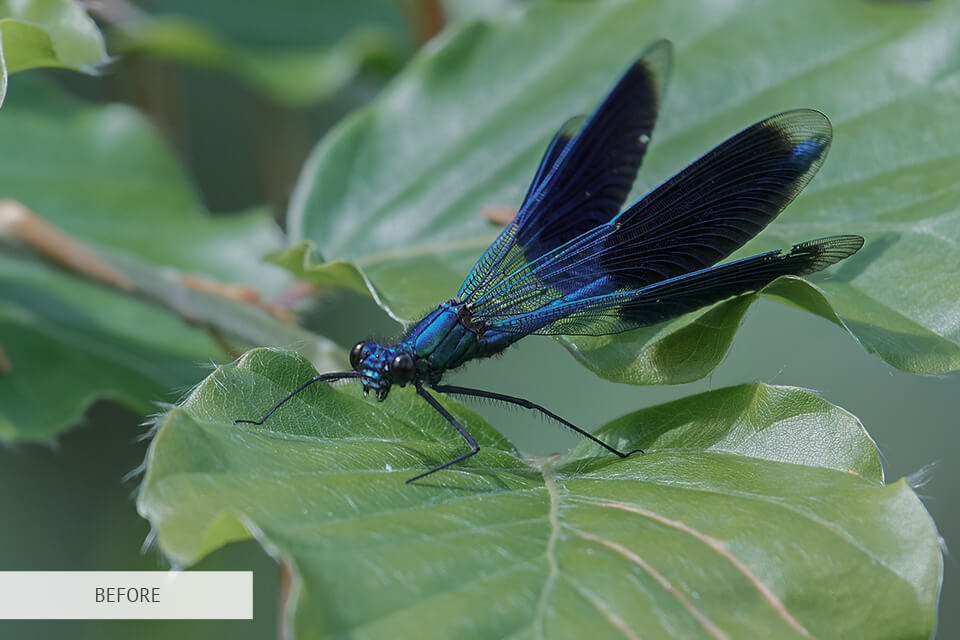
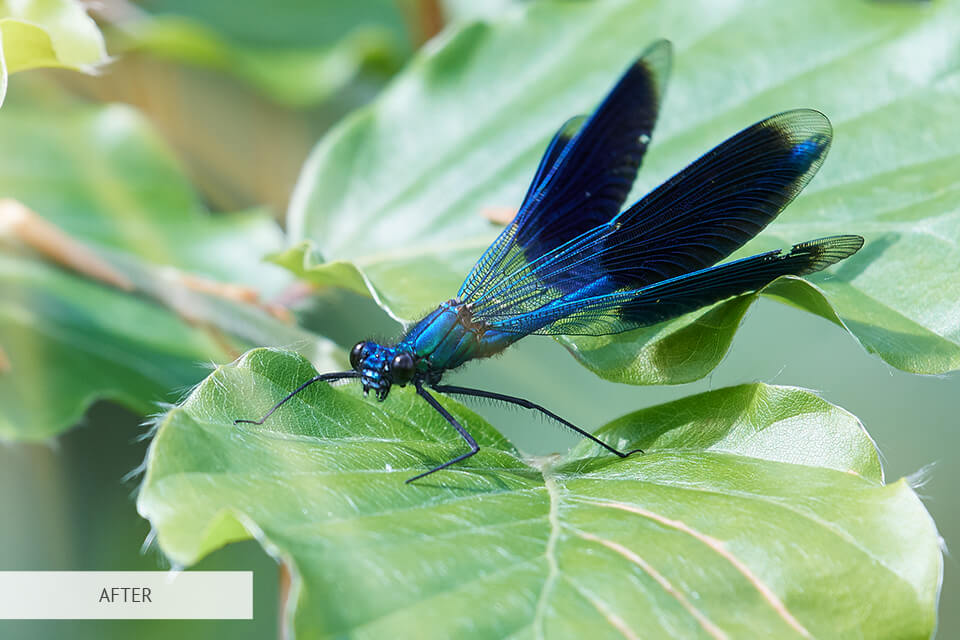
Use this Sun Splash overlay to give your ordinary nature photos a special appeal. After you apply it, you will notice gentle sun rays appearing in the image. Of course, such an effect is ideal for insect photography.


