Boudoir lighting is key in ihis photography genre. It sets the whole feeling, from soft light to bold shadows. Good lighting shapes the mood, makes your client look their best, and helps them feel confident and comfortable when posing during a photoshoot.
Boudoir photography requires special skills and a deep understanding from the photographer. This is because even photographing partially unclothed bodies is tricky – you need to show them in the best way possible and also highlight their shape. Lighting acts like a sculptor: it can show every flaw on the body. That's why choosing the lighting for such shoots must be done very carefully.
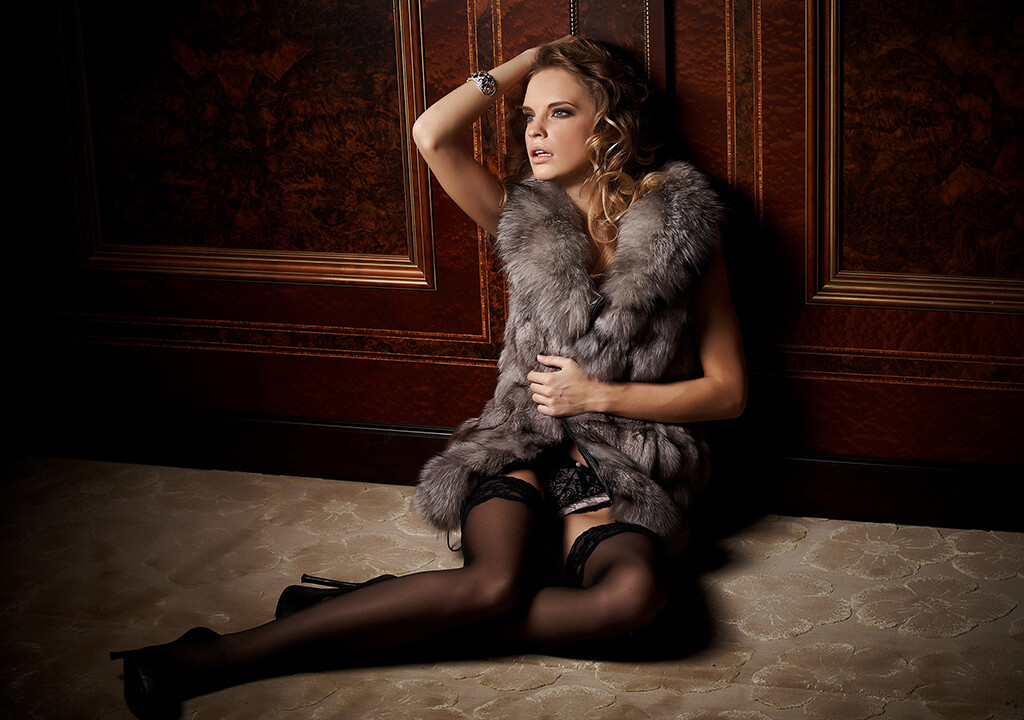
Boudoir photo lighting is different from regular portrait or fashion lighting. It has two main jobs at once: it needs to make the body look attractive and create a strong mood or feeling. The point isn't just to light the person correctly – it's to bring out their sensuality, vulnerability, and empowerment. That's the real heart of boudoir photography.
The wrong lighting can quickly feel harsh, clinical, or unflattering, which is why understanding light modifiers, positioning, and intensity is crucial.
Bad lighting can easily make boudoir photos look harsh, cold, or unflattering. That's why knowing how to use light tools (modifiers), where to place the light (positioning), and how strong to make it (intensity) is so important.
The boudoir photographers truly understand this. They use thoughtful lighting techniques to bring out their client's natural beauty and confidence, all while creating an artistic and intimate mood.
Natural light is usually the easiest and first option for boudoir photos. Big windows with thin curtains, using indirect light, give a lovely soft glow. This soft light makes skin look beautiful, adds a romantic feeling, wraps gently around the body to soften shadows, and creates a glowing, classic look.
For natural light boudoir photos, I usually place my subject near a window. Then, I put a reflector on the other side to soften dark areas. When it's very bright outside (like midday), I use curtains or flash diffusers to soften the strong light and keep it balanced.

When using natural light, most photographers start by softening the window light. This is called "diffusing." It means putting a thin, soft material (like sheer curtains) in front of the light to filter it and make it gentler.
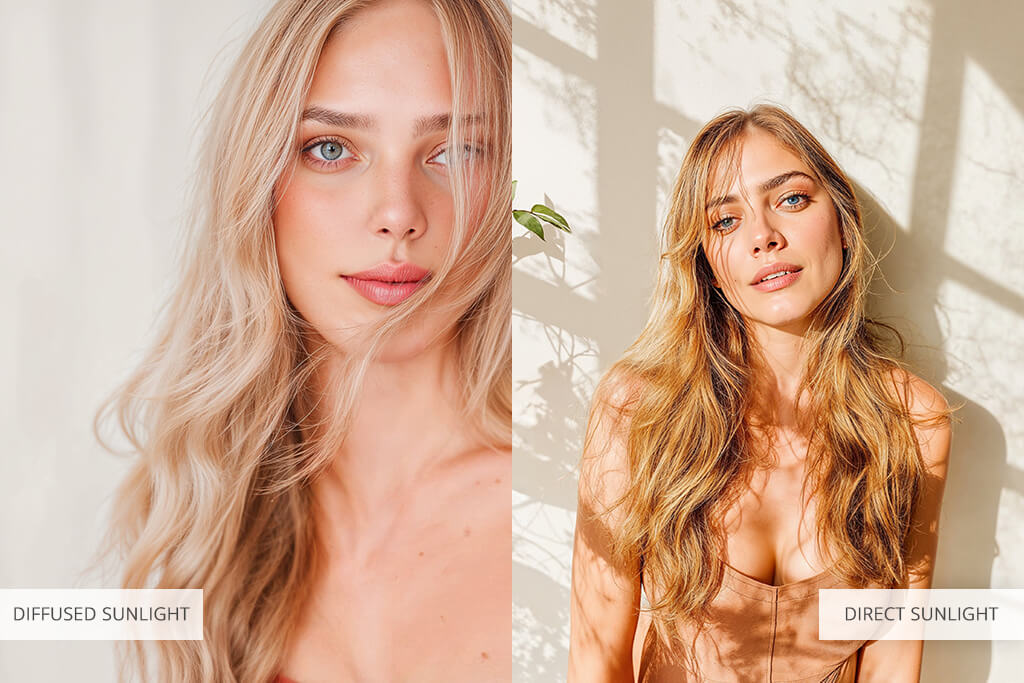
Outside, clouds naturally soften sunlight, making it even and gentle. Indoors, curtains do the same job for window light – they soften harsh brightness and make the light less strong. This creates beautiful, flattering light that’s perfect for boudoir photos.
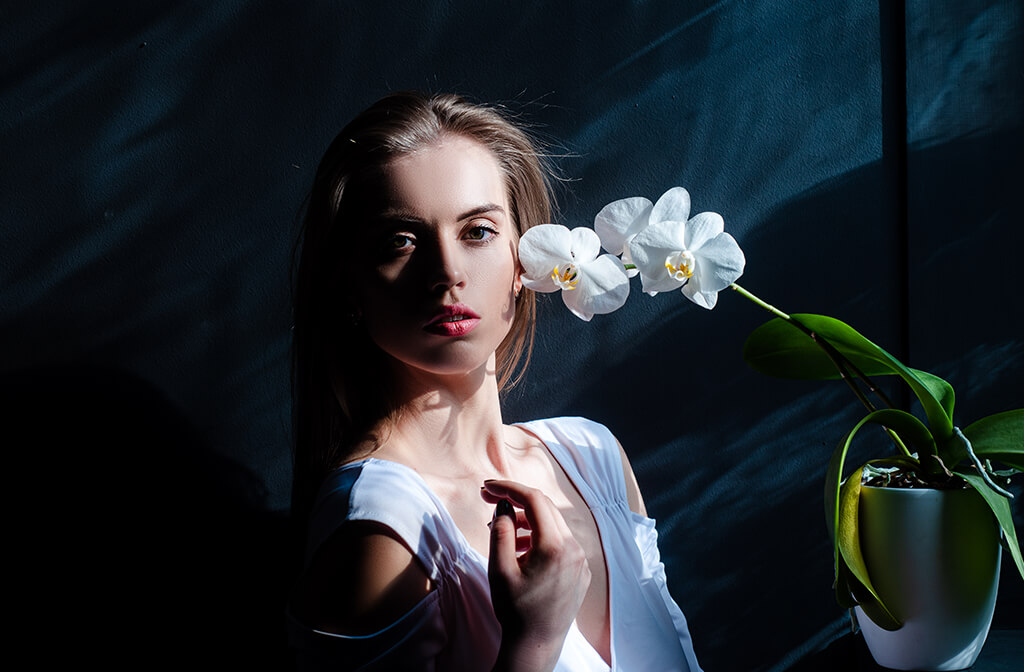
Unlike direct sunlight (which makes harsh shadows and overly bright spots), soft diffused light gives boudoir photography a much more natural and intimate feeling.
Most portrait and wedding photographers avoid direct sunlight because it's harsh. But skilled boudoir photographers use it creatively. They turn strong sunlight into striking images with bold shadows and lines, while keeping that natural, summery feeling.
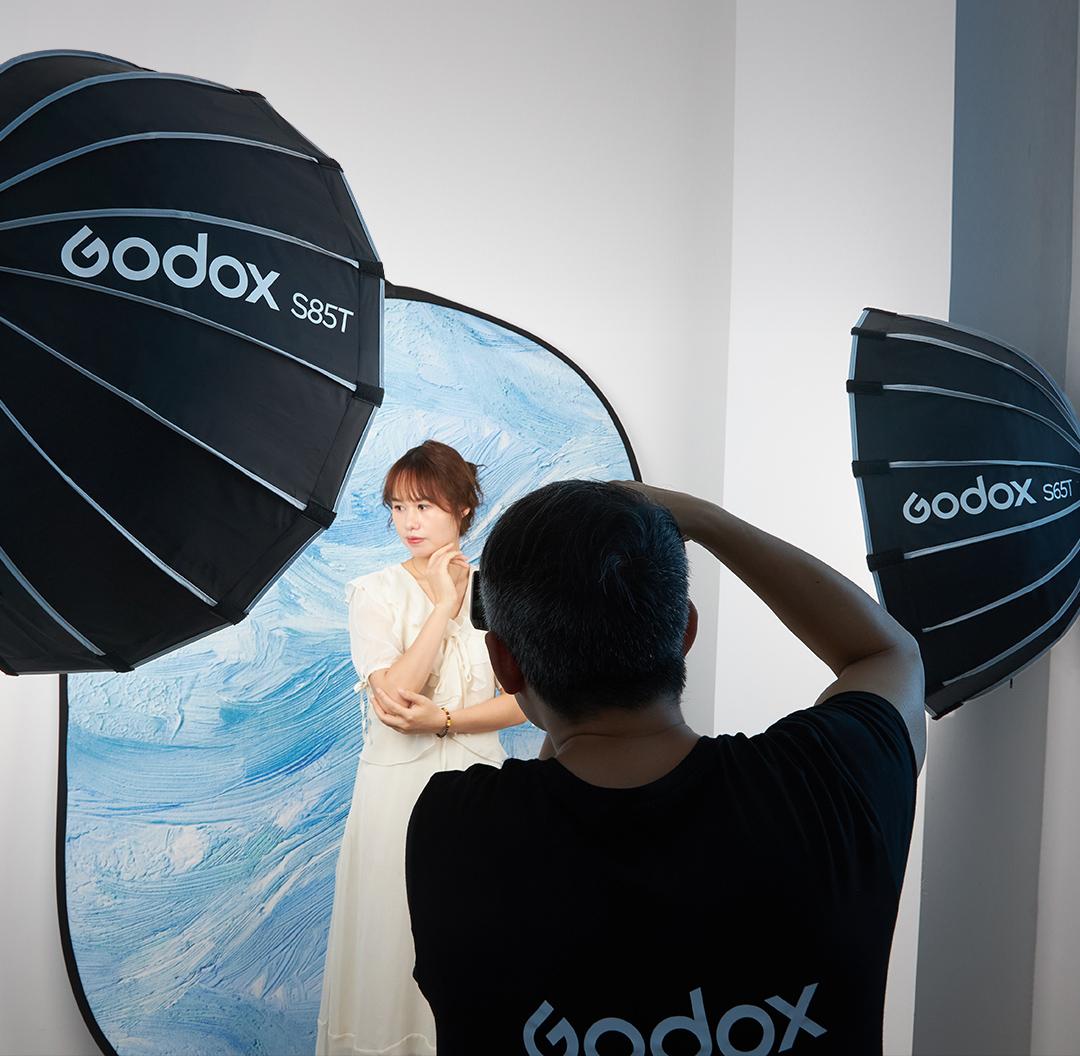
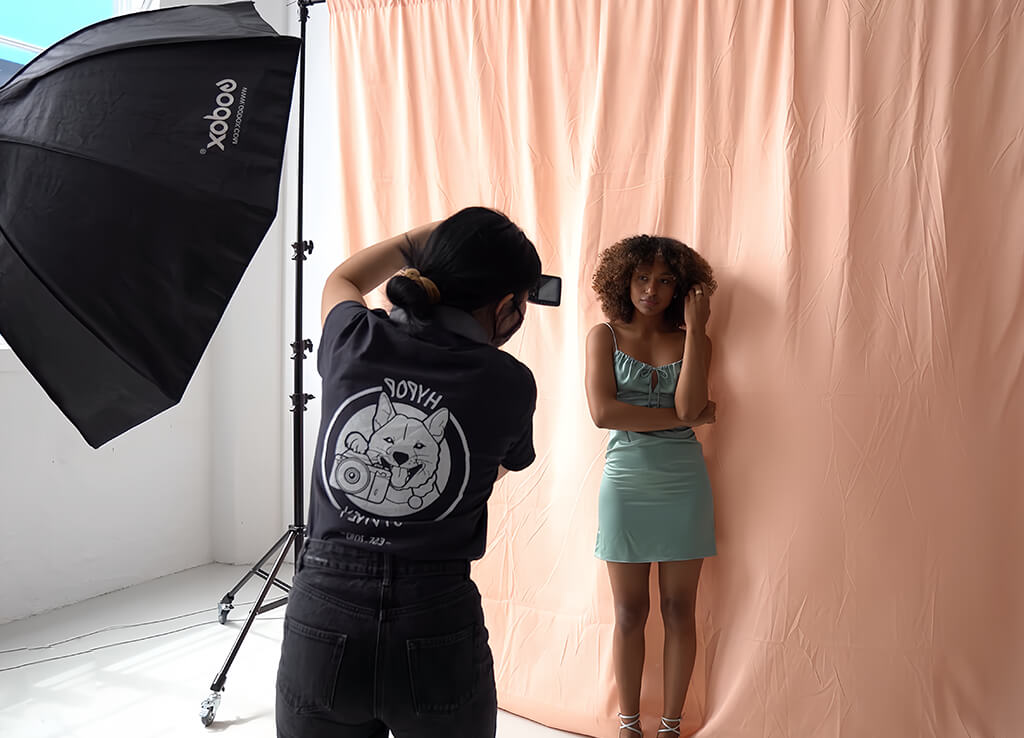
Artificial studio lighting setups give you more control for boudoir shoots. Unlike natural light, you can adjust it exactly how you want. Check these popular lighting setups and gear options:
You can change any boudoir lighting setup: adjust how gentle or harsh the light is, where it comes from, and how bright it shines to get exactly the look you want.
Strobe or flash photography gives amazing results when done right. Photographers choose studio flash because it lets them fully control the light's brightness, angle, and warmth. It's also essential in dark places where natural light isn't enough.
By combining natural and artificial lights, or using only studio lights with different sources and reflectors, you can create endless stunning and unique photos.
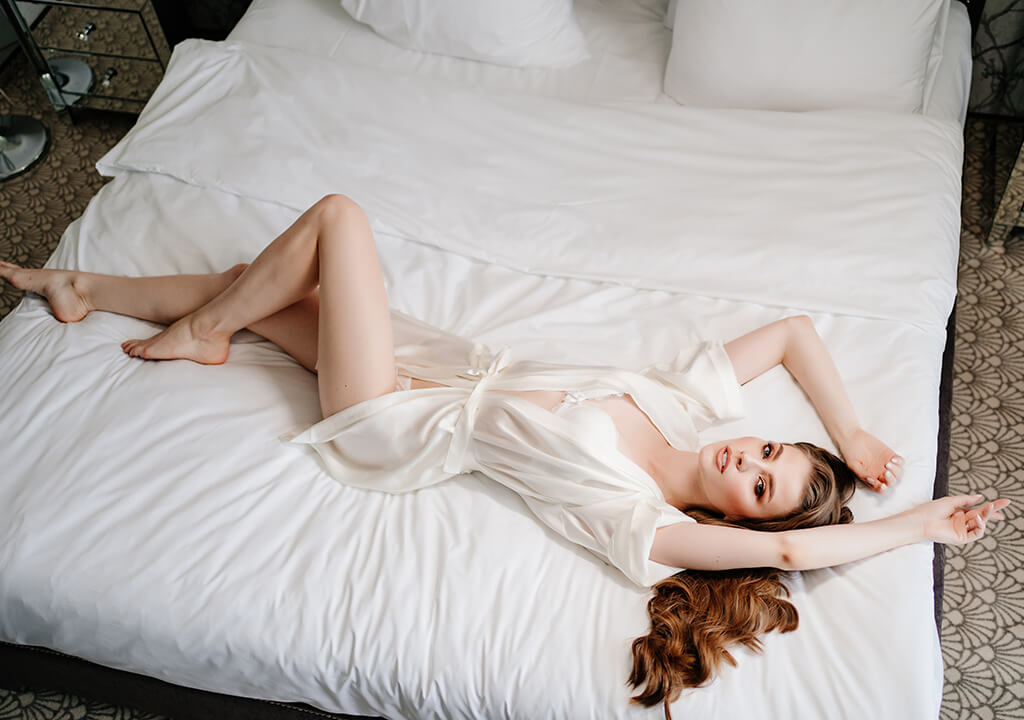
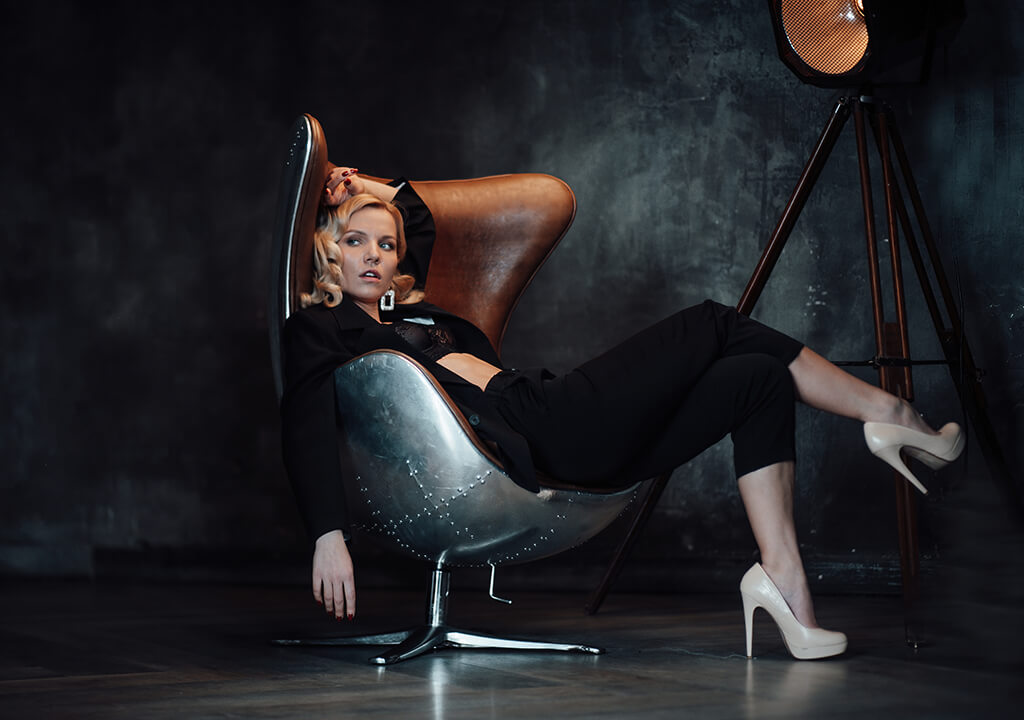
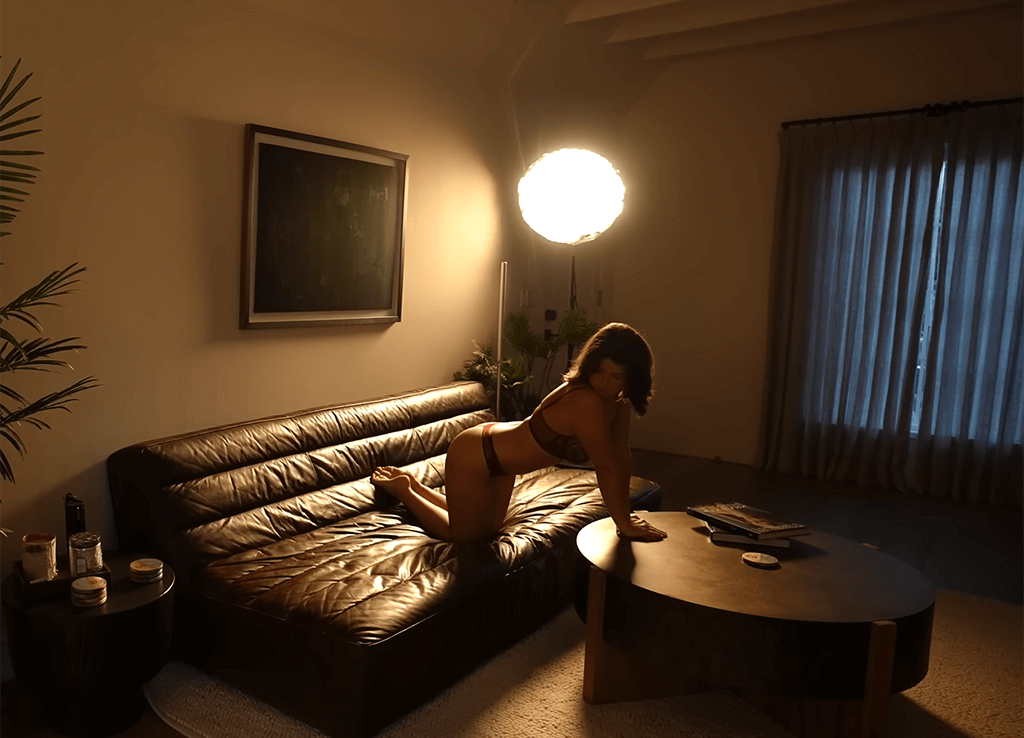
Low-key lighting (dark shadows with bright highlights) is perfect for showing body shapes and curves while hiding skin marks like stretch marks that many women don't want visible. This style celebrates the beauty and mystery of the female form. Strong posing remains essential – the lighting remains soft, but the poses are powerful.
Most low-key boudoir photos only need one light. For photographers, this makes setups easy and achievable, keeping things simple while still creating stunning results.
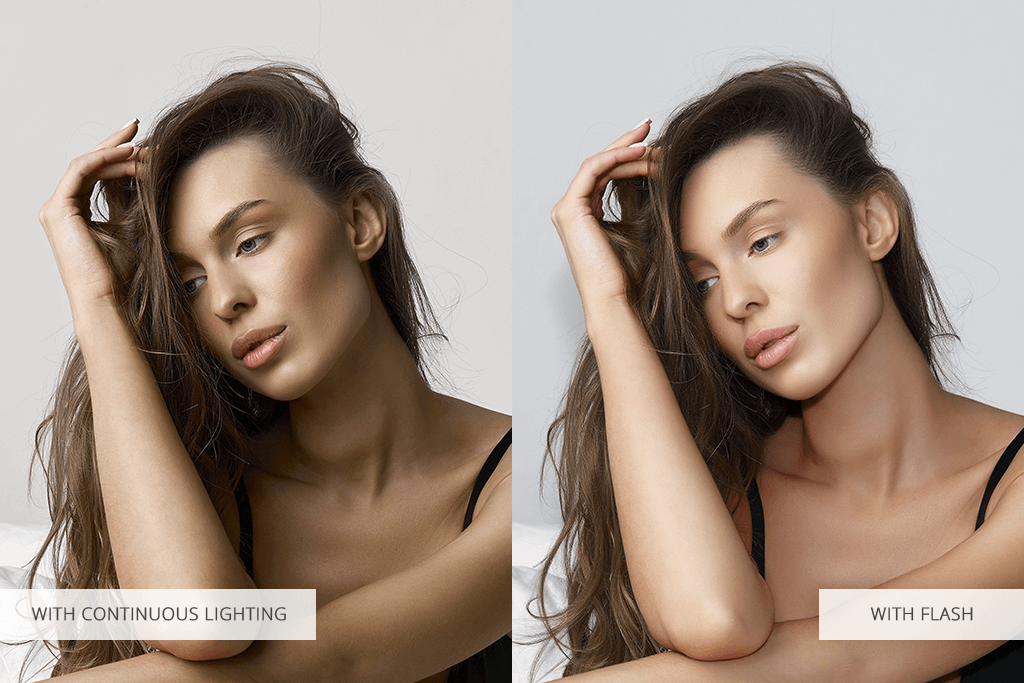
When starting lighting for boudoir photos, your first big choice is: use always-on lights (continuous) or quick burst lights (flash). Both work for boudoir, but they feel different and create different looks. Here's how they compare:
Continuous lights (like LED panels or softboxes) stay on constantly. You and your client see exactly how the light hits the body as it happens. This lets you change the lighting, move your model, or adjust angles while shooting, without needing constant test photos.
Experienced boudoir photographers often choose flash (strobe) lighting because it gives strong, exact bursts of light. It's perfect for creating bold shadows and bright highlights - the dramatic look that makes deeply emotional boudoir photos stand out.
Gentle, kind light is key for beautiful boudoir photos. Even DIY softbox helps by spreading out harsh light into a softer glow. This smooths skin and softly shapes the body. Softboxes give that cozy, natural look like window light, which is perfect for emotional boudoir shoots.
What to look for:
Soft light from one direction is vital for boudoir photos. It shapes the body smoothly while hiding small flaws. Softboxes let you control exactly how bright the light is and how far it spreads. This precision is key for both moody, dramatic shots and soft, natural-looking boudoir photos.
Boudoir continuous lighting is now very popular in boudoir photography. It lets you see live how the light hits your subject – no guessing needed. This is extra helpful for new photographers or when shooting in tight spaces (like small bedrooms) where tiny light changes make a big difference.
What to Look For:
Continuous lights are great for boudoir shoots where clients need to feel comfortable. They're gentler on clients than flash and let photographers work smoothly without stopping to test lights. They're also perfect for tight spots (like small bedrooms) or DIY setups where you need exact lighting control.
If you like using quick bursts of light, flashes, or strobe lights for photography are still a strong choice for boudoir. Strobe lights give you brighter, more reliable lighting and better control over existing room light. This makes them essential for professional boudoir shoots in studios.
What to Look For:
Camera flash stops movement perfectly – ideal for capturing action poses or natural, fun moments in boudoir shoots. They also give you more freedom to shape shadows and control light direction.
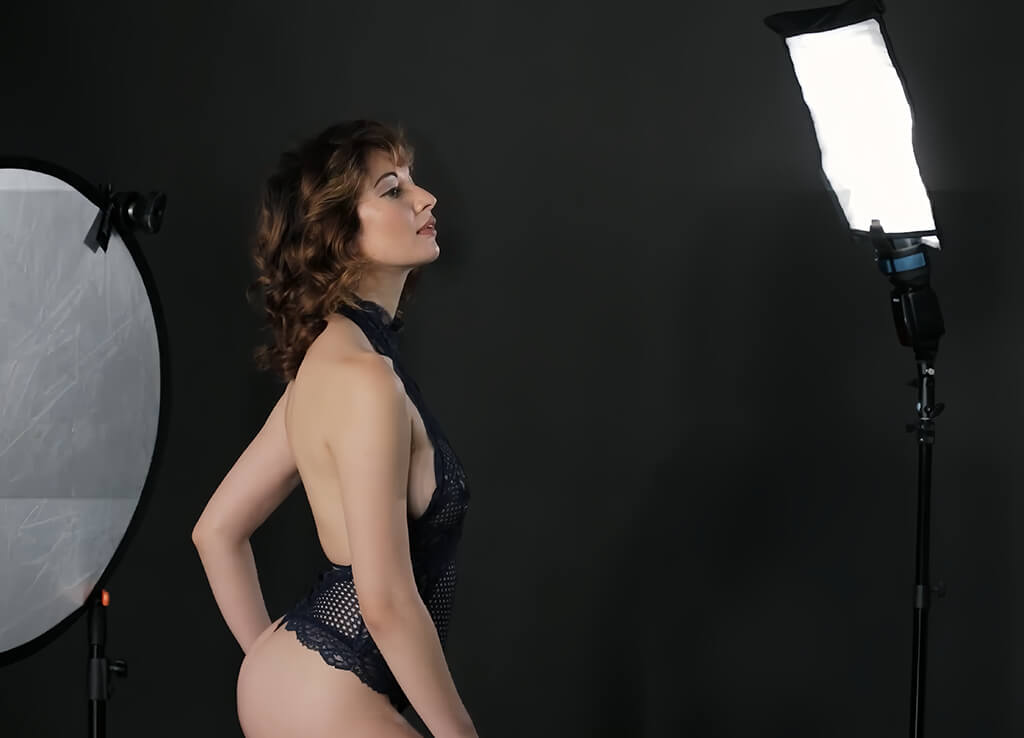
When it comes to perfecting your boudoir photography lighting setup, modifiers are more than essential. They shape the light, making it gently hug curves, create bold shadows, or softly outline your subject against the background.
Essential Modifiers:
Light modifiers let you shape light to match your shoot's mood – from soft, romantic glows to bold, edgy shadows.
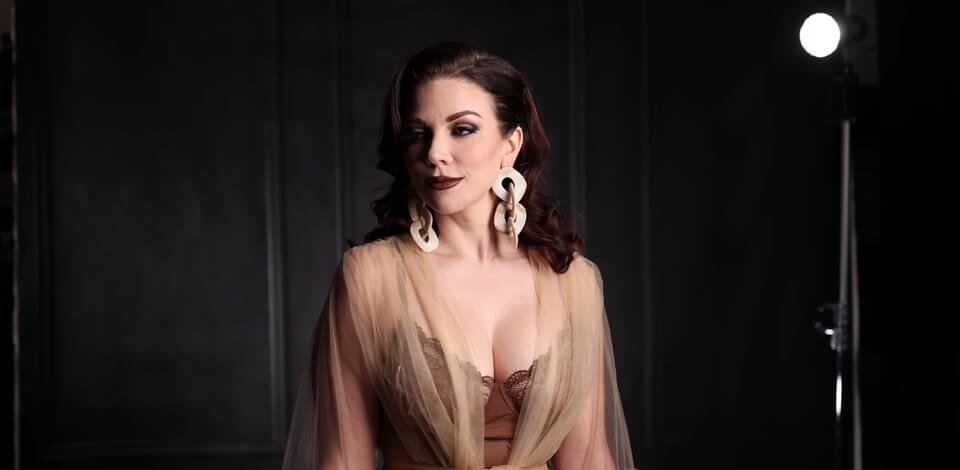
Using background lights or rim light photography is probably one of the best lighting setups for boudoir photos, which helps your subject stand out from the background, giving photos depth and a polished look. These lights can brighten hair, shape dramatic outlines (silhouettes), or gently show texture in backgrounds.
What to Look For:
Rim lighting adds a professional, expensive look to boudoir photos. It creates a glowing outline around your subject, sharpening body curves and giving a dramatic movie effect.
One of the most essential boudoir lighting tips is to use sturdy support. Purchasing solid projector stands keeps your boudoir lights secure and perfectly positioned.
What to Look For:
In boudoir photography, exact light placement is critical. Good stands guarantee safety and maintain your lighting vision smoothly.
Basic boudoir lighting equipment like this is often ignored, yet it's very effective for sculpting and directing light exactly how you want.
Uses:
The precise tools used in boudoir photography help make small, critical tweaks that create the perfect balance of light and shadow for stunning results.
Are you in search of a user-friendly boudoir photography lighting tutorial? Here's an easy, effective setup to begin:
This simple boudoir lighting setup creates beautiful photos in many styles, using only a few tools.
Professional photographers from FixThePhoto team specialize in boudoir imagery. They've shared expert lighting tips to boost your results immediately.
“Boudoir looks best with soft, kind light. Achieve this using large softboxes or by diffusing natural light (like with sheer curtains).”

“Your light's angle sculpts muscle tone, curves, and facial features dramatically - experiment to find the most flattering look.”

“Walk around your subject while shooting. Watch how the shadows change and find the best angles. It's okay to let some body parts be in shadow. This often makes the photo look more sensual and artistic.”

“Use extra lights behind your subject to show background textures or add dramatic separation.”

“Take time during the shoot to explain why you're placing lights where you do, how light and shadow will make them look great, and how this sets the mood you're creating together.”