Have you just embarked on the path of a real estate photographer and have no idea what real estate photography camera settings to use? Should you choose ISO 400 or 800? What is the difference between f8 and f2.8? This in-depth guide covers basic camera settings that are suitable for varied shooting conditions and guarantee your photos will look amazing.
Interior photography is a rather difficult task that requires special skills and knowledge. If you are just starting, read these recommendations on how to apply real estate photography settings correctly.

Photo by Panasonic Lumix FZ1000
Professional photographers use additional lighting when taking commercial interior photography. However, if you are a beginner without special equipment, you can improve the quality of your photos with the help of aperture and ISO settings. The higher the ISO value is, the more light comes to the frame.
You have to remember that too high values can cause lots of digital noise in your photos. This is not what you need. I recommend you to use the ISO settings in the range from 100 to 320. It is better to use ISO 320 when you work with a flash, as it will make your photos vivid and clear. If you are photographing in a very dark room and you do not have special additional light, you should increase the ISO value to 400. It will help you get more light, make an image clearer and highlight important interior details.
Learn interior photography tips to produce high-quality photos of the kitchen, bathroom, living room, and hall.

Photo by Canon EOS M5 + Canon EF-M 32mm f/1.4 STM Lens
Interior photography implies taking wide frames. The main thing here is to save clarity. The best values for interior hotel photographs are the interval between . They are optimal for several reasons. First, a lower value (for example, f3.5) can add too much bokeh to your images. This way you will get pictures with very blurred edges and a highlighted center. If you choose a higher value, such as f16 or f18, you can capture more objects and show clear details, but this aperture value will certainly have a negative effect on other aspects of photo quality.
To learn how to play with color while taking interior photos and to make this “WOW” effect, read the book “Сaptivating Сolor”. Find out how to illuminate objects in the chapter about colors.
Imagine that you need to emphasize some important detail in the interior of a room, for example, furniture or a fireplace. Use a small aperture value (approximately f/2.8) to blur the edges of the image and focus on necessary objects. Put down your user manual, say goodbye to ‘Auto’ mode and learn firsthand how to use your camera to its full potential and take high end real estate photos.

Usually, the shutter speed of the lens is adjusted after a photographer has already set the aperture and ISO, in accordance with the exposure. When working with aperture and ISO, we can choose a specific range in which it will be convenient for you to shoot and get good images, while there are no universal settings for the shutter speed. It all depends primarily on your camera and its capabilities.
If you use the Manual mode, I recommend you to apply the shutter speed between 1/60 and 1/2 second intervals. Just keep in mind the cheat sheet above and you will have no problems. Learn about basic real estate photography gear you need to use for the best results.

Many photographers wonder what exposure-metering mode will be the best one for interior shooting. There is no single answer to this question. The fact is that unlike other types of photography, here you do not need to create a composition, but you have to shoot a finished object.
If you want to surprise your real estate agent with a creative and modern approach to your photographs, suggest making 3D real estate photos to raise his/her sales twice!
Therefore, there is no universal interior setting, since everything depends on your wish and the type of room. However, many experts advise using spot metering. It highlights small, well-lit details perfectly.

Photo by Nikon D850 + Nikon 10-24 mm 3.5-4.5 G ED
I prefer to use the automatic white balance for indoor photography. Of course, you can apply manual settings and control the process of shooting. However, some photographers do not want to spend their time doing so.
I use the automatic settings and then correct WB in Lightroom. Of course, this method is not the best variant too, since you will have to spend a lot of time editing photos and correcting colors later. Nevertheless, it allows you to focus your attention on the subject of photography and other important things, without being distracted by the manual settings.
Taking a photo, you see only a scene in the viewfinder, while your camera gets more information about the shot. This data matters a lot, when you improve your photos in image editing software, brightening shadows and darkening highlights.
Though, be accurate with the way you recover the data in these areas, as it is really important not to overdo and keep everything well-balanced. Thus, learning how to edit real estate photos in Lightroom or Aperture, you must understand that this technique doesn’t work in every case.
If you shoot in RAW, you get more info for detailed image editing, which means the finished photo will look professional. However, the best results are possible if you delegate the task of image processing to experts with many years of experience in this field.
Even newbies instinctively feel that different shooting conditions require different camera settings. Below, I have listed various values you need to use to get professional results based on the place you take images in.

As I have mentioned earlier, you’d better activate an aperture priority mode just to be on the safe side.
When you take images in a partly dark space (i.e., a room that has very little dynamic range), use the following camera settings:
Exposure Mode - Aperture Priority
Aperture - f/8
ISO - 400
Shutter Speed - Determined by Camera
Focus Mode - Single-Shot Autofocus
Metering Mode - Matrix
If you a photo ends up too dark with these settings, make the aperture wider (i.e., moving from f/8 to f/7.1) or raise the ISO (i.e., moving from ISO 400 to ISO 800).
If you get too bright photo using such settings, close down the aperture (i.e., to f/11) or reduce the ISO (i.e., to ISO 200).

When working in very dark spaces and those with a wide dynamic range, you have to set up your camera in a bit different way.
Though most camera settings remain the same, you need to change a metering mode, setting it to Spot:
Exposure Mode - Aperture Priority
Aperture - f/8
ISO - 400
Shutter Speed - Determined by Camera
Focus Mode - Single-Shot Autofocus
Metering Mode - Spot
Besides, it is necessary to bracket the exposures, as explained earlier.
Photographing too dark rooms, choose the maximum number of bracketed exposures your camera allows with 2 EV increments (or the maximum allowed by the camera). Also, switch to the continuous shooting mode.
Though camera settings for interior and exterior photography have much in common, there are some differences to keep in mind. Below, I will dwell on how to adjust your camera in a proper way.
However, no matter how hard you try to configure your camera correctly and take high-quality images right on the spot, you can’t do without further photo processing. If you don’t feel like editing pictures on your own, you can always address professional retouchers or use ready-made presets to get the desired outcome without much effort on your part.
Use these real estate Lightroom presets to edit your interior and exterior photos. Correct white balance, adjust shadows, make green and blue colors vivid, etc. in several clicks.

When it’s sunny, there’s no need for additional lighting, that’s why I tend to use ISO 100 in most cases and I get the results like in the photo above.

This is what happens, when you go overboard with ISO. The colors are faded and the house loses details. Always keep your ISO as low as you can.
Trying to learn about the best time of day to take real estate photos, you’ve probably heard about the Golden Hour phenomenon, which is 30 minutes before sunset and after sunrise. At this period, you really get wonderful, tender and warm light, which may greatly assist you in taking real estate photos.
Level up your real estate photography business having followed these real estate photo tips and tricks. Become a professional photographer from the first photoshoot!
However, you must be quite flexible and fast to accurately adjust your camera for such conditions. Mainly, you have to mind the exposure, as light intensity in the evening (even during the golden hour) differs greatly from that you have in the daytime. In such cases, I prefer raising ISO to about 400. Thus, you will perfectly cope with the lack of light not scarifying a good depth of field.

People, who are professionally engaged in real estate photography, believe that aperture is the most important of 3 parameters, when it comes to property exterior.
This is the result you’ll get if you don’t know what the correct aperture is. Both interior and exterior shooting require the same approach, as you have to capture the whole scene. That’s why, set aperture in the F/8 - F/11 range.
This is the result you get if you use the settings I recommend. The whole image is crisp and in focus without even a trace of blurriness. Want to see more real estate photography mistakes? Check out this list of bad real estate photos and don’t repeat these amateurs’ mistakes.

Photo by Canon EOS 5D Mark IV + Canon EF 11-24mm f/4L USM
Shutter speed for real estate photography doesn’t greatly affect the quality of both interior and exterior shots. Judging by the amount of natural light you have at the spot, you need to keep shutter speed between 1/60 -1/2 a second.
These aren’t ideal values that will work for all situations. You can try them for your scene and then slightly regulate. If you have set your camera this way (I mean, shutter speed 1/60 -1/2 a second), but wish to get a brighter photo, make the aperture wider, so more light will reach the sensor and you’ll get an image with vibrant colors.
Vice versa, if the picture is too bright, you can narrower the aperture or decrease the ISO. Both variants work effectively.

Photo by Sony A7 III + Sony FE 16-35mm f/2.8 GM
Look carefully at the settings of this evening exterior shot. A lot of people don’t get them right straight away. It will probably take you a while too.
Personally, I choose the longest focal length possible, but it shouldn’t exceed 22m or you’ll get all kinds of distortions and perspective problems in your property images. Providing buyers with too wide images may be misleading as they will imagine the house somehow different than it really is. Thus, they may be not only disappointed but even angry because of such inaccurate photos.
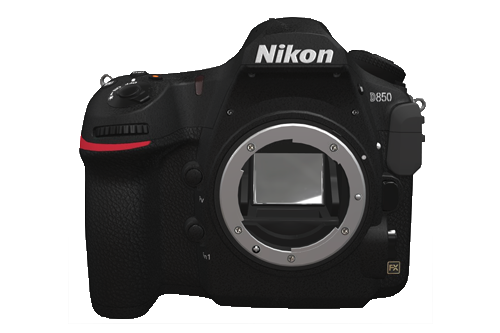
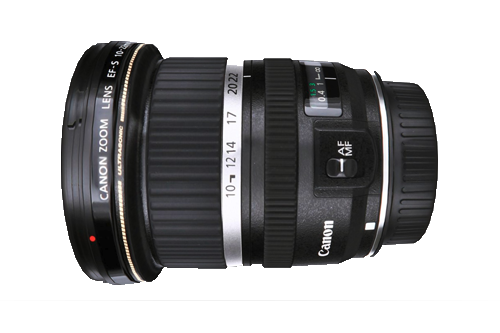
I don’t know what real estate photo equipment you use. Is it a full-frame or cropped sensor DSLR? Let’s imagine you use Nikon D850, which is believed to be a decent device for property shooting or Canon EF-S 10-22mm that is often called the best lens for real estate photography. With a full-frame digital SLR, you’ll get images with a focal length corresponding to the lens attached. For instance, if the lens is zoomed out to 20mm, the picture will be 20mm. With a cropped sensor DSLR, your pictures will have a magnification of the focal length the lens attached, based on a pre-determined ratio.
Also, you can use drones for real estate photography and take breathtaking aerial photos from the bird’s eye height.
Different manufacturers offer diverse crop ratios. For example, if you photograph at 17mm, the picture you get will be 27.2mm (17mm x 1.6). Nikon’s cropped sensor devices come with a 1.5x crop factor. Take this into account, while choosing the best camera for real estate photography and compatible lenses.

Using these Real Estate Lightroom Presets for photo editing, you can significantly speed up this process and get amazing results without manual tweaks. There are many great tools that produce interesting effects, beautiful color combinations and more. Decide what atmosphere you want your images to have and choose a preset suitable for that scenario.


