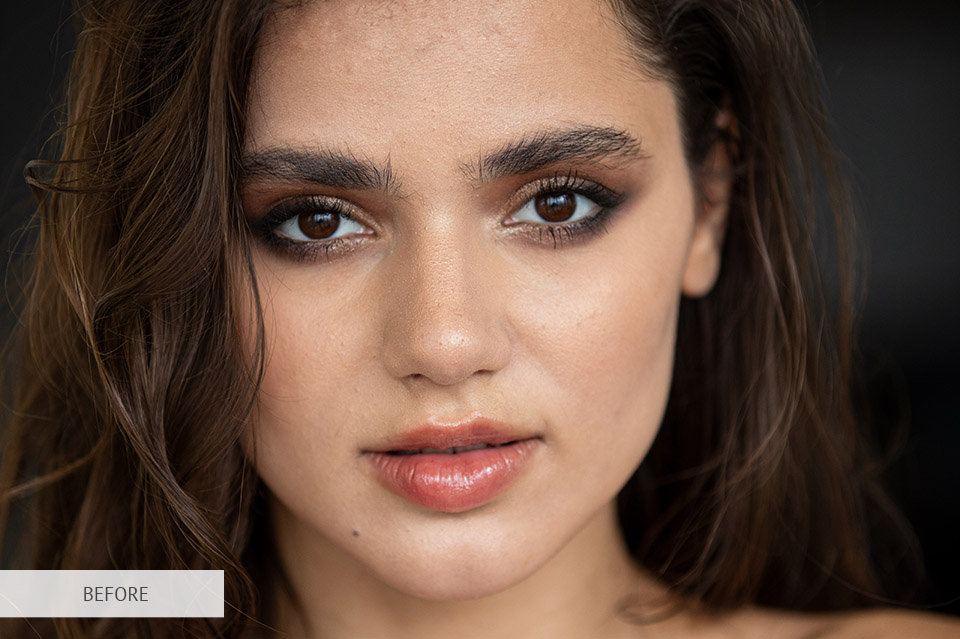
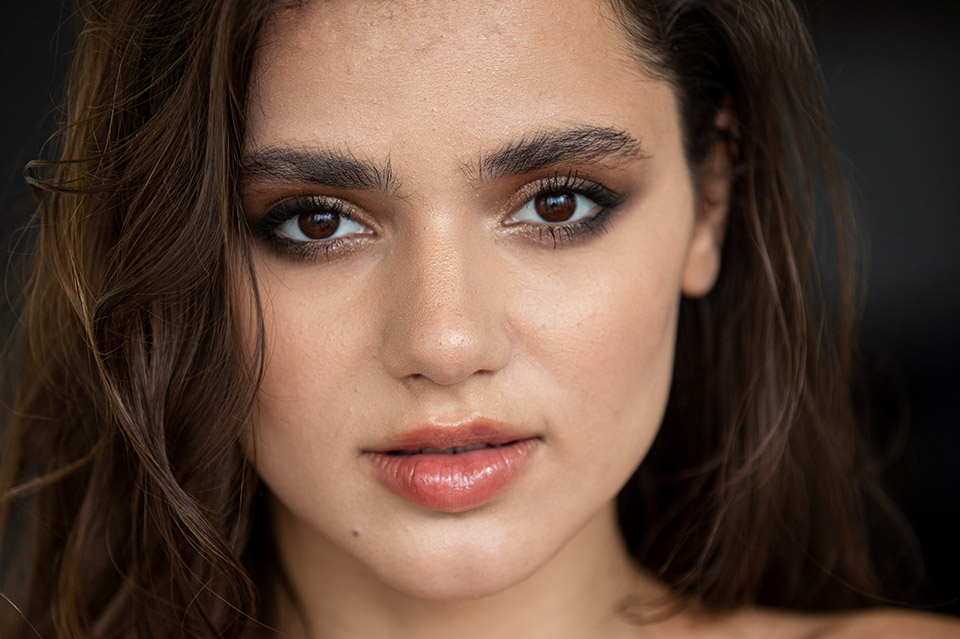
Can’t understand how to smoothen skin in Photoshop realistically and fast? Follow one of my three tutorials on how to soften skin and make your portraits look amazing.
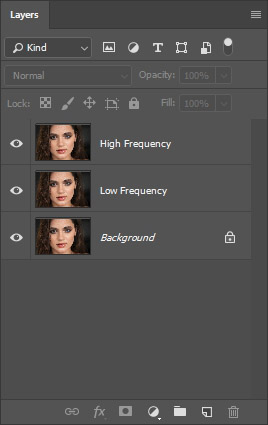
To fix various skin defects, many photo retouchers use this method. It involves two independent levels of image editing. At the first stage, you work with high frequencies, eliminating such flaws as wrinkles, acne, scars, skin pores, strands of hair and others.
Editing tones, colors, volume, light and dark areas are performed when you work with low frequencies.
To smooth skin in Photoshop using this technique, you need to make 2 copies of the layer.
Select the “Background” layer and press Ctrl + J (Cmd + J) twice. Next, name these layers Low Frequency (LF) and High Frequency (HF) respectively.
To rename layers, you need to double-click on their names. Thus, it will be easier for you to navigate later.
Before proceeding to the HF layer, you need to blur the skin texture of the LF layer. Use the blurring filter to soften skin in Photoshop until all imperfections disappear completely. You can find the necessary option by going to the menu Filter - Blur - Gaussian Blur.
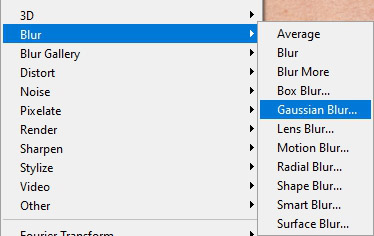
Applying this technique, you should use the correct radius to remove all the flaws. Set the slider position when the texture looks a bit blurry.
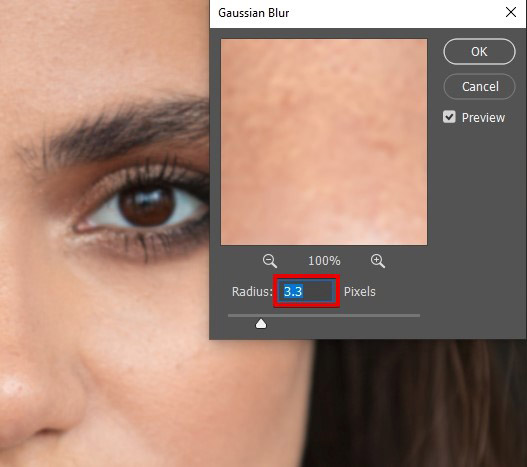
Tip: For close-up shots, set the radius of 6-8 px, medium-size – 3-5 px and for full-length photos – 1-3 px.

Enable the visibility of the HF layer and select Image - Apply Image.
Enter the values you see in the picture in the following boxes:
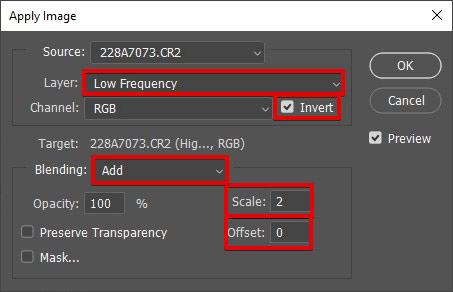
As a result, you will see only the outlines and the whole image will be gray. Press “OK”.

Without leaving this layer, switch from Normal blending mode to Linear Light.
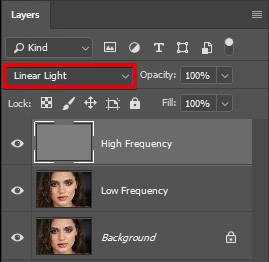
Your picture will look like the original photo.
Then, you need to create an empty layer between the HF and LF layer.
You can do this with the shortcut Shift + Ctrl + N (Shift + Cmd + N).
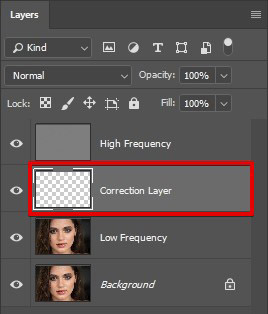
This will help you clean up the result with the Eraser, if there’s going to be something you don’t like.
The next tool is Mixer Brush Tool. It lets you work with transitions between light and dark areas. To find this function, you need to open the toolbar and double-click on the brush.
To get good results, use the following settings:
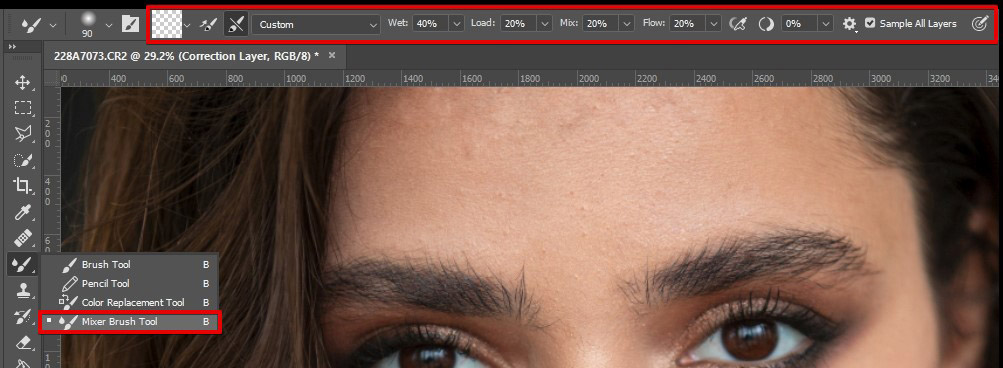
Clean the Brush after Each Stroke • Custom • Wet: 40% Load: 20% Mix: 20% Flow: 20% • Sample All Layers ✓
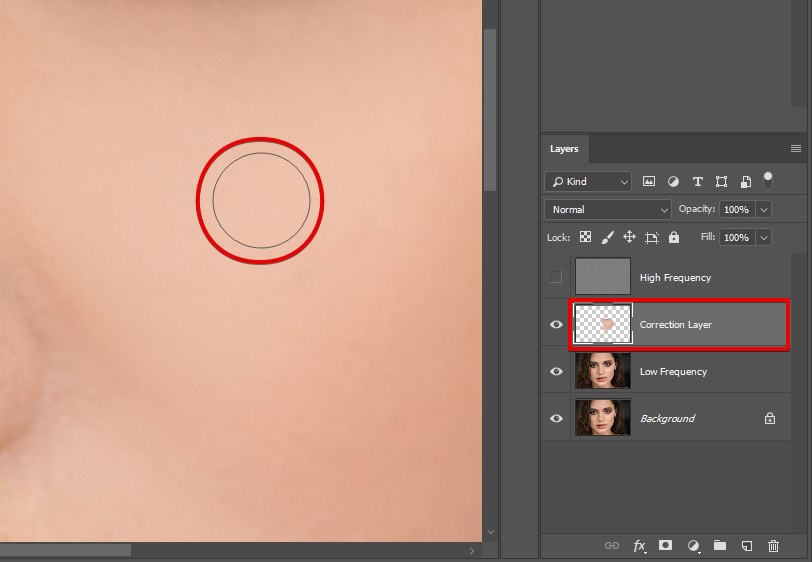
In the left part of the panel, click on the eye to hide the HF layer. Use the Mixer Brush Tool on the Correction layer to depict the light and shadow as accurate as possible. In this way, you can remove imperfections.
Move the brush from dark parts of the skin to light ones. These manipulations let you make even out the skin tone and make is smoother.
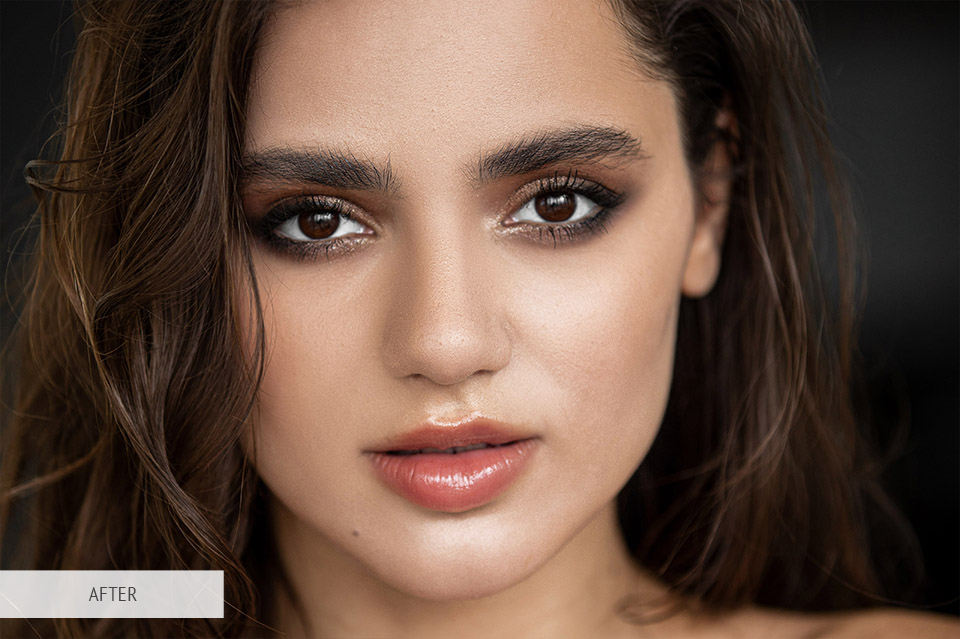
Now you know how to smooth skin in Photoshop using the Frequency Separation technique.
You need to follow onlys even simple steps to get even skin while maintaining its texture. This is a great quick method for professional image retouching.
You’ve probably had the experience to use PS tools such as Dodge and Burn. It is worth mentioning that with these tools you can change the exposure settings as well as use a brush to brighten or blur the particular areas on the photo.
These tools are essential for learning how to smooth skin in Photoshop. Dodging and Burning method allows you to remove all skin blemishes without distorting the skin texture.
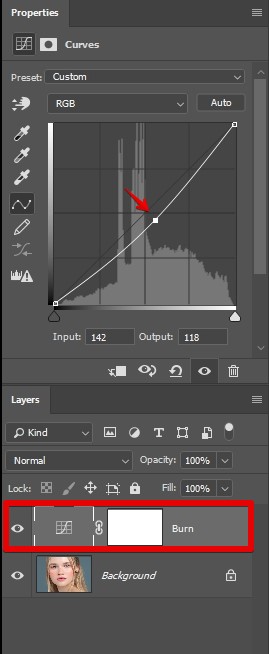
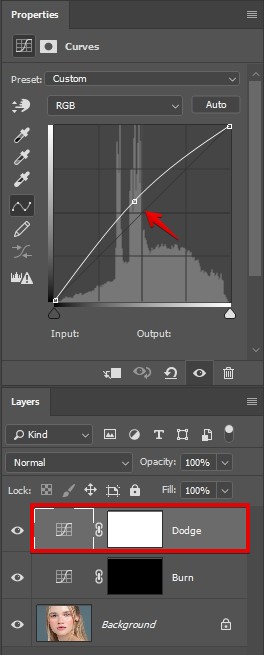
Create a new “Curves” adjustment layer.
Go to:
Layer -> New Adjustment Layer -> Curves...
Click OK in the dialogue window.
Name it “Burn”.
Then, lower the point in the middle of the curve. Simply click on it and drag it down.
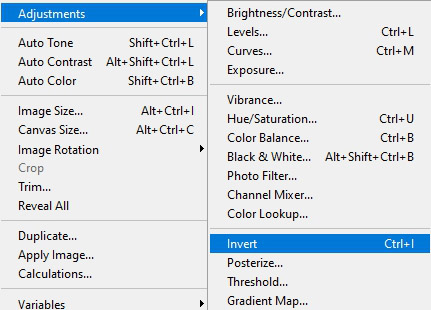
The next step of the fast skin retouching process is inverting the adjustment layer.
Go to:
Adjustment - Invert
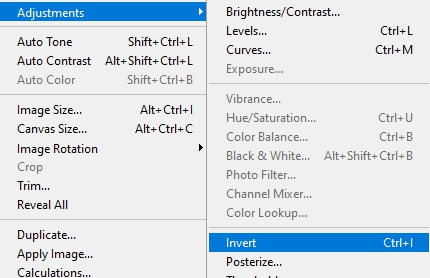
To quickly invert the layer use the shortcut: Cmnd + I on Mac or Ctrl + I on Windows.
At this point, you need to create another layer.
Once again go to:
Layer -> New Adjustment Layer -> Curves...
Name the layer “Dodge”. Click OK in the dialogue window.
Lift the point in the middle of the curve.
Now, you need to invert the layer we just created.
Once again go to:
Adjustment - Invert

Don’t forget that you can use the shortcut: Cmnd + I on Mac or Ctrl + I on Windows.
Choose the brush tool (B) and set the opacity to 40%.
Now you can start Photoshop skin improvement: lightening dark areas and brightening dark areas on your model’s face.

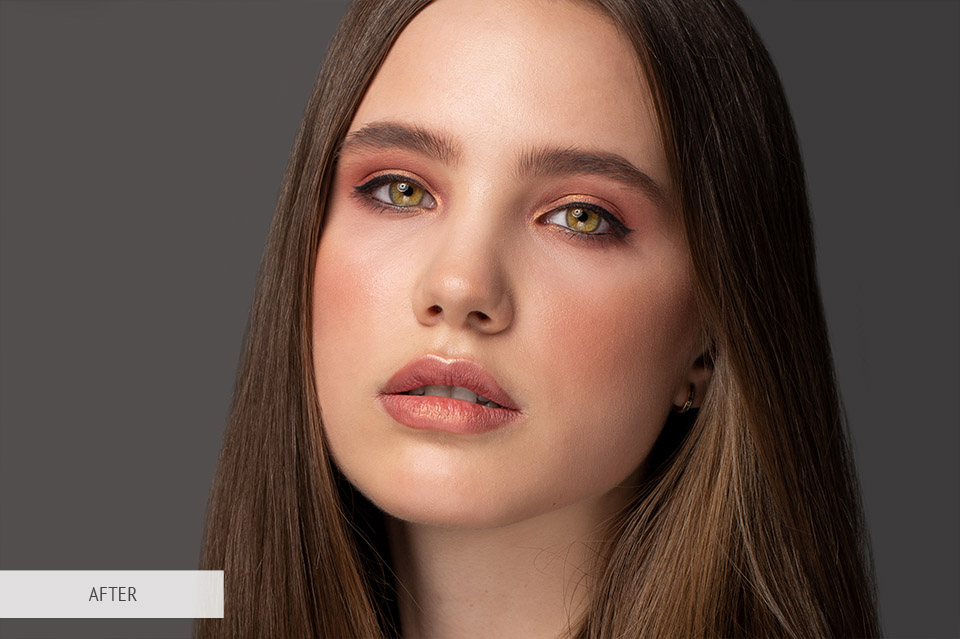
Now you can enjoy the result.
Perhaps at first glance, this seems a little complicated and scary, but in fact, this method is quite simple and effective. All you need to do is use white and black paint to get even and smooth skin.
Besides, this technique lets you keep your skin texture intact.

The next Photoshop skin retouching method is based on using an inverted high pass to smooth out any bumps. You can use it both to improve the skin and to smooth any other surfaces, such as backdrops or fabrics.
This technique is pretty simple. Here’s how you do it.
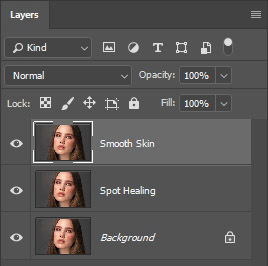
Start performing this type of skin smooth Photoshop retouching by creating a ‘Spot Healing” layer.
Use these combinations: Shift+Cmd/Ctrl+Alt+E.
Name it “Spot Healing”.

Start removing small blemishes with the Spot Healing Brush Tool.
Zoom in for better results.
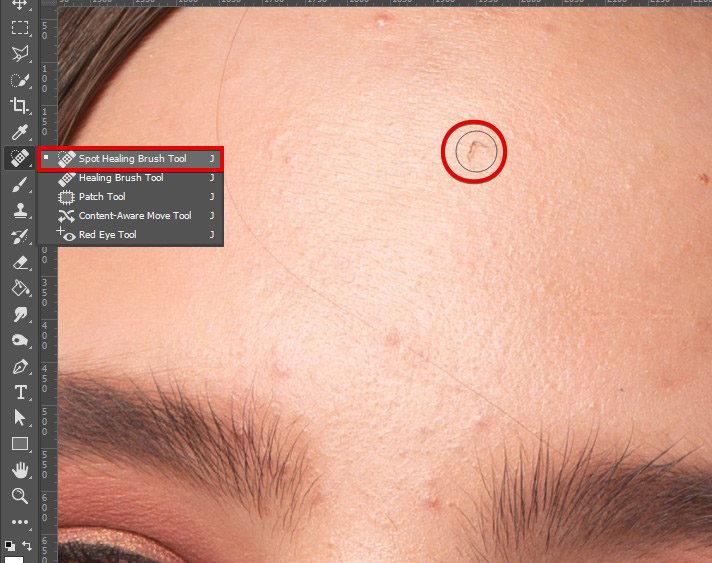
This wouldn’t make any drastic results, but this will clean up the model’s face pretty well.
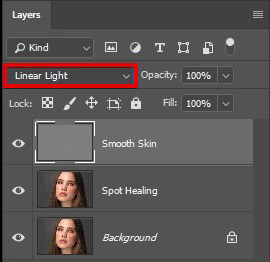
The next step is creating one more layer and name it “Smooth Skin”.
Once again, use the shortcut: Shift+Cmd/Ctrl+Alt+E.
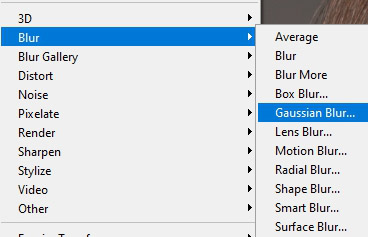
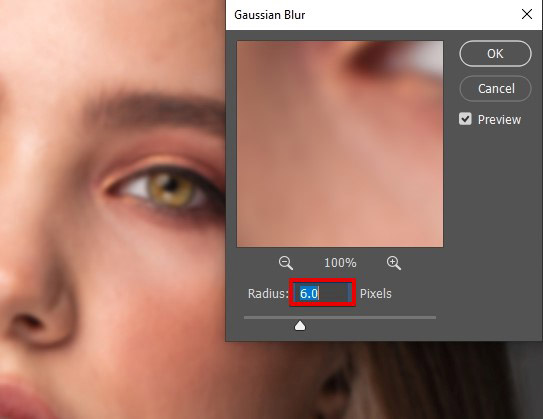
Now, choose Gaussian Blur from the Filter menu.
Select the radius of 6 Pixels.
Click “OK”.
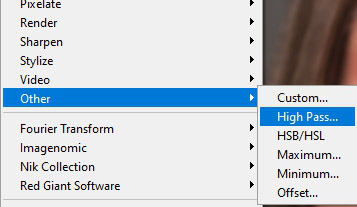
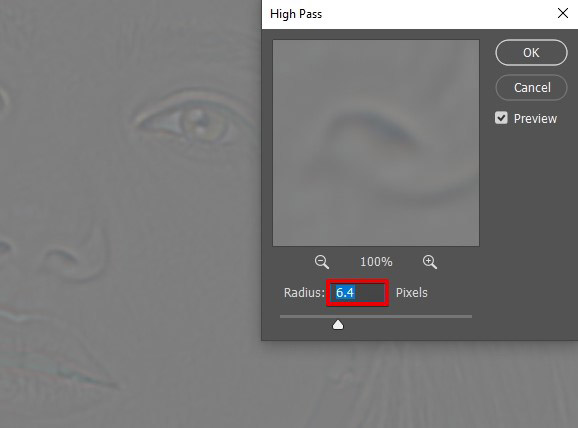
Take these steps: Filter-Other-High Pass.
Enter a 6.4 Radius and confirm by clicking OK. Set the desired value by moving the slider from zero.
You will not see bulky volumes or excessive tonal transitions if the radius is too small (for example, one or two pixels). A too large value (about 10 pixels) will not give the desired result either.
Then you should change the Blend Mode. Select Linear Light.
Your image will look like you’ve added clarity to it.

The next step of this skin smoothing Photoshop tutorial.
Press Cmd/Ctrl+I combination to invert the layer quickly.
The photo will now appear blurry.

Click the Add Layer Mask button in the Layers panel. A white box will appear next to the “Smooth Skin” Layer Thumbnail.

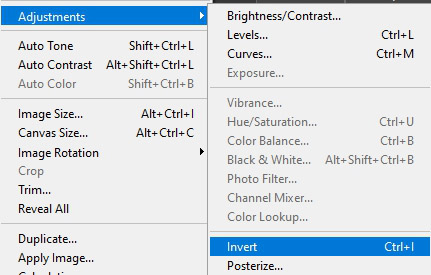
Then, invert the mask by going to Image – Adjustments – Invert or using the shortcut: Ctrl+I for Windows and Cmnd+I for Mac.
Select the Brush Tool to paint on the mask and cover imperfections.

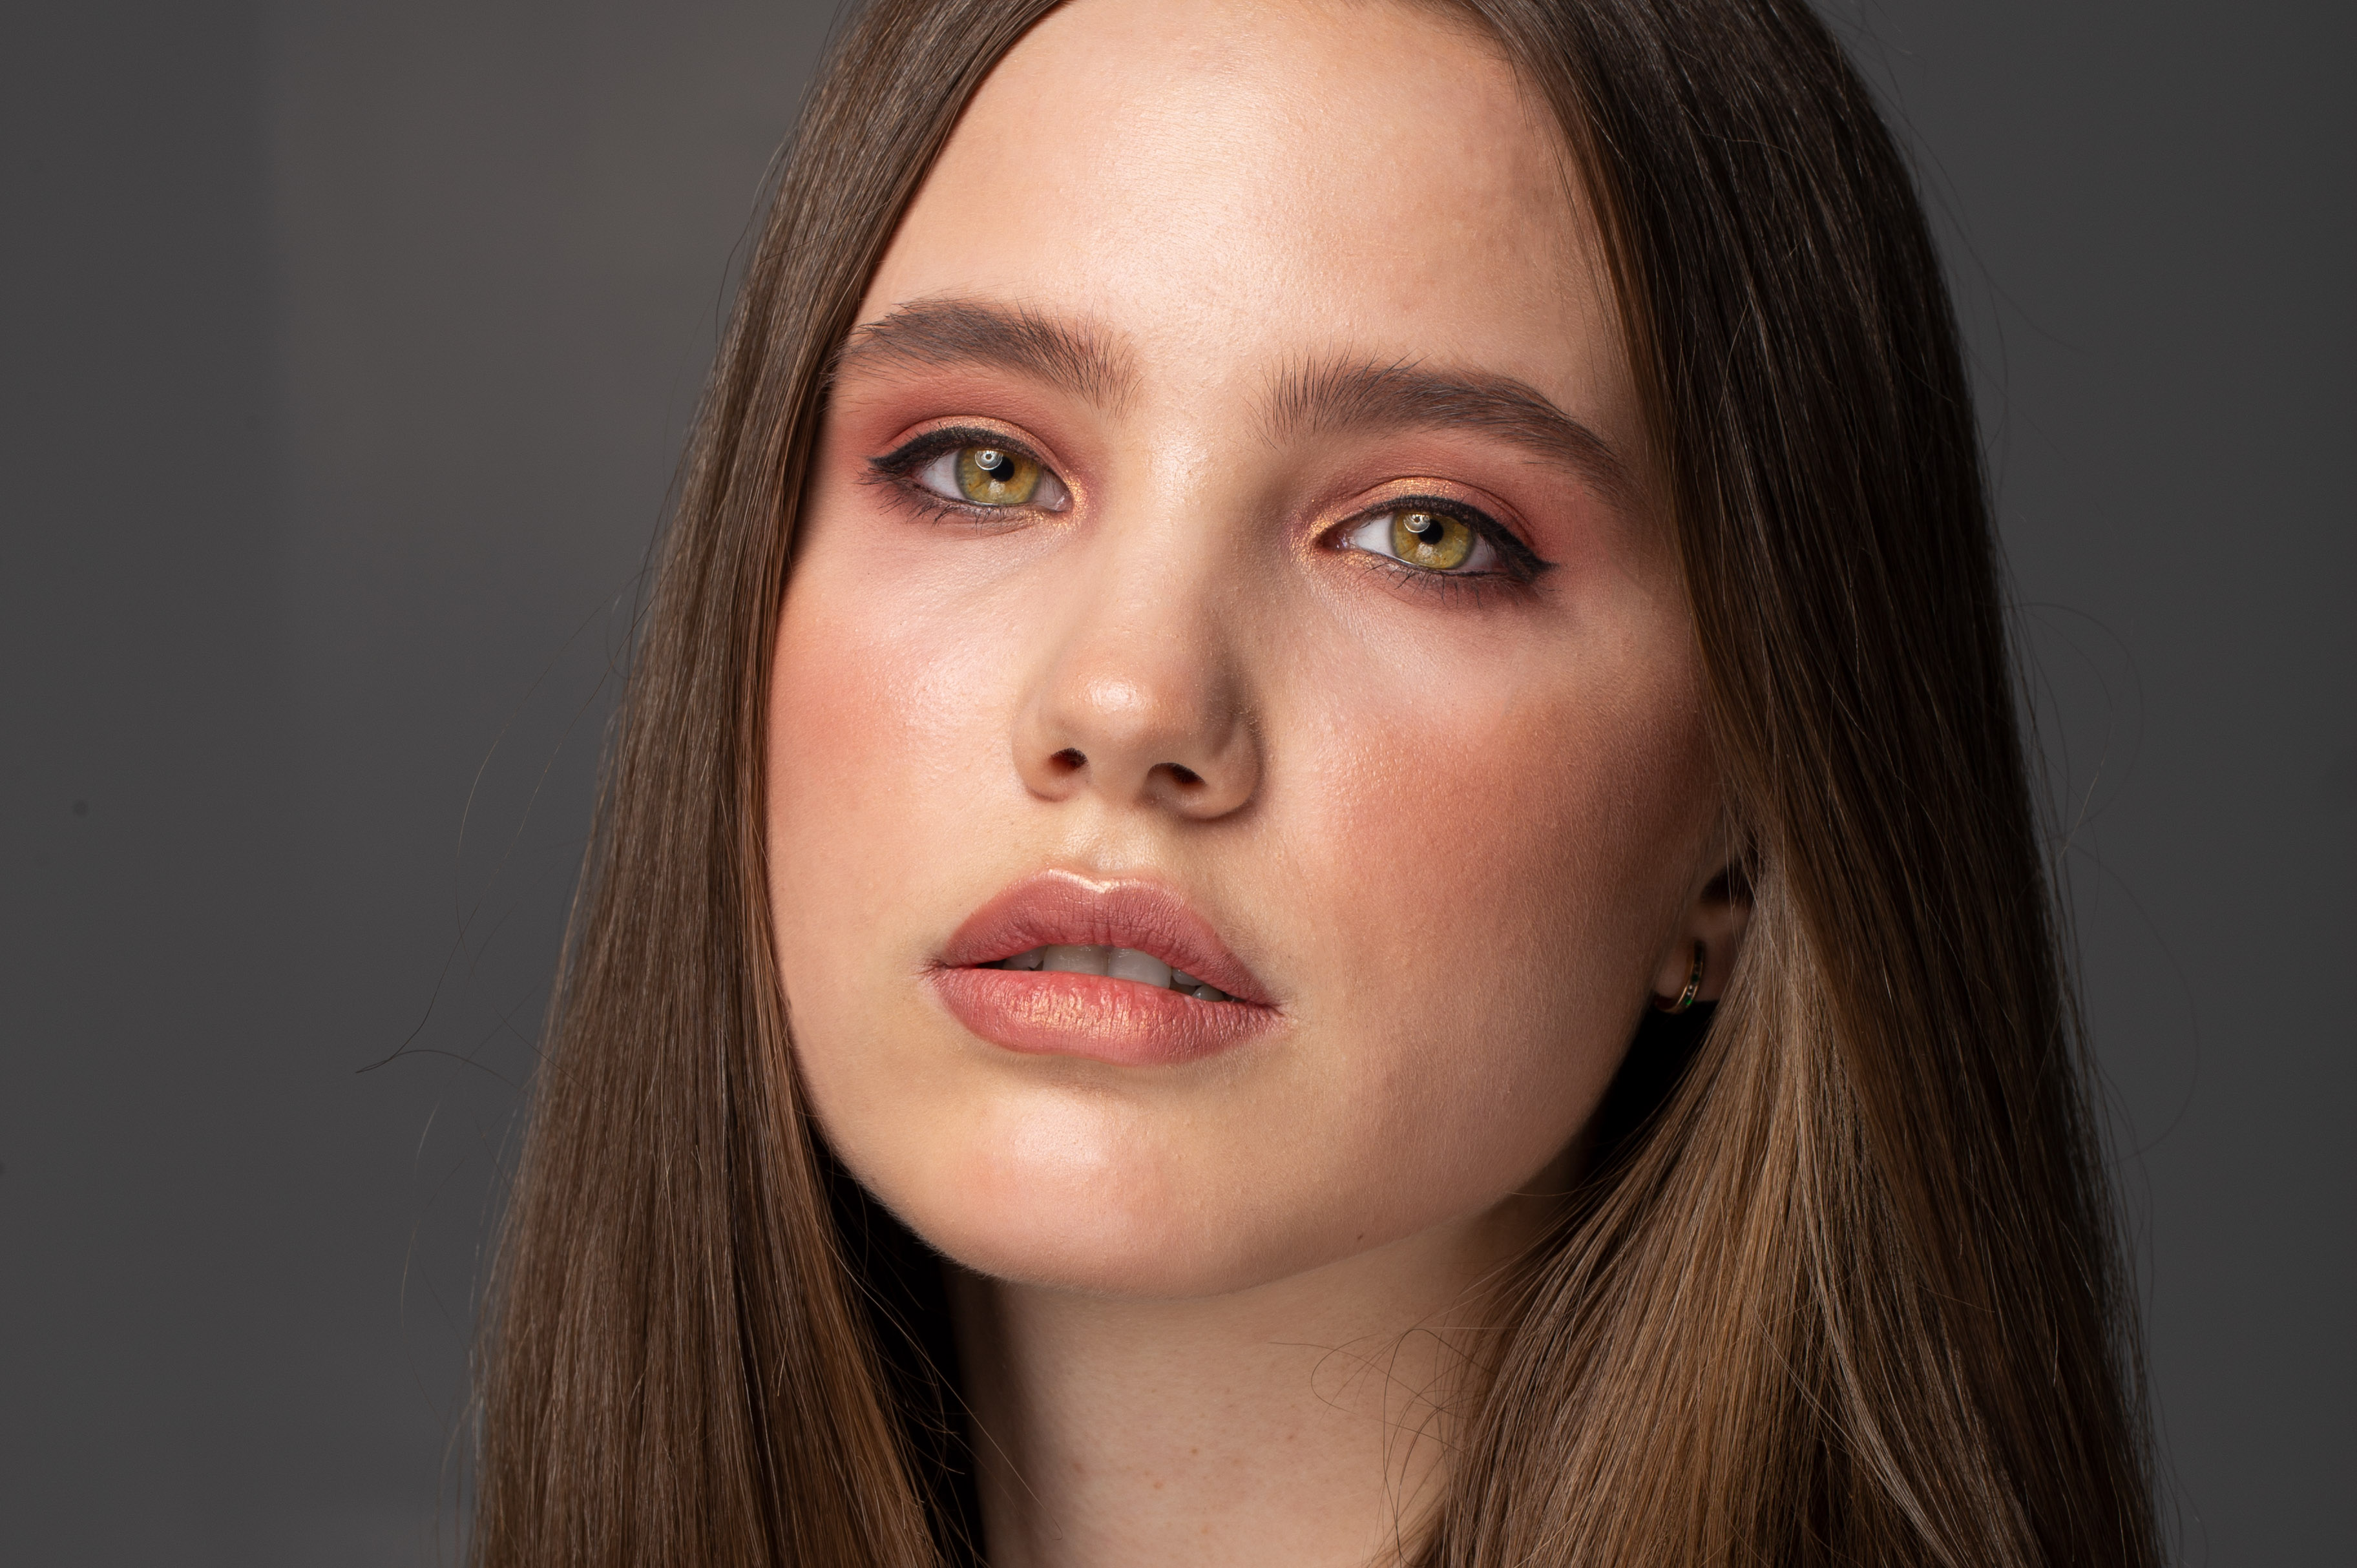
The job is done! Now you know how to smooth skin in Photoshop using the High Pass Filter.
High pass skin retouching is an important part of the workflow of any professional photo editor. Using the inverted high pass technique to enhance the skin look is an essential complement to your dodge and burn skills.
You can edit the portrait subtly and neatly. This method lets you correct uneven makeup, add volume to your hair, eliminate a greasy highlight, etc.
However, be careful. If you overdo it, you can get the opposite result.

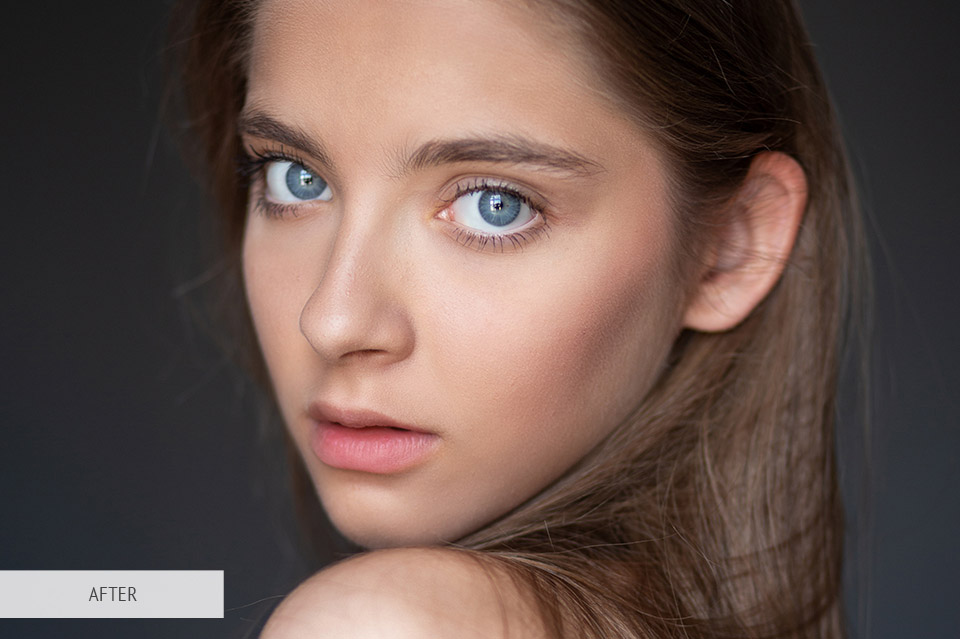
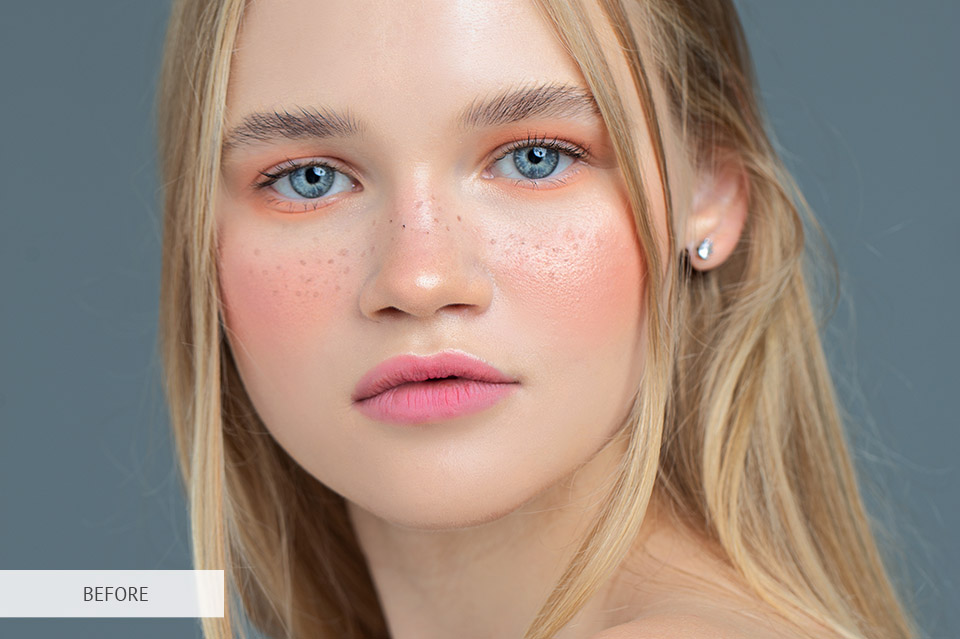
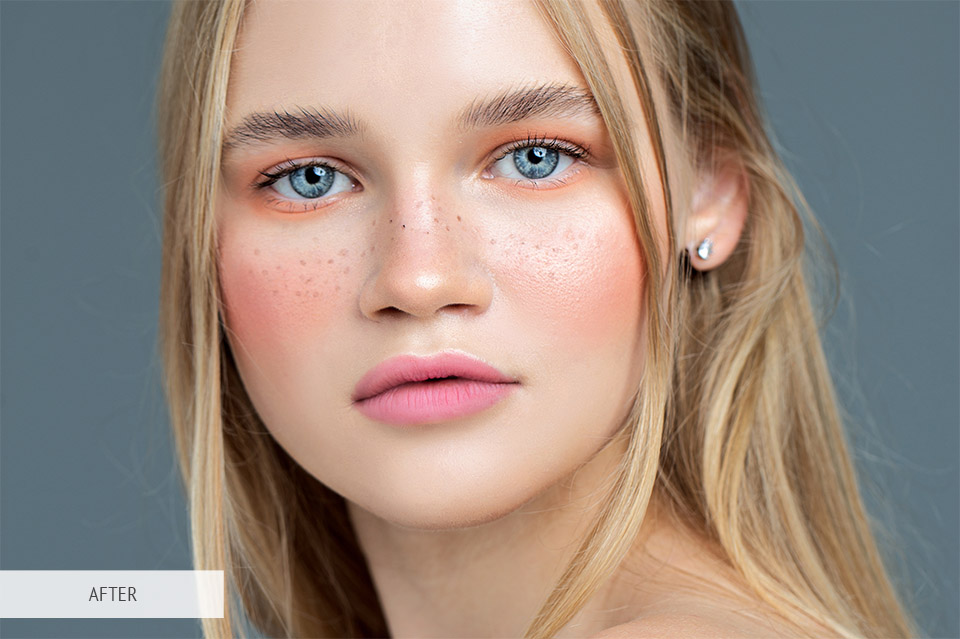
This Photoshop action is recommended for studio or beauty portraits taken on the plain background. Give your model a natural and pinky skin tone, emphasized her make-up.
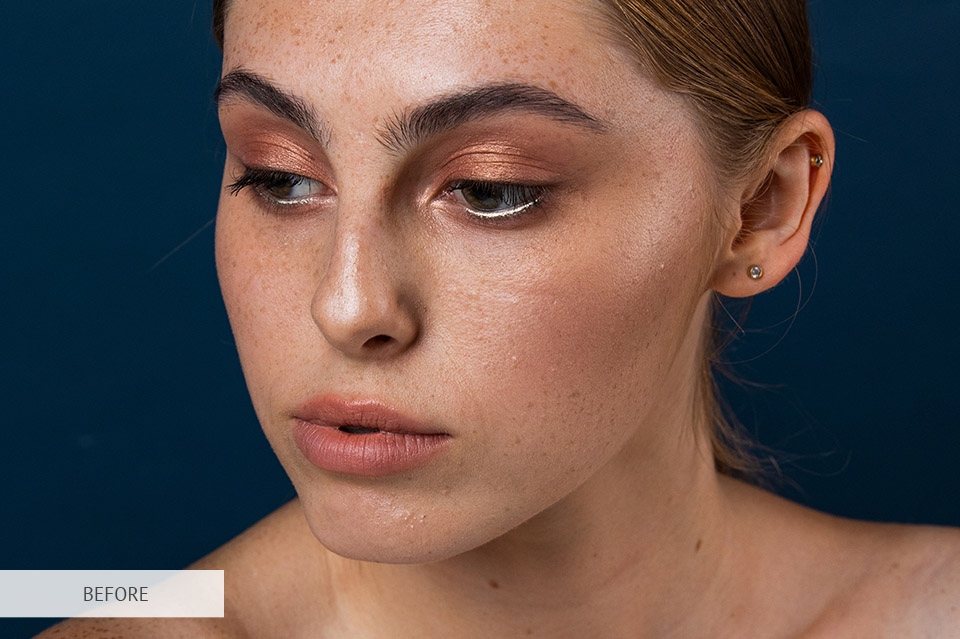

If you took a close portrait at the street under natural light, download and apply this free smooth skin Photoshop action. This Photoshop filter will adjust shadows and remove small skin blemishes and too vivid facial hair.
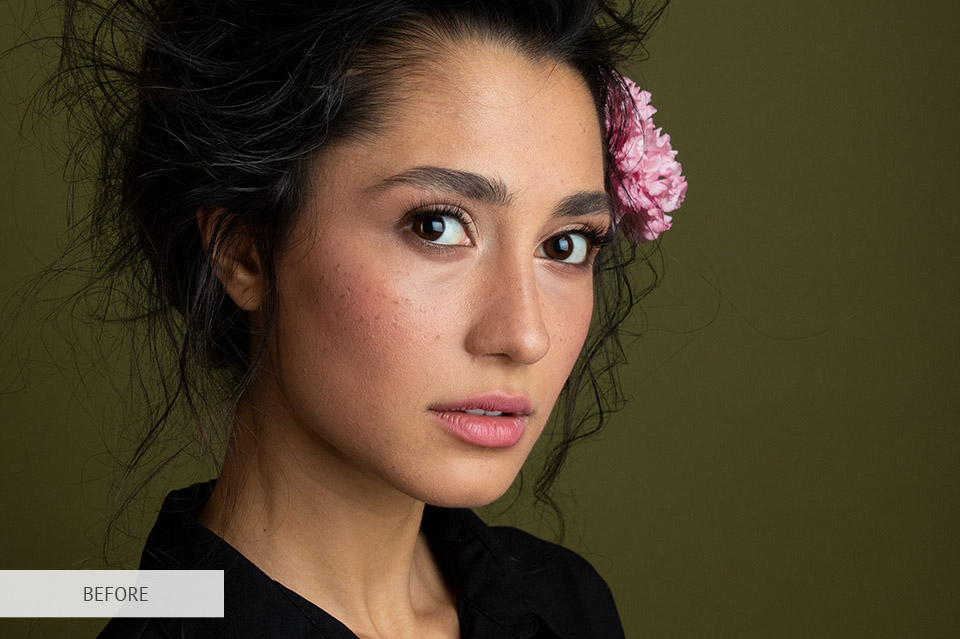
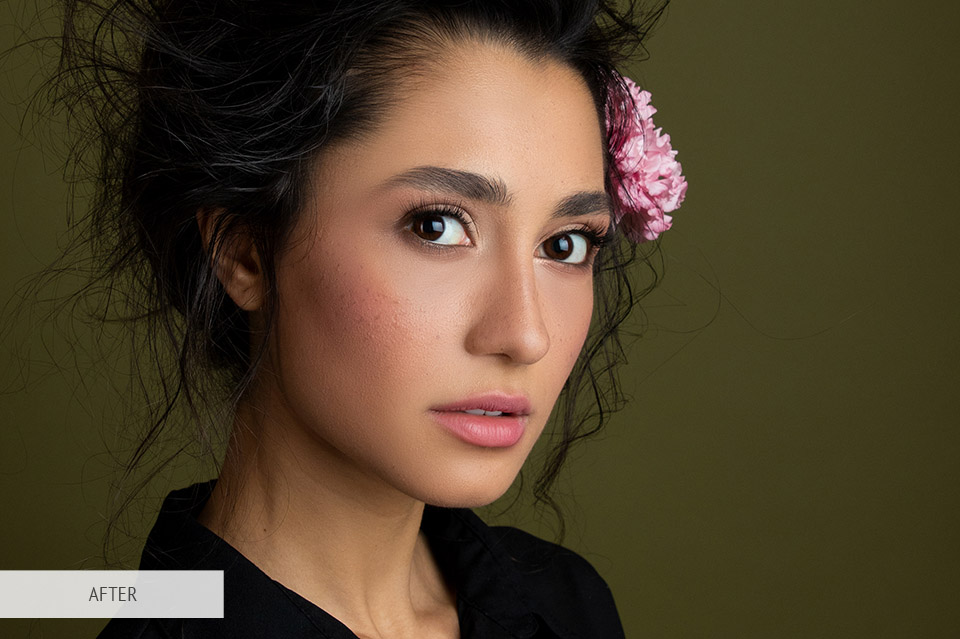
The most universal Photoshop action for portraits of men and women. Apply it to make your model’s skin soft and pure. It gets rid of small imperfections and poor light distortions.


