Do you feel stressed out when it comes to taking images and improving them based on eCommerce requirements? The process can be really tiring considering all the steps you have to take. Fortunately, using the solutions by Picture Instruments you can speed up your work and get fantastic results straight away. Read about all the tools offered and find out whether they are worth investing in.
Companies specializing in eCommerce claim that the quality and variety of images can either make or break your entire trading campaign. To help aspiring novices find their niche in a highly competitive market, Picture Instruments created a modular system that you can quickly adjust in accordance with your needs.
The software is space-saving if compared to similar solutions for product photography. It also stands out with amazing customization and scalability options. What’s more, it allows automating all rigamarole photo post-processing operations. Once done, you can integrate improved pictures into existing systems through an API.
It is obligatory to edit product photos if you want them to catch buyers’ eye and increase your sales. People really like realistic images of different items in online shops, which means you should inspect every inch of a shot and make all the needed corrections. The Picture Instruments software is of modular nature and allows users to enhance their images in a convenient way thanks to the abundance of customization features.
All controls are user-friendly. You can find them in the Serial Shot section. It is advisable to start with minute changes and then proceed with more serious alterations. When the editing part is over, users can transfer their images and take advantage of the interaction with other software, e.g., Mask Integrator (to ditch the background) or 360 Webspin (to make interactive spinning objects for sites). It is great that all pictures are named and sorted in accordance with the project and product number.
You can begin with the Crop and Resize features if you need to preserve identical dimensions across all images for your online store. After that, you can initiate automatic photo processing for a pack of files. Another cool function is auto multi-processing for one image. This is a real timesaver if you want to use the same photo on different channels and in different formats. With Picture Instruments, you can choose proper settings and wait till several versions of your picture are ready. Next, you can integrate them into existing infrastructures by dint of communication over an API or by FTP transfer.
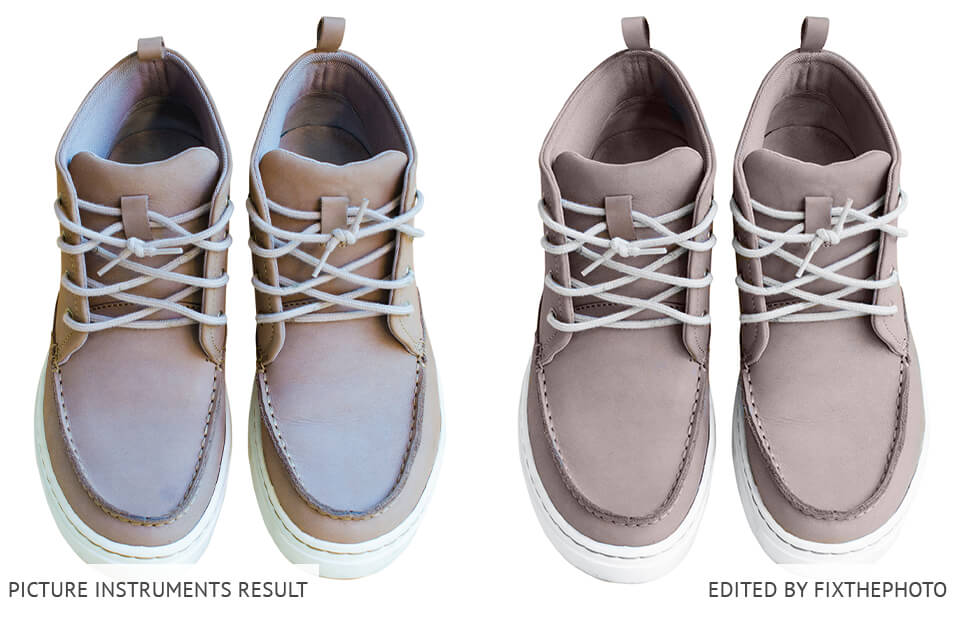
The Picture Instruments software has all the needed tools to give your product photos a catchy look, but if you really want to take your photo to another level, address FixThePhoto professionals. You’ll get affordable pricing and a quick turnaround.
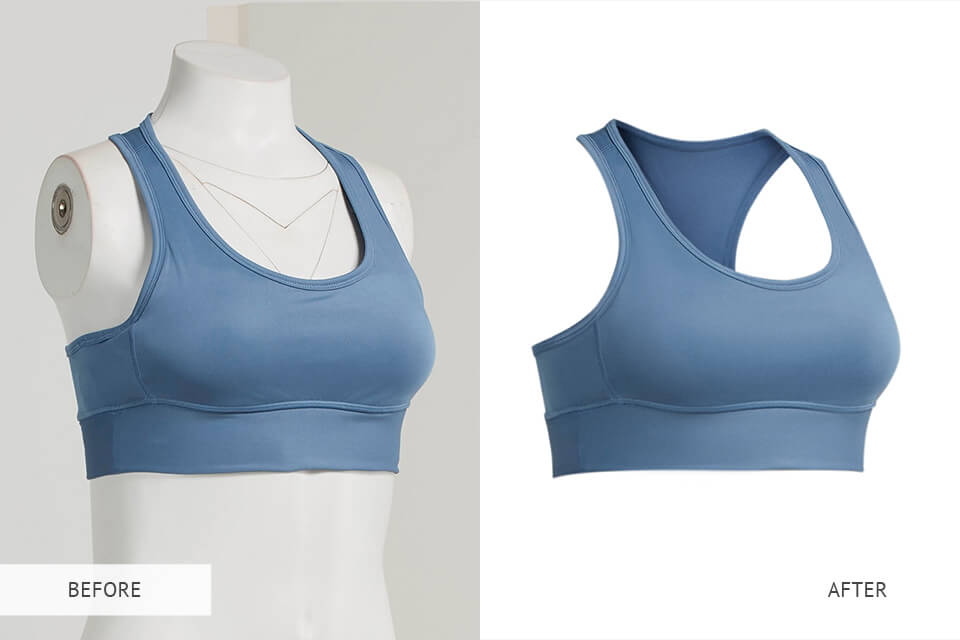
When it comes to product editing, background removal is undoubtedly the most frequent procedure. By performing such a simple change, you can raise a visual appeal of a thing depicted and make such an image more “attractive” to search engines. Frankly speaking, the process may take a lot of time. Fortunately, Picture Instruments solutions can speed it up eminently. In fact, they get rid of the background while you are taking a photo.
That sounds fantastic but you only need to access your camera through the software and let the system take care of the rest. Wait several seconds and download a processed image without a background. The best part is that the program can automatically remove the background of many product types in the process of photographing.
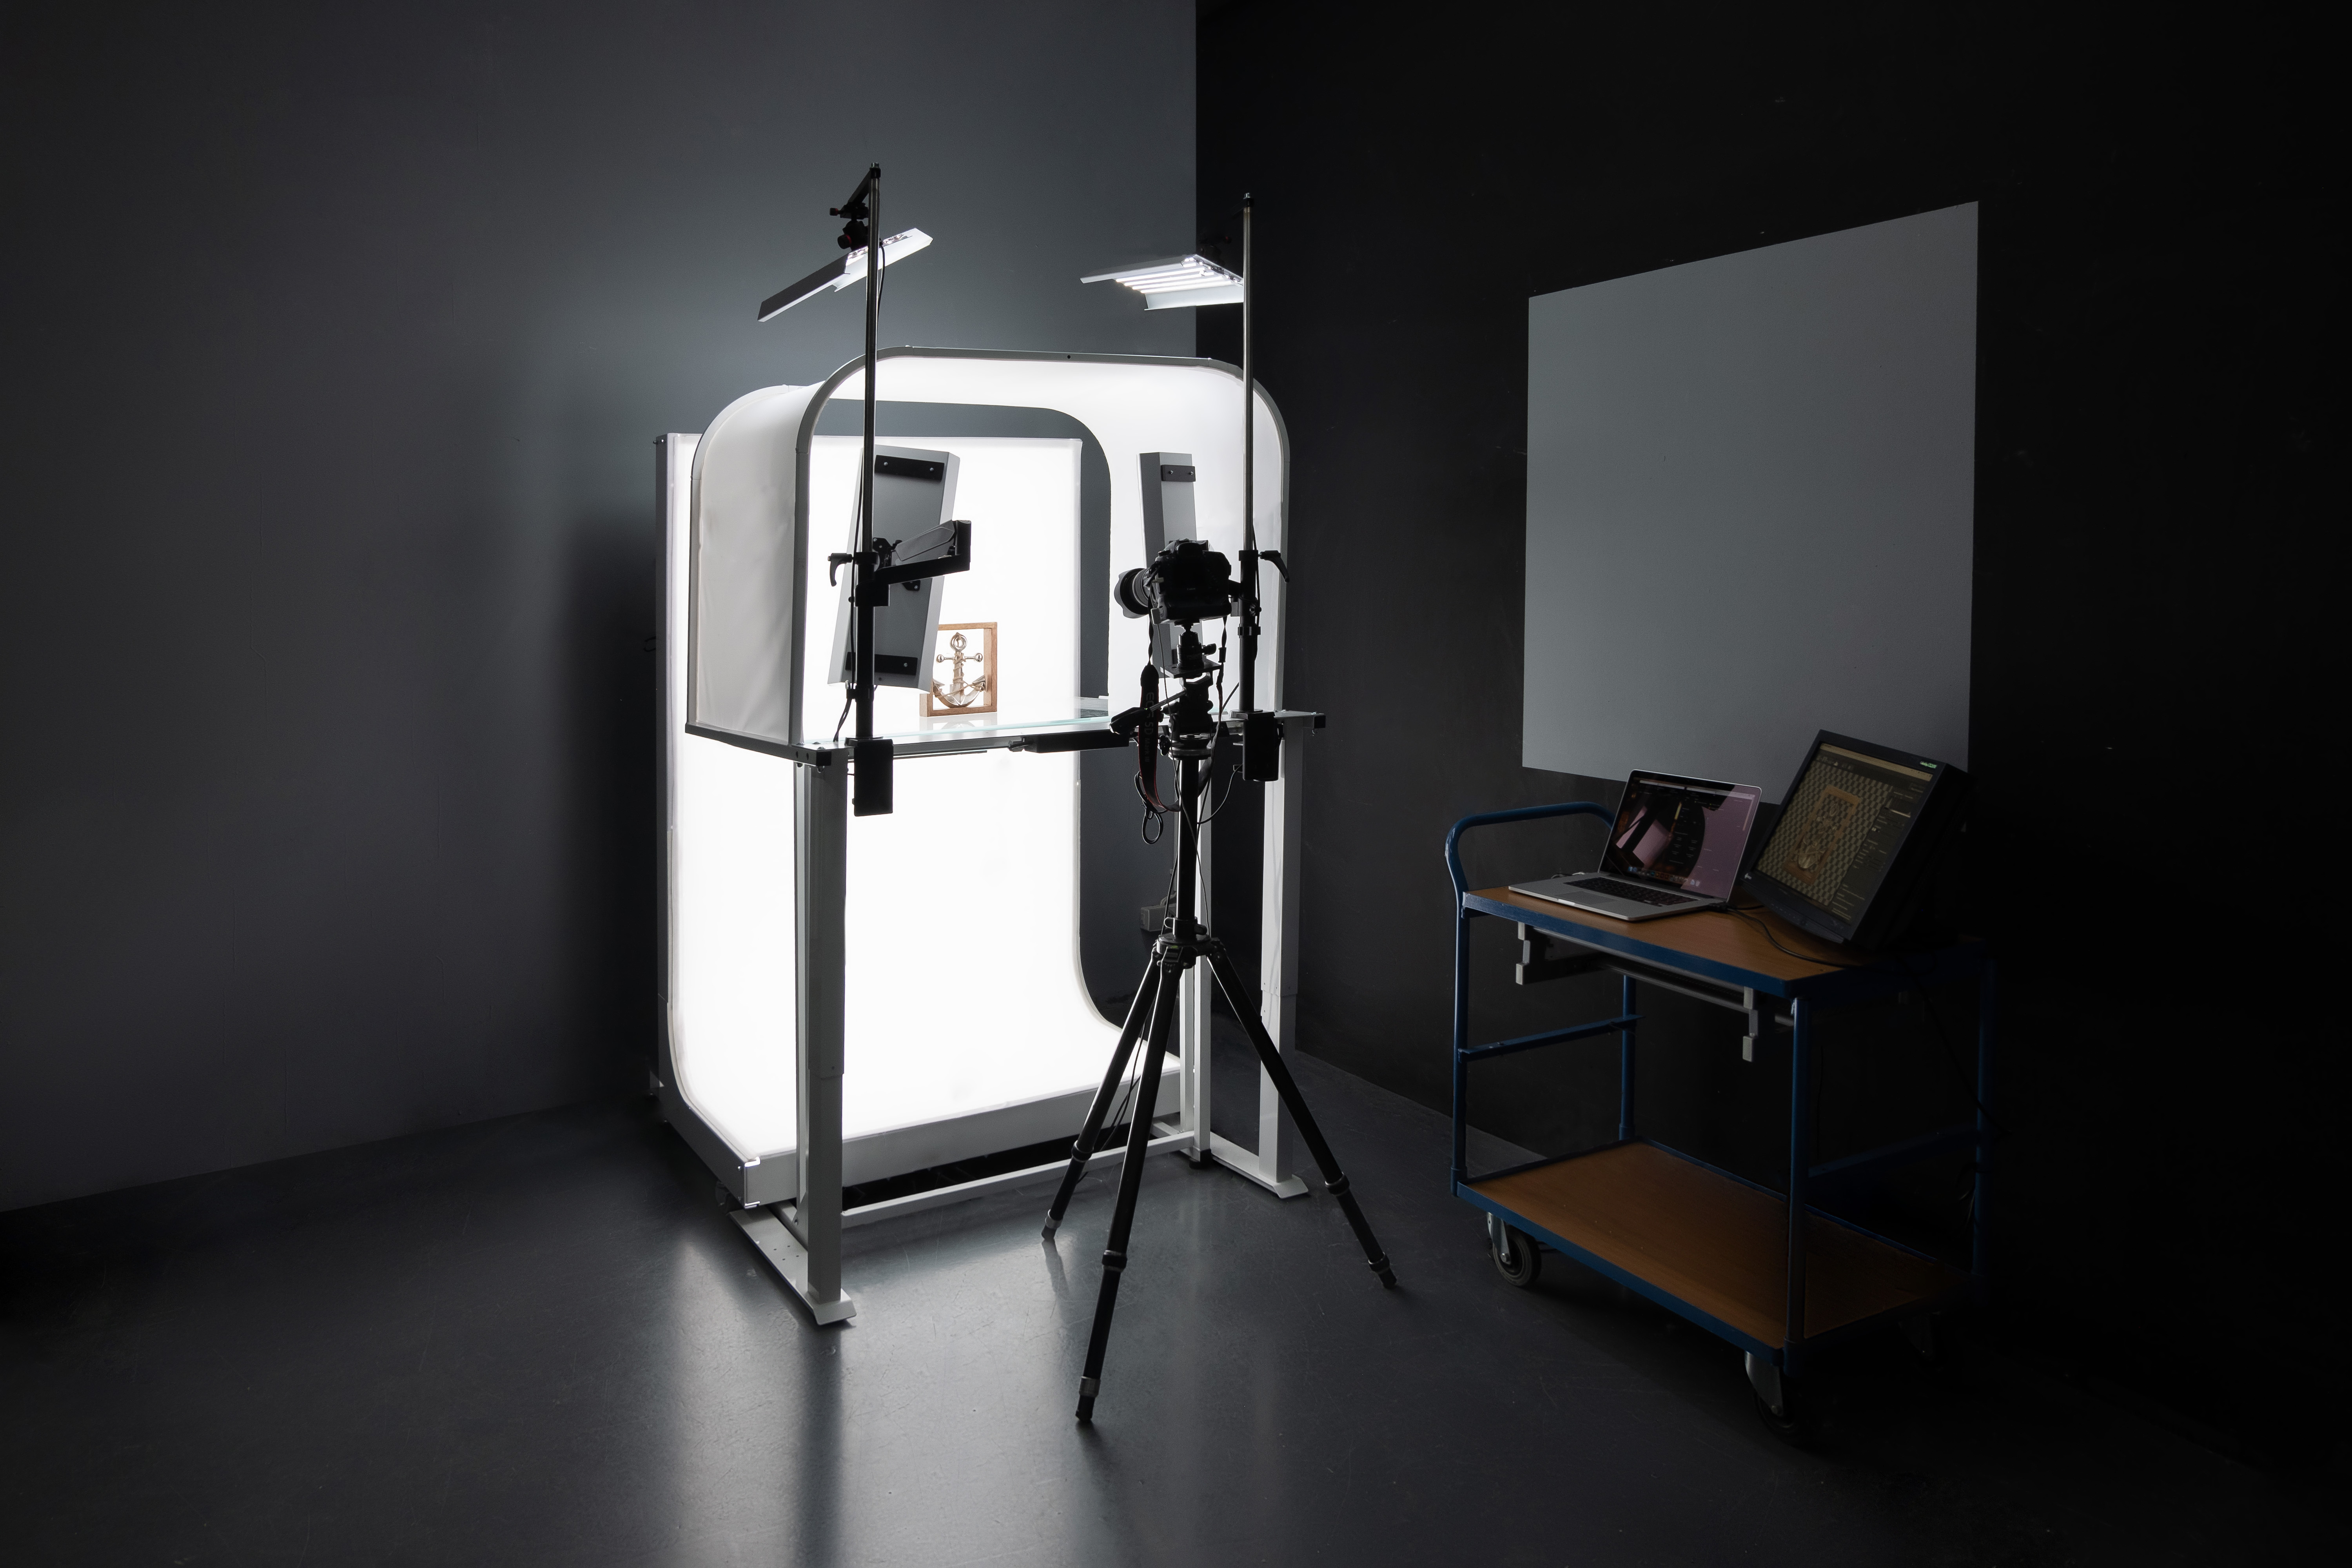
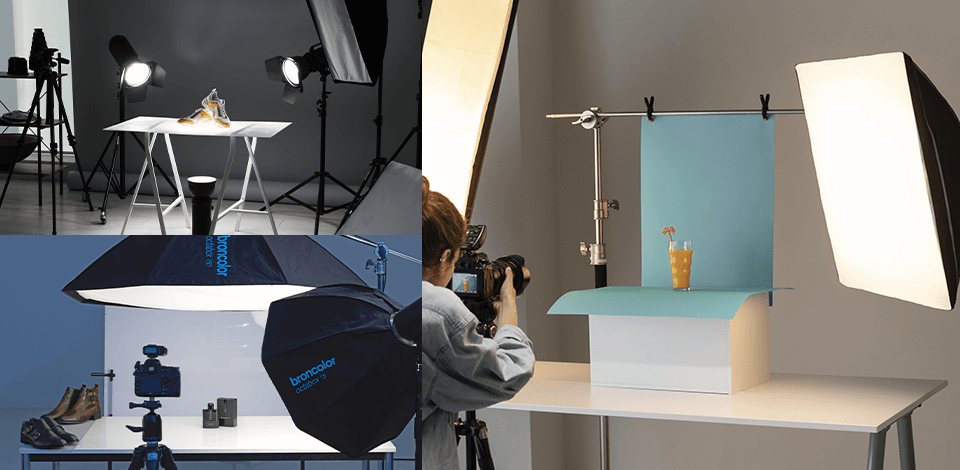
If you have ever tried to take a product photo, you definitely understand how frustrating lighting setting up can get. If you fail to adjust proper lighting, your pictures will suffer from harsh shadows. Every product photographer knows that getting even and flattering lighting is a must for top-quality images. Standard photo booth systems are fitting with light sources of one type. And Picture Instruments completely outpaces them in this regard.
Since it operates on an open DMX standard, users can easily control the lamps and add more light sources for sufficient illumination of the scene. What’s more, you can save custom-made light presets for different scenarios. Using such pre-configured presets, even novices can get beautiful lighting patterns in their photos for eCommerce platforms.
Flickering through the set of tools, you will see the 360º Player that can be embedded as a JavaScript plugin in virtually any environment. Besides, it is compatible with mobile and desktop platforms. With its help, you can instantly present the results of your 360 photography session, preliminary uploading it via Serial Shot.
By opting for Picture Instruments software, you can forget about the difficulties of creating high-quality product photos for your eCommerce store. Besides, there are tools that help analyze the current market situation and come up with a bespoke concept. You can get in touch with the team behind this program and receive expert recommendations on how to present your products in the most efficient way.
Partaking in training sessions, users can learn the techniques of professional product staging, manipulating lighting, and more. Such tips can come in handy not only for total novices but also people with some experience, who crave for self-development.
Diverse eCommerce websites have different requirements concerning the size, quality, and resolution of product images. Of course, making all the needed adjustments manually can drive crazy the most patient photographers and retouchers, so many of them switch to Picture Instruments solutions.
With them, you can quickly adapt to Amazon product photography requirements or demands imposed by any other trading platform. When most operational processes are automated, the chances to experience professional burnout are lower. This is beneficial for all participants of the shooting and editing stages.
There are various steps in the photo post-production workflow that can be optimized. Using the Picture Instruments system, you can handle many tasks with minimal time losses. People of all stripes look for tools capable of streamlining their daily routines and those engaged in product editing for Amazon and similar platforms often choose Picture Instruments. The software is also popular because it helps prevent mistakes that appear because of the human factor.
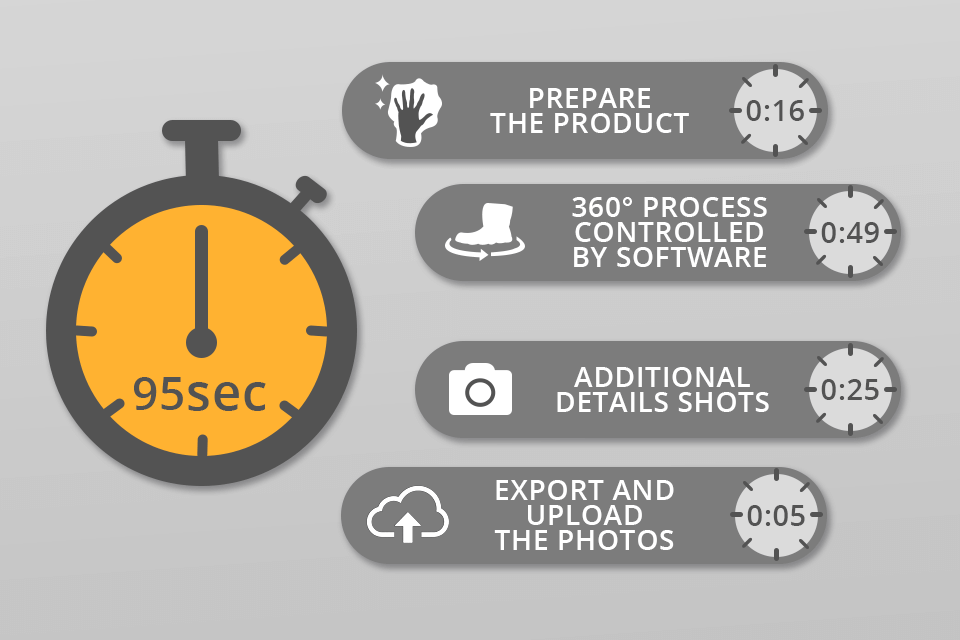
When using this system, you have to spend just 95 seconds (equals 4 steps) to receive the desired result. Everything is intuitive even without a product photography tutorial. Timing for different steps may vary depending on the hardware used.
STEP 1. Prepare the Products
First and foremost, you need to ensure that everything you are going to photograph is neat and properly arranged. Besides, you have to scan and enter the product ID and center an item on the turntable.
STEP 2. Get Down to Work
Start the 360° Process and let the software take care of the rest. It refers to triggering the camera, transferring photos, and controlling the turntable and lighting. After that, the software will remove the background. Your task is to remove this product and prepare the next one.
STEP 3. Take Additional Detail Shots
This step somehow resembles the previous one as it also involves triggering the camera, transferring images, and removing the background. However, at this point, you need to concentrate on details, e.g., the sole of shoes, glitter on the skirts, strap in a watch, etc.
STEP 4. Export the Photos
Once the main corrections are applied, you need to finalize your work. The software will crop and resize your photos in accordance with the parameters chosen. After that, you can upload the resulting images to your server.
I appreciate that they offer solutions for different needs. Besides, all their modular software and hardware can be customized with ease. You can get a full-featured package or choose a program designed to solve a specific task, e.g., background removal. The Picture Instruments photosystems are designed to make the entire process of taking images and modifying them streamlined.
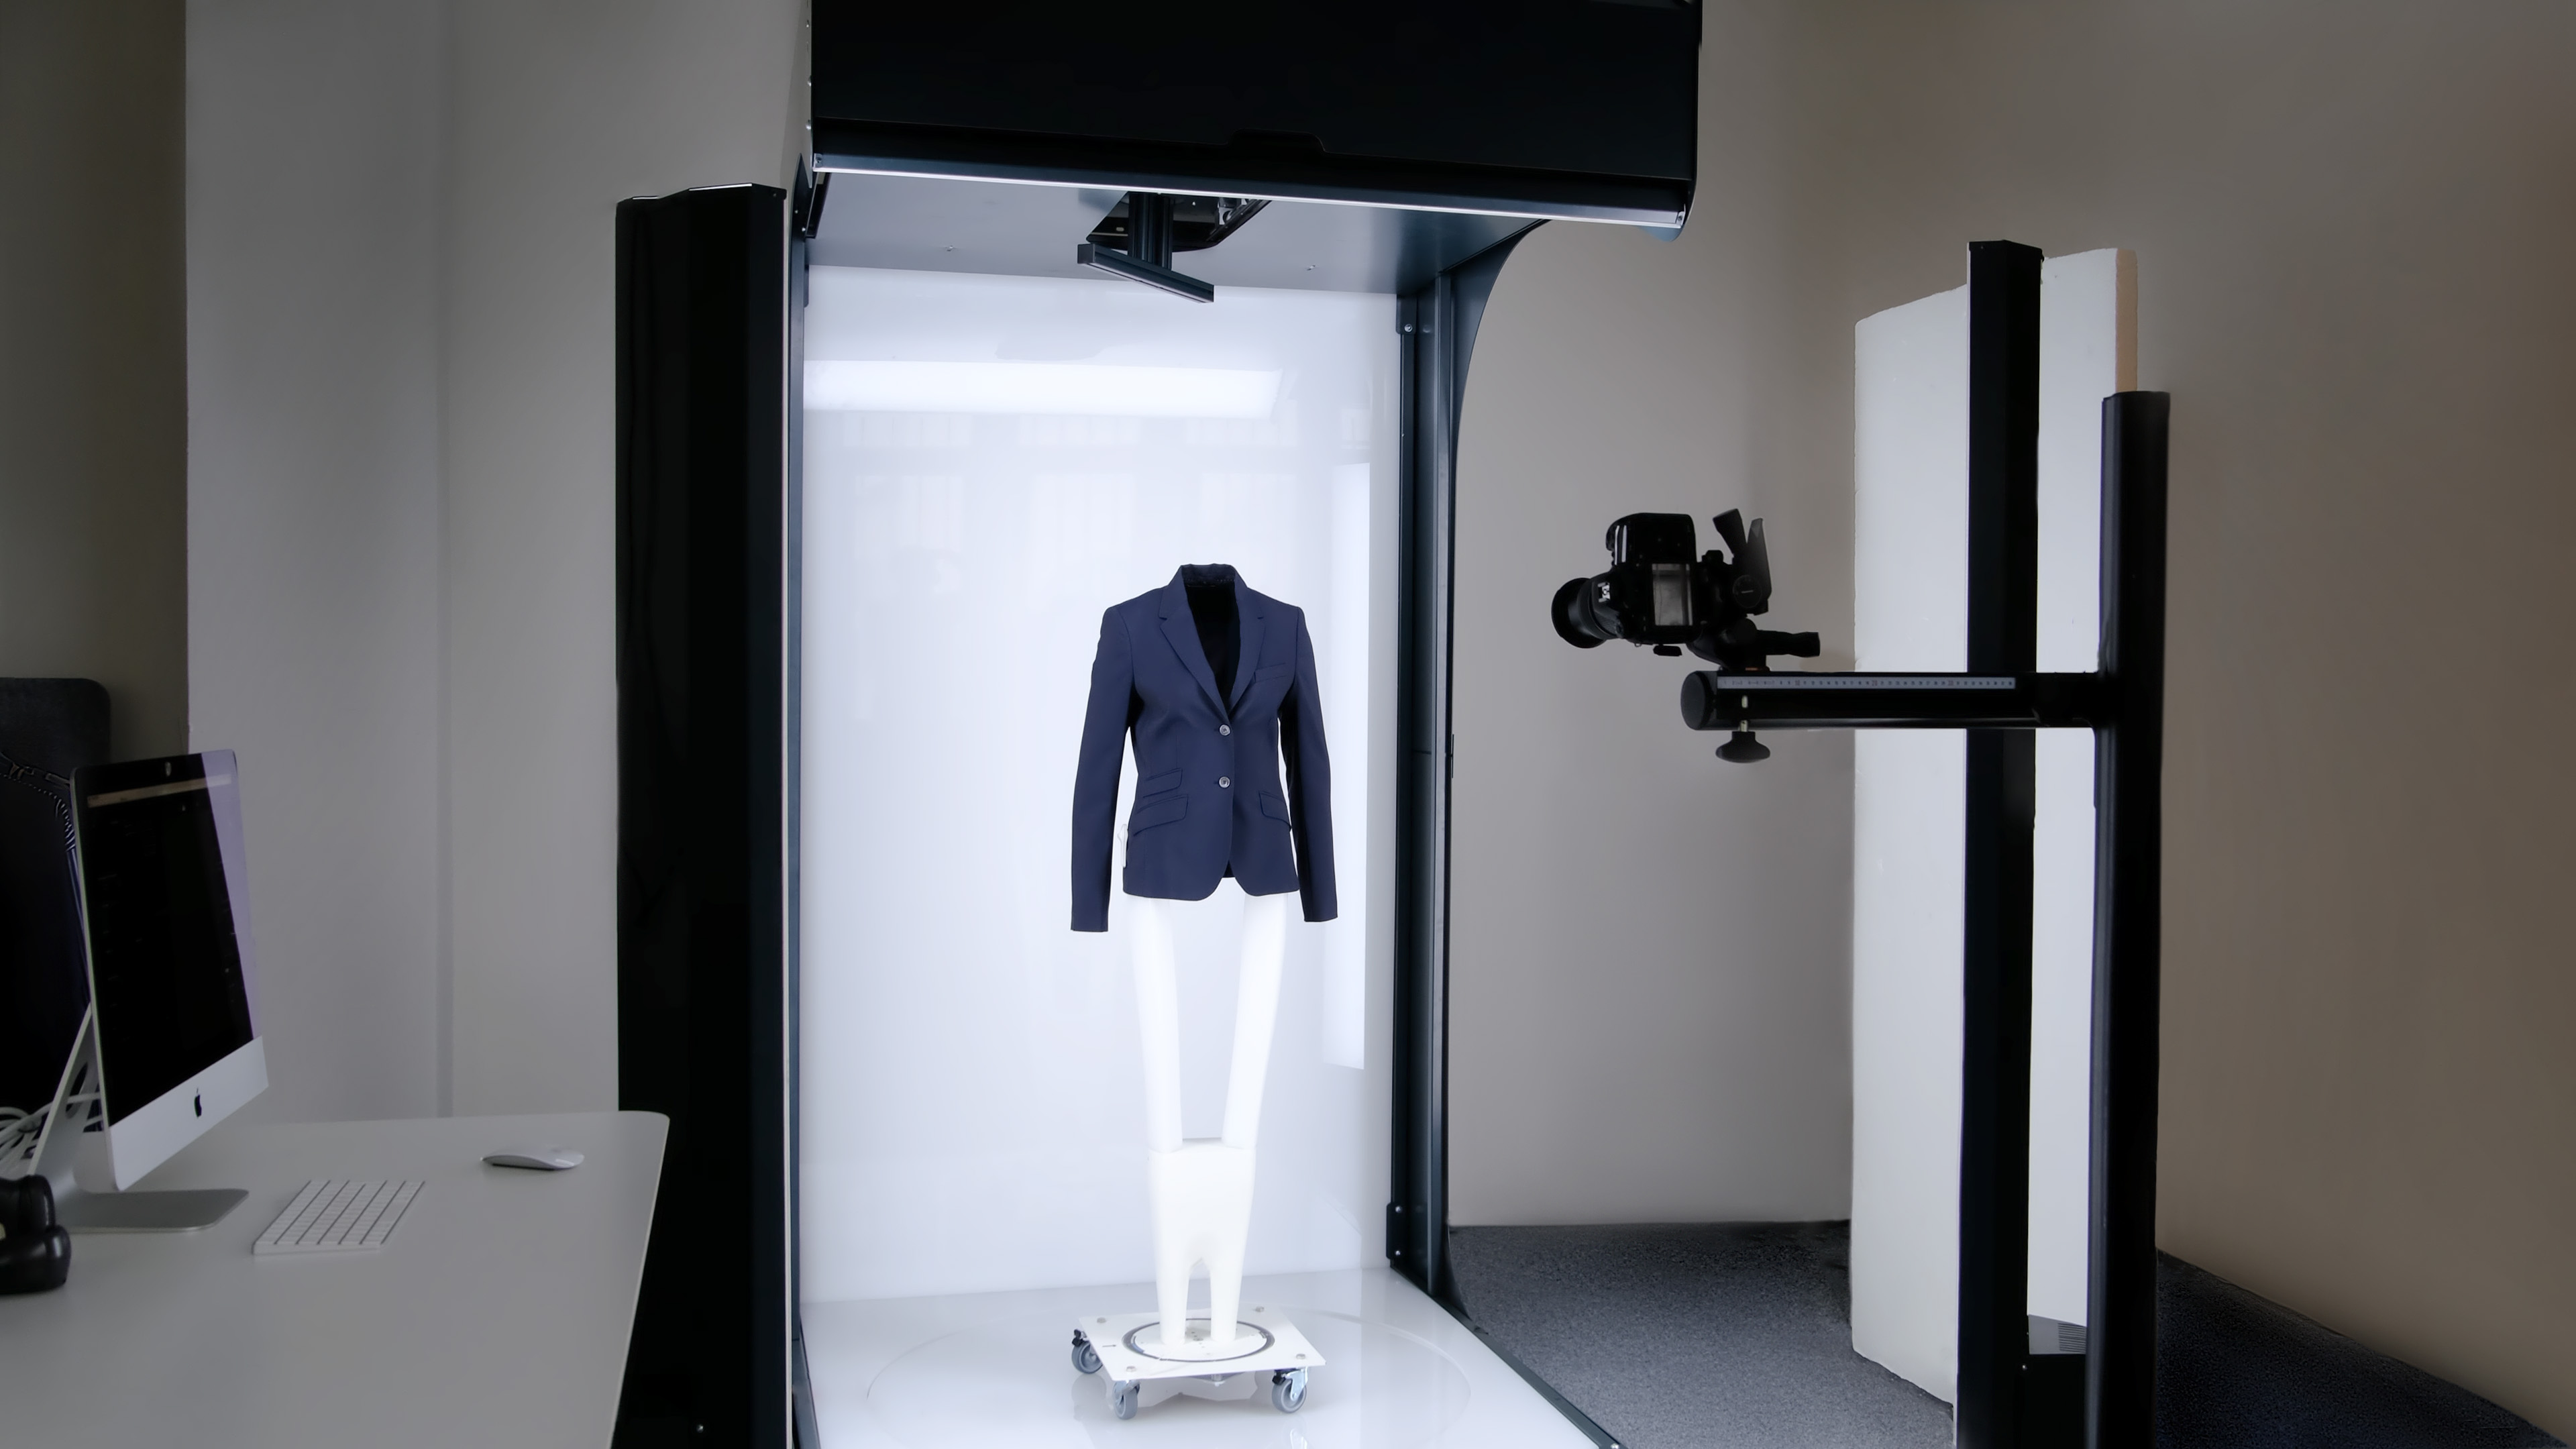
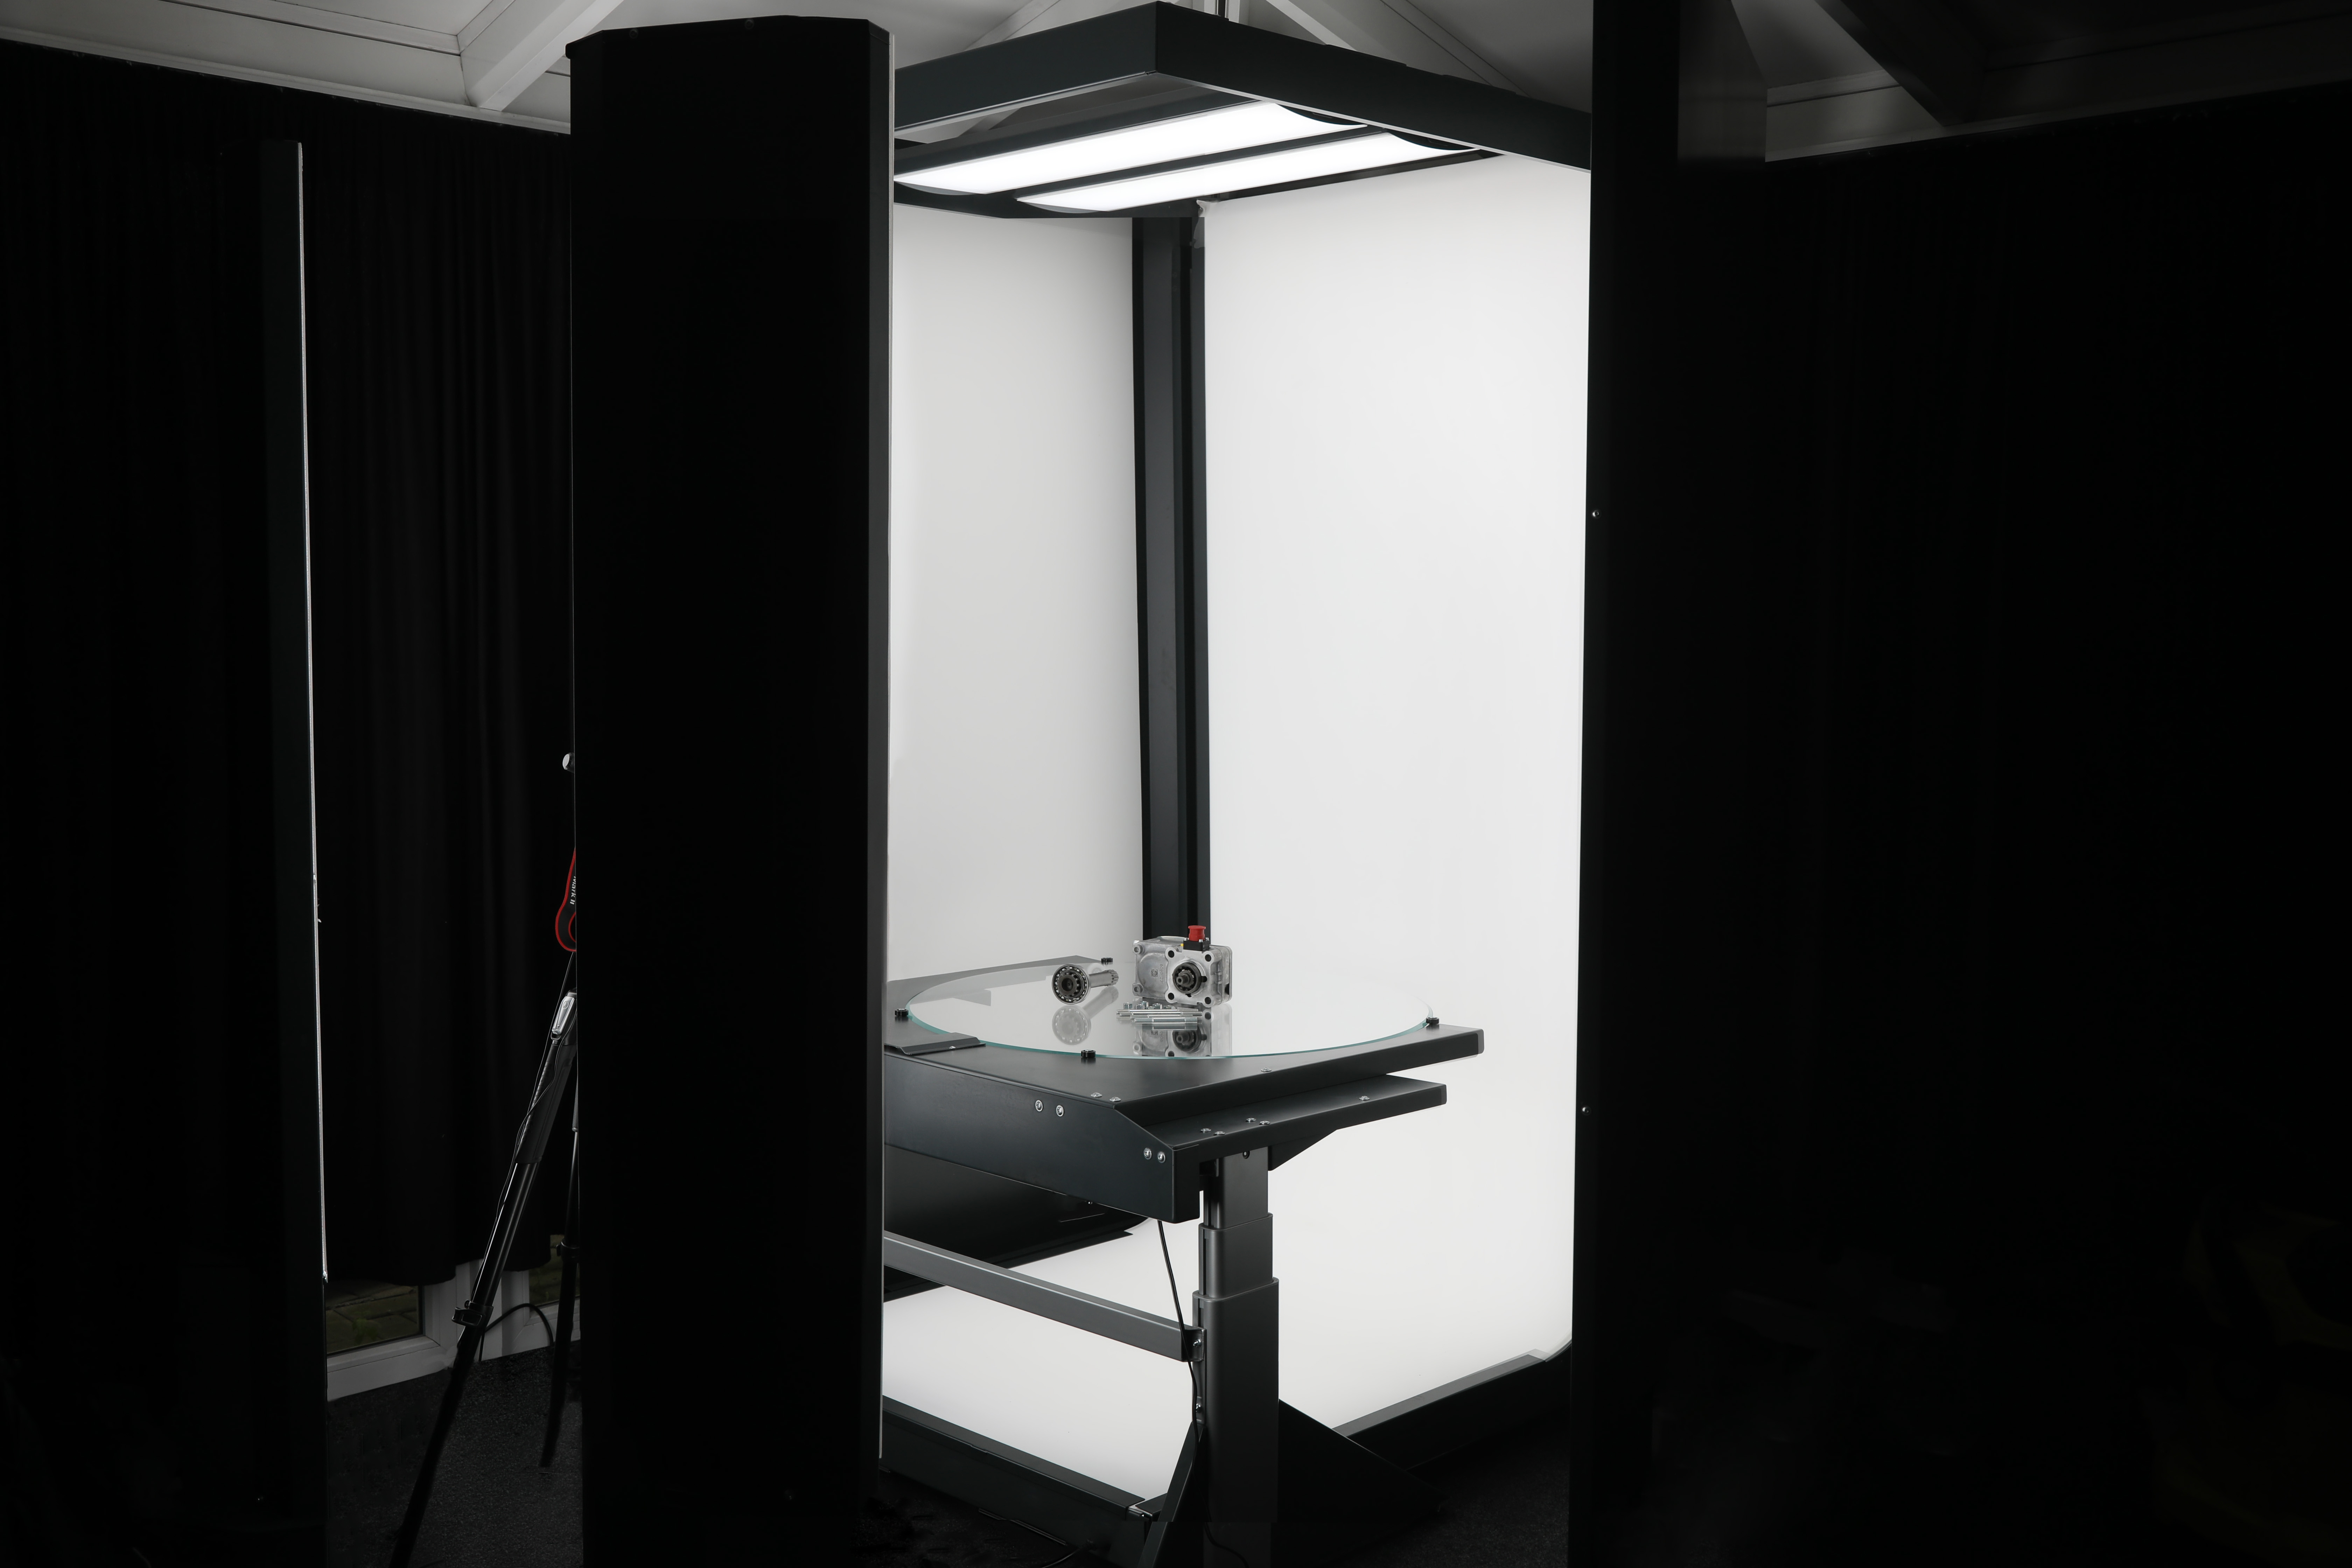
Fashion & flat fashion. Using the provided instruments, you can achieve terrific results in ghost mannequin photography. For instance, it is possible to apply the ghost mannequin techniques to the torso mounted on a special holder, take images of clothes all around, and then apply automatic background removal.
There is a glass panel that you can use for styling. The background in product pictures can be automatically removed during the shooting thanks to a backlit panel. For those interested in creative experiments to boost presence on eCommerce websites, the developers added manifold replaceable glass plates.
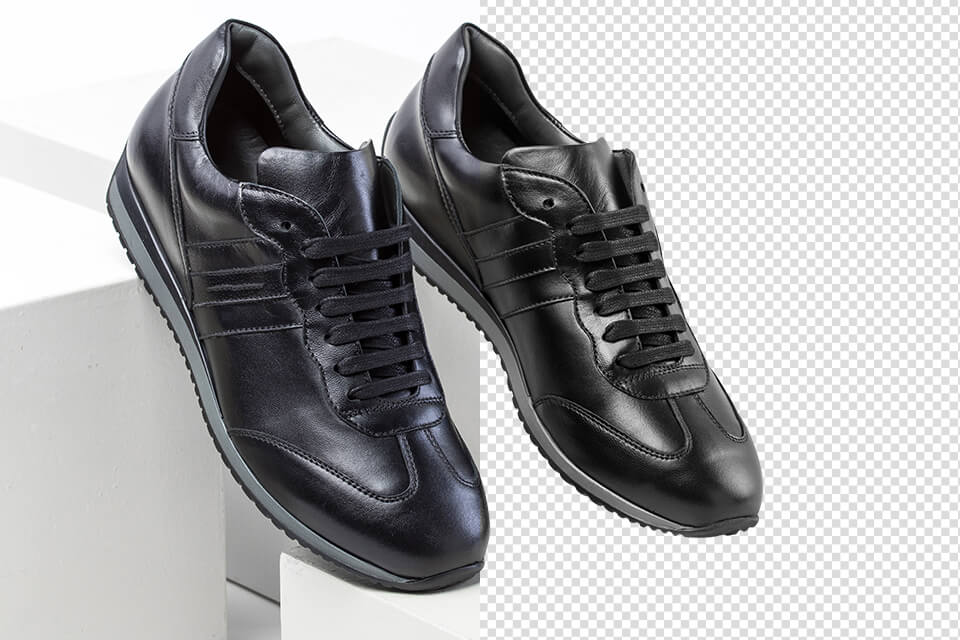
Shoes. Photographing shoes with the Picture Instruments system is a breeze. You can snap images of footwear in 360º with no background, include the background when capturing the from the above view, as well as highlight details such as laces, soles, heels, etc.
Accessories, jewelry, and makeup product photography. Adjusting light becomes very tricky when dealing with jewelry and accessory photography. Standard setups won’t work in this case, so the team has created product-specific lighting concepts. Thus, you can get pictures that present jewels, makeup products, and various knick-knacks in the most appealing manner.
Glass and Semi-Transparent Objects. If you have photographed a semi-transparent item and now need to remove the background from such an image, you are like to experience some difficulties. A clopping path will end up unhelpful in this case because the outcome will be too unnatural. Fortunately, you can apply the mask with tonal value gradation to get rid of the background without compromising realism.