Makeup Photography Guide for Beginners – 30 Tips
When you purchase through affiliate links on our site, we may earn a commission. Here’s how it works.
30 Makeup Photography Tips for Beginners
Cosmetics play an important role in portrait photography. When we’re talking about fashion photography, I usually distinguish several types of shots. The first demonstrates new trends and fashionable clothing ideas of the season. Photos of the second type are created for advertising products by famous designers, e.g. apparel or makeup product photography. Pictures of the third type are taken to reflect the model’s attractiveness, beauty, and charm. This is known as beauty photography. In this article, I’ll focus on this third type of makeup photography.
Tip 1. Expand Your Knowledge About Makeup Photography

This term, in a nutshell, is a type of portraiture that aims to emphasize the beauty of the model’s face. Professional hairdressing and cosmetics are used to get brilliant results. They help demonstrate the model’s natural beauty and individual style.
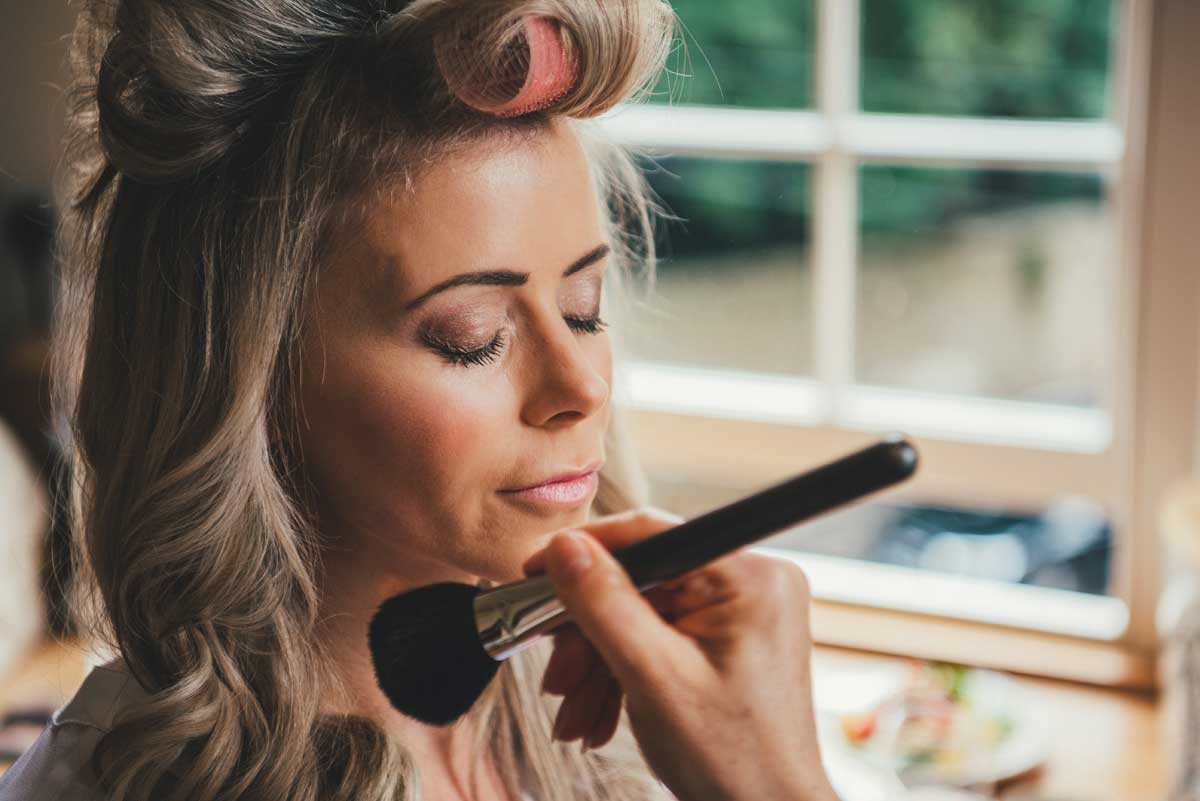
Tip 2. Cooperate with Professionals

If you want to take natural shots, you still need the services of a hairstylist and makeup artist. It’s obvious that the success of your work depends on both your professionalism and theirs. It is also a good idea to take photos of experienced models; try the website ModelMayhem to find good candidates to work with.
Tip 3. Use Concept Cards

I like to create concept cards and draw storyboards for my photo shoots. Such detailed preparation helps you reach mutual understanding and feel confident at the photoshoot. Photographers should have the whole view of their work. To achieve it, you may use various looks, textures, color schemes, and ideas for posing.
Do you love Pinterest as much, as I do? Maybe, yes. But do you use it for taking perfect makeup photo shoots? My little secret is to have special boards with fashion photography ideas in my account. So, I look at them before the photoshoot to get inspiration and review the best ways of posing.


Texture
This is a very useful app for photographers because it allows you to get access to many fashion magazines. You can learn about new trends and discover unusual ideas. With Texture, you can download your favorite images both on a computer and a smartphone.
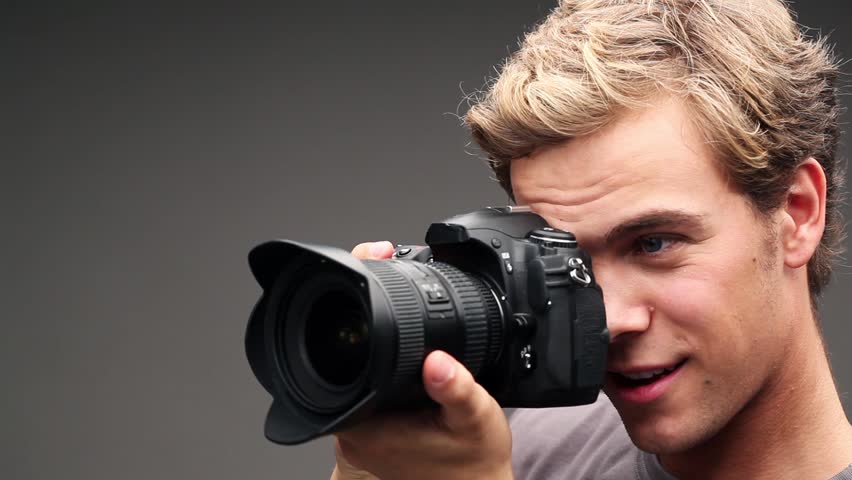
Tip 4. Don't Stand Too Far From the Subject

What’s the difference between taking editorial or fashion shots and working with makeup photography? In the first case, you should have a wide-angle lens and can include a lot of surroundings in the frame. In contrast, when taking a makeup photo, you should focus on the model’s face. You can come as close as possible, make contact with the model, and experiment with portrait photography poses.
67 Portrait Poses
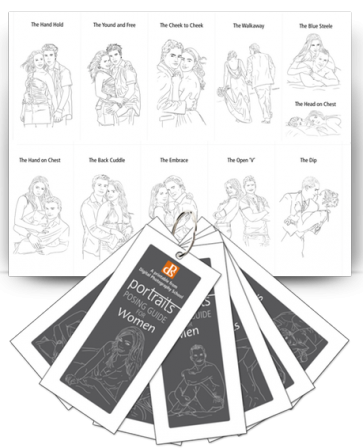
I recommend that you read this book if you’ve never worked with models and posing. Here you’ll find many useful tips about what photo angles are recommended for certain types of faces.
Tip 5. Pay Attention to the Model's Head

After working in the field of makeup photography for a long time, I can say that the right position of the head is crucial for getting a beautiful portrait. You should think about the shape of the face and try to find the most suitable position. I recommend that you avoid both excessive turning of the head and direct shooting from the front.
Posing App
This app includes 410 poses in different categories: children, women, men, groups, couples, weddings, and portraits. You can choose some poses and add them to your favorites. In addition, they have a short description and illustration.
Tip 6. Focus on the Model's Eyes

No matter what aperture and depth of field you use, eyes are the central element of makeup photography. You should always keep them in focus. Make the whites of the eyes purely white, and give the lashes volume (this can be easily edited in Photoshop). Join the photography course 10 Essential Studio Techniques Every Photographer Needs to Know by Scott Kelby to take portrait photos that are sharp and ensure that everything is in focus.
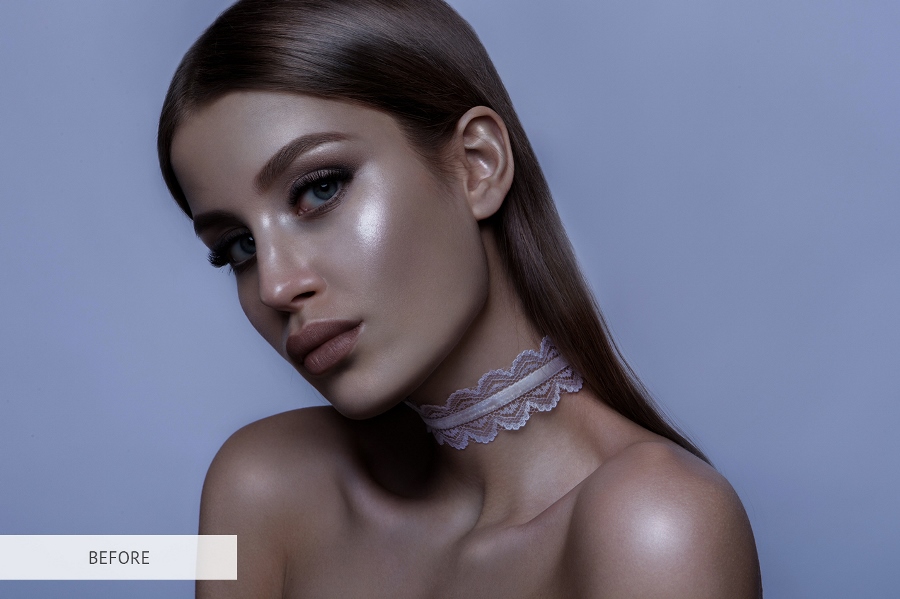
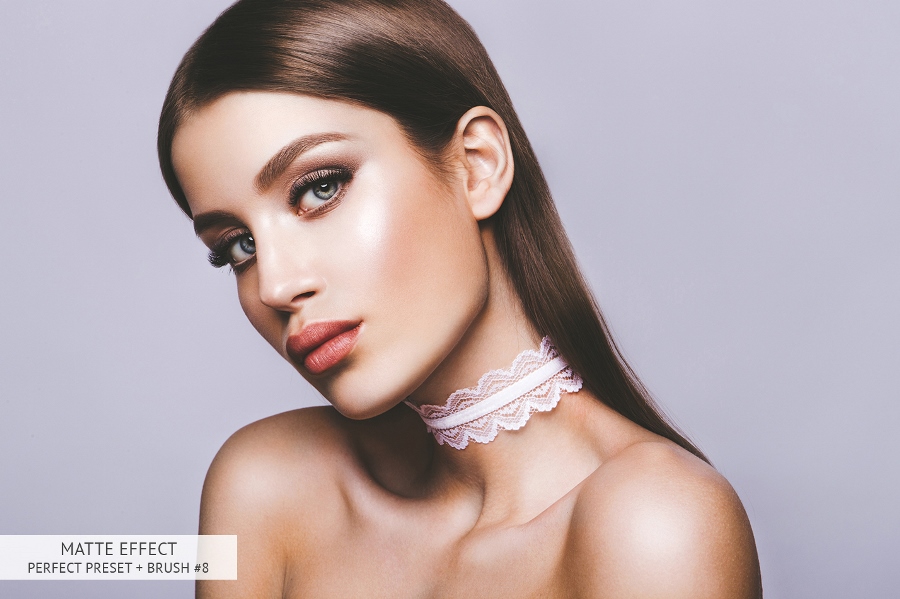
Matte Lightroom Presets for Makeup Photographs
Tip 7. Get Rid of Distracting Background

In makeup photography, remember that the subject itself plays the main role in the portrait. So, you should try to separate the subject from the background. It’s very important to avoid any distracting elements in the background, such as bright layout details, text, human-like forms, and shapes. This way, you won’t spend time eliminating them during photo retouching. Make everything blurred.
Recommended:
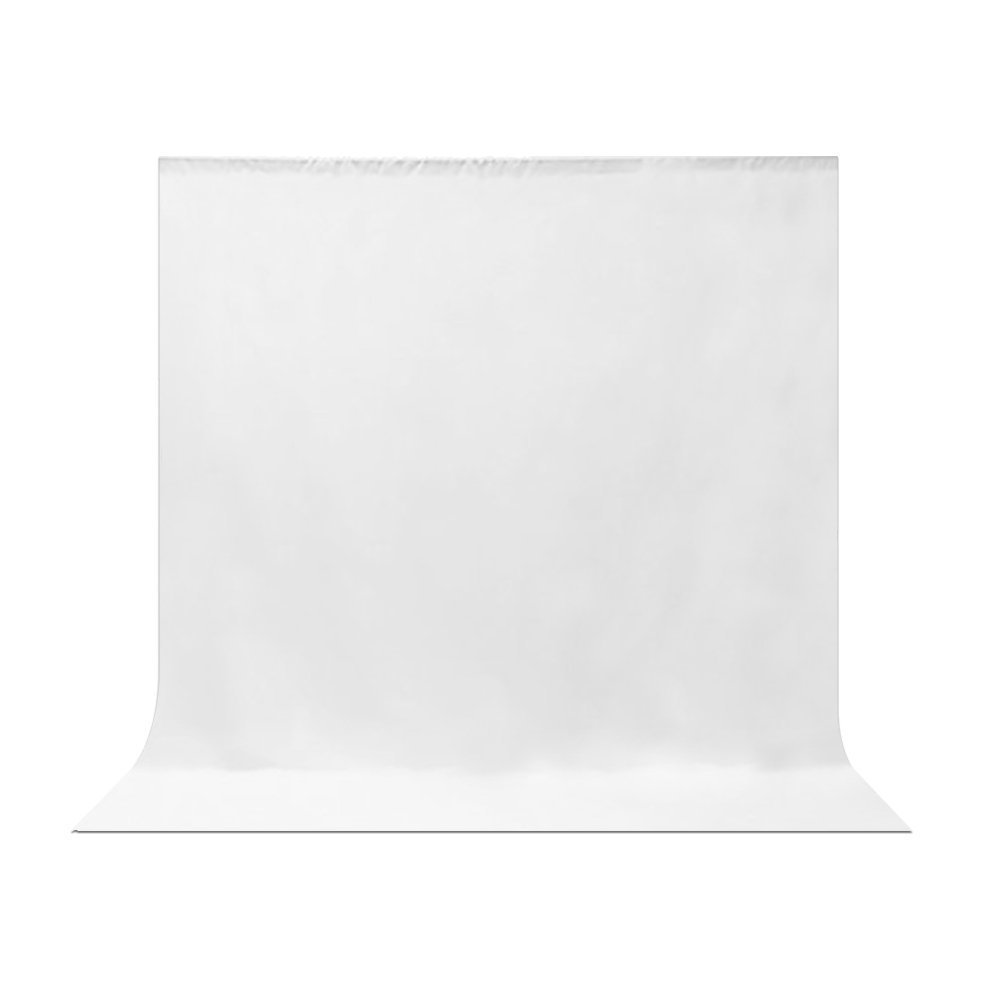
White Photo Backdrop
This is a nice choice that will come in handy for beauty photoshoots. The backdrop transforms any background into a professional-looking layout that doesn’t have any unappealing shadows. Top-quality fabric makes using and cleaning easy.
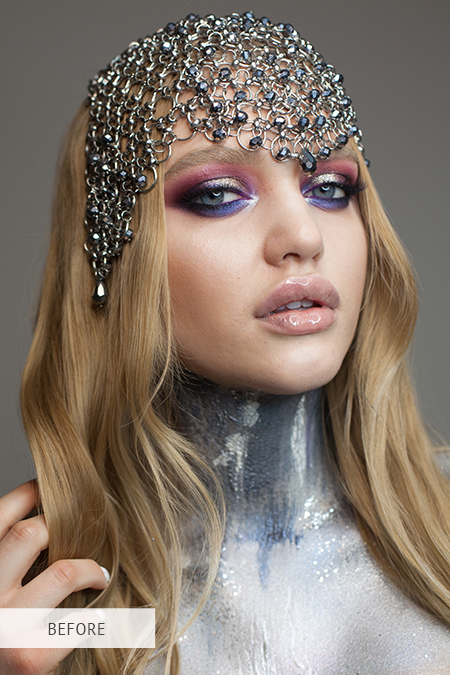
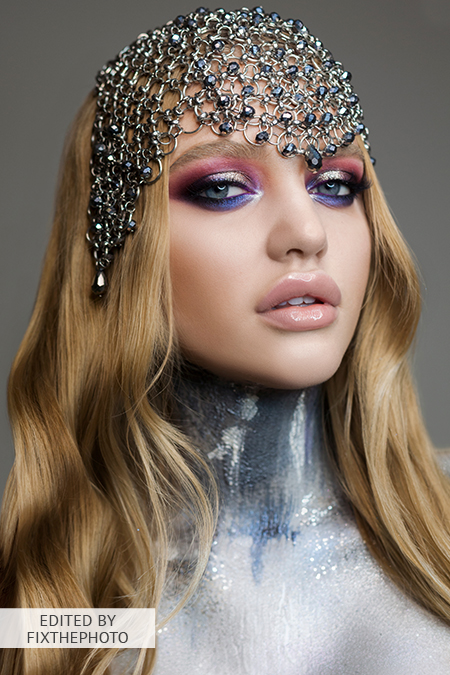
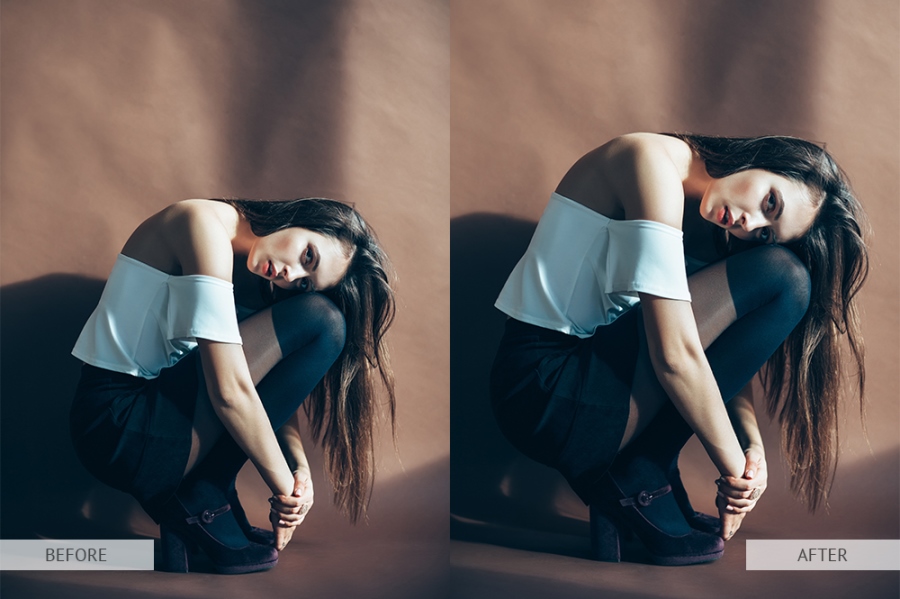
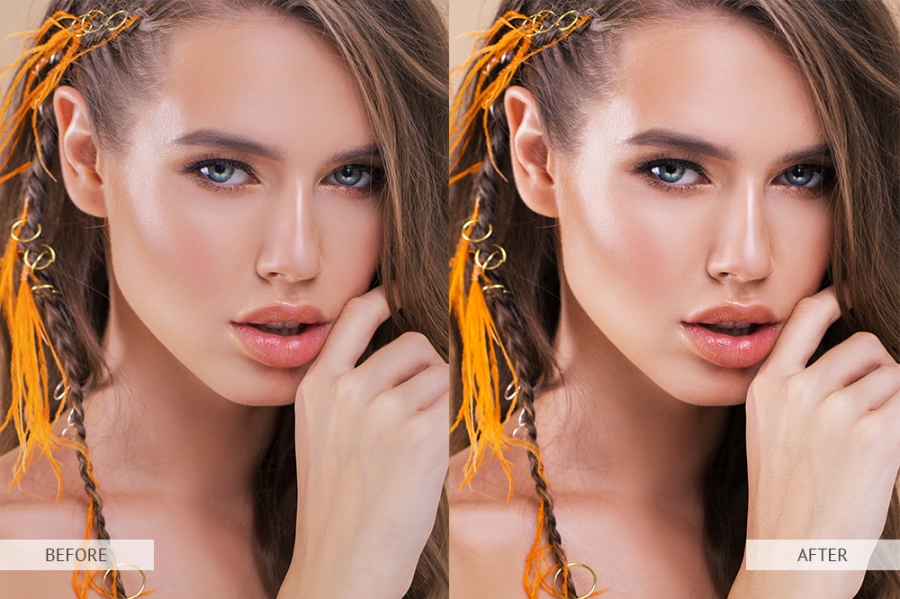
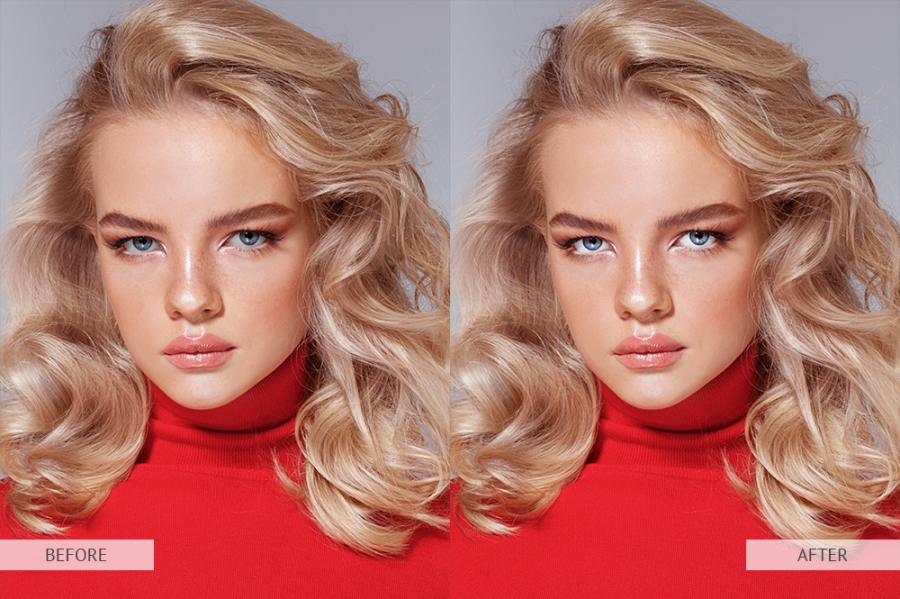
Tip 8. Don’t Underestimate Image Editing
- Receive professional product retouching services at a reasonable price and in a short period of time.
People don’t want to be accused of unnatural photos. Be accurate and don’t overdo it. Your beauty photo retouching should be invisible, especially if you’re going to print your makeup photos in high resolution. Follow my basic photoshopping portraits tips that will be a great starting point for your work.
1. Proper Cropping
Every online photo editor offers a cropping function. As soon as you choose the crop tool, there will be a frame on the shot, which you can drag by the small squares on the corners or on the sides. This way, you may choose what will be in the frame.
2. Levels or Curves

Increase contrast to make your photos interesting. Try to brighten light parts of the frame while keeping dark areas even more saturated. The easiest tool to use for this is Levels.
3. Dodge and Burn for Adding or Removing Light
By means of dodging and burning, you will have an opportunity to add or remove unnecessary light from the photos. These tools will allow you to enhance contrast and make the light a bit softer in your photographs.
4. Emphasize the Eyes
Put a greater emphasis on the eyes with the help of the Adjustments layer (emphasize the details, improve color, add a little brightness, etc.). Read more to learn how to change eye color in Photoshop in several easy steps.
5. Enhance Skin Tone
By using Lightroom’s color curves, you will get proper and even skin tone.
6. Make Use of the Healing Brush
In my opinion, the healing brush is a really useful photography makeup tool that helps remove all imperfections both from the face and the background. I take advantage of this effect while editing sports and landscapes photos. Try it to see how your picture changes after getting rid of unwanted defects.
7. Use Digital Lipstick
Move gradually from the original color of the lips to bright red lipstick. Otherwise, your model will look unnatural or even sick. Use a round brush to draw a red lipstick on a base layer set to linear burn. Draw a darker shade in the corners to achieve the gradient effect.
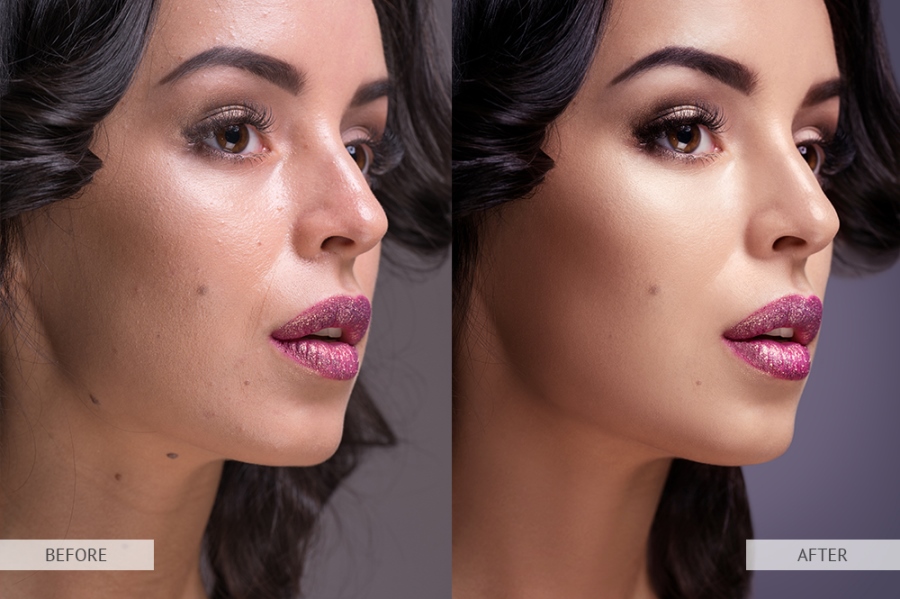
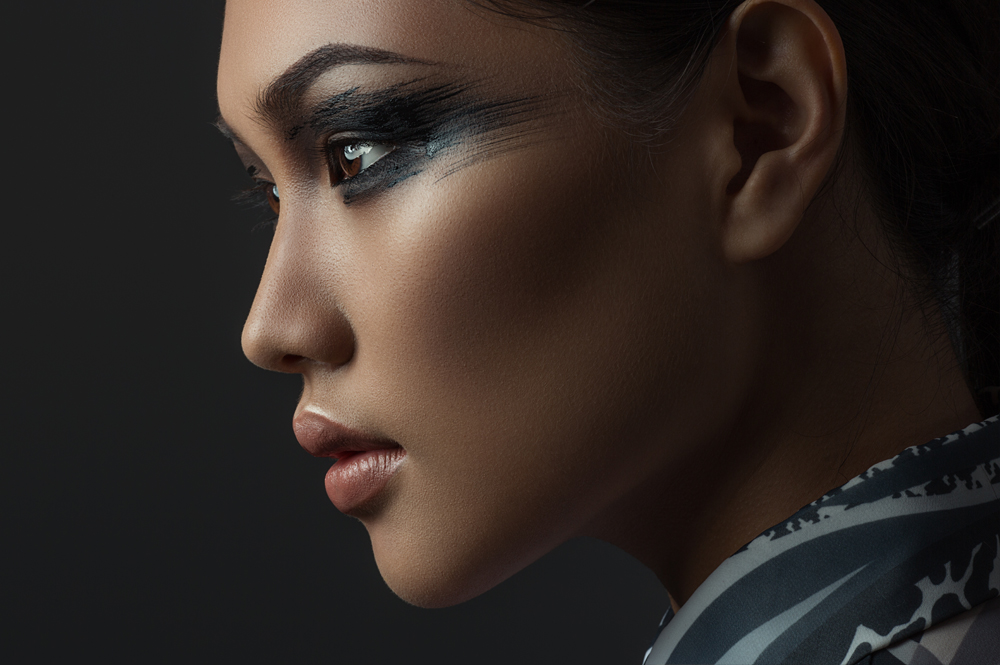
8. Create a Smokey Eye Effect
Switch to the round stick brush to prepare a black one for the eyes. After that, reduce stiffness up to 0% to create eye shadows. Avoid using a brown color. Combining layers regimes will cause any brown shades to take on an intense red tone. That’s why using a slightly muted purple will allow you to get a desirable effect.
9. Create Beautiful Brows

Proper and dense brows greatly influence a makeup photo. After getting rid of unnecessary hairs, fill in the “empty” areas using the “stamp” (S) tool. Hold Alt to clone hair “pockets” before applying them to every eyebrow. Use the burn tool (O) to intensify and darken each of them.
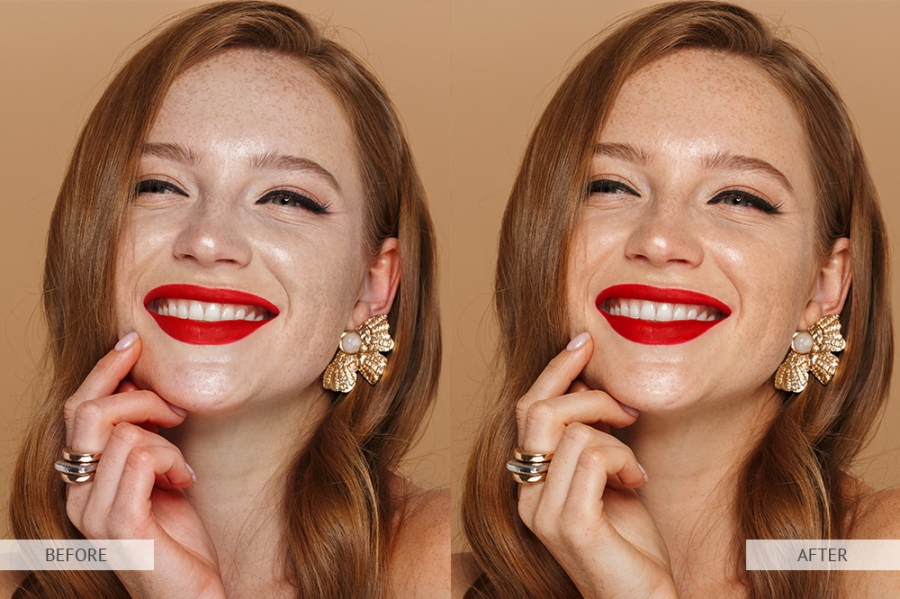
10. Whiten Teeth

Use Photoshop to remove any yellowish tint and make a truly Hollywood smile. I recommend using only specific brushes. View more to learn how to whiten teeth in Lightroom quickly and easily.
Tip 9. Pick the Proper Lighting

Makeup photography lighting may cause some problems for inexperienced photographers. To avoid failures, I propose that you use my methods:
- METHOD 1 – Underlighting
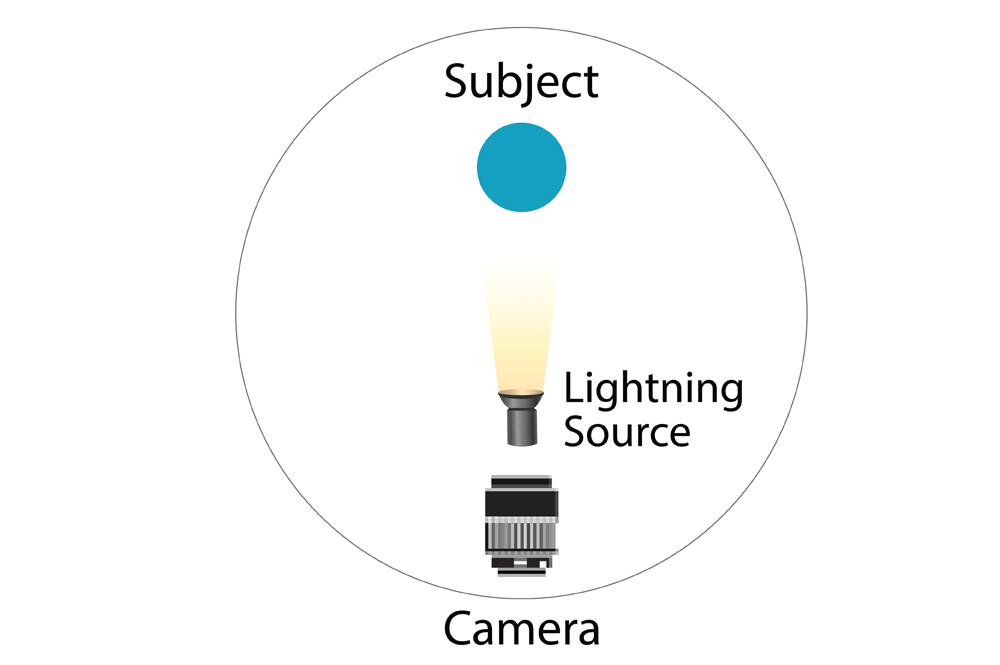

A great choice for those who want to add some dramatic atmosphere to his/her shots but can’t afford to purchase the best ring light for makeup photography. This lighting effect emphasizes the shapes of the model’s body or face. Usually, a model is wearing clothes of dark colors, but you can also experiment with bright accents as well.
How to Set Up
This effect requires only one lighting source and warm photography light bulbs. So, I used a simple black background and put the strobe with the reflector directly in front of the model.
- METHOD 2 – Doubleback Lighting

The unusual setup with two light sources looks quite impressive. It draws the viewer’s attention to the shadows, adding angles to the model’s body and face.
How to Set Up
I use two common 24” x 24” Glow softboxes, which aren’t expensive. I take the two light sources and put them behind the model, on opposite sides. As a result, the light slightly wraps around the hair and shoulders. You can also notice an evident badger “W” marking on the face.
- METHOD 3 – Butterfly Lighting
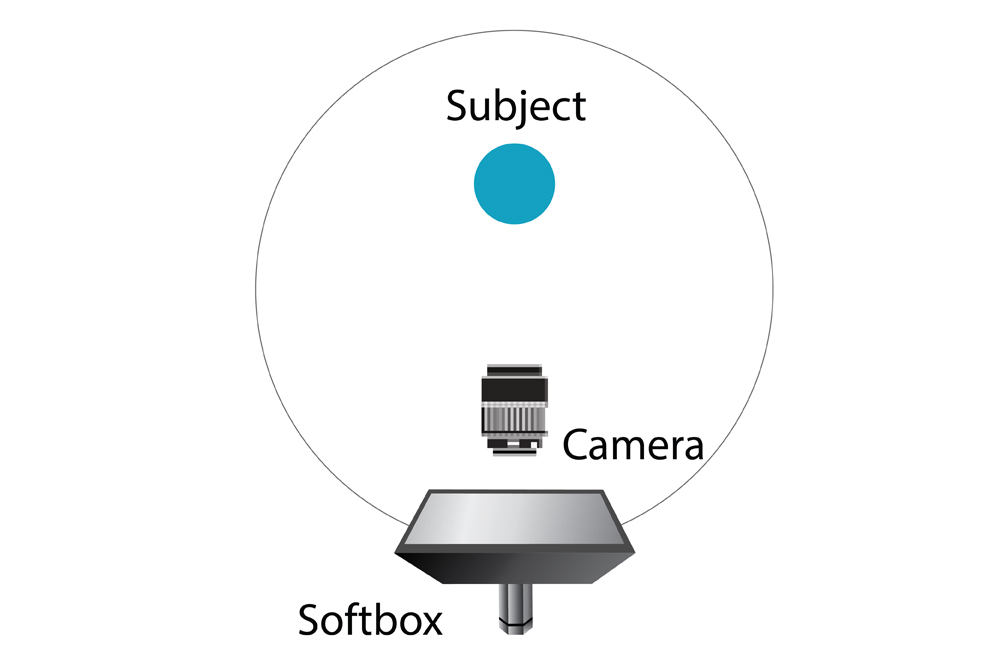

This is a creative combination of one light positioned above the model and another one in front. So, a shadow resembling a butterfly appears under the nose.
How to Set Up
You should place a light source with a diffuser — for instance, a 24” x 24” Glow softbox — in front of the model. It must create a butterfly shadow under the nose. Then, aim your camera straight on with the model’s face for the symmetry.
- METHOD 4 – Clamshell Lighting
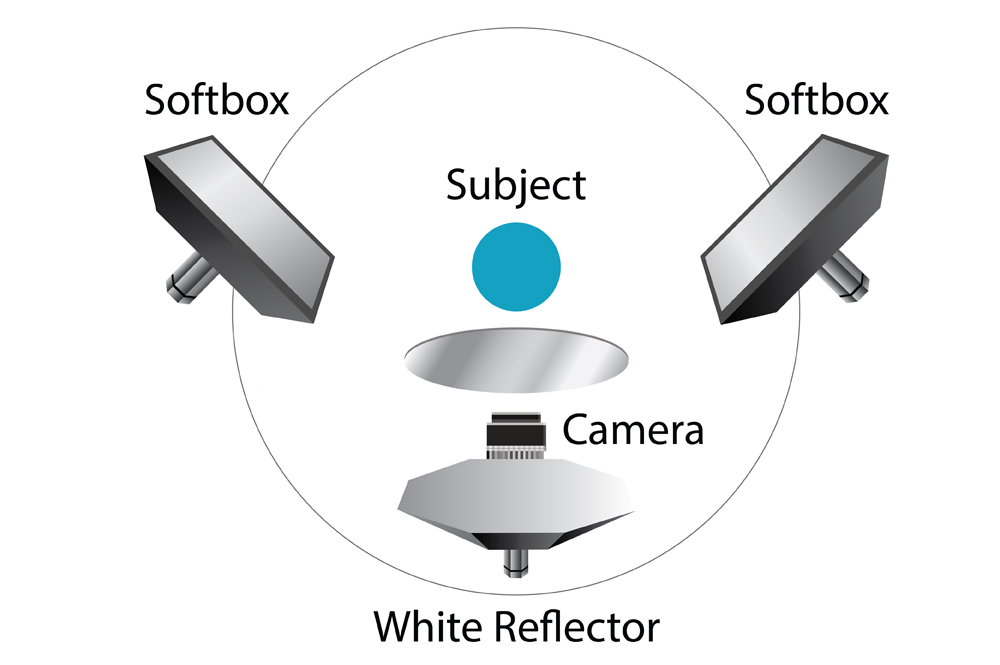
This is a widespread lighting technique in studio fashion photography taken by a low light camera. Using it, you can achieve the elimination of shadows on a model’s face. The thing is that the light sources are placed to neutralize the shadows that each of them creates.
How to Set Up
All you need to do is to place a light source in front of and above the model. At the same time, a reflector or second light is positioned below the face.
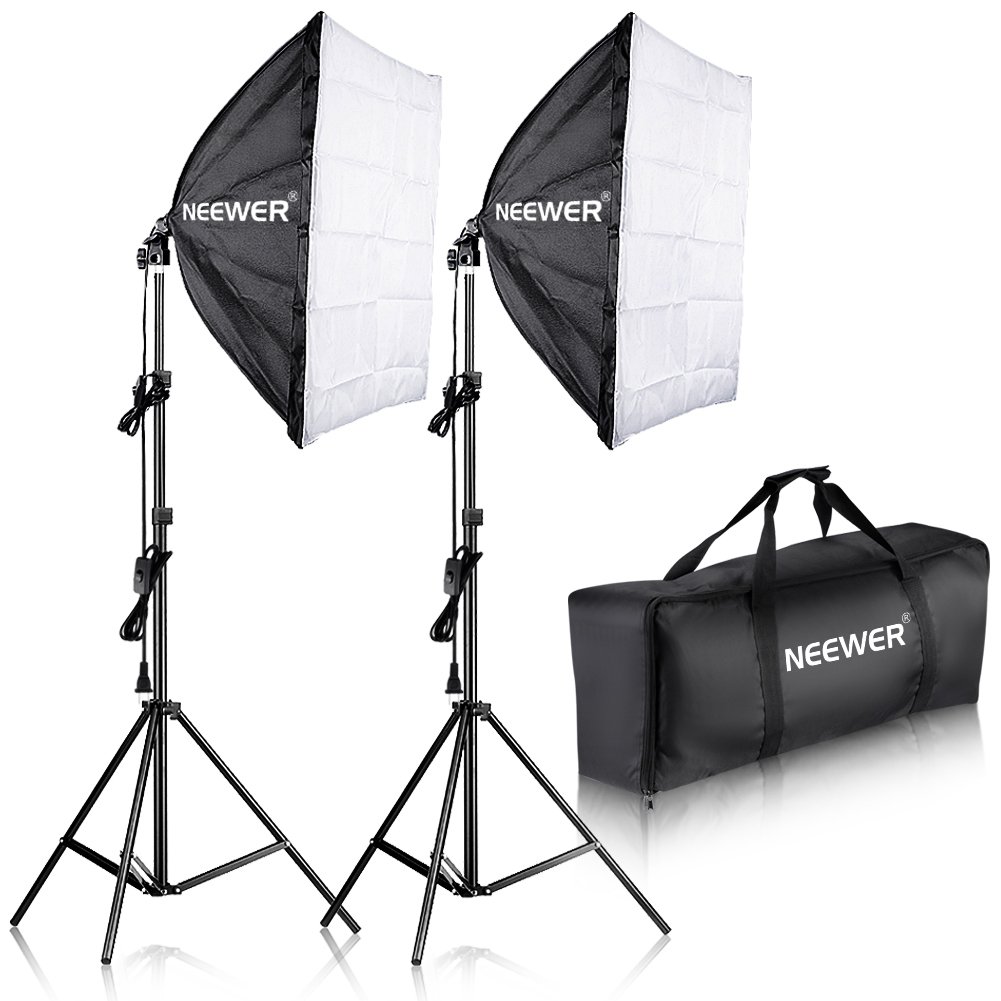
10. Play with Light Modifiers

As for the modifiers that I use for makeup photography lighting, there are several types of them: umbrellas, softboxes, and reflectors. These modifiers will add more shadows or make the light softer. In most cases, I take advantage of light modifiers during studio photo shoots. It’s a simple way to get dispersed light, which makes a little light source bigger.
Recommended:
Neewer 700W
This softbox works for different types of shooting, because it performs functions of an excellent reflector. Use it for portraits, group photos, fashion photos, and commercial photography.
Recommended:
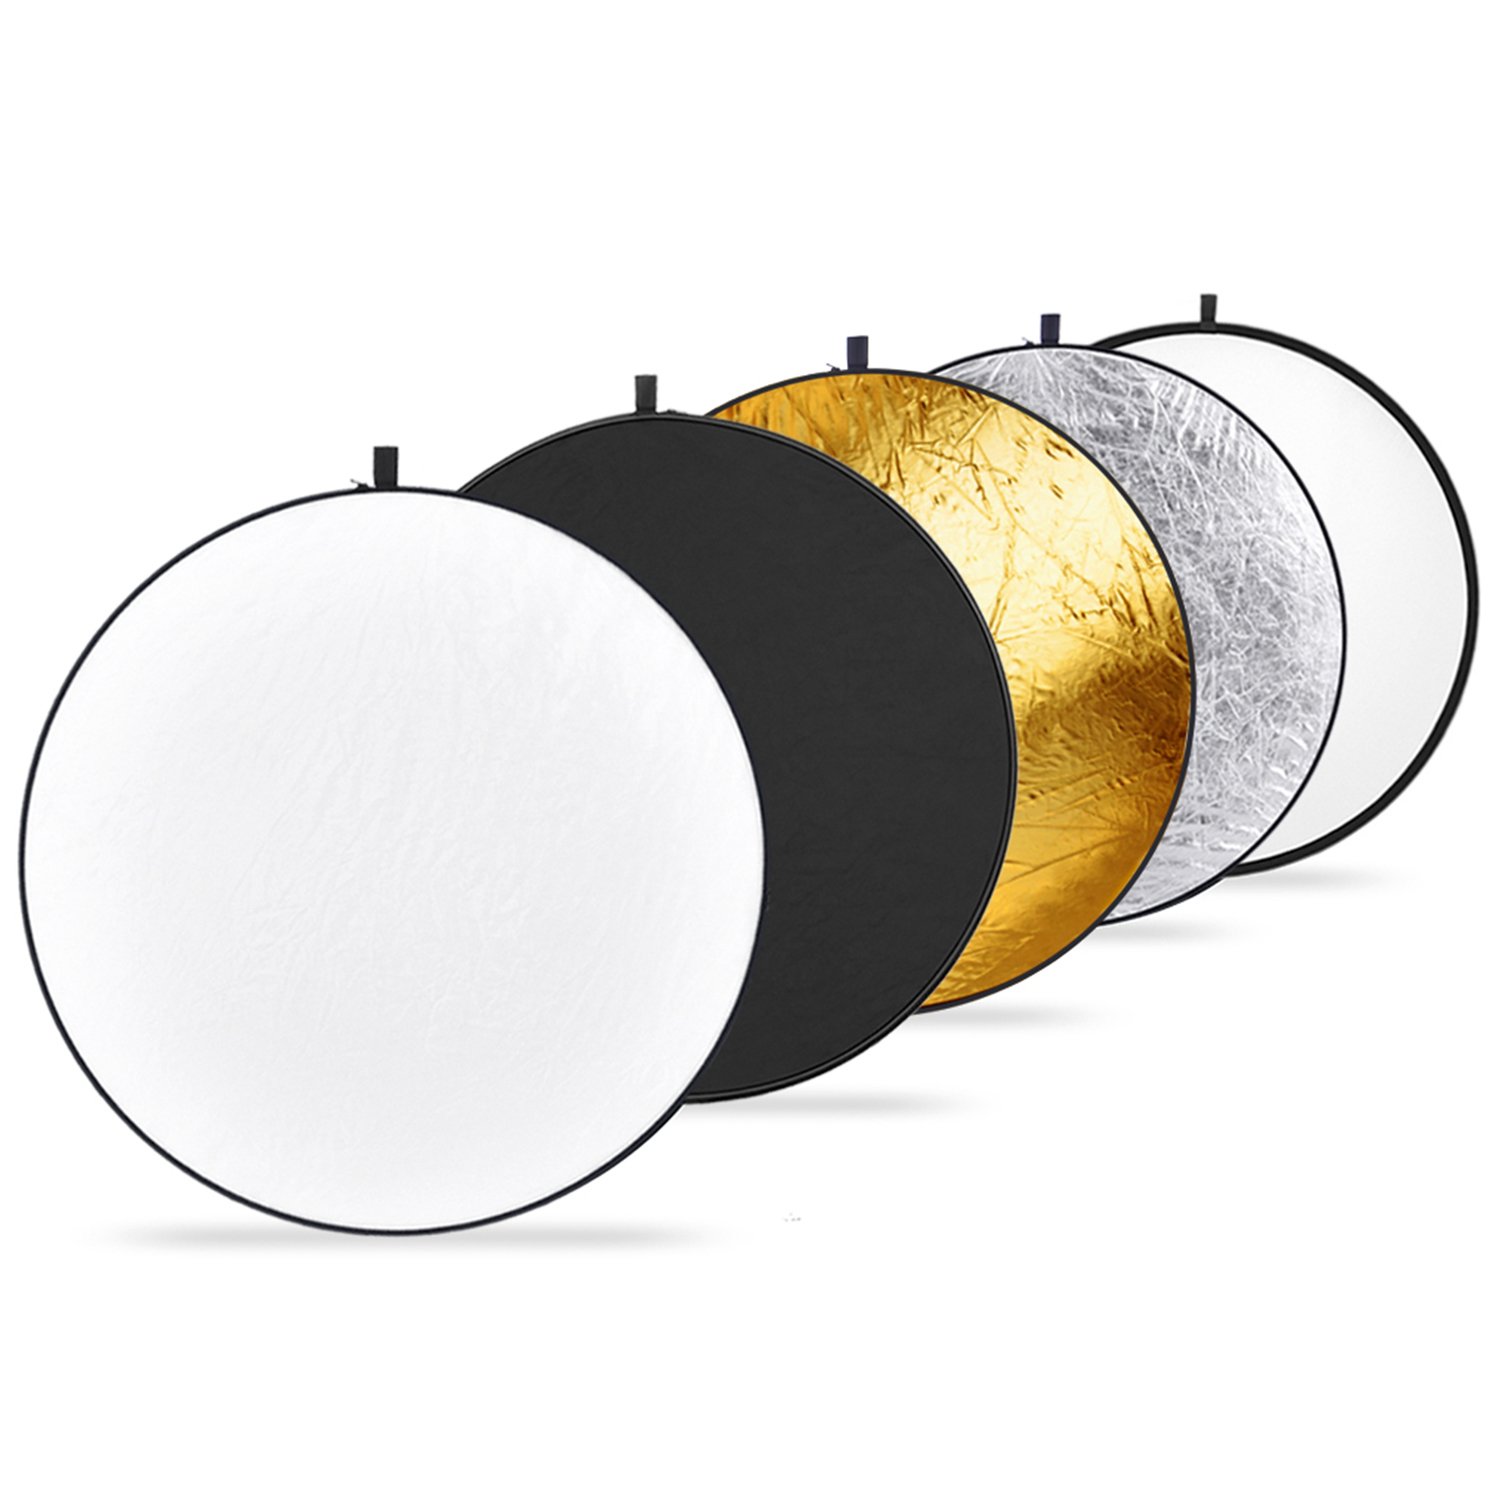
Neewer 43-inch
You can choose between gold, silver, black, white, and translucent reflectors for getting creative light. Due to its material, high-quality steel, and portability, it’s one of my must-have pieces of lighting gear.
Recommended:
Umbrella Lighting Kit
This kit meets the strictest photography requirements of taking high-quality and high-resolution photos in the studio. It makes portrait photos sharp and doesn’t ruin your model’s skin texture.

Tip 11. Choose a Camera Attentively
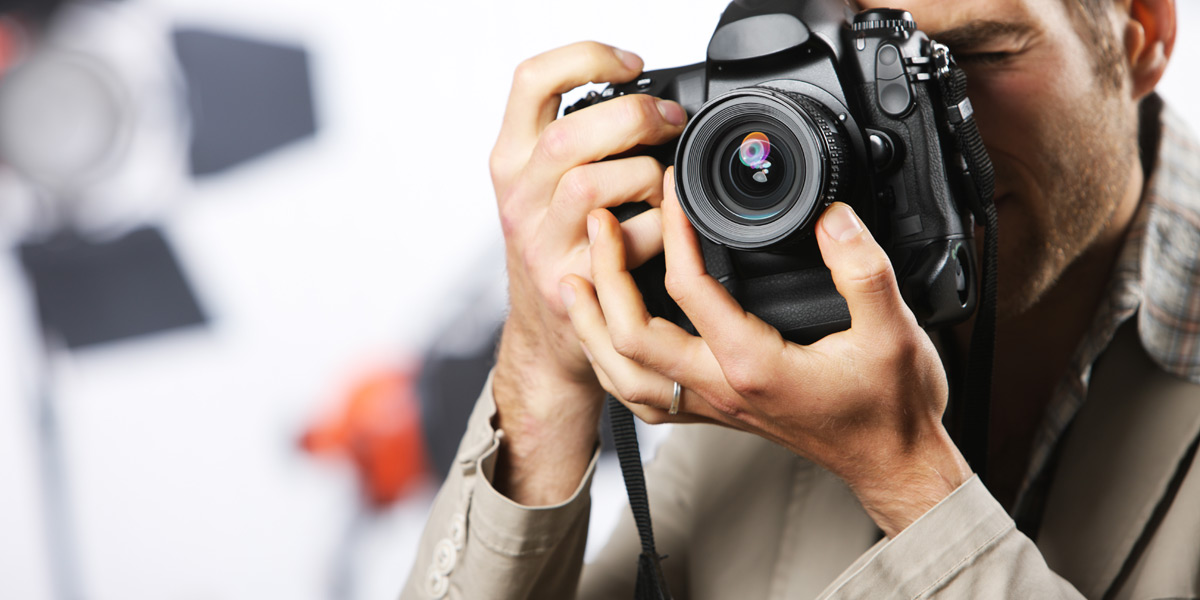
To get a makeup photo of really good quality, the first thing you should pay attention to is making the right choice of the camera. In order to make it a bit easier for you, I have already prepared a list of a few great variants.
- Check out my list of good cameras for fashion photography that are universal, inexpensive, and user-friendly for amateurs.
Tip 12. Mind Studio Camera Settings
)
Aperture: A makeup photo presupposes that all the details are clearly visible. So, it’s better to close the aperture as much as possible. According to recommendations of experienced photographers, it should be f/8 or f/9. This aperture setting will help to highlight all the details of the model’s makeup, her face, and her hairdo. The details will be maximally sharp, which is very important for successful makeup photography.
ISO: To avoid image noise, set ISO to 100. Afterward, you will obtain a beautiful and sharp picture.
Shutter Speed: In order to adjust your camera perfectly to the flash, set the shutter speed at 1/160.
Tip 13. Choose a Suitable Lens

The quality of the image depends not only on the camera but on the lens too. As for makeup photo shoots, the most appropriate will be a long lens (longer than 80 mm). Look through the options I have chosen for you.
Tip 14. Stabilize Your Phone

Photos taken with a phone camera may be inferior to pictures shot with a DSLR in terms of quality, but you must be aware of how to photograph makeup with your phone properly. Only with the help of an iPhone tripod or a monopod will you obtain crisp images. Otherwise, your camera will be shaking and the photos will be blurred.
Tip 15. Use a Back Camera

The back camera offers higher quality than the front one, no matter which phone you have. That’s why I strongly recommend that you use a back camera while taking beauty photography selfies even for your Instagram account. If you are afraid that you won’t be able to see how you look in the frame or whether you are there at all, that’s not a problem. Just take photos opposite the mirror to make sure you get desirable pictures as a result.
Tip 16. Don’t Zoom

Using zoom will definitely spoil the quality of your photos. They will be noisy and lose sharpness. I advise you just to come closer to the subject if you want to focus more on its details.
Tip 17. Compose the Frame Properly
Make sure that the main subject of your photo is in the area of focusing. As usual, a camera focuses on the center of a frame, but some new camera models can identify the object of focusing at any place of the frame, especially if it is a person’s face. In order to change the focusing point, touch the desired object on the screen.
Tip 18. Take Advantage of the Phone’s Flash

Use the phone’s flash as it can make a big difference to your makeup photos. To avoid glaring and flat light, you may use a piece of paper or even a tissue. Just put it in front of the flash and light will be much softer. Also, you may use a color filter and your photo will look more interesting. One more variant is to lighten up a thing next to you to achieve a more non-trivial effect.
Tip 19. Make Use of an Extra Kit
When you’re researching how to photograph makeup, you will see that such photos are focused mainly on the model’s face and shoulders. No matter whether you work in a studio or prefer to prepare makeup for photo shoot outdoors, it’s of vital importance to have reliable props. As for me, I recommend these accessories:
- Some furniture for shooting sitting poses (a chair or backless chair)
- Table for your assistants, makeup artists, and hair stylists
- Nice music that will inspire and create a needed atmosphere
- Portable device with viewing monitor (tablet or a large screen laptop)
It will help you and your model feel confident and concentrate on the main tasks.
Recommended:
Adjustable Tilt Stool
This modern and comfortable furniture can be used in different ways: as a photo prop or for preparing make-up. Using the backless construction gives the model an opportunity to experiment with different sitting poses.

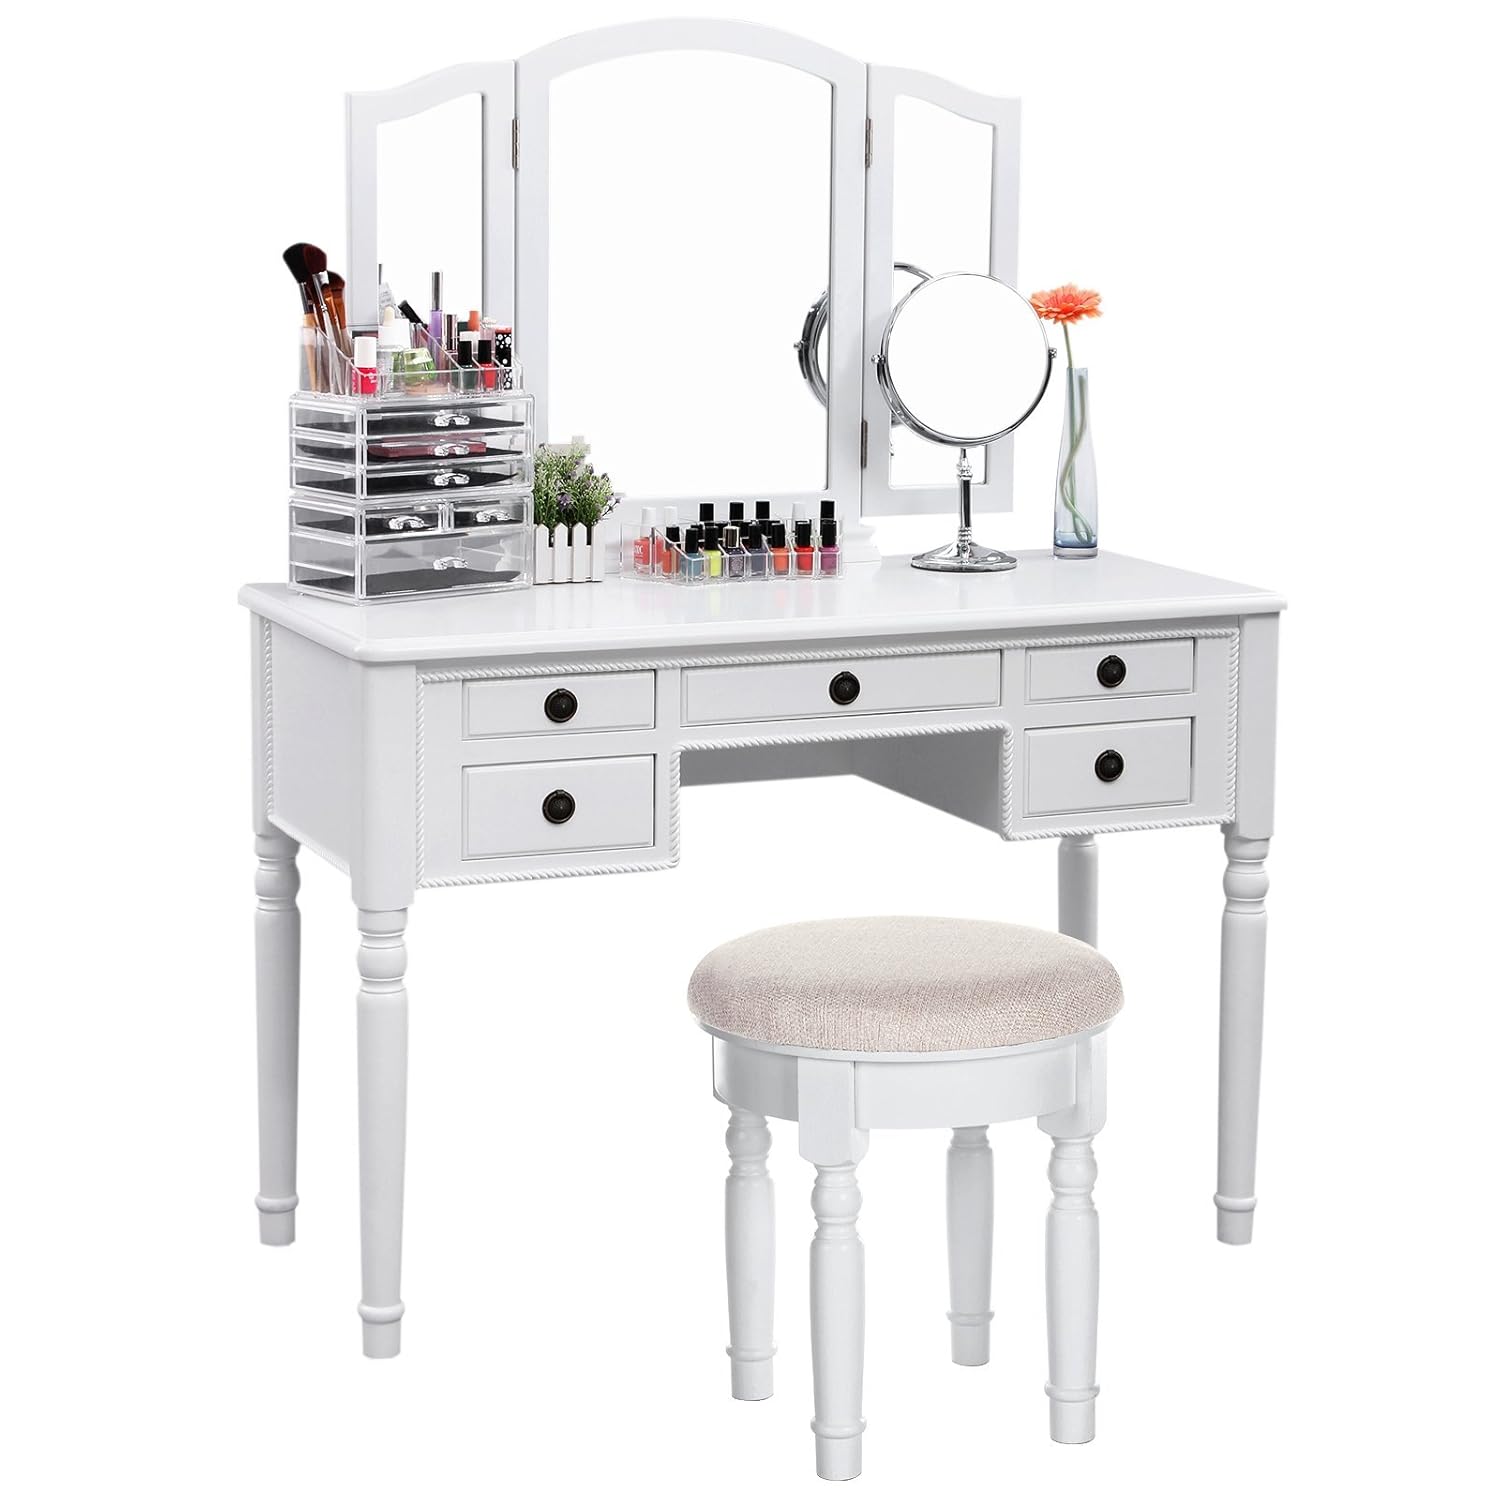
Recommended:
SONGMICS VanitySet
This elegant vanity furniture has two mirrors that fold 180 degrees, as well as the main mirror. So, the model can view his/her hairstyle or makeup from almost all possible angles. The stool is reliable and comfortable at the same time.
Tip 20. Follow Creative Makeup Photoshoot Ideas
The next recommendations will assist you in taking incredible photos. Save them to try with your makeup shoots.
1. Playing with stencils from light and shadow
There are many variants of such stencils. It may be a harsh shadow from a piece of paper, color patterns from the lamp standing next to the model, or a light stencil that emphasizes the bone structure of the model’s face. All this adds something special to makeup artistry pictures, something that makes them stand out from the rest.
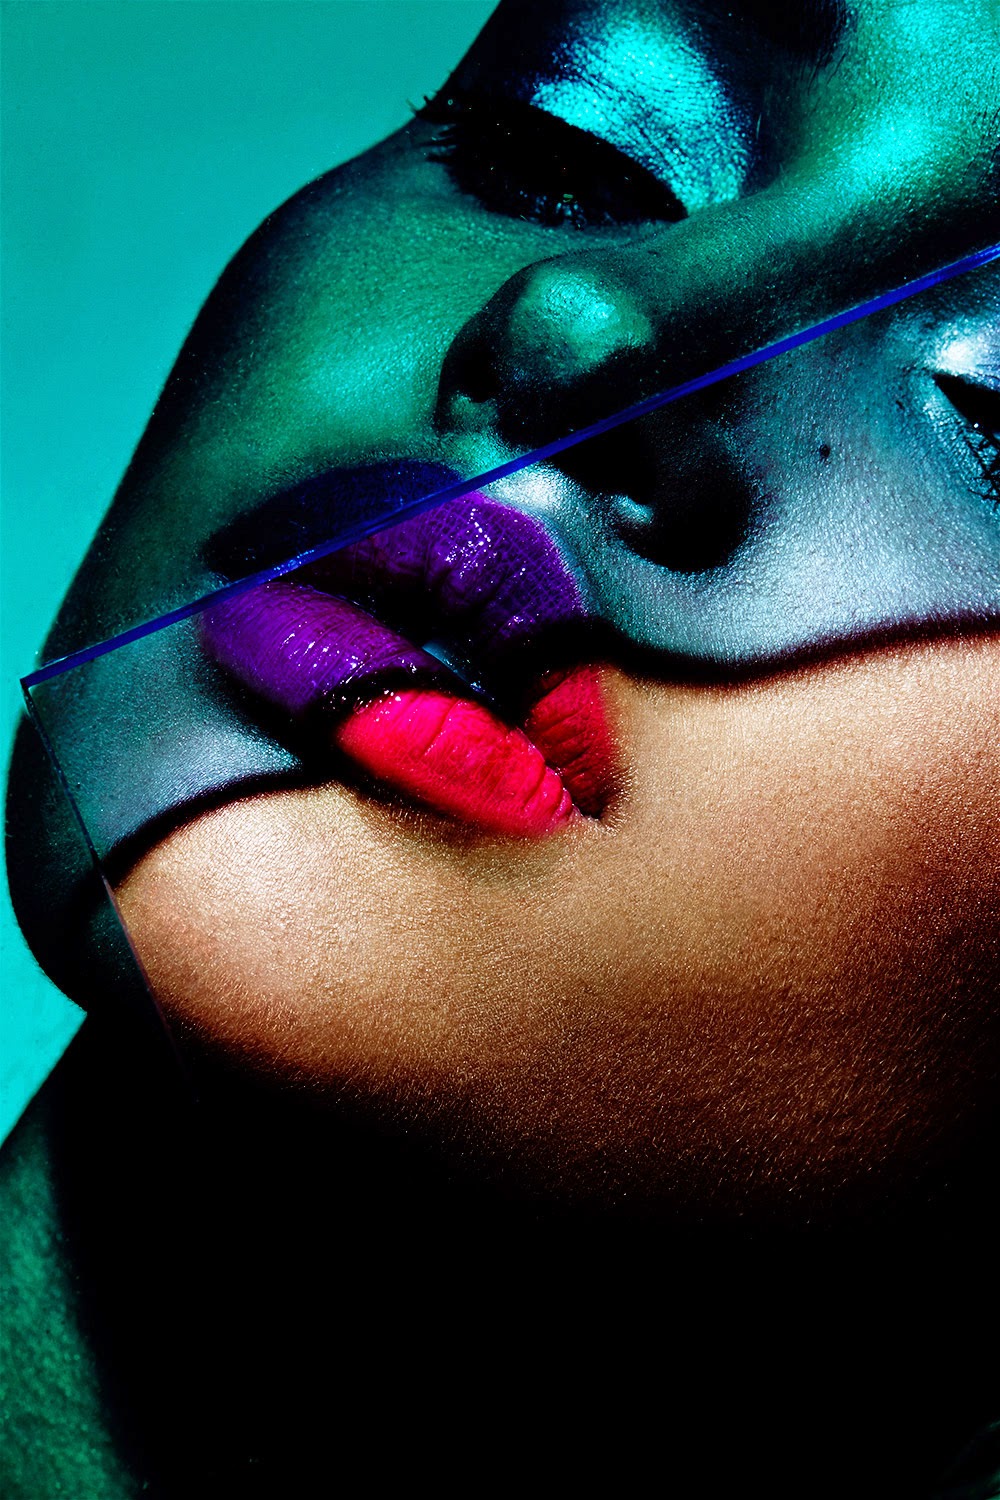
2. Cover a part of the face
If you are not in the studio, you can use bushes or everything around you to focus on particular parts of the model’s face. By doing so, it is possible to create a captivating sense of mystery and draw attention to the visible features. It's a unique way to experiment with artistic expression and produce visually striking images that leave a lasting impact.
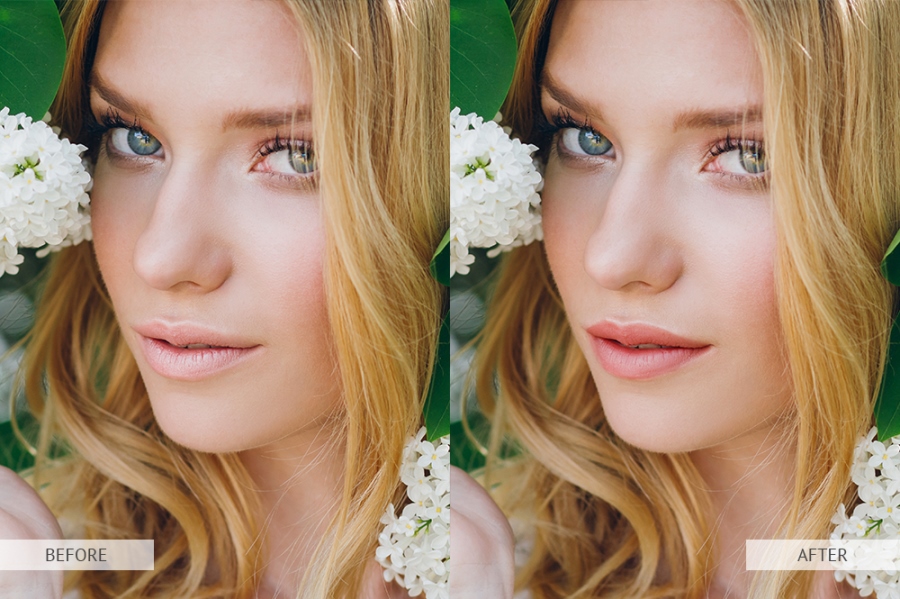
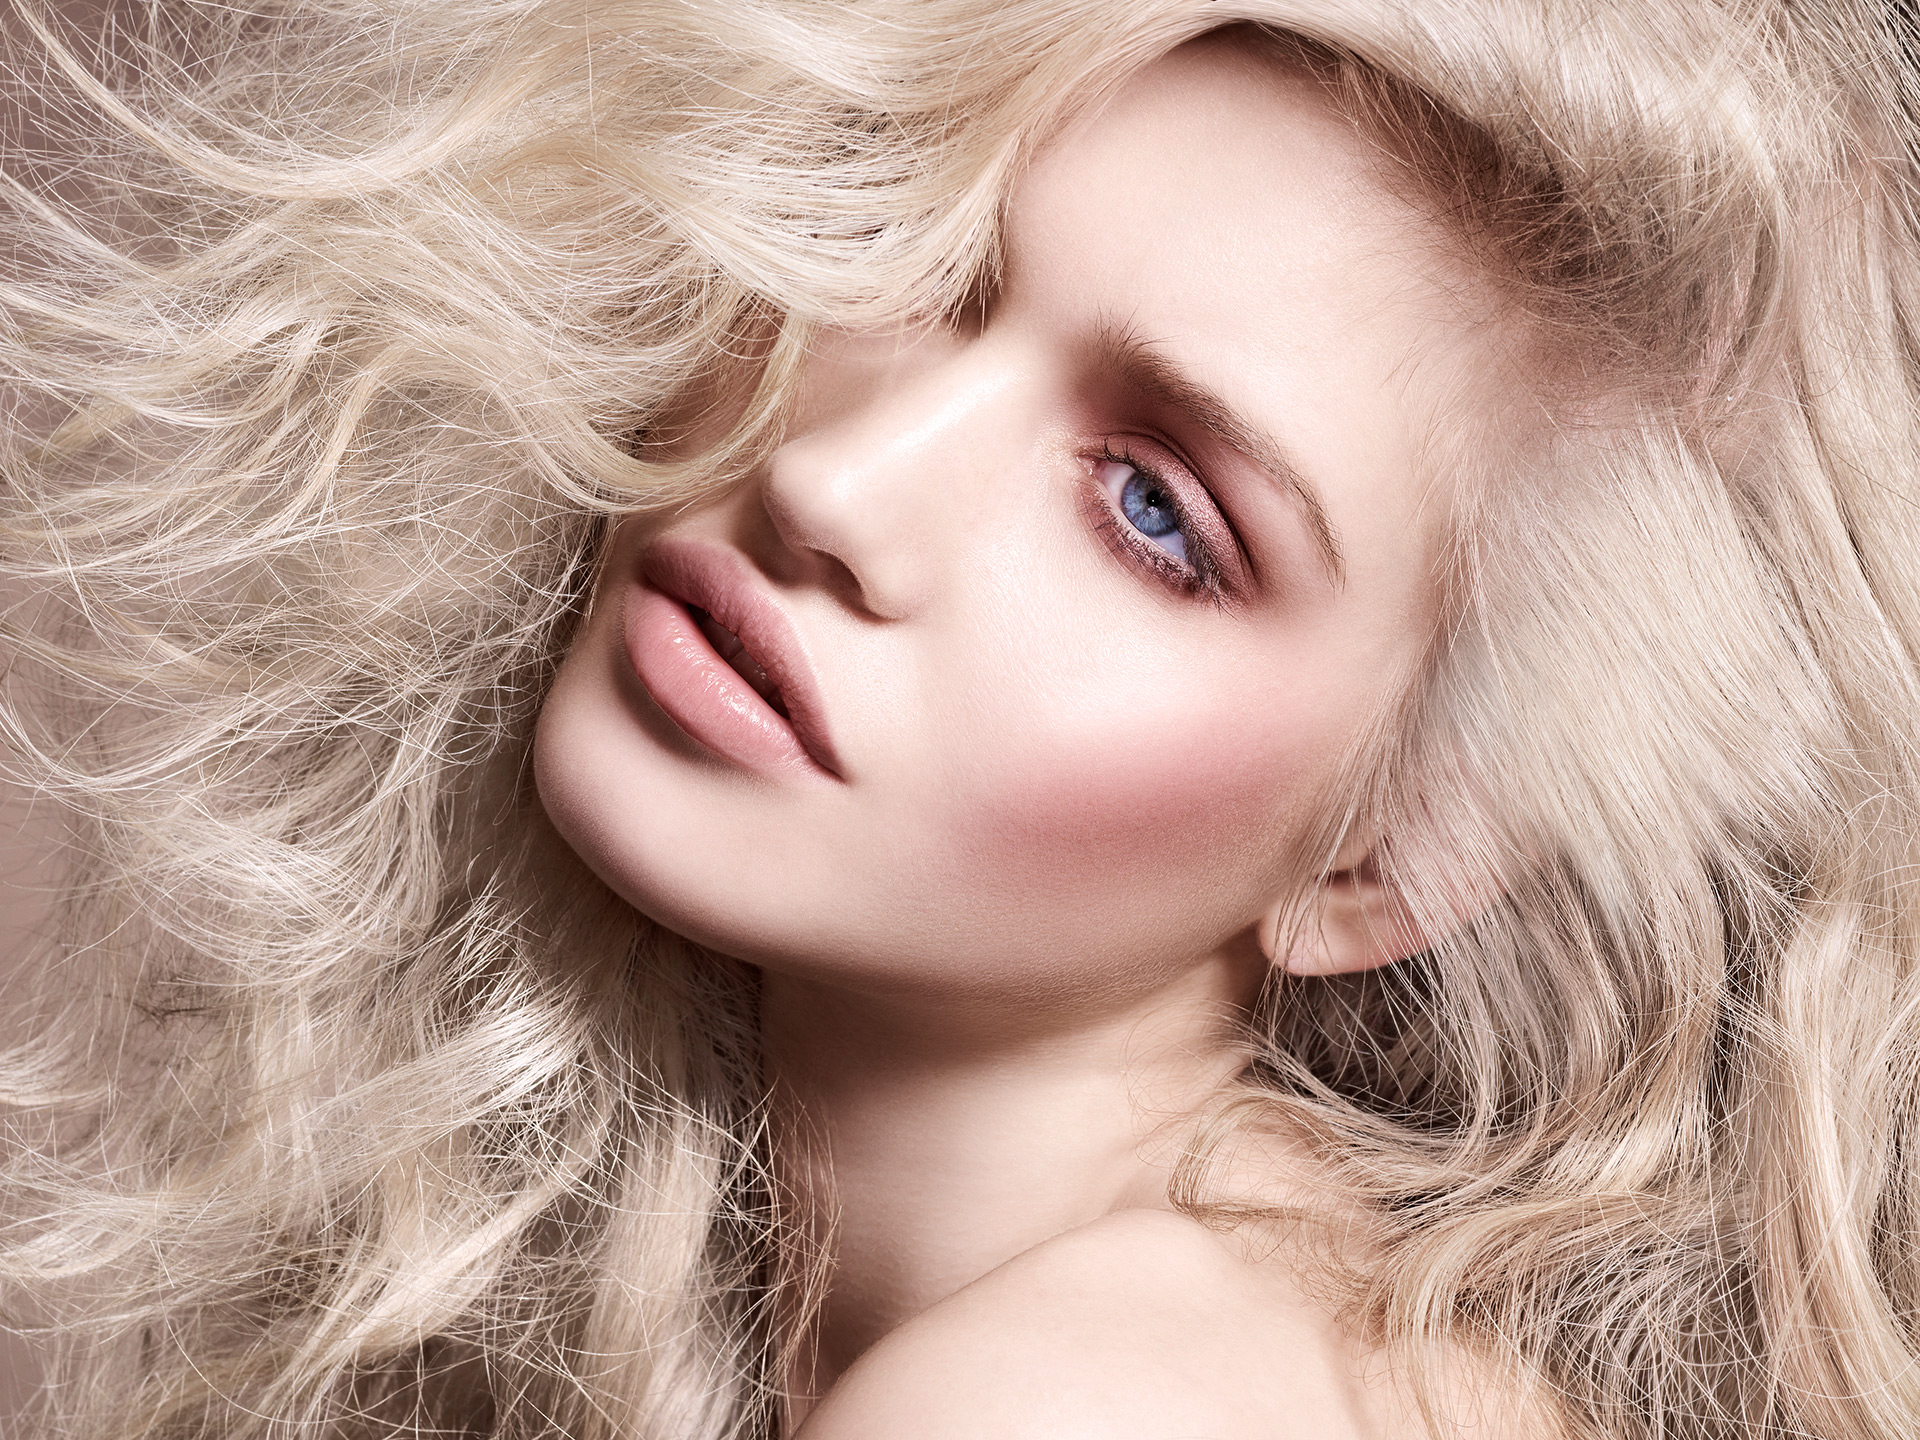
3. Frame the face

Experiment with using bushes, flowers, picturesque plants or even strange props. Such an approach to makeup photography will bring a creative feeling to your portraits. Using long hair is also a good idea. It will help attract attention to the model’s face.
4. Use water

If you shoot indoors, take advantage of a shower. If you have a waterfall at your disposal, that’s excellent. You can lay the model under the waterfall and dip her face into the water a bit.
5. Double exposure

Using this makeup art photography effect, you will get an opportunity to show feelings, thoughts, and dreams. Choose suitable makeup and you won’t be disappointed with the result. I recommend that you use this Color Double Exposure Photoshop Action that will help you edit photos faster and easier and achieve this surreal effect.
6. Shoot from above

Such a photo will show the model’s face from another angle that allows you to capture the interplay of light and shadow.
7. Black and white photography

Black and white photos make your pictures more dramatic and demonstrate the contrast between light and shadow. The model should look aside while shooting.
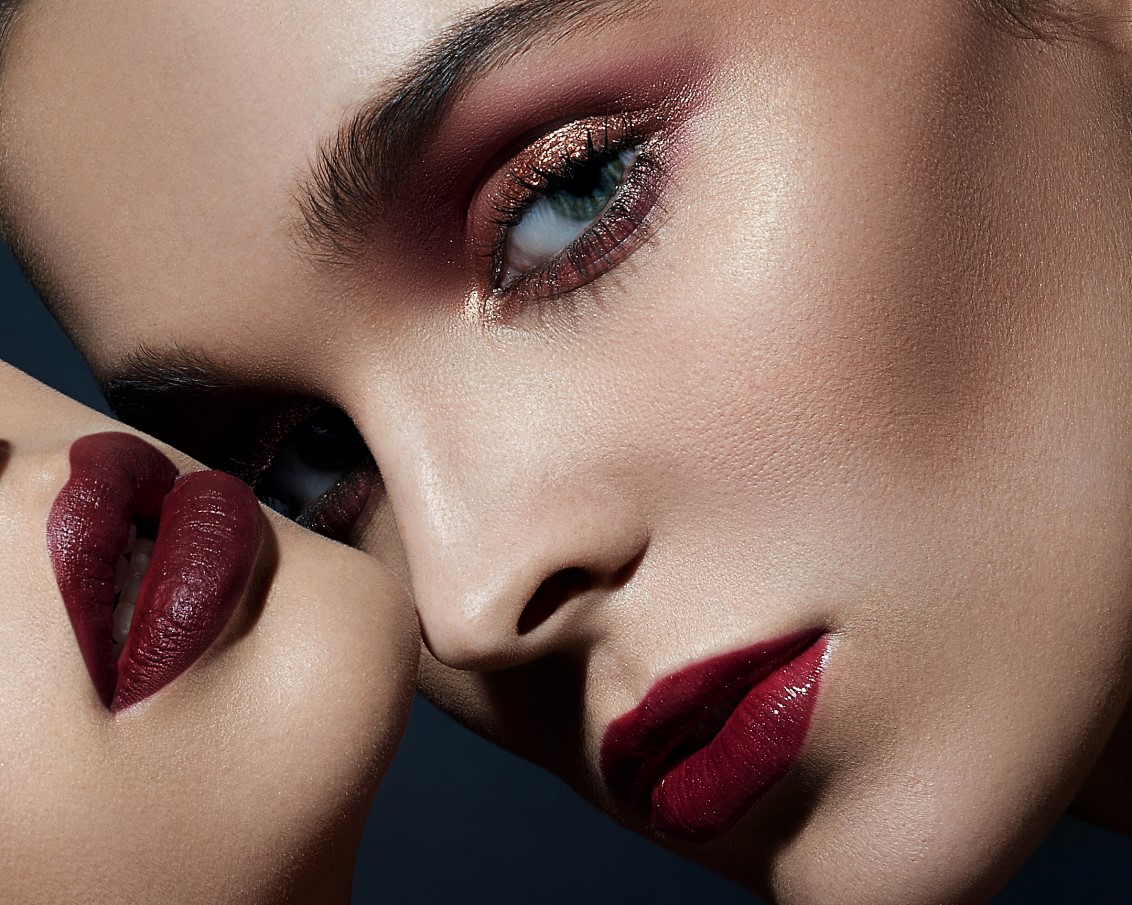
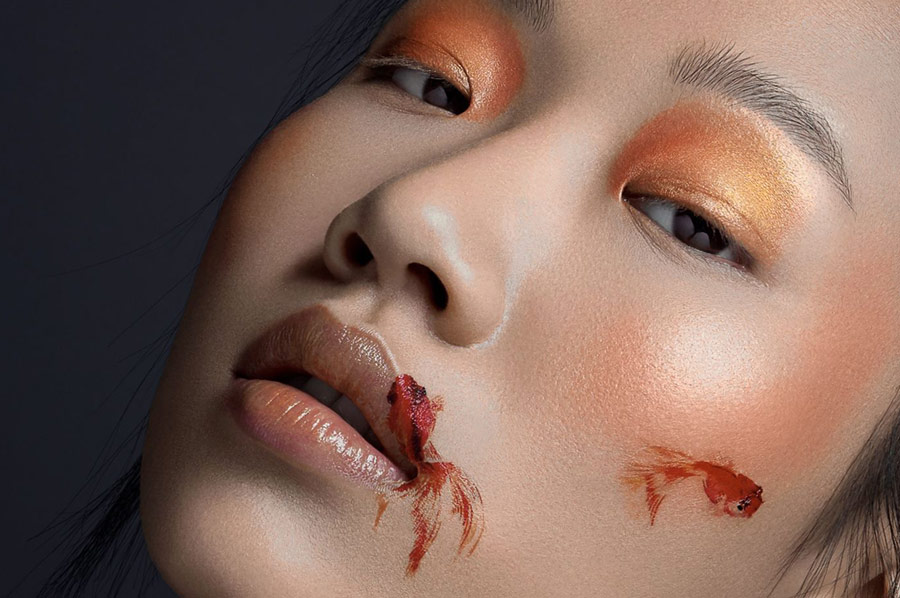
8. Focus on the particular part of the face

One of the most interesting makeup photography tips is taking photos of the mouth, lips, or eyes. No doubt it will leave much space for a viewer’s imagination. I recommend you to concentrate on one part of the face and photograph it.
9. Take pictures outdoors

Natural light will favorably emphasize the beauty and makeup of your model.
10. Try a sideways glance
Photographing your model when he/she is looking over their shoulder will give you a very interesting shot.
FREEBIES for Editing Makeup Photography
Lightroom or Photoshop are indispensable software programs to improve your makeup photography professionally. I’ve chosen a few free tools for these softwares that’ll help you improve your images quickly and easily.
1. FREE PS Action "Bright Eyes"


Intensify the contrast on the iris and highlight the eyes using this tool.
2. FREE LR Brush "White Teeth"

Download this stylish Portrait Lightroom kit of brushes made by professionals to make your photos unbelievably beautiful. Give your model a Hollywood smile in several clicks.
3. FREE PS Hair Brush "Curly Hair"


Other effective freebies are hair Photoshop brushes. They will allow you to draw real locks of hair or improve the hair and emphasize the beautiful makeup.
4. FREE PS Action "Color Tone"


Sometimes the skin looks pale or a bit red in photos. Eliminate this effect using the “Color tone” action.
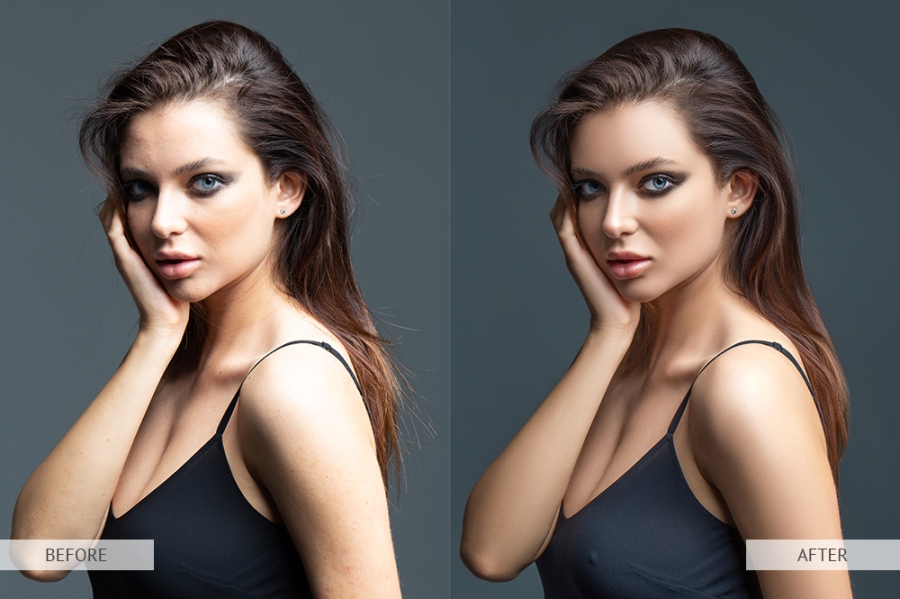
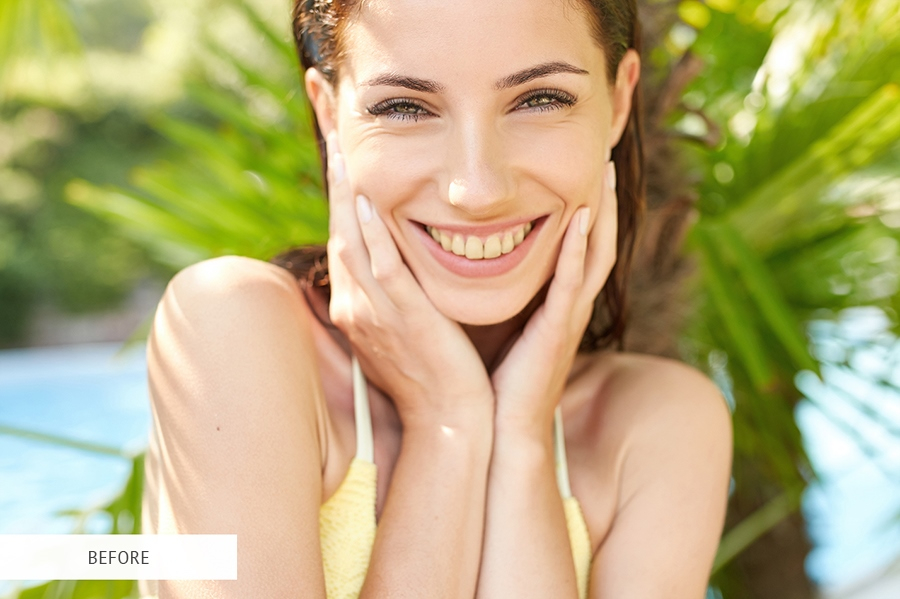
5. Free PS Action "Smooth Skin"


This is probably one of the most popular actions for makeup art photography. It helps smooth skin without ruining its structure. You will easily get rid of acne, undereye circles, and other defects. By the way, this effect doesn’t affect eyes, hair, or lips, which is very important in this genre of photography.
Makeup photography is the newest genre of photography, serving to emphasize the beauty of the face with the help of makeup. This genre is among the most adaptable ones, while its results keep fascinating more and more people.


