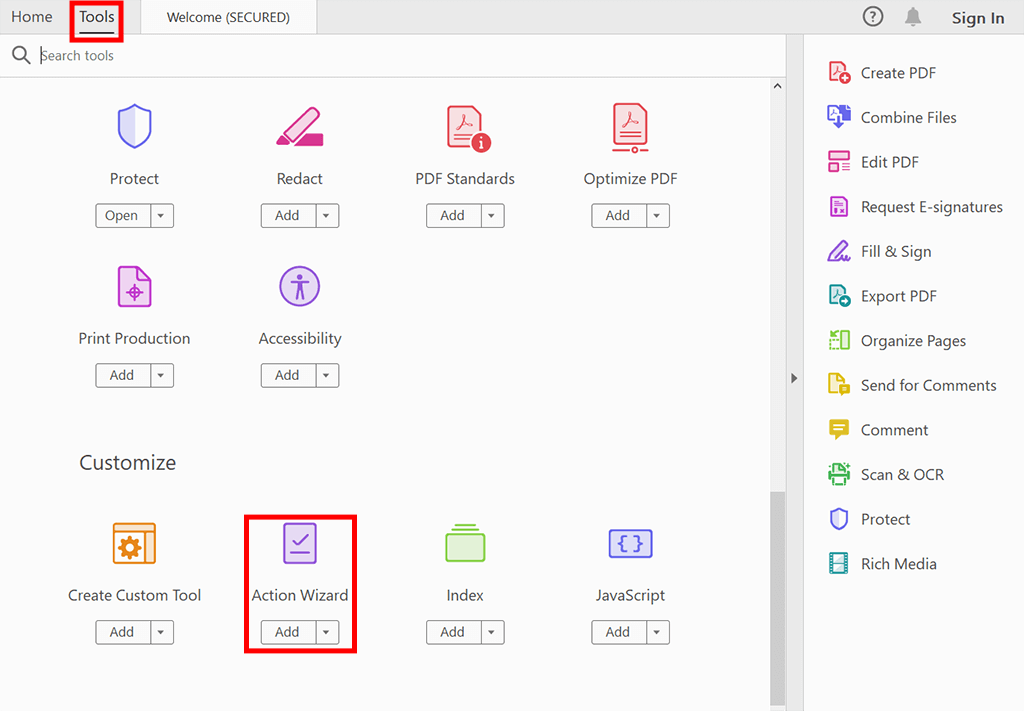
Launch Adobe Acrobat Pro, create a project from scratch, or upload your existing files. Keep in mind that there shouldn’t be any open files. In the main menu of the editor, select "Tools", scroll down the list to the very bottom, to the Customize section, and choose “Action Wizard” there.

Choose "Make Accessible" in the list of actions. The right pane will be changed to display each task included in the “Make Accessible” action, along with instructions on how to complete the process.

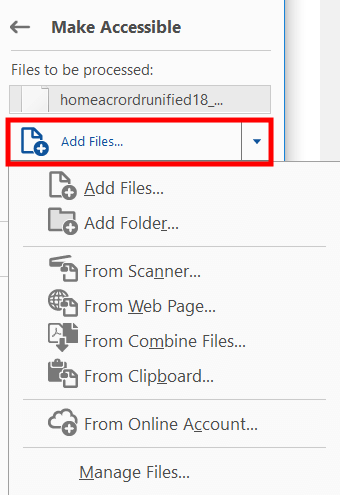
The next step is to add files that you want to make accessible. By default, the action is applied to the document that is currently open. Select "Add Files" to choose other PDFs or folders, which you want to apply the action to. Click Start.
It is great that making PDF accessible in Adobe Acrobat Pro is possible not only for 1 file but for batches. You only need to hold down the Shift key when choosing files.

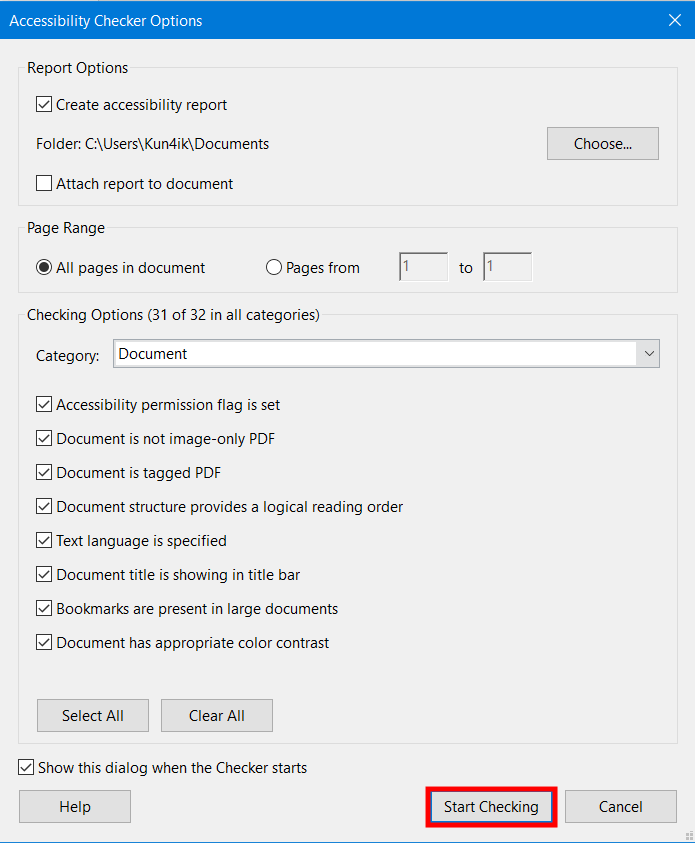
Select the settings as shown in the example and click “Start”. The results are displayed in the “Accessibility Check” panel on the left. It also contains helpful links and troubleshooting tips.

If you created the report in step 2, the results will be displayed in the selected folder.
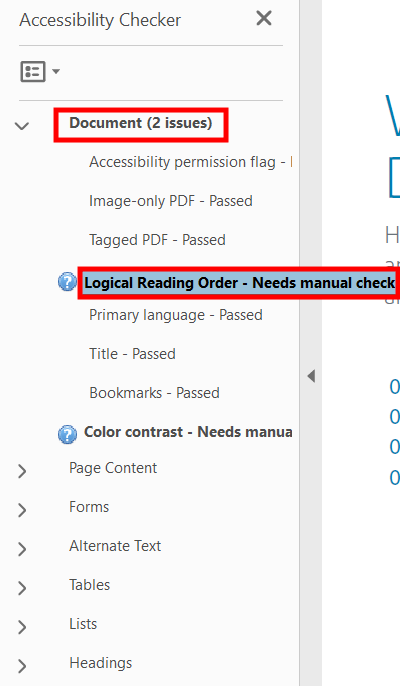
Open the "document" tab and find the Logical Reading Order there. You can check the elements manually. If there weren’t any errors or you have successfully corrected them, you can save a document. Or, you can continue working on it.
Many PDFs are simply images of the text created by scanning paper documents. Unfortunately, image-based PDFs are completely inaccessible in their initial form and require conversion to text in OCR software to become accessible.
The fundamental difference between such files is that accessible ones can be viewed and altered by any user. For a PDF file to become accessible, it must meet a set of accessibility recommendations.
Find your document, open it, and load it into Adobe Acrobat Pro. In the software, you can select “Accessibility”, “Check Accessibility”, and “Start Check”. In the Documents section of the Accessibility Checker, you will see an error message titled - Error. Right-click this error and select "Fix".
Most likely, you are using an outdated version of the editor, CS5 or even older. To keep your tools up to date, you can download a trial version of Adobe Acrobat Pro free of charge from the official website.
Run the accessibility checker integrated into Acrobat Pro. Choose “Tools” > “Accessibility” > “Full Check”, then read the report and follow the instructions. The report lists items in various categories such as “Document”, “Page Content”, etc.