Learning how to change transparency in InDesign is a rewarding thing to do, as this is the easiest way to draw attention to objects or use them as a background. Transparency in InDesign is very important if you want to overlay text on complex graphics as in semi-transparent margins to avoid visual collisions with the underlying images.
Transparency in design refers to the amount of light passing through an object. In printing, transparency is treated as opacity and you can adjust it for graphics and text. By reducing opacity, you make the underlying graphics visible through the element's surface.
Using built-in Effects tool or toolbar in Adobe InDesign, you can change the transparency of objects documents. Thus, you can create professional and attractive transparent effects and transitions. Read on to know how to change object or text’s opacity in InDesign by using its adjustments.
Open Adobe InDesign and click “File” > “Open” in the control panel at the top of the workspace to open a new document. If you don't have a document you currently work with, create a new one by going to “File” > “New” > “Document”. Use free InDesign templates and settings for streamlined work.

Use the “Direct Selection” tool from the tools panel or press the “A” key to activate the Selection tool. Click on the element to adjust its opacity. If your document does not contain any elements, create them via shapes or text, or import by clicking “File” > “Place”.

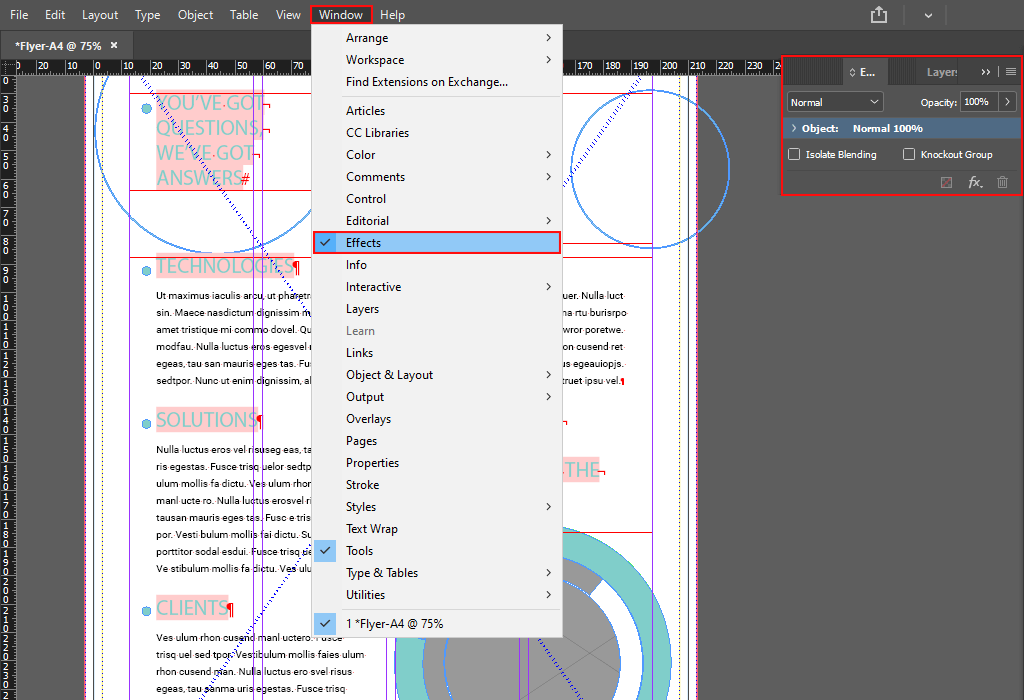
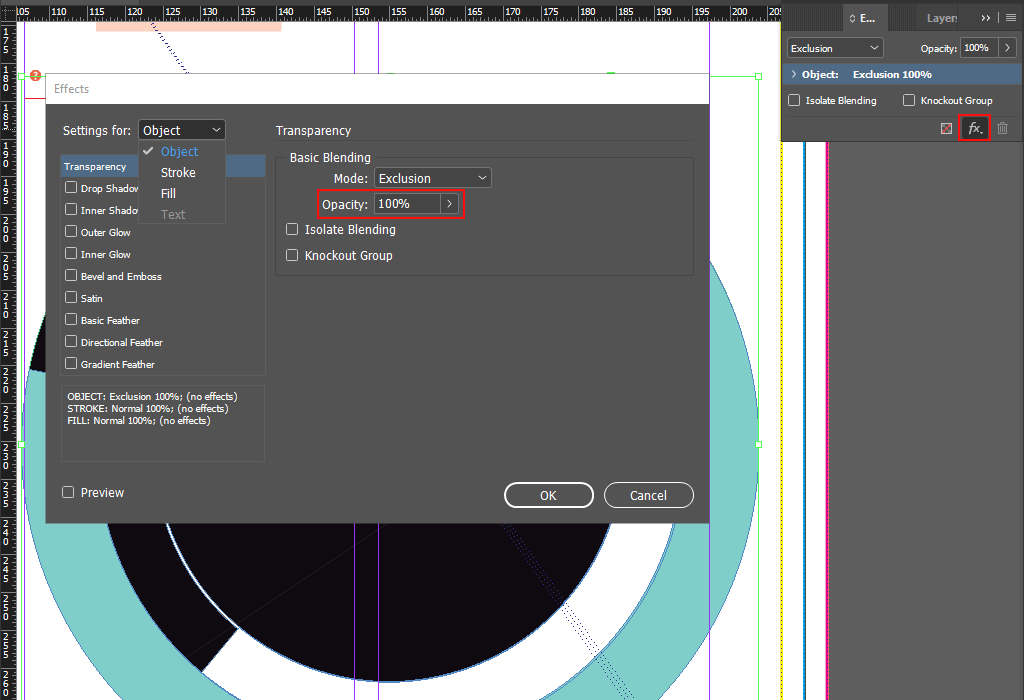
Choose “Window” > “Effects” to display the “Effects” panel. You can choose a level setting: click the “Apply Effect to Object” button and select “Object”, “Stroke”, “Fill”, or “Text” depending on the element that you are working with.
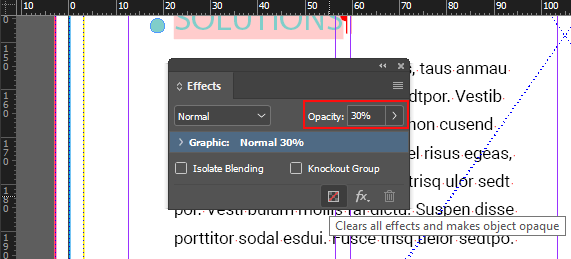
Enter a numeric value in the “Opacity” box. You can click and drag the slider next to the setting from 100% opacity (fully opaque) to 0% (fully transparent).
Repeat these steps for each element you want to adjust the transparency of. For other creative changes, check useful InDesign tutorials.
If you want not only to alter InDesign image transparency, but also change the background with all the elements arranged on it, order advanced image manipulations from professionals. Thus, you can be sure you’ll get amazing results without learning all the processes on your own.

To change InDesign transparency text, you need to go to the Effects panel. However, if you are interested in non-standard changes, the default tools may not fully satisfy your needs. Getting useful InDesign plug-ins is a smart thing to do.
InDesign lets you combine grayscale, CMYK, RGB, or LAB objects on a single page; assign CMYK and RGB profiles to control and display colors simultaneously. Most likely, such a document has RGB and CMYK elements, and you need to select your preferred Transparency Blend Space from the Edit menu (RGB – for interactive documents, and CMYK – for professional printing).
Sometimes, when you apply a transparency effect, there appears a white box or ghost border. This usually happens in documents that contain shadows or gradients. This problem can appear if the transparency effect interacts with a spot color. To solve the issue, you may not use spot colors with transparency, or smooth the transparency and select the “Simulate Overprint” option. Click “Composite CMYK” on the “Output” panel of the “Print” dialog box to find it.
InDesign offers 9 transparency effects. Many settings and parameters for creating effects are similar, the difference is usually noticeable at the edges of the elements. The purpose of Drop/Inner Shadow, Outer/Inner Glow is clear from the name; Basic/Directional/Gradient Feather softens the edges of an object in different ways, making them transparent. Satin, Bevel and Emboss add various combinations of highlights and shadows to give text and images a three-dimensional look.


