How to Make a DIY iPhone Tripod in 30 Seconds - 22 Ideas
When you purchase through affiliate links on our site, we may earn a commission. Here’s how it works.
Do you still think that making a DIY iPhone tripod is way too complicated? Follow these five easy and fast ways of making homemade iPhone stands and tripods in 30 seconds. It’s easier than you think. If you need a tripod for iPhone but don’t want to waste money, this is your chance to get one for free. Some ideas are even suitable for creating a budgetary analog to a branded car laptop mount.
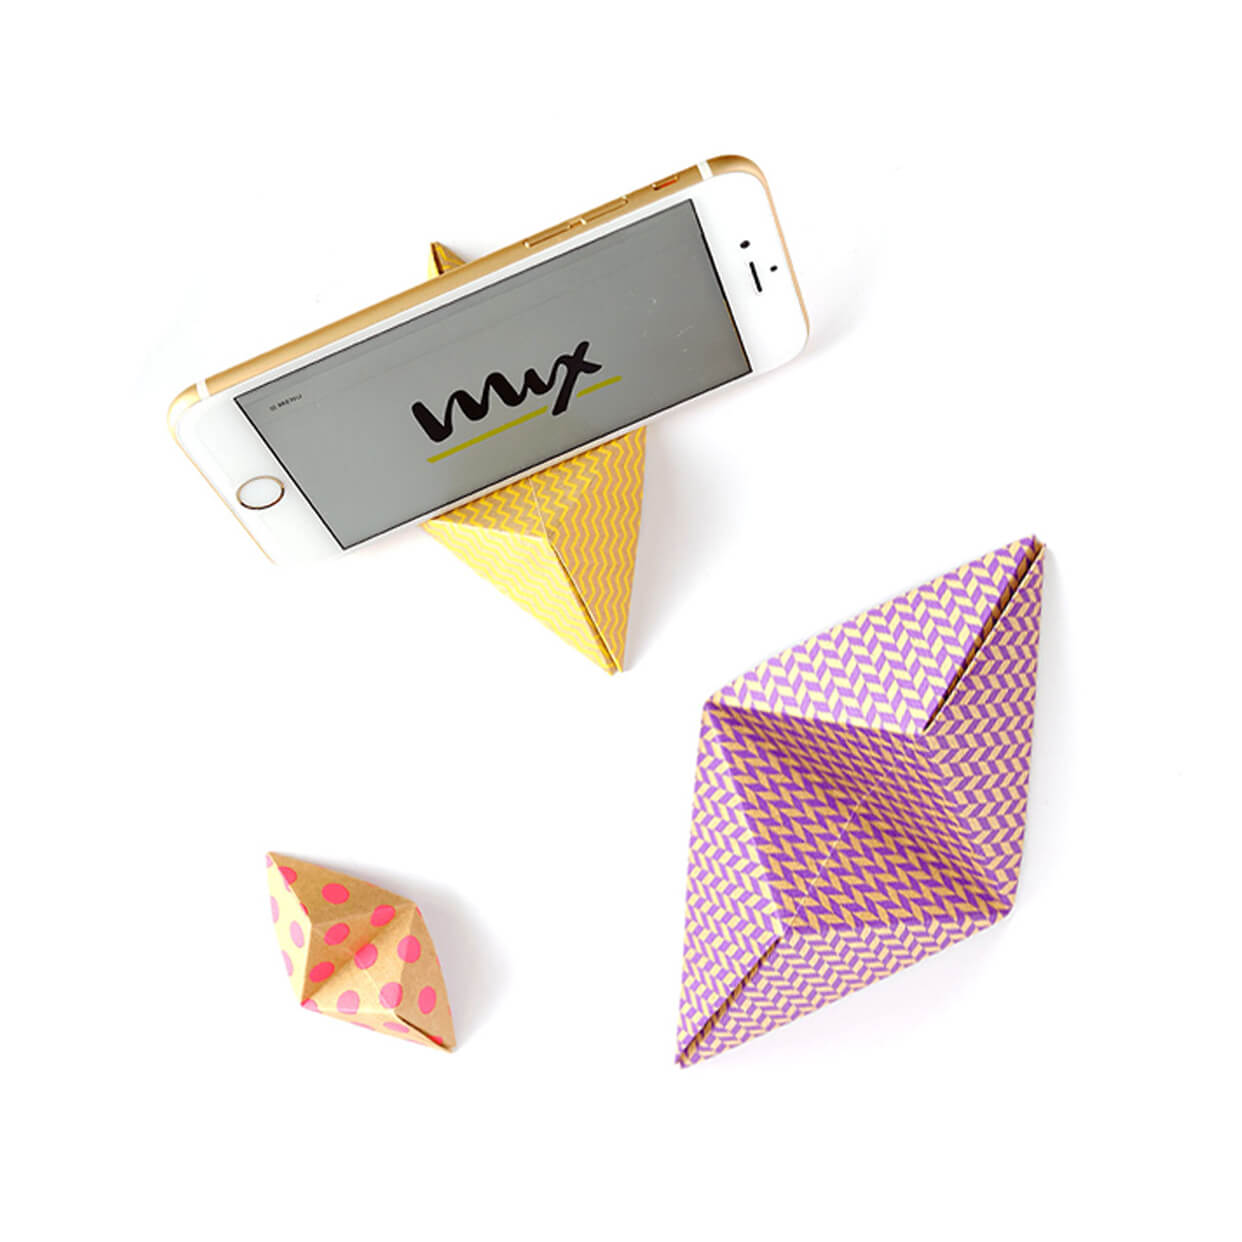
How to Make a DIY iPhone Tripod in 30 Seconds
Today I’m going to show you how to make a very simple mobile phone tripod mount that will cost you next to nothing. The iPhone has a great camera and a great feature that allows you to shoot time-lapses. The only problem is that to take great time-lapse footage with your iPhone, you’ll need to attach it to a tripod. The iPhone itself is not designed to be mounted on the tripod the way a regular camera is, no matter what tripod brand is it. So, to fix this problem, we’re going to make a simple DIY iPhone tripod.
1. Cup iPhone Tripod
Tools and materials needed:
- A paper (or plastic) coffee cup
- Box cutter or scissors
There are 3 plastic cup options you can try out. I will walk you through all of them.

You can take a regular paper or disposable plastic cup for coffee or tea. It must be rather hard and durable. You can use other materials, for example, yogurt or ice cream packaging or anything suitable you can find in your home.

To position your phone at a slight angle, choose the one to the left, to position your phone straight- choose the one to the right. Or you can take two cups to have both options at your disposal.

Make sure to make them symmetrical.

That’s it! Enjoy your new tripod.
2. Cup iPhone Tripod
Now let’s look at how you can position your phone straight. This is the simplest way of making the best tripod, even in the cafe after a cup of coffee.

Make sure not to make the cuts really low.

If you need to add some extra stability, simply place some weights on the bottom of the cup, for example, small pebbles, candies, sand, or anything you can find.
3. Cup iPhone Tripod
There’s one more way to position your phone straight up.

Make sure that the cuts are perfectly symmetrical. Otherwise, your phone will tilt to the side.

Now you have a perfectly functional DIY iPhone tripod! This incredibly fast and very inexpensive option is perfect for anybody. This is the easiest and most accessible option among other homemade iPhone stands ideas.
- Read more if you want to buy a professional iPhone tripod. Choose one of the following budget tripods for taking high-quality photos and videos with your smartphone.
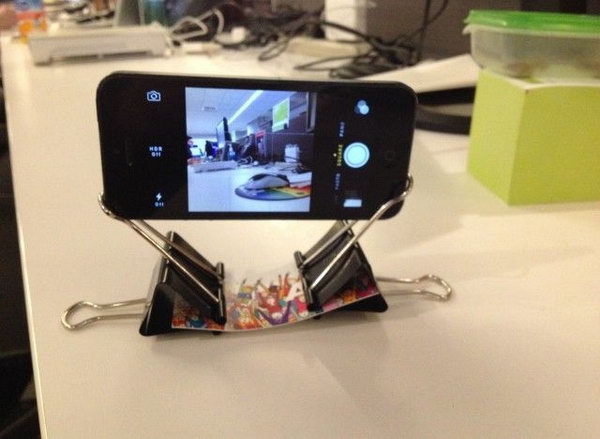
4. Binder Clip iPhone Stand
Tools and materials needed:
- 2 big clips
- 2 small clips
- 1 rubber band

Everyone has binder clips and rubber bands laying around the house, so it’s super convenient.

This will be the base of your tripod.

Keep in mind that this will help to position your phone only vertically.

We’re almost done!

This will keep your phone in one position and make sure it won’t slip.

Thus, you get a very comfortable and steady makeshift iPhone tripod. I love this method because it can literally be done in 10 seconds!
5. Plastic Card Stand
Tools and materials needed:
- 2 Plastic cards
- Scissors or box cutter

For this DIY iPhone stand, you have to take plastic cards you don’t need.

This will ensure that the cuts are as symmetrical as possible. The width of the cut depends on the thickness of your iPhone.

This will ensure that the cuts are located as symmetrically as possible. The width of the cut depends on the thickness of your iPhone.

It doesn’t really matter which of those you use, as long as you cut carefully.

Remember, the steadiness of your future tripod depends on this step.

That’s it! Your stand is ready.

The best part of this stand is its portability. You can simply carry these two cards in your wallet and take them out wherever you want to. Moreover, it’s a good video tripod that will help you record good travel videos without a stabilizer.
1 Minute iPhone Stand DIY Ideas
All of the iPhone stands DIY ideas in this article offer fairly quick tripod options. However, some of them can be done in under a minute! Although they are really quick to make, rest assured that they will provide stable support for your camera and high-quality iPhone product photography.
If you want to take high quality iPhone photos, join this professional photography course by Emil Pakarklis. He will show you that you don’t have to buy expensive DSLR for beautiful photos.
1. DV Case iPhone Stand
Necessary materials and tools for this homemade iPhone stand:
Don’t have much time to create a stand? Then pay attention to this idea. You don’t need to cut or glue anything. All you need is a mini DV case and 10 seconds to set it up. The best part about this DIY iPhone stand is portability. You can easily throw it in your pocket and use it as a carrying case for your earphones, in addition to using it as a stand.
2. Cardboard iPhone Stand

Tools and materials needed:
- A piece of durable cardboard
- Scissors or office knife
Here is another simple iPhone stand DIY idea. You can use absolutely any box that you have at home, for example, packaging from your phone or other gadgets. However, be attentive and make sure that the cardboard is really durable. You should not use cardboard that is too soft (for example, cereal boxes). In addition to simplicity, a significant advantage of such a tripod is its compactness and mobility, as it is easy to fold.
3. DIY iPhone Stand Binder Clip and Business Card
Tools and materials needed:
- Clips
- A card
This is another simple and convenient option for you. Some people may think that it is rather unreliable and unstable. I know that it looks really wobbly, but that is not true. Try to make this DIY iPhone tripod and see it for yourself!
4. Paperclip iPhone Stand
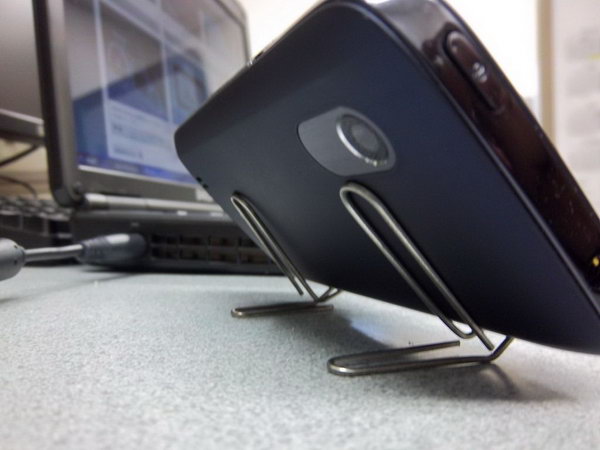
Tools and materials needed:
Here is another incredibly cheap and easy option for you. All you need is to bend two paper clips so that they form an improvised stand. You can use this stand to view videos on the internet. Make sure that the clips you have can handle the weight of your iPhone model to avoid any damage!
5. Plastic Cap DIY iPhone Tripod

Tools and materials needed:
- Plastic cap
- Knife or box cutter
To create this iPhone tripod, take an aerosol cap and cut it vertically twice. Repeat the actions on the opposite side of the cap. Fold two flaps outward, as much as possible. Now, you have a homemade iPhone stand. If you want to turn it into a tripod, cut a hole at the bottom of the cap. This hole should be of the same size as the neck of a plastic bottle. Grab a bottle and put the cap on top of it.
6. iPhone Flexible Tripod

Tools and materials needed:
- MDF piece (3 mm)
- Glue for wood
- A drill
- A table saw
- A piece of wood
- Glue clamps
- A screwdriver
- A screw terminal
- Small wood screws
- A stern electric wire 2,5 mm
All fans of Goby tripods will definitely appreciate it. Unlike a popular expensive model, this DIY iPhone tripod is free. Several simple steps will help get a desirable stand. First of all, prepare the above materials and tools. Next, make a large ledge so that it will be able to support a smartphone. Give a piece of MDF a square form drill holes. Attach a prepared piece of wood to the MDF with help of glue. Make the markings on these two pieces and cut along them using a saw. Then, take a few screws and attach the screw terminal on the back of homemade iPhone stand. Now you need three pieces of an electric wire. Put them into this terminal. An elastic band will provide a tripod with nice flexible legs.
- View more about the best flexible tripods that you may buy under $100. Professionally designed iPhone tripods for amazing time-lapses.
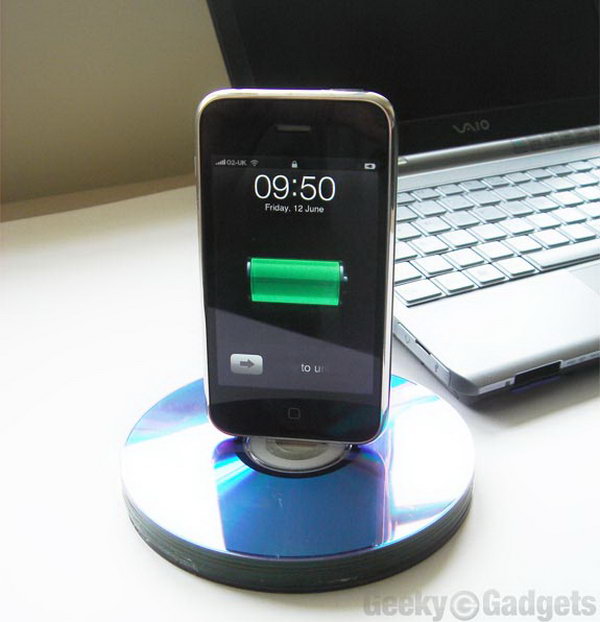
7. Recycled CD iPhone Dock

Tools and materials needed:
For this idea, just take 4/5 more CDs than the height of phone charging connector on the USB cable. Prepare a Dremel or any other similar tool and cut the discs. Thus, you will be able to jab a connector through the hole. Finally, glue all parts together to work with this iPhone tripod.
8. iPhone Packaging Vertical Stand

Tools and materials needed:
- A ruler
- USB
- Utility knife
- Double and single-sided tape
- Black packaging plastic
Making a fantastic tripod at home in 30 minutes. I love this idea because it recycles iPhone packaging that you would throw away otherwise. Take a plastic holder, cut it into two parts, one of which should be glued to the front. Stick a small piece of foam to it so that it will be comfortable to press the home button while using this iPhone flexible tripod.
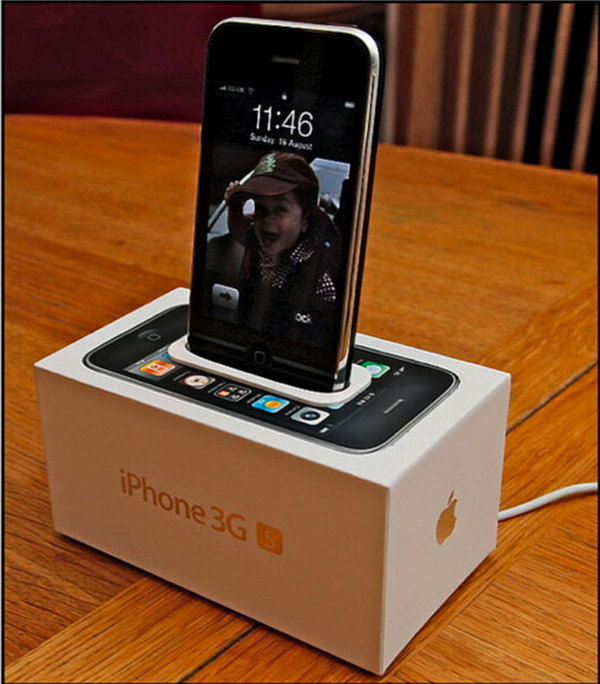
9. Box Dock
Tools and materials needed:
- Glue
- iPhone box
- A dock plate
Check out one more fantastic iPhone packaging tripod idea that doesn’t require too much time and too many tools. Take a box that your iPhone came in. Put some glue and a bit of trimming on the plate bottom, so that a dock connector sits square. Mount your phone and enjoy.
10. iPhone Packaging Horizontal Stand
Tools and materials needed:
- Plastic iPhone packaging
- Box cutter
To create this iPhone mini tripod, you just need to cut the plastic packaging that your phone came in. This idea allows for horizontal phone positioning. Remember, a high surface, such as a table or a stack of books, is needed for the proper functioning of your tripod.
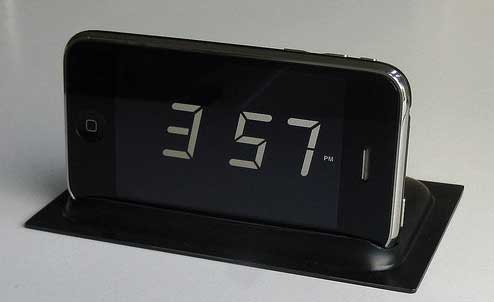
11. Book Support Stand
Tools and materials needed:
This is another very simple and quick variant. You can make this DIY iPhone tripod from cheap and available materials. Another advantage of this stand is rubber feet, as that will protect your phone from scratches. This stand is very compact, so you can easily put it in your pocket. It will enable you to use this handy tripod anywhere.
Creative Homemade iPhone Tripod Ideas
Get your creative iPhone stands going with these homemade iPhone tripod ideas that are truly unique. Remember, these ideas are for iPhone cameras, they can’t be used as backpacking tripods.
12. Pencil Stand
Tools and materials needed:
- 8 rubber bands
- Needle nose pliers
- 2 paper clips
- 6 pencils
Take two pencils and bound them together in order to make a horizontal support. You may need even more pencils to create a triangle. Use bent paper clips as the additional guard rail. Be ready to use more rubber bands to make this iPhone stand DIY more stable. Now just place your phone and enjoy the shooting process.
13. Bottle Tripod

Tools and materials needed:
- A bottle
- Box cutter
- Any wide bottom to prevent falling
- A hack saw
Do you want to know how to make a tripod for iPhone in order to take shots at home? Then look at this brilliant model. Glue a bottle to the chosen wide bottom. Mark the width of the phone on the plastic surface, and then cut it! Take into consideration the angles you want to position your phone at. This tripod lets you take pictures in a horizontal, vertical or overhead position.
14. Chopstick iPhone Stand
Tools and materials needed:
Getting a stylish DIY iPhone tripod is a matter of several minutes. Just take 13 chopsticks and glue them in a U shape. Choose the most comfortable angle. Afterwards, add a broken chopstick as a bolt.
15. Plexiglass iPhone Stand

Tools and materials needed:
- Plexiglass
- Glue gun
- A ruler
Here you should start by heating the glass with a heat gun in order to bend it. Just move it back and forth. Feel free to choose the angle that will be comfortable for you while using DIY iPhone stand. Plexiglass should get quite cold while you are keeping the stand in place. Isn’t it great to get a stylish tripod just in 10 minutes? The best thing about this solution – it doesn’t look DIY, it looks like it an expensive stand bought from a store. All in all, you need minimum skills and materials to create this top-class stand.
Fun Homemade iPhone Tripod Ideas
What do you imagine when thinking about a DIY iPhone tripod? Do you think of a boring or dull construction? Just look at the following ideas and see how interesting and unique the tripods can really be. So, if you want a tripod under 100 dollars, check out these ideas.
16. LEGO Stand

Tools and materials needed:
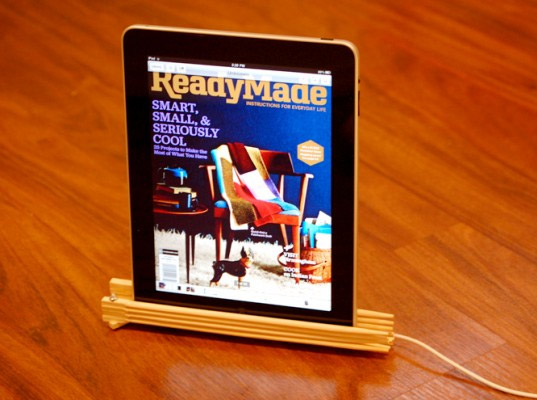
Most people have LEGO at home, which means there is no need to waste money on materials to create such a homemade iPhone tripod. As a result, you'll get a colorful and impressive stand. Moreover, you don’t need to follow specific steps to make it. Just devote some time, use your imagination and skills and create a unique LEGO stand. Keep in mind, it can be used for iPads as well.
17. Dino iPhone Tripod
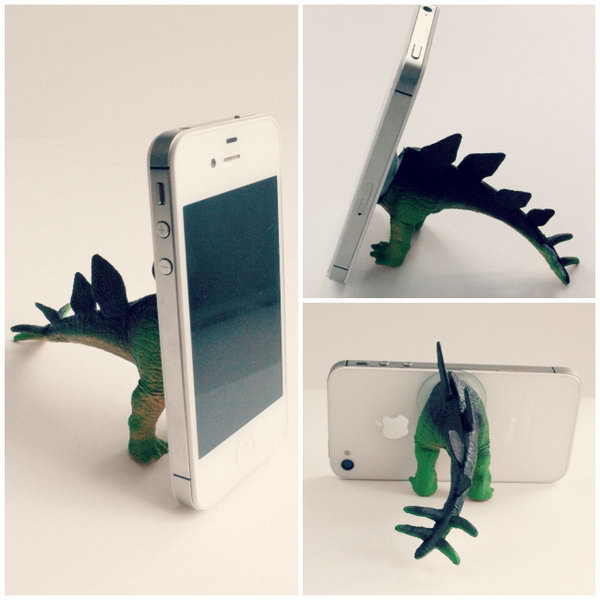
Tools and materials needed:
- A paint brush
- Box cutter
- Dinosaur toy
- Caulking
- A suction cup
Just look at this fantastic DIY iPhone tripod. Isn’t it great? You can do it at home fast and easy. First of all, prepare a dinosaur toy. Add some caulking to stabilize the tripod. But don’t overdo it with the caulking. Use a brush to clean the surface. It will be better to add some caulking to the bottoms of a tail and feet. Otherwise, your phone will fall. Finally, let the dino dry for a couple of days and get a really unique tripod.
18. Wine Cork iPhone Dock
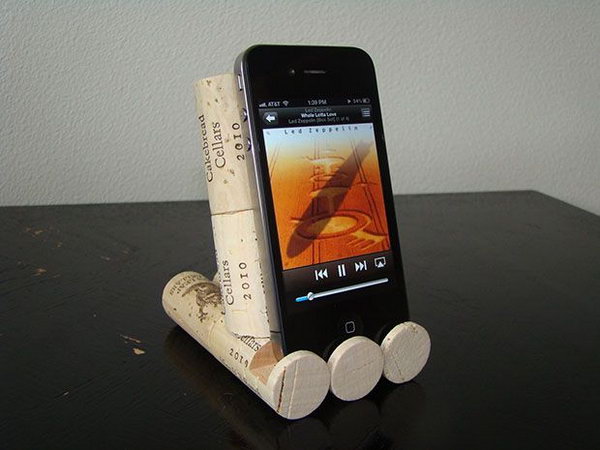
Tools and materials needed:
- Glue
- Wine corks
- Box cutter
You’ll definitely like this table top tripod for iPhone if you admire unique things. Just take some wine corks and glue them together. As you see, no special tools are involved, but the result is really cool.
So, DIY iPhone tripod construction can be both interesting and useful. Such stands can’t compete with expensive models, but they can be useful if you need a tripod fast and now. Study all above-mentioned ideas and choose the one you like the most. Spend some time and get unique support for your iPhone.