Asymmetrical balance in photography is a key feature of professional compositions, where photographers carefully select elements to convey the image’s message and intent while ensuring they complement each other without overpowering. That said, balance doesn’t always refer to combining identical elements.
It can also be achieved by mixing different, sometimes opposite elements, as seen in countless asymmetrical balance photography examples. Such a dynamic composition guides the viewer’s glance from element to element despite all of them having different visual weights.
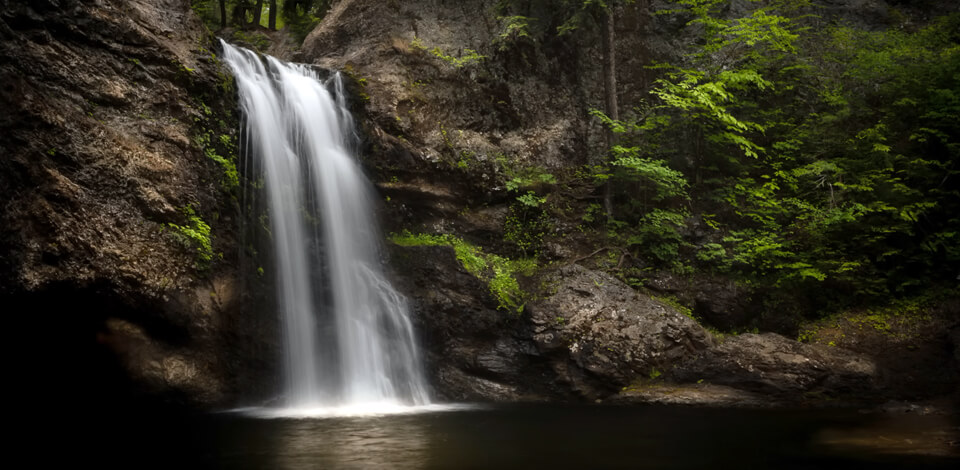
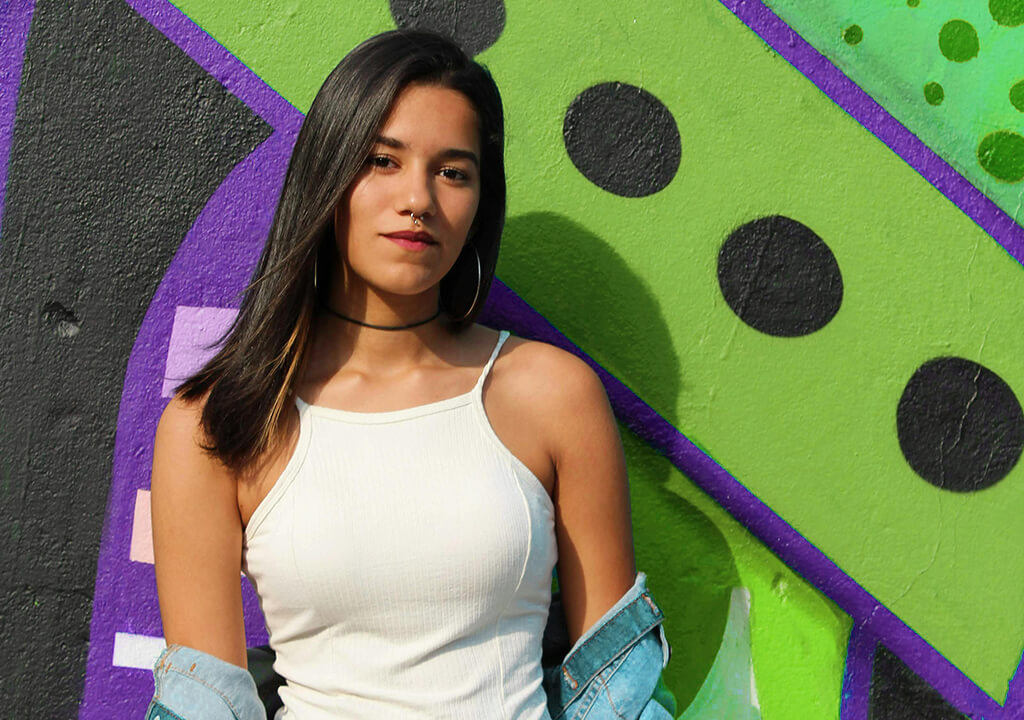
Asymmetrical balance is created by including elements with distinct properties. For instance, part of the shot features sharp, bright shapes, while another area has smooth, dark elements. Even though the two halves are very visually distinct, they don’t overpower each other, making it seem like they fit together.
In contrast to symmetry in photography, which features two parts with identical or very similar visual elements, asymmetrical balance capitalizes on the differences. The bigger the contrast between elements, the more effort it takes from the photographer to find the optimal match.
“Asymmetry makes my shots more energetic. By arranging the subjects off-center, I establish a natural flow that captures the viewer’s attention.”

A big element that takes up a lot of space in a shot has to make up for a smaller but visually impactful element (for example, a vibrant color or prominent shape). Whereas symmetrical balance relies on uniformity and a natural flow, asymmetrical balance thrives on diversity and harmony.
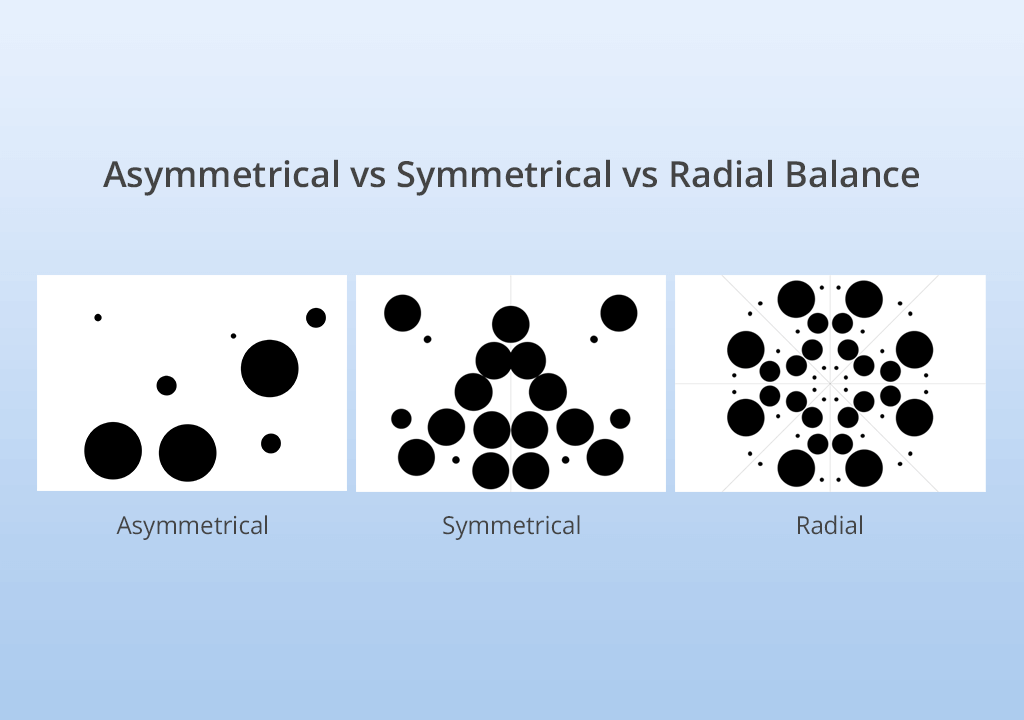
Balance is an essential part of photography that determines the viewer’s perception of a photo as well as its composition. All balance types – symmetrical, asymmetrical, and radial balance come with their unique features, affecting the atmosphere and flow of an image.
Characteristics. Uneven visual weight across the shot; it achieves a dynamic and eye-catching composition.
Mood. Natural, creative, and evokes contemplation.
Genres. Frequently used for urban, landscape, and portrait photography.
Characteristics. Even visual weight on both parts of the shot; conveys harmony and order.
Mood. Balanced, calm, and professional.
Genres. Standard for architectural, nature, and formal portrait photography.
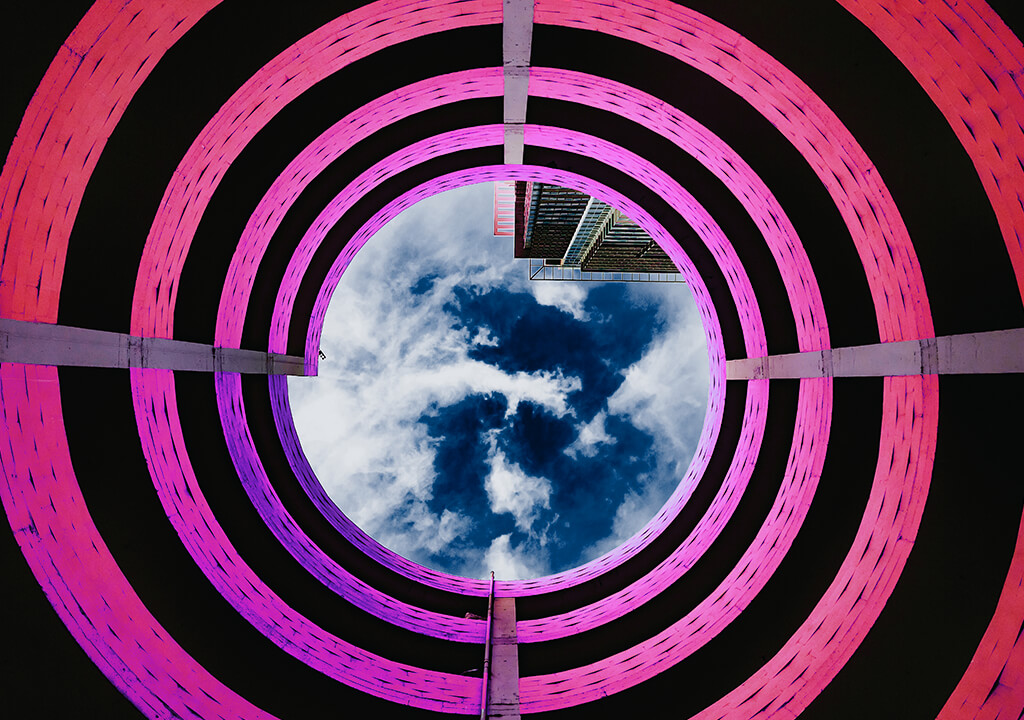
Characteristics. Elements radiate out from a central point, directing the viewer’s gaze eye around the shot.
Mood. Focused and intricate.
Genres. Used for macro, abstract, and several subgenres of architecture photography.
So when should you use different kinds of balance?
| Genre | Symmetrical | Asymmetrical | Radial |
|---|---|---|---|
|
Portrait
|
✔️
|
✔️
|
❌
|
|
Action
|
❌
|
✔️
|
❌
|
|
Product
|
✔️
|
✔️
|
❌
|
|
Nature
|
✔️
|
✔️
|
❌
|
|
Macro
|
❌
|
❌
|
✔️
|
|
Street
|
❌
|
✔️
|
❌
|
|
Abstract
|
✔️
|
✔️
|
✔️
|
|
Landscape
|
✔️
|
✔️
|
❌
|
|
Architectural
|
✔️
|
✔️
|
✔️
|
If you look at examples of asymmetrical balance in photography, you’ll notice that such images tend to feel messier than ones with symmetrical balance. That said, this technique grants you a lot more freedom when it comes to photography composition since you don’t have to achieve perfect symmetry.
You can also use it to avoid the monotony that tends to rear its head when a photoshoot only features shots with perfect symmetry.
“Asymmetrical composition can frequently look more natural. I employ it to evoke emotion and guide the viewer across the frame.”
In contrast to symmetry, which strives to assign all elements an equal visual weight, asymmetry highlights differences to create a more captivating and dynamic composition. As such, one element can receive most of your attention instead of having it be split between two equally eye-catching objects.
Asymmetrical balance is very aesthetically pleasing to many people since it comes across as more natural than symmetrical balance. Symmetrical balance is great at evoking a sense of perfection, but that rarely reflects our real world since perfect symmetry is rather rare in nature.
The task of creating an asymmetrical balance can sound even harder than taking a symmetrical photo, but it’s not as complicated as it may seem. Likely, you’ve already been snapping asymmetrically balanced pictures without even recognizing that fact.
There are plenty of photography tips for beginners for you to follow to add a balanced, asymmetrical appeal to your images. Remember that a balanced photo draws an equal amount of attention to all its parts. Along with the FixThePhoto team, we covered all the ways to achieve an asymmetrical balance.
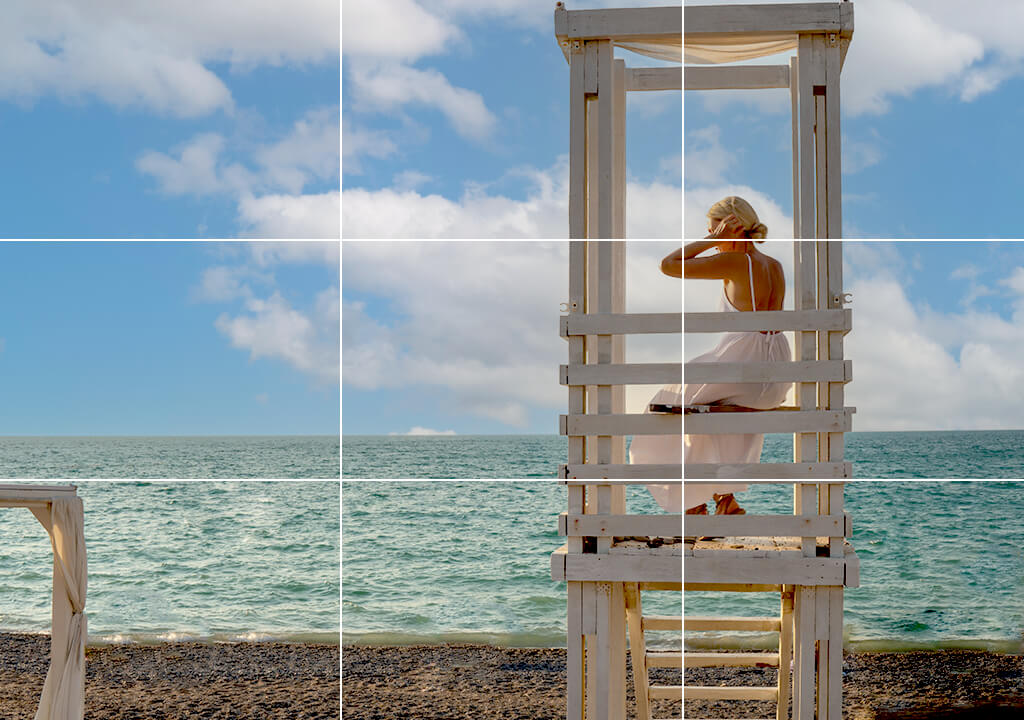
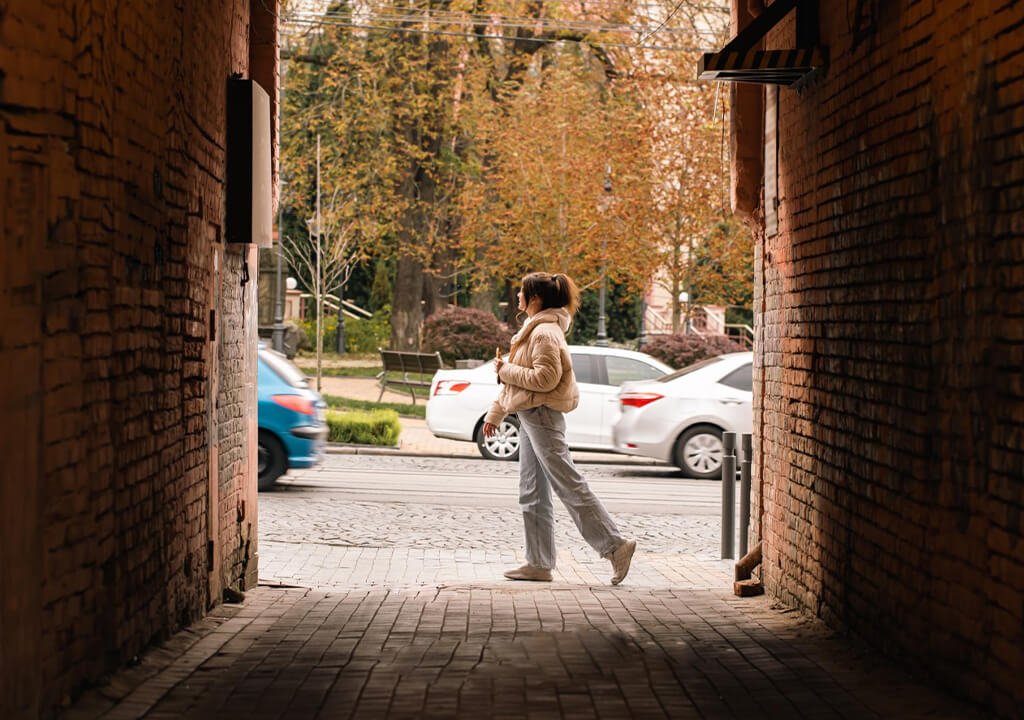
The rule of thirds is a fundamental photography technique that is the go-to for everyone interested in creating asymmetrical balance. If you divide the shot into a 3x3 grid, you visualize four intersecting points. Your goal is to ensure the subject is framed off-center.
Such a position naturally attracts the viewer to the focal subject while balancing the rest of the shot with less visually weighty elements. It’s a straightforward but incredibly effective technique for achieving asymmetrical compositions.
Negative space, which includes completely or mostly empty areas around the subject, is very useful if you’re looking to recreate different asymmetrical balance photography examples at home.
If you place the subject in one part of the shot and leave the rest empty, you’ll notice that the visual weight of the focal point will be counterbalanced by the space around it. However, it’s also important to remember that negative space doesn’t necessarily need to be empty. You can include subtle textures or smaller elements to add depth without disrupting the balance.
You can help establish asymmetrical balance by featuring contrasting or complementary tones to attract the viewer’s eyes. Combining rich hues with muted colors or adding contrasting elements off-center tends to create dynamic shots.
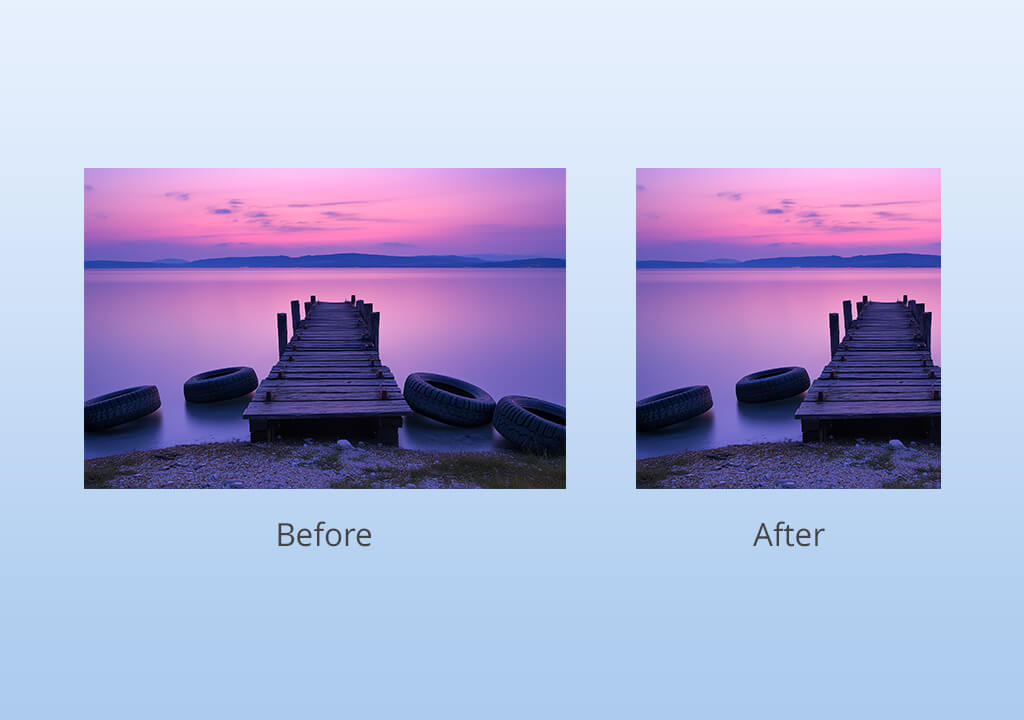
For instance, you can place a bright subject against a dimmed backdrop to make the photo more visually compelling without losing balance. Gradual color transitions, which you can see during a sunset, are also very useful for achieving natural asymmetry without any tricks or props.
Textures and patterns can be great for adding contrast and interest to a shot. I like to mix elements with various textures, for instance, smooth and rough surfaces or detailed and basic patterns, to make the composition deeper and more visually striking. As an idea, you can contrast a textured door against smoother surroundings to achieve an eye-catching asymmetry.
I enjoy mixing elements of different sizes to create asymmetry. Bigger subjects tend to have more visual weight, while smaller ones act as a poignant juxtaposition. By properly arranging such objects, I ensure they make my photos dynamic without competing against each other.
Framing in photography deals with dividing the shot into elements, gauging their visual weight, and tweaking the camera angle to receive a balanced composition. Bigger objects, eye-catching textures, or rich colors are heavier, while smaller or neutral elements are lighter. Adding elements off-center or to the foreground strengthens asymmetry.
I believe that conceptual meaning can be very important for determining the visual weight of an element. Colors, emotions, and symbolism are essential aspects to consider when examining different asymmetrical balance photography examples and devising ideas of your own.
Warm hues like red or yellow are heavier, while cooler tones like blue are lighter. Emotional elements, be it a silhouette or a symbolic subject, add depth and should be balanced around when planning the rest of the composition.
If you fail to properly balance your asymmetrical shot, it can still be fixed during post-processing. Even though framing is very important, you can fine-tune it in photo editing software for PC. However, remember to avoid compromising the photo quality in your quest to find the optimal balance.
You should start by removing all distracting elements. Cropping lets you get rid of improperly framed objects to tidy up the shot. Moreover, it helps you follow the rule of thirds if you fail to do so initially.
However, remember to save the initial aspect ratio of your image unless you have a specific reason why you want to change it. If you were shooting in RAW, the resolution should be high enough to accommodate different cropping needs.
Cropping deletes unwanted elements at the edge of the shot and can be used to adjust the aspect ratio, but it won’t change the balance between the objects that are left. That part requires more intricate adjustments, be it color, brightness, or clarity.
For instance, if you want to lower the visual weight of an element, you can decrease its saturation or boost its brightness with the help of a brush tool. Meanwhile, if you want to make a large area of the photo more subtle, I suggest using the blur feature. It can also be useful for smoothing a textured object to counterbalance it against the main subject.
Tweaking contrast helps if you’re trying to create asymmetrical balance in photography based on the brightness vs darkness juxtaposition.
If the dark area is too big and dominates the light one, you can consider employing the Curves feature to boost highlights and restore balance. Meanwhile, if you want to add more negative space to counterbalance a visually heavy subject, a darker backdrop is what you need.
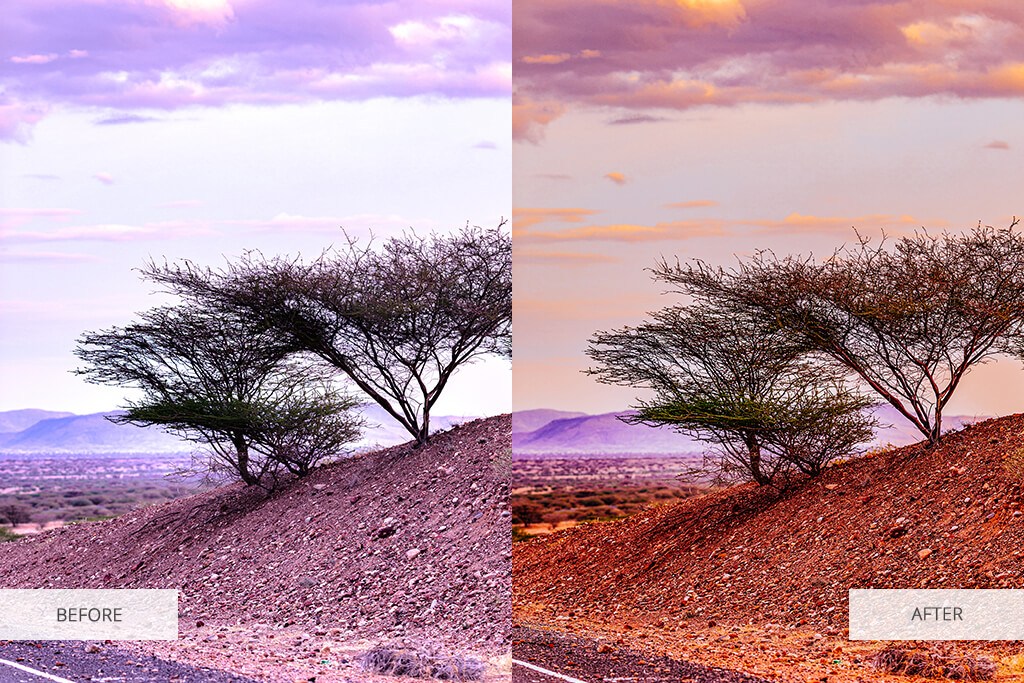
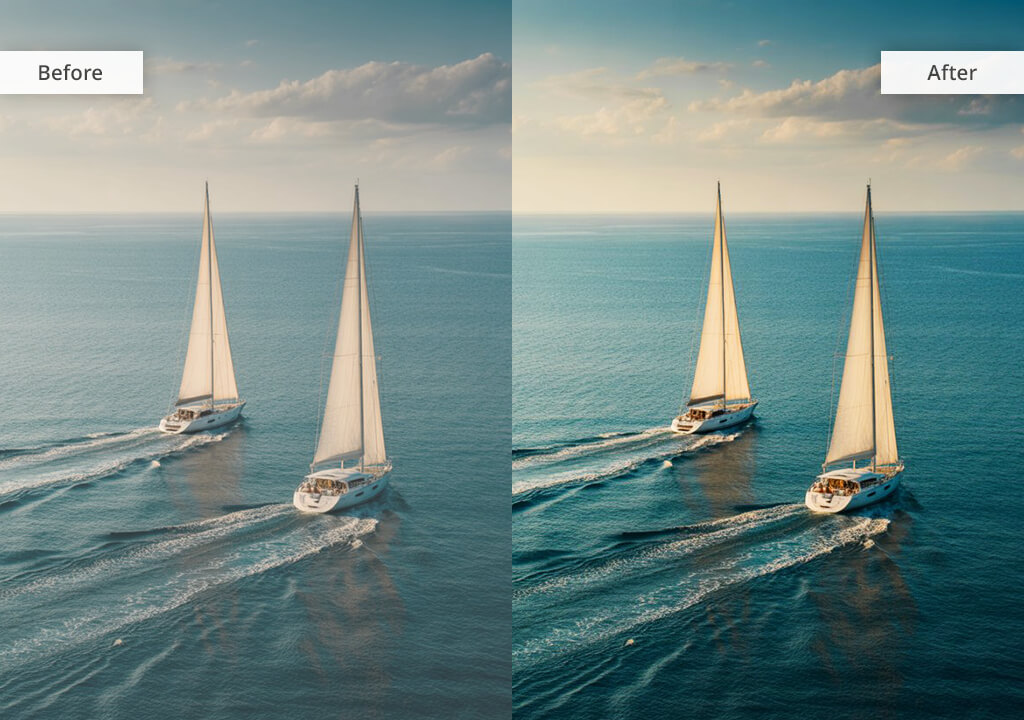
If you’d like to achieve balance by relying on colors, you’ll have to perform color correction. By tweaking the tone, saturation, contrast, and brightness, color grading can dramatically alter the look and balance of an image. It can help achieve a cinematic look, adjust the color temperature, or change the entire color palette, affecting all the elements in the shot.
“Finding asymmetrical balance often comes down to intuition. I combine elements of various weights and follow the natural flow of the composition.”
You can also go for a more direct approach to achieve asymmetrical balance in your photos. Possible techniques include deleting entire objects from the shot, swapping the background, recoloring elements, making the image B&W, applying a vignette, and many others.
However, if you look at examples of such asymmetrical balance in photography, you’ll see that they often don’t look as natural or lack their original appeal.


These presets can make your images look more professional and eye-catching in only a couple of clicks. Use them to enhance colors, fine-tune the contrast and saturation, add a bit of texture, and make other adjustments with minimum effort. They also include a variety of effects that can add uniqueness to your photos.


