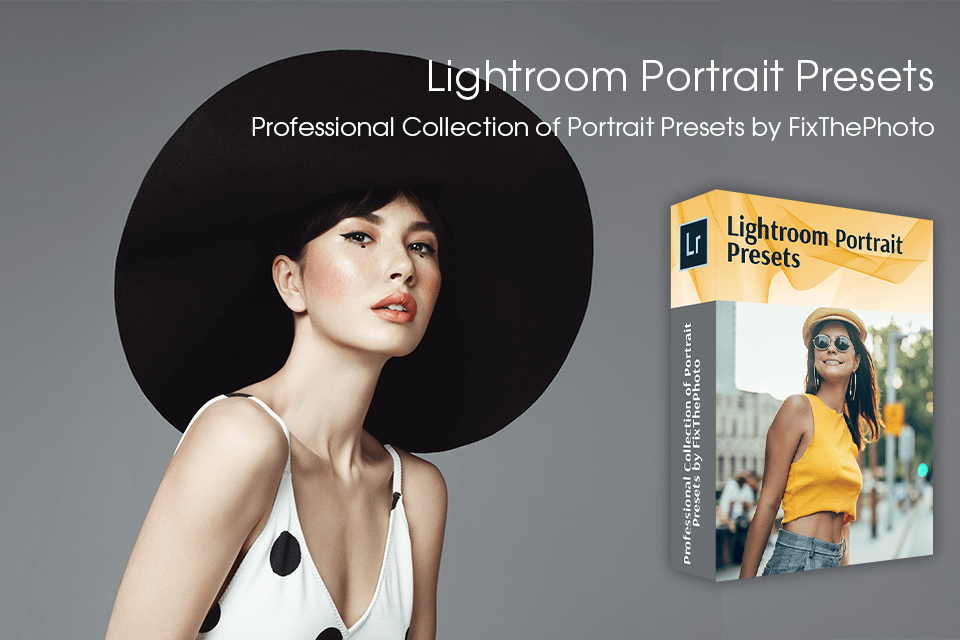
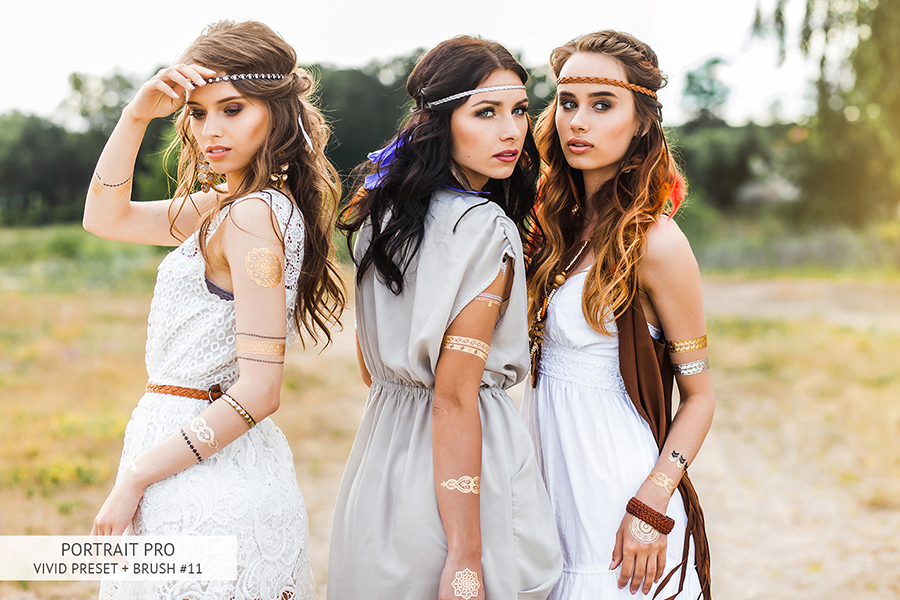
Even the most high-quality portraits taken by expensive equipment require further editing. For $9.99 a month, Lightroom offers many simple and intuitive tools that allow beginners to perform many tasks associated with enhancing portraits quickly and easily. You can fix any lighting issues, remove blemishes, improve composition, and enhance colors to your taste.
I’ll show you how to edit portraits in Lightroom in 15 easy steps. No matter how much Lightroom experience you have, this guide will let you make portraits pop and get that WOW effect in several clicks.

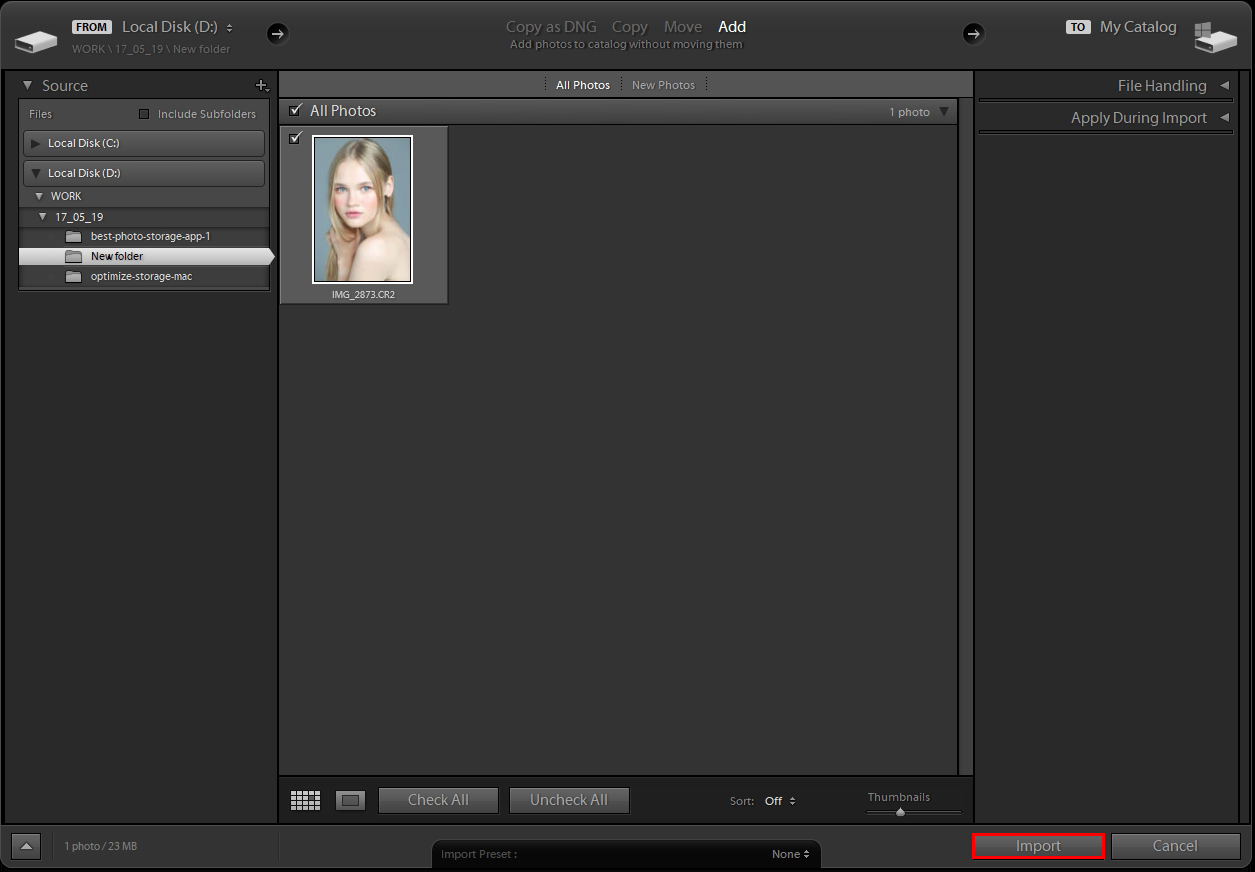
The first step of Lightroom portrait editing is launching the program and importing RAW files into Lightroom. Select "Import" in the Library module and click on it. Go to the "Source" panel, find the folder with the necessary photos and select it.
Note that if the folder contains subfolders, tick the “Include Subfolders” field. This way, you can see thumbnails of pictures. If you want to make Lightroom faster make sure you use the "Add" option, not "Copy". Otherwise, there will be photo duplicates that will waste the program’s extra resources.
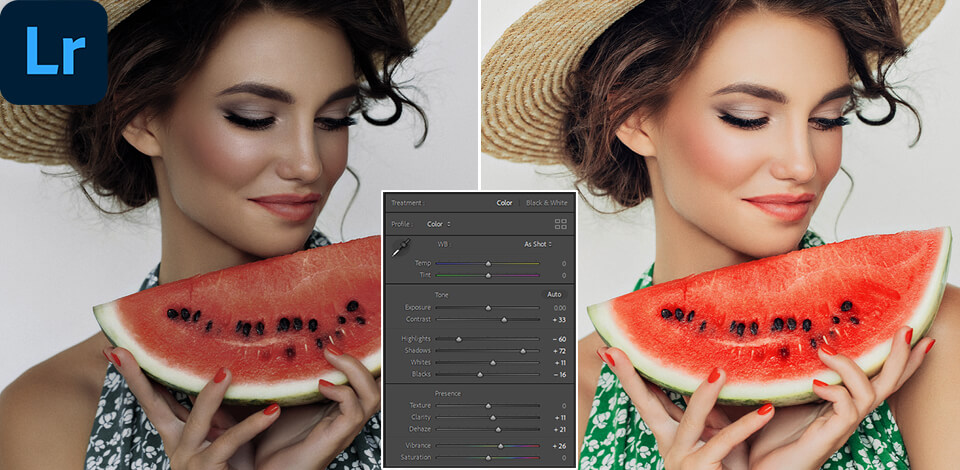
A convenient trick when editing portraits in Lightroom is to install Lr presets on Mac & Windows and apply them while importing images. Their effect can further be corrected. You can adjust the light by reducing or increasing its amount, eliminate redness, brighten the darkened parts of a photo, change the intensity of shades, adjust the skin tone, lightening it or making it softer, etc.
To use the preset during import, go to the right panel of the program, find the tab “Apply during import” and choose the desired preset. Go to the Develop module after you have imported the necessary file. This is especially relevant when working with a large number of photos, and you want to batch edit in Lightroom much quicker.
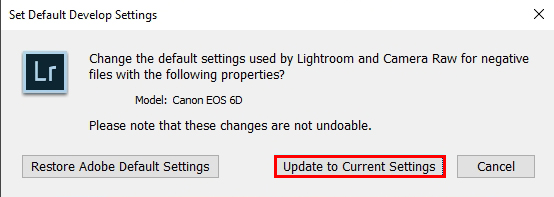
You need to perform absolutely different actions for pictures taken by different cameras for portraits. Open the file using the default settings, press and hold the Alt button to see available options in the Develop module.
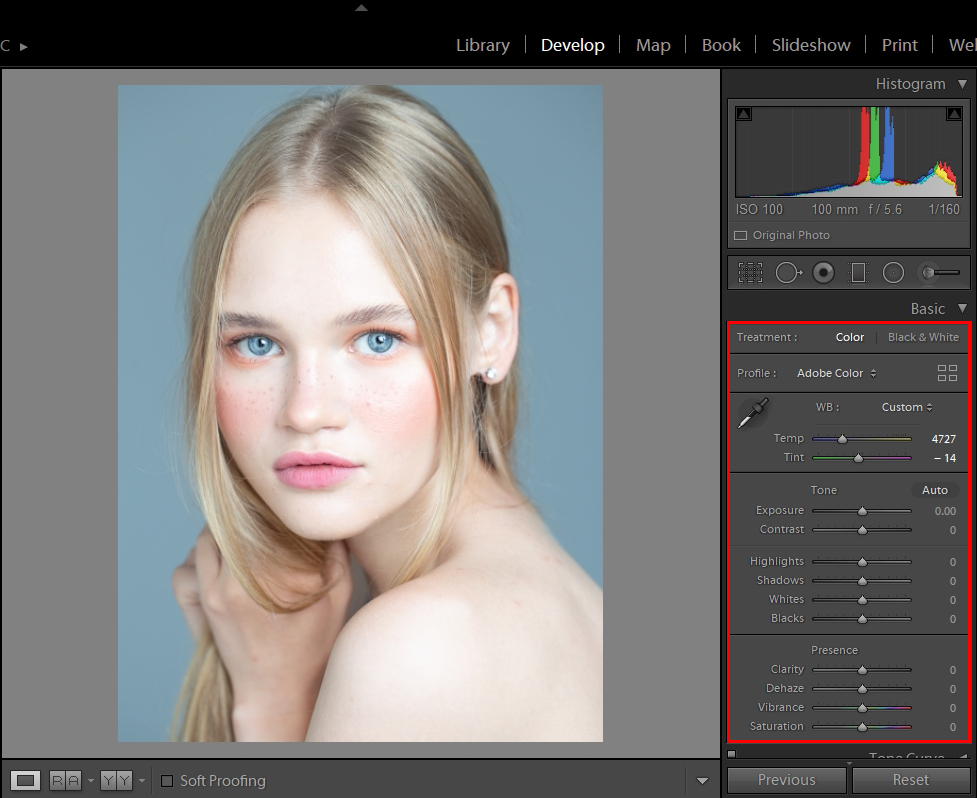
The White Balance tool (keyboard shortcut “W”) will help you fix the flaws connected with incorrect shades. It looks like an eyedropper and is very convenient to use.
Select the tool, find the area you want to change and apply it. For example, you can remove the gray tint in this way. If the picture is dominated by too cold tones, click on the temp slider and move it towards the yellow color. If your photo has a noticeable green tint, move the slider towards magenta.
Pro tip
Use keyboard shortcuts to improve the efficiency of Lightroom portrait workflow. Getting a keyboard cover skin is one of the best ways of streamlining your editing process.
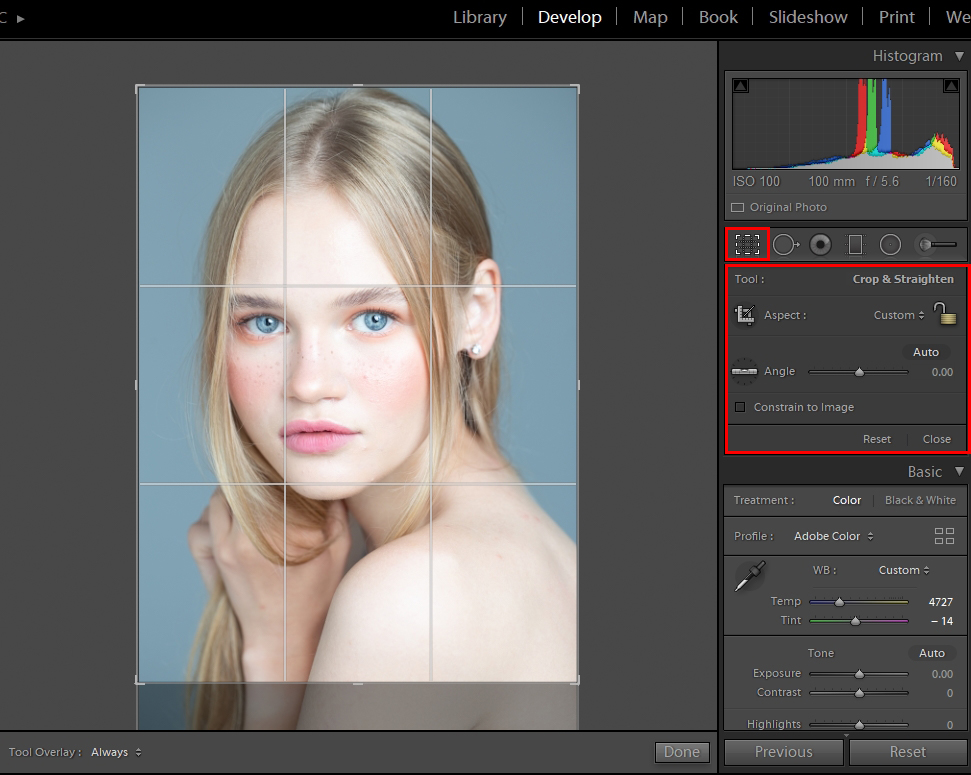
Cropping plays a huge role in the portrait edit. This tool eliminates compositional flaws quickly and easily.
You can emphasize the face of the model and remove unnecessary details with its help. Find the tool in the “Basic” part of the develop module, right under the Histogram or simply press and hold the "R" key.
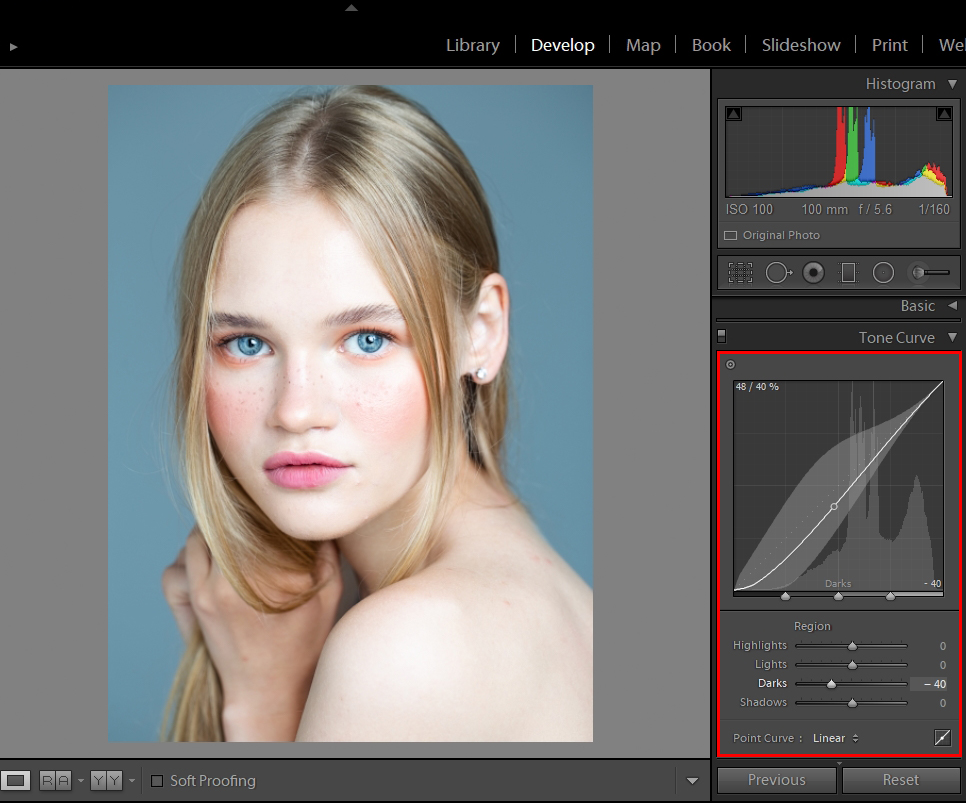
This is the main panel for managing colors. The lower left corner is responsible for the shadows. The upper right corner deals with highlights. The middle part of the panel is responsible for mid-tones.
The properly adjusted curve will add depth to your image. The tool may seem difficult to use, but it is quite easy to learn how to work with it. All that is required from you is to know clearly what exactly you want to correct.
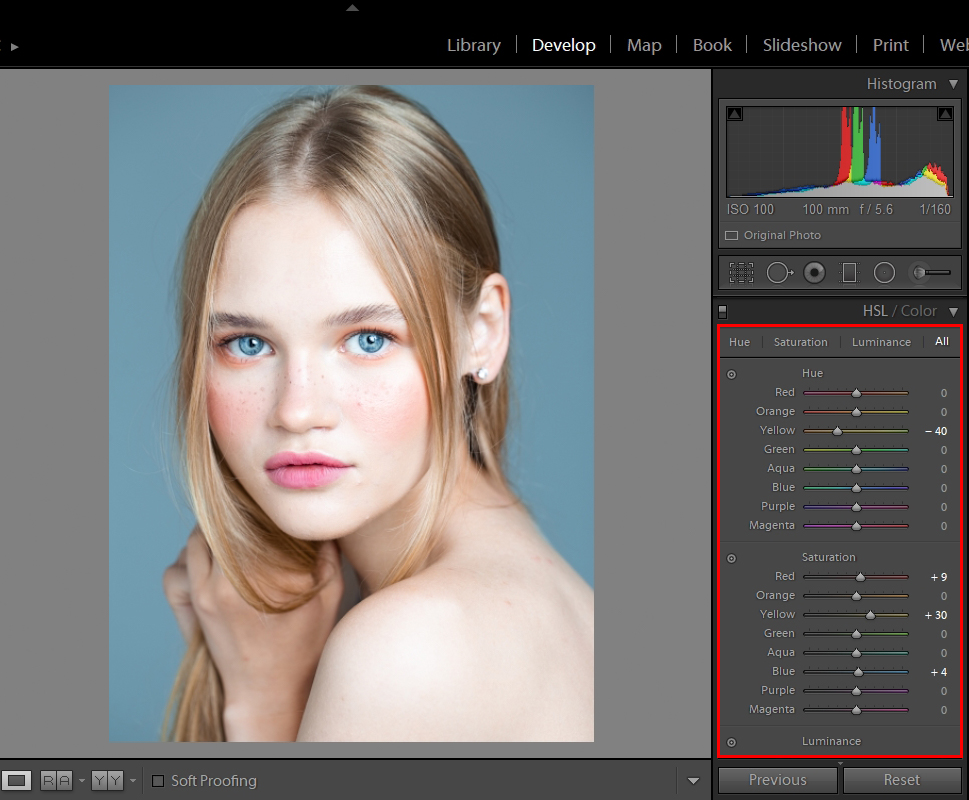
The HSL panel is one of the best tools for changing colors and enhancing your portrait photography ideas. To apply the tool, use a few sliders, such as “Saturation”, and / or “Luminance” and “Hue", and change the image according to your goals.
The "Hue" sliders allow you to move hues around the color circle. “Saturation" will determine the intensity of colors and shades, and "Luminance" will be responsible for brightness.
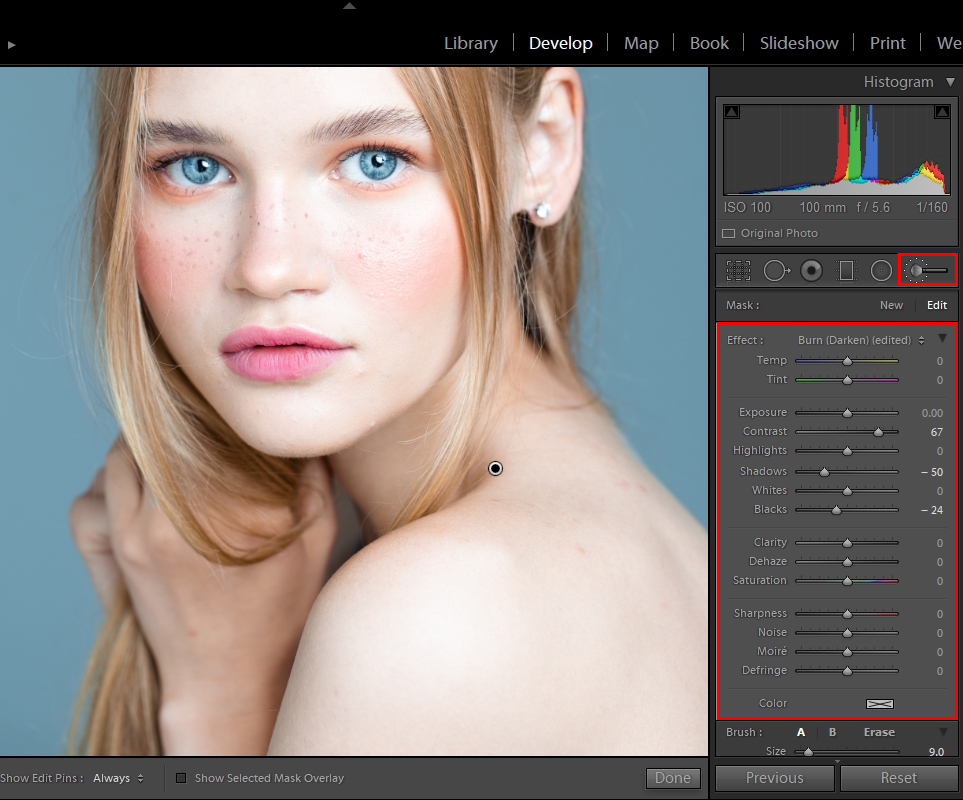
If you need to change specific areas when editing portraits in Lightroom, you should use brushes. They will help you lighten or darken the desired parts of the picture. You can use the default brushes, or install Lightroom brushes from a third party source.
In order to apply the brush properly, you need to select the correct settings. Specify a high feather value to achieve the most natural effect.
Use a low opacity value to apply a brush gradually. Select the necessary size and process the chosen area.
Pro tip
All professional retouchers use tablet for photo editing when improving portraits in Lightroom. Wacom Intuos Pro is a great option I recommend to invest into.
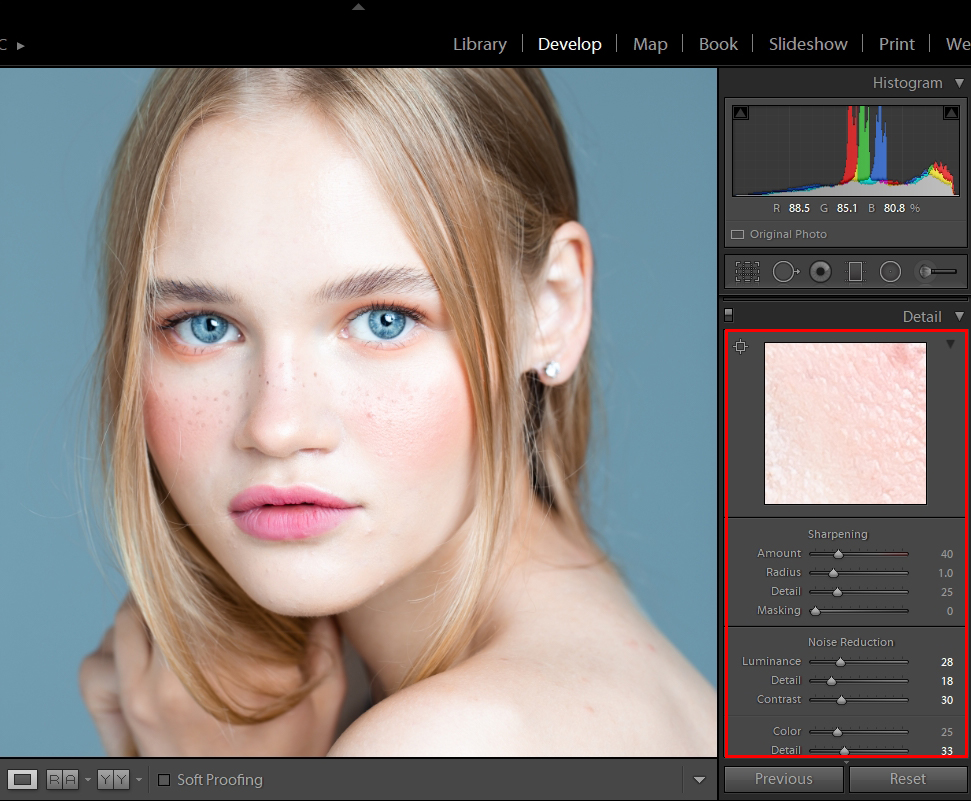
The amount of digital noise depends on the ISO settings and the sensitivity of your camera. Some photographers prefer to turn it into an element of photo styling.
However, regarding portraits, I recommend learning how to remove noise in Lightroom to increase the quality of your portrait. Open the "Detail" tab, select the "Luminance" slider under "Noise" and move it to the right to reduce the amount of digital noise.
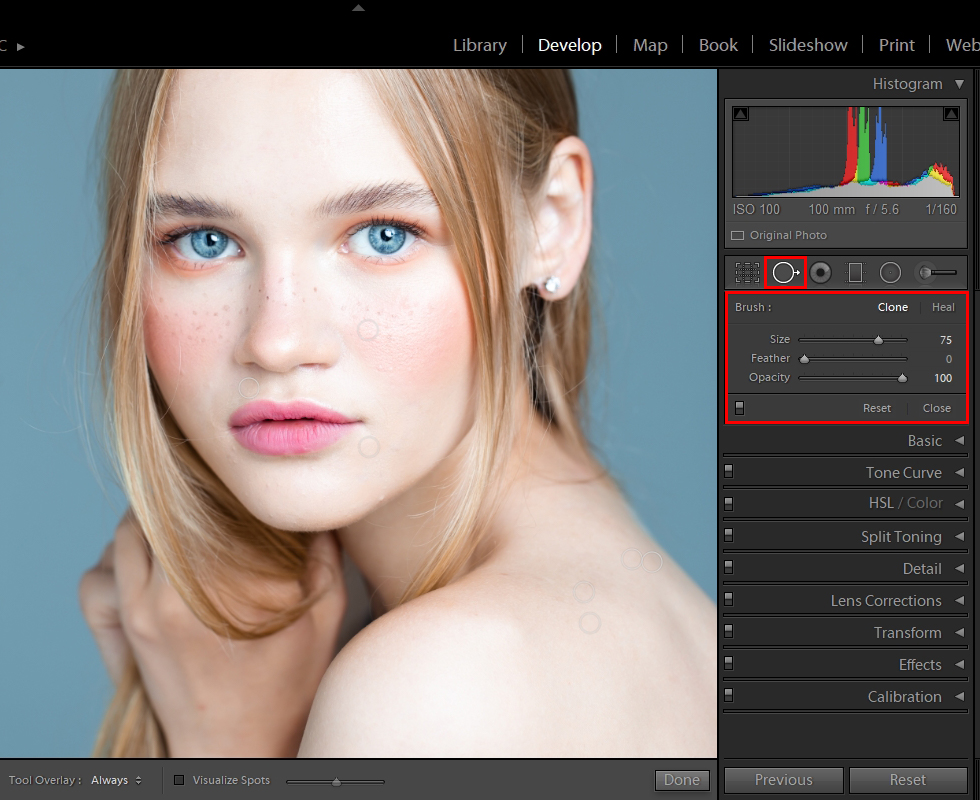
Remove spots from the skin using the Spot Removal tool. Make sure it is set to Heal. Go to the tool parameters, which are located on the right side and check it.
Adjust the size of the brush tip using the square bracket keys (] and [). It should be slightly larger than the spot you want to remove when editing photos in Lightroom. Get rid of it by painting over or dabbing.
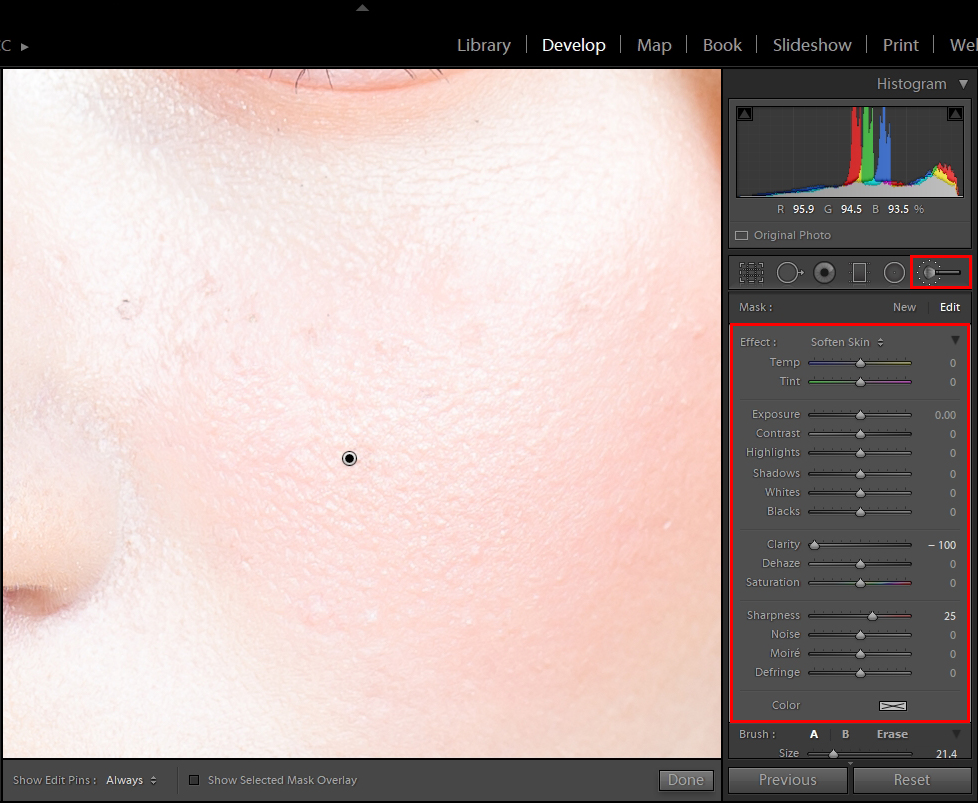
Lightroom’s tool for skin softening is another way to eliminate the flaws in portrait photography. Find it in the “User” settings of the program's brush.
Select the desired effect and brush over the skin. Adjust the sharpness and clarity to achieve the softest and natural look. In addition, apply a mask to define clear boundaries of areas with skin.
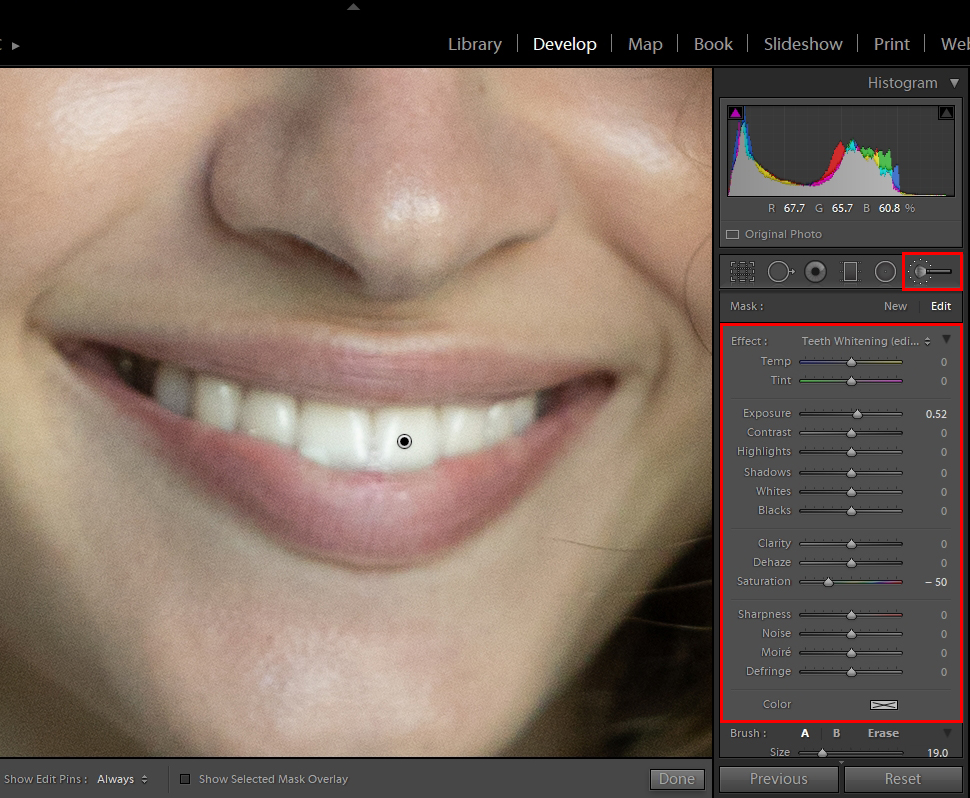
Use the Adjustment Brush Tool to whiten teeth in Lightroom. It has many useful pre-installed functions. Select this tool, open the Effect dropdown and find the teeth whitening effect.
Brush over the teeth. By the way, this editing technique does not require extreme precision. Just select “Range Mask: Color.” Do not be afraid to go beyond the contours. The program will determine them automatically.
Pro tip
Extend the program’s functionality by using Lightroom plugins. Portraiture Pro 3 plugin will be the most helpful for editing portraits in Lightroom.
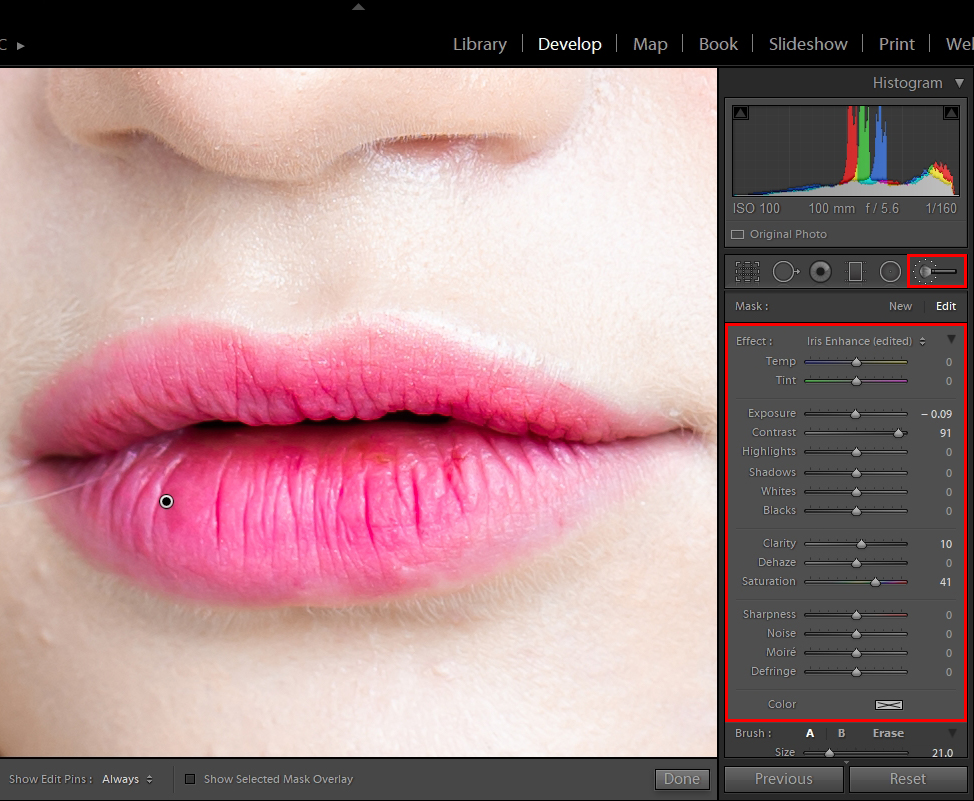
Work on lip color very carefully. White teeth can look very unnatural against the background of pale lips.
Make lips rosier with the Adjustment Brush tool, using the warm up setup. Increase the saturation of the light and lower the Contrast and Clarity values.
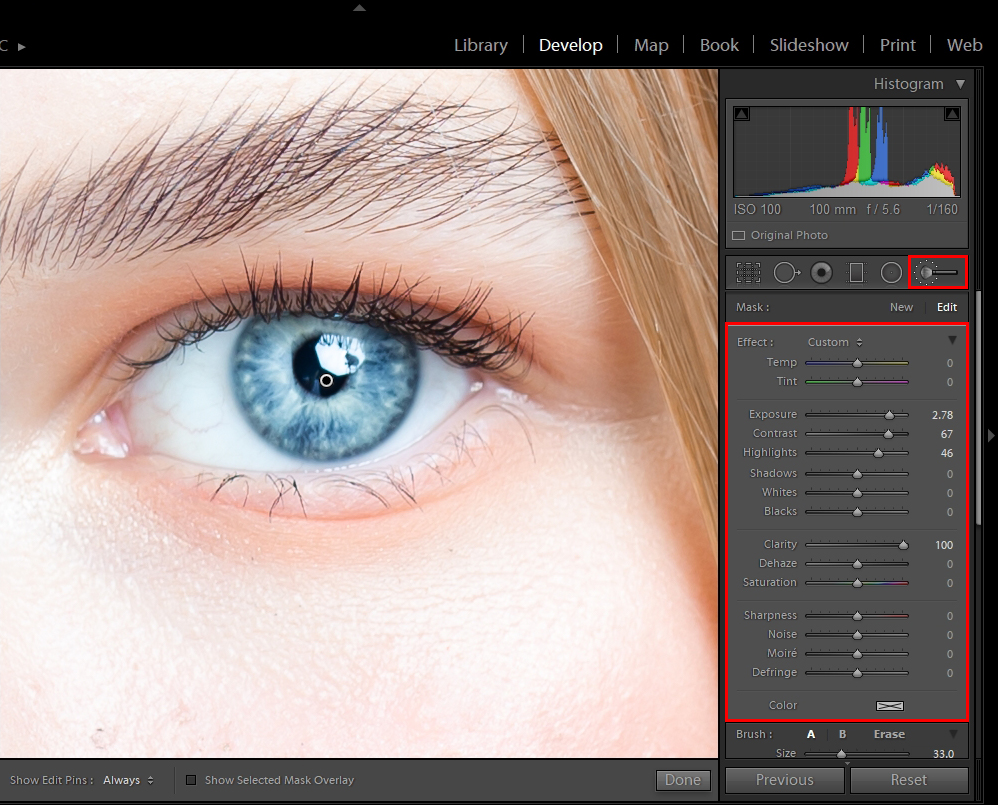
Usually, professional portrait photographers do not apply sharpening to the entire image when editing faces in Lightroom. It can lead to some digital noise problems.
The photographers prefer to work with the eye area separately. Use the Adjustment Brush. Click on the "Show Selected Mask Overlay" checkbox at the bottom of the program and start editing the eye zone very carefully.
Increasing exposure is a good trick for the eye area. However, you should not overdo it. Choose the Adjustment Brush and set a positive exposure value. Work with white areas. Then darken the edges of the iris applying other settings.
Pro tip
Use the backslash () key to see the photo before any modifications with your current image side by side. This will help you evaluate the work you’ve already done, and see if you need to undo certain changes.
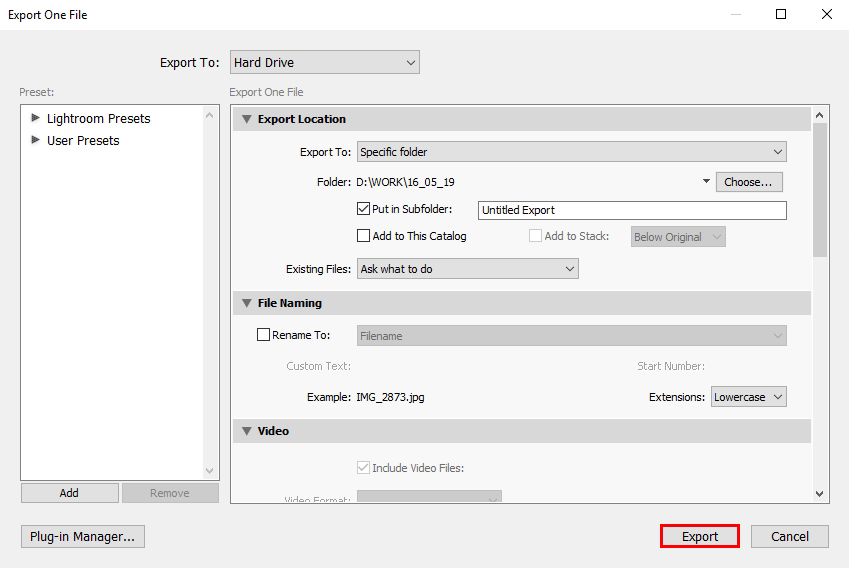
Finally, select the photos for the export. Using the Grid View is the easiest way to do this. Bring up the export window. After you have selected the files you need, click "File" and open the export dialog.
Enter the recommended Lightroom export settings for Instagram or other social media for photographers. Now you know how to edit portraits in Lightroom in 15 simple steps.