Water Droplet Photography Guide: 17 Tips
When you purchase through affiliate links on our site, we may earn a commission. Here’s how it works.
If you have always enjoyed looking at beautiful photos of falling water and want to take an image of a water droplet, study these useful tips to delve into a stunning world of water droplet photography even staying at home during quarantine.
25 Water Droplet Photography Tips
To get started, make sure to read my tips and tricks connected with equipment that will help you impress everyone with mesmerizing pictures of water drops.
1. Create a Water Drop Manually
There is no need to wait for the rain to take a photo of water droplets, you can create them by using a dropper, a container, and some water.
It doesn’t matter which dropper you have, a medical or cosmetic one. Both of them have a soft collapsible bulb that allows controlling pressure. You can also choose any bowl for water.
2. Use a Water Drop Kit
Make sure to purchase a water splash photography kit that will open a whole world of limitless possibilities.
As it ensures more accurate dosing, you can decide which droplet size you need. By using Scotts All-in-One Precision Drip Kit, you can set the intervals between drops, as well as decide on drop size, and handle the flash-lag.
3. Use Controller/Intervalometer
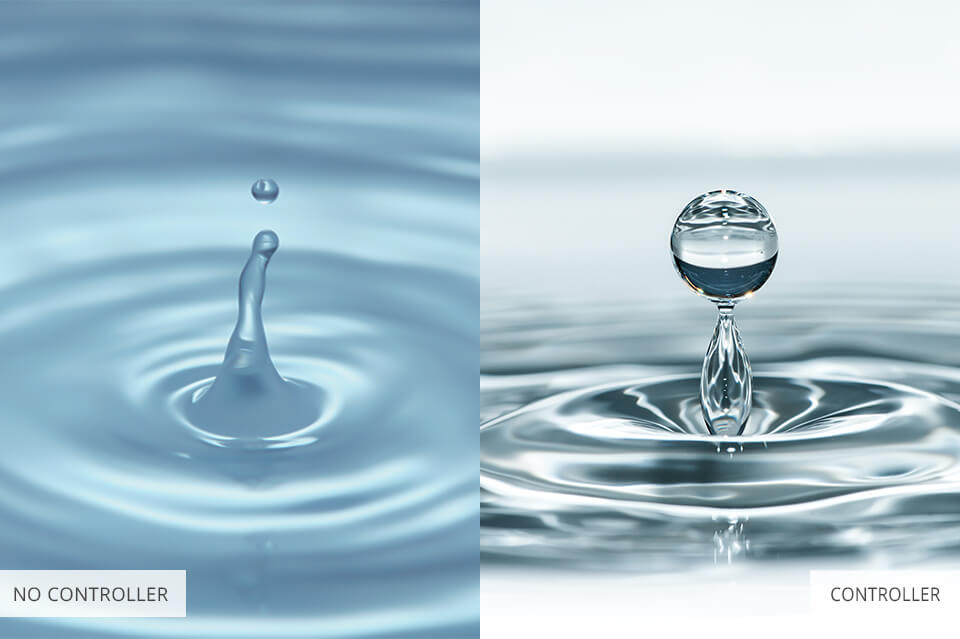
The Neewer DSLR Camera Shutter Release is a handy tool for time-lapse photography that can be remotely controlled. With the help of this intervalometer, you can set a number of drops, an interval between them, a drop size, and the flash-lag.
It allows you to take a photo of a water drop easily. It’s better to opt for two drops as the third one rarely turns out to be perfect due to slow valve closure.
You need to activate a shutter button that opens a camera shutter and creates two water drops in a row. Then the camera flash goes off and the shutter closes.
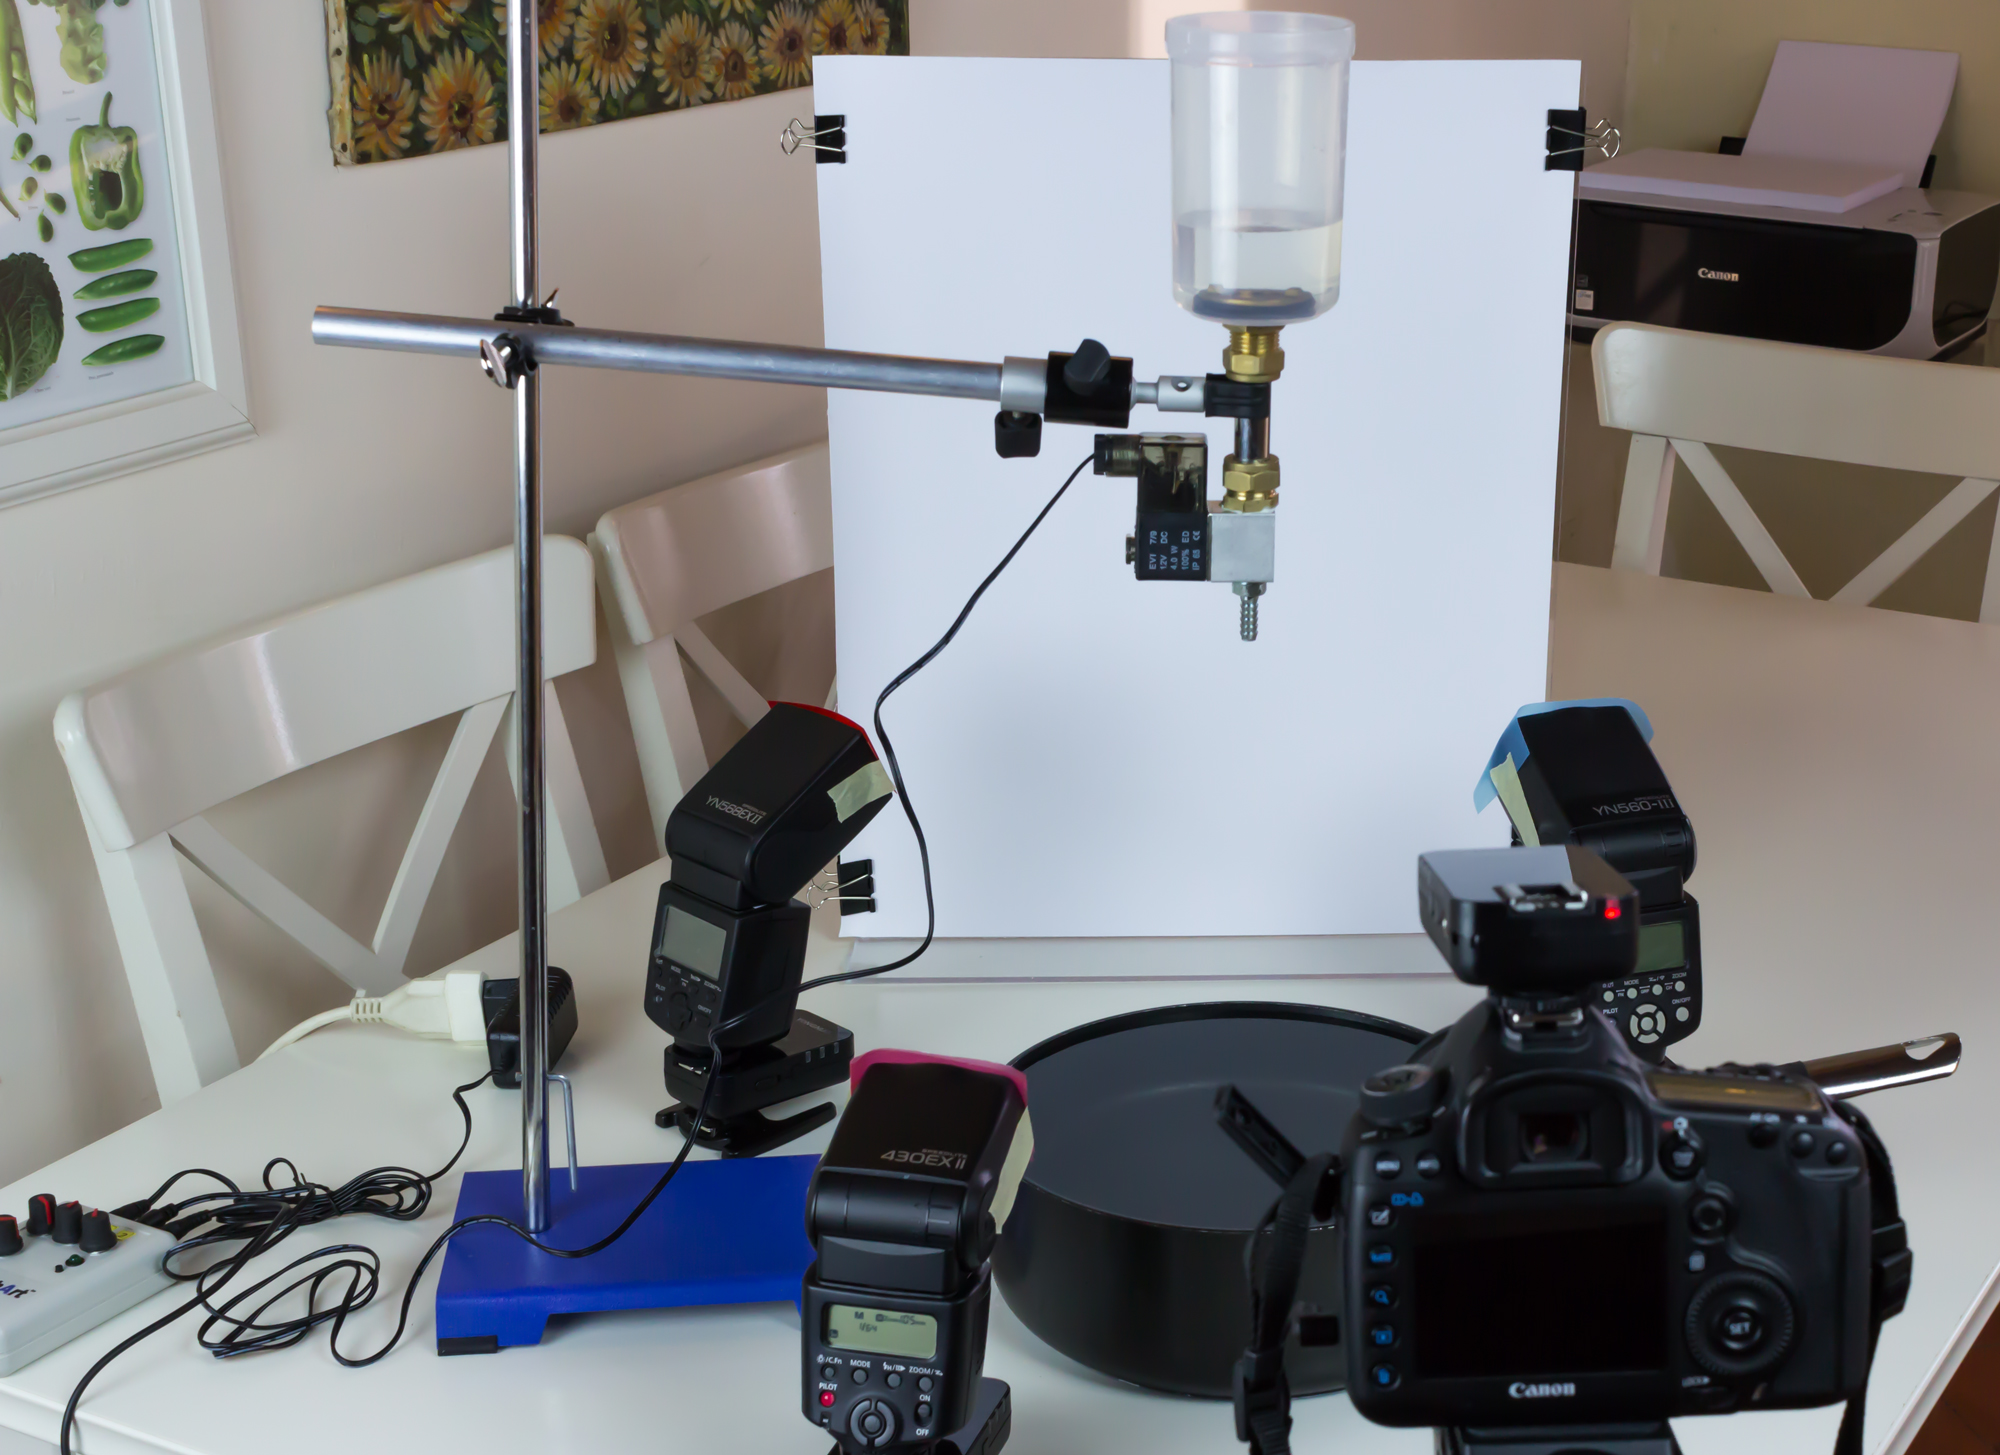
4. Choose a Convenient Container

For water droplet photography, choose any container that you like. I prefer a simple water tray with a 16x11x2-inch size. As it is fully black, it’s easier to get clear reflections.
If you need to take a photo with a container fully visible to create an ad, chose a tray of white or blue color. It’s also important to use a deeper container to focus on drops without showing the edges of a tray.
5. Focus on a Drop
The right focus is tremendously important for water drops photos. You need to focus solely on a water drop. It’s better to spend some time to understand where a drop will fall. Set a manual focus point where a drop is supposed to appear.
Photographers use different tools to find a focus point. You can use either a Socket wrench shaft extender or a serrated bread knife.
6. Pick the Best-Suitable Background

You can fully transform drops by adding food coloring. Note that the background can be changed as well. To do it, try placing plastic gels over your camera’s flash. You can also use colored films that can be quickly designed and printed.
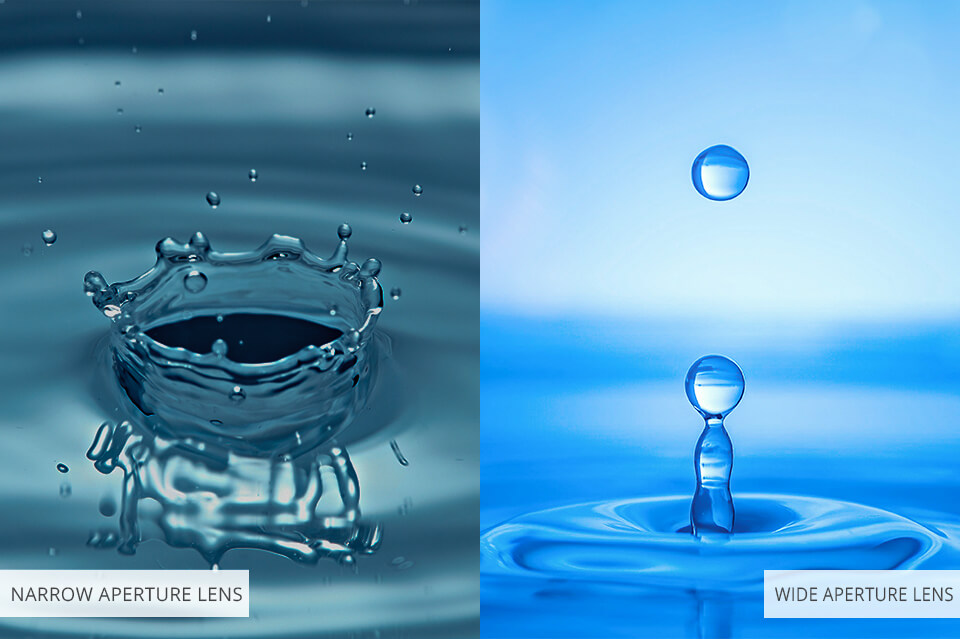
I prefer using a white matte background. I place it on a 20-inch distance from a water container. You need to use a small diaphragm opening to bring drops in focus. A blurred background is vital for taking a beautiful picture.
7. Take Photos in a High-Speed Burst Mode

In water drip photography, time is crucial. If you use an external flash, make sure to check that it is well synchronized and can be triggered quickly.
I usually take from 150 to 200 shots to change a time interval between the collision of two drops.
When it comes to outdoor photoshoots, it’s impossible to predict where and when you will see water drops. You can’t change a landscape as well.
Try using a high-speed burst mode to take as many pictures as possible in a short period of time. It’s better to choose a sunny day to use natural lighting and use low ISO with high shutter speed.
8. Don’t Forget about Photo Post-Processing

To improve my photos, I adjust brightness levels and remove objects that don’t add much to a composition, be is a stray drop or a water bubble. There is a wide array of tools that can be used to sharpen a photo or reduce noise.
You can also crop a photograph, align it to your liking, change saturation, and adjust color temperature. Photoshop is quite handy in water droplet photography, as it allows you to delete all the unnecessary objects in no time.
9. Use Natural Water Droplet Sources
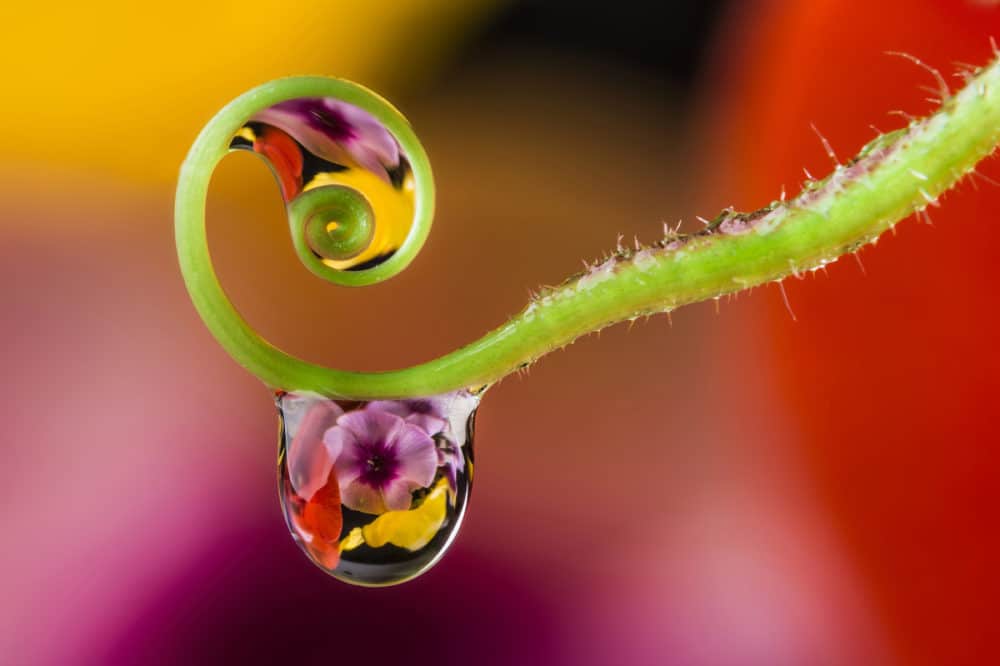
Before buying expensive gadgets or creating complex photoshoot setups, try going outside and taking a couple of pictures there. While water drops on leaves might be less impressive than artificial ones, Mother Nature will surprise you with its endless ability to create the most surprising objects.
10. Use Additives

To change the color of the water in a waterdrop photo, try using additives. For instance, you can add glycerine, dissolved sugar, or guar gum. To make water more syrupy, use dissolved sugar or syrup. It will add some spots to the drops as well.
Guar gum is a powder that is used to make liquids more syrupy. Add 1/8 teaspoon of guar gum in a cup of warm water, use a hand blender, cool the water, and pour it through a coffee filter. While this method is quite handy, there might still be some lumps left so you need to be especially careful to avoid them.
11. Experiment with Different Liquids
Besides water, you can use other liquids as well, for instance, milk, almond milk, cream, or different combinations of these liquids. Water is the most difficult liquid to work with as it has low viscosity and flows too quickly. It is thicker at 4°C so you can add several ice cubes to make it colder.
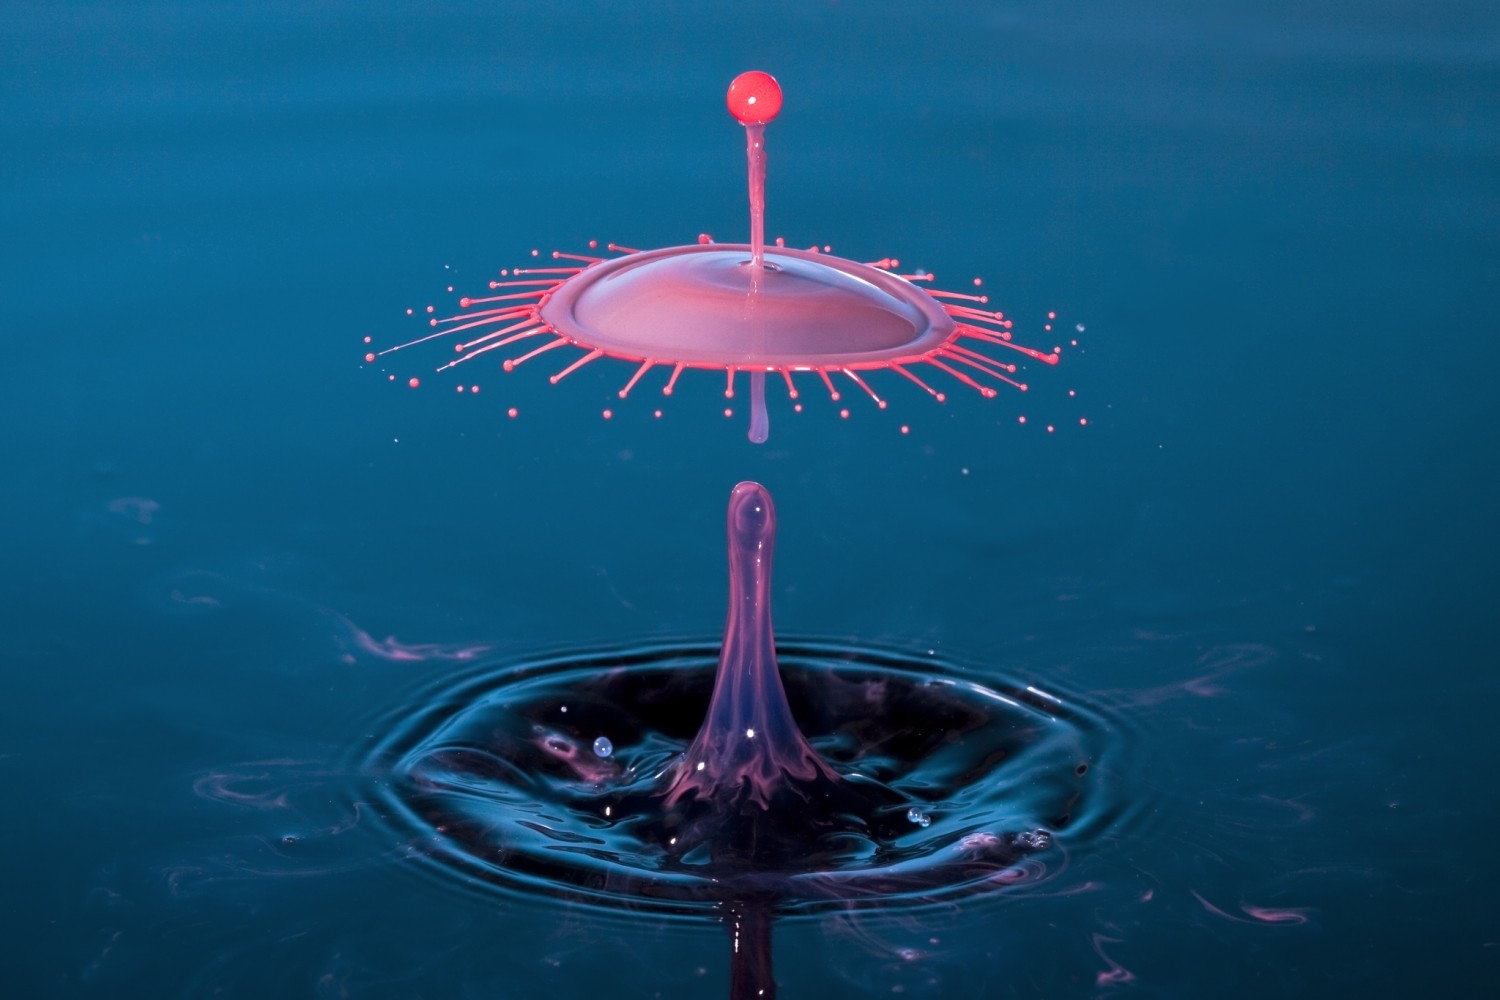
Thanks to the higher viscosity of milk, it will be easier to take a photo of a perfect ‘umbrella’ formed by a drop. As milk contains fats, it creates beautiful forms. Almond milk is also useful but it forms grainy structures.
12. Add Coloring
Those who want to take state-of-art photos with mesmerizing effects can experiment with adding different liquids. If I need to get a unique water droplet photo, I use food coloring and watercolors but any other liquid will do.
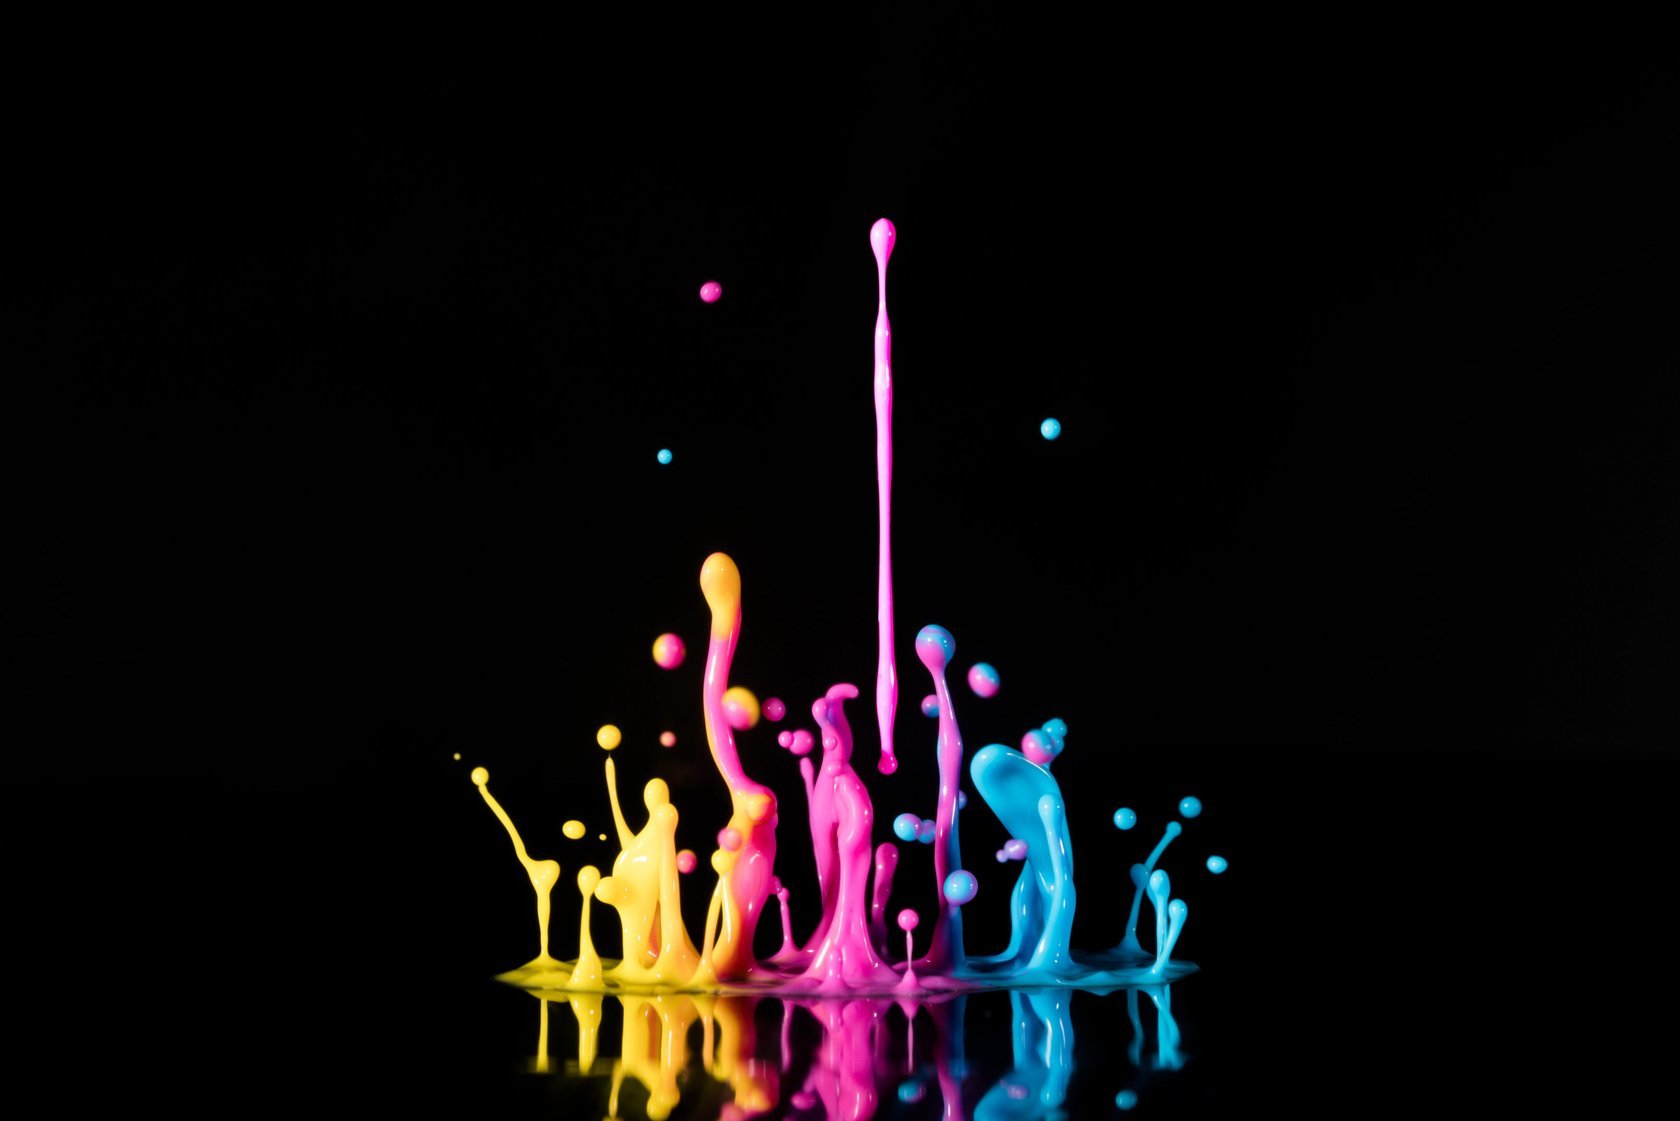
Some people add oil and nail polish to produce stunning images. It’s quite helpful when you take pictures for ads. By adding ingredients that make the liquid more colorful and viscous, you can achieve a stunning result.
13. Choose the Right Lighting
The better lighting you have, the less noise you will see in your photos. Try using artificial lighting only. To take photos, you need an in-built or external flash and reflectors.
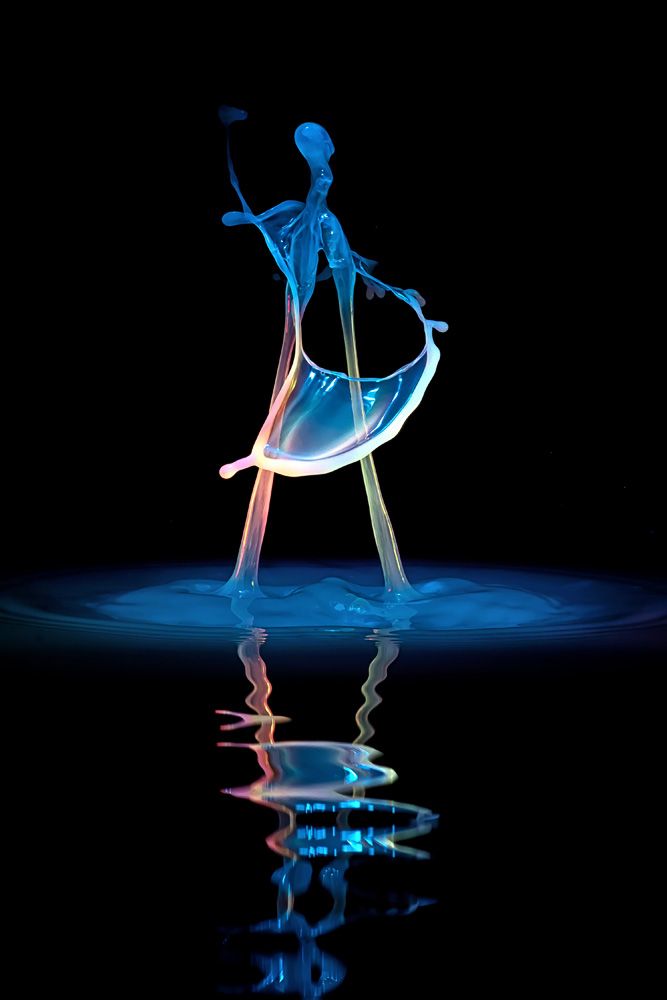
Soft light is always better for water drop photography, as it allows experimenting with different colors. Right behind a water tray, I put an acid-etched glass and use plastic reflective sheets to reflect light. Thanks to it, light on the water surface gets softer and reflections become mesmerizing. Try experimenting with a source of light by finding a different place for it.
14. Use a Flash
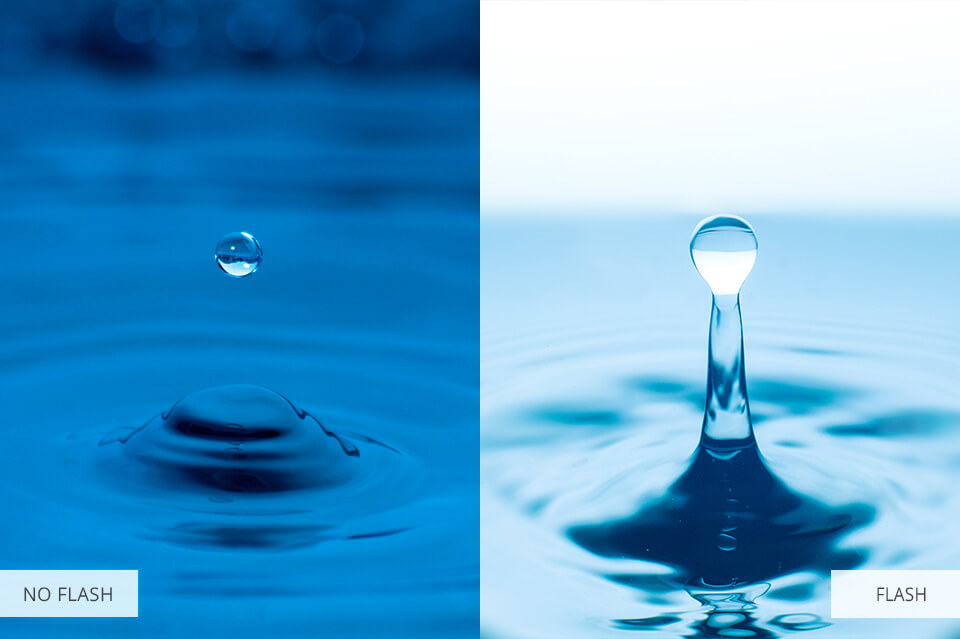
For water drop photography, I recommend using two or three Speedlite flashguns and setting them to a power of 32 or 64. At low power, the flash will be triggered quickly so you will be able to capture the droplets and the picture will be sufficiently bright.
It’s better to take these pictures in a dimly lit area so that the flash could become the main source of light. You can experiment with finding the best position for the flashguns. As for me, I put them behind the tray.
15. Pick a Camera with Manual Settings
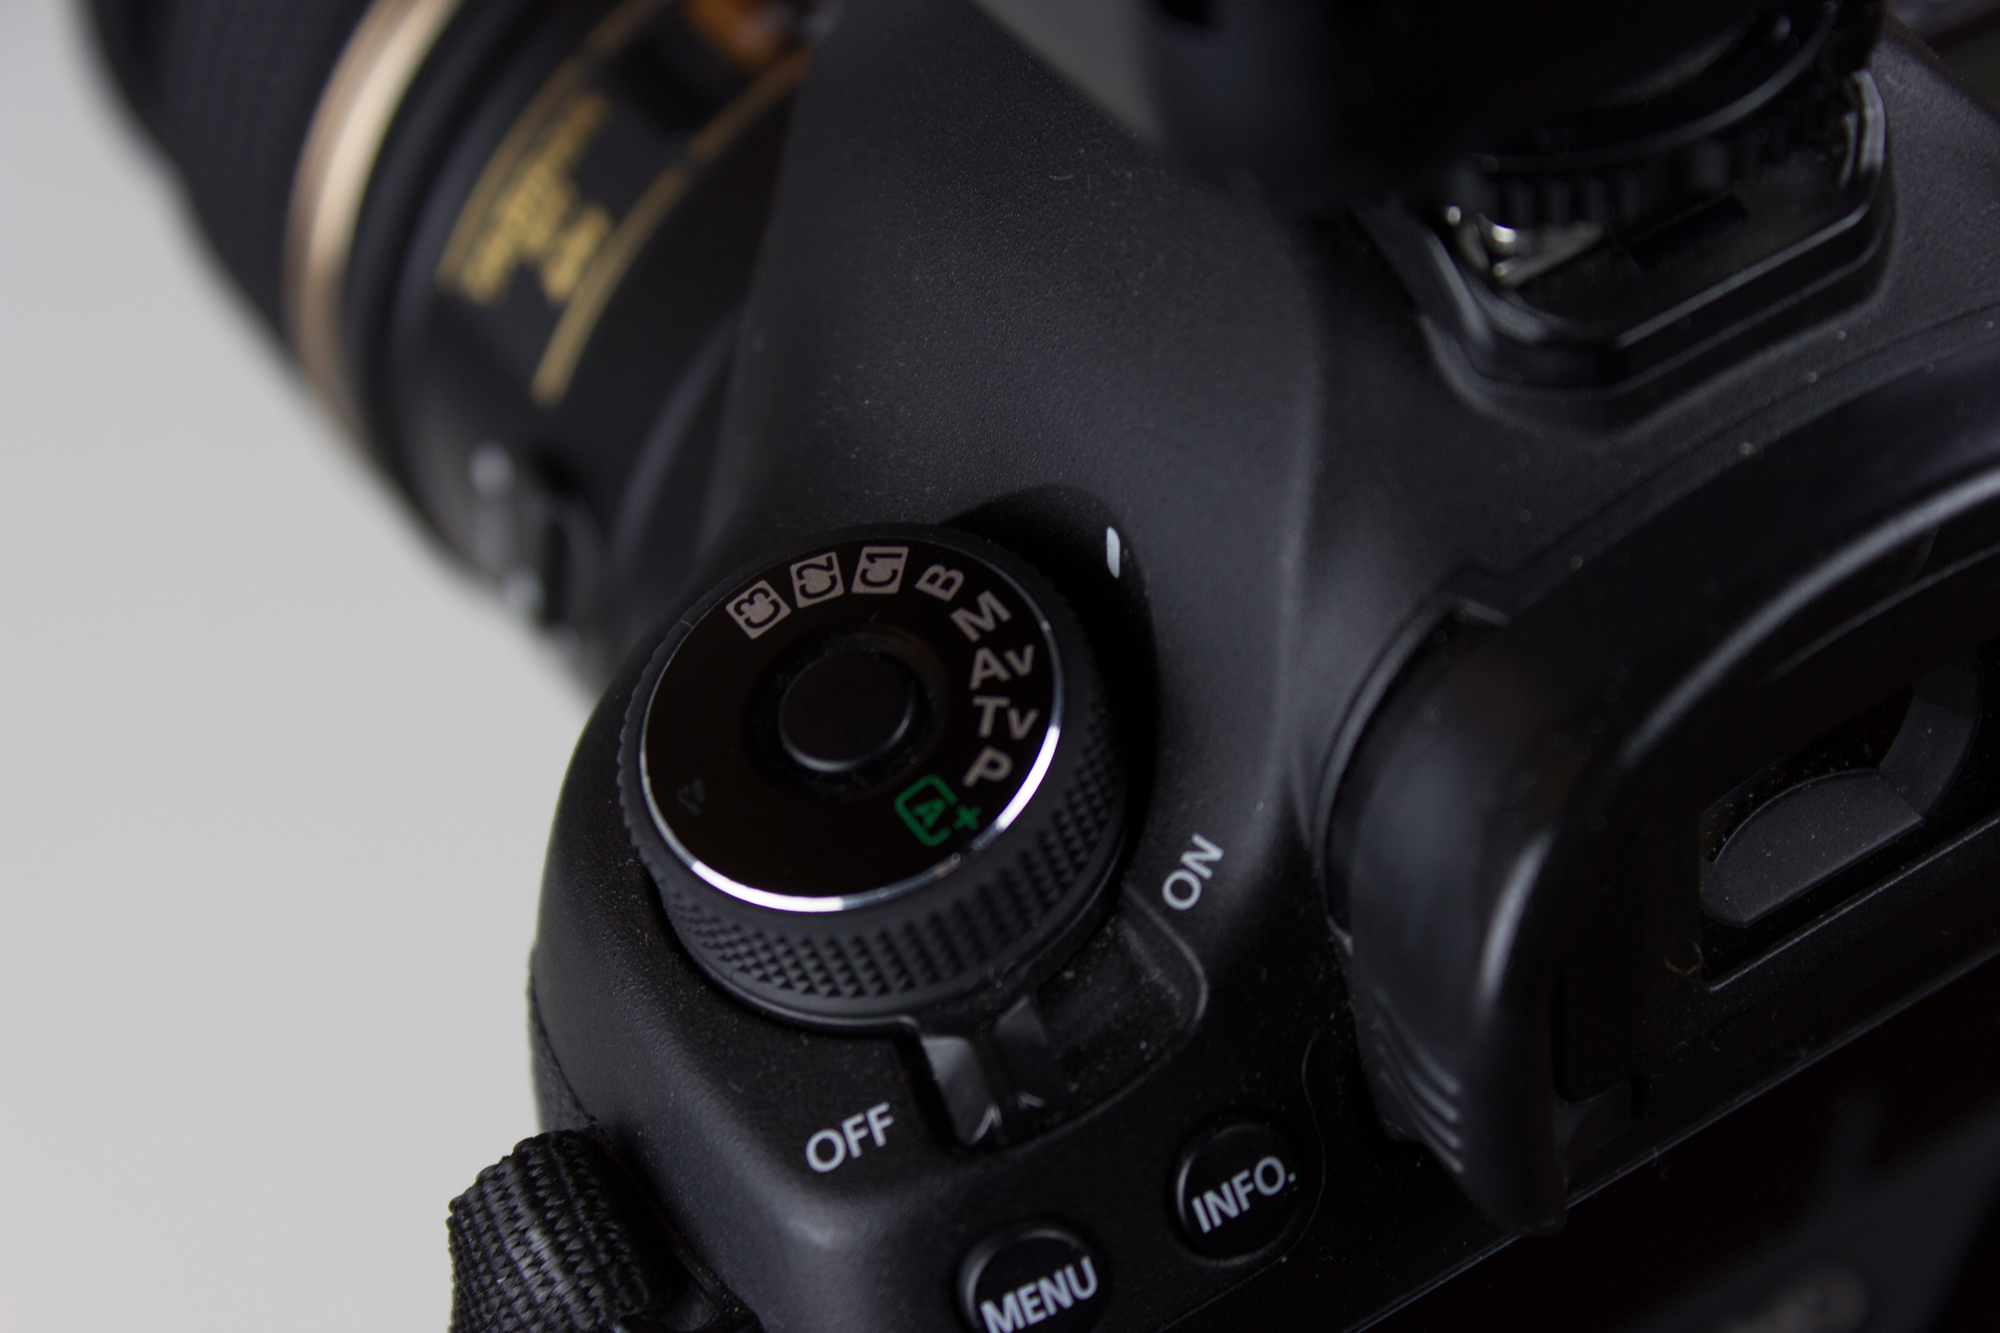
The Canon 5D Mark III is quite handy when you need to take pictures in low light. As it comes at an affordable price, it’s a great option to consider if you are interested in water droplet photography.
You can also use Canon EOS 50D DSLR Camera. This 50D camera has the Live View option that allows zooming in up to 10 times. You can also find a perfect focus with the help of an LCD.
16. Adjust Camera Settings
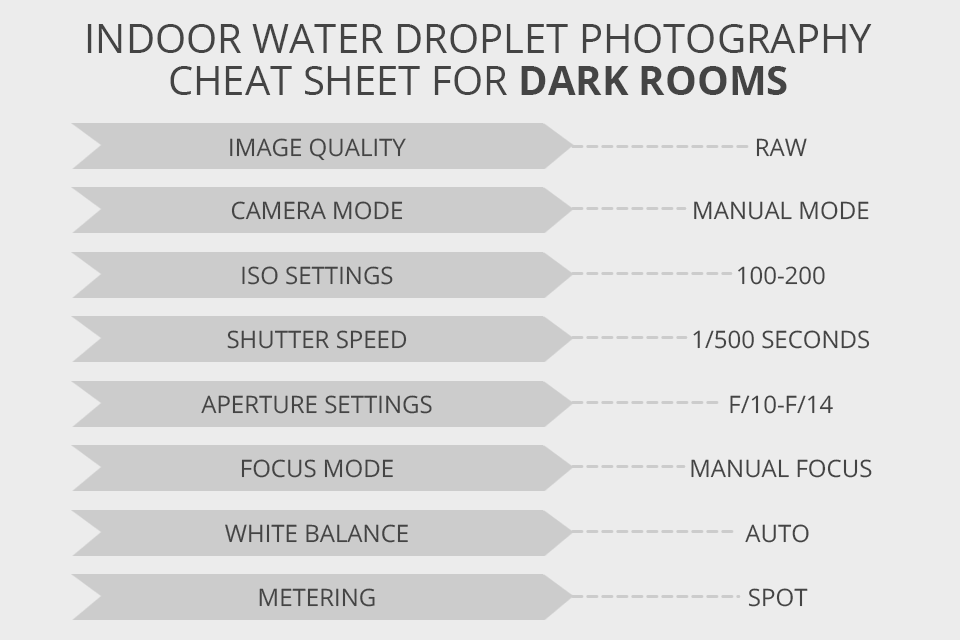
You will need to use your camera in a manual mode. It’s better to work with RAWs as it supports auto white balance. I advise you to stick to a neutral style as it will be more beneficial for your photos.
For water droplet photography, it’s important to set ISO to 100. When you need more light, ISO 200 might be useful as well. However, the higher ISO is, the more noise there will be.
Set the shutter speed to 1/500 seconds to compensate for the flash-lag. It’s vital to open a shutter in time to capture a droplet. This is why I prefer working in a dim-lit room as well. I usually set the aperture to f/10 or f/14 as it allows for getting enough light and achieving a sufficient depth.
17. Use a Macro Lens

You need to use at least a 100mm macro lens. For instance, you can consider using Canon EF100 mm f/2.8. In macro photography, you can improve the overall composition quality by using macro lenses. You need to see only a drop against a background in the frame. You can also crop an image later but its size will be smaller. You might need to use a different format as well.
Freebies for Water Droplet Photography
If you are wondering how to enhance your photo even further, take a look at the FixThePhoto collection of mesmerizing effects.
Water Texture

If you want to add a water drop texture that looks both natural and relaxing, take a look at this one. Ripples on the water surface have a calming effect. You can easily achieve it by using this texture.
Watercolor Texture
Whether you work in a studio or outside, these Watercolor Textures will add a dreamy-look to your pictures. This light and soft texture will emphasize the lightness of drops and splashes.
Monochrome Collection
These monochrome presets offer the quickest way for creating magnificent back-and-white photos. They allow adding glare effects, making hues look even more beautiful, and adding visual accents to your photos.
Water Splash
Water Splash Overlays allow adding realistic drops of water splashing at different angles and with different intensity. If you are interested in water drop art and have taken photos near water, you will appreciate these overlays.
Underwater
To enhance your photos, try applying this underwater photography effect. It allows adding waves, bubbles, and other elements that will make your pictures look amazing.


