Lens Calibration Extended Guide
When you purchase through affiliate links on our site, we may earn a commission. Here’s how it works.
It is impossible to do without lens calibration when the autofocus on your lenses may not be exactly where you expect, the familiar lens becomes dim and the pictures get blurry.
When you buy a new lens or camera with an increased sensor resolution, you may also find a slight defocus since cameras and interchangeable lenses are often manufactured at different factories.
Therefore, when you combine them, it is better to conduct lens focus calibration for this particular configuration.
What Is Lens Calibration?

Various factors, such as manufacturing defects, insufficient quality testing, or improper transportation and handling can negatively affect the accuracy of autofocus.
Сamera lens calibration involves a sequence of specific camera adjustments that let shooters fine-tune the autofocus of lenses without modifying the lens itself. I wouldn’t suggest physically calibrating the lens yourself. This may affect the warranty and should only be performed by the manufacturers.
The lenses must be disassembled, configured, and reassembled under certain conditions.
3 Ways to Calibrate Lenses
Calibration will help shooters get the most out of their lenses. The majority of them are afraid of the term “calibration”. However, in fact, it is a non-complicated procedure that can be reversed or disabled.
To calibrate a camera lens accurately, a calibrator is required. It can be a ready-made calibration kit, specialized software, or even a ruler made by hand.
Way №1 – DIY Manual Lens Calibration
Affordable method for all cameras

$
 Rating
 ⊕ Easily read targeting system
⊕ Effortless installation and use
⊕ Precision die-cut for fast assembly
⊖ Sensitive to vibration
⊖ Unpredictable results
This method works using a regular ruler and even a printed sheet with divisions. But with the focus pyramid as a tool proven for years, it is common for fairly accurate and inexpensive manual autofocus calibration.
1. Set up the camera and calibrator.
Installation should be carried out in a space that offers plenty of ambient light. Place the camera on a tripod or a flat, stable surface, such as a table, and put the focus pyramid opposite on a flat surface. The location of the system must be strictly horizontal and stationary, which is the primary condition for successful lens calibration.
The center of the lens outlet and the rectangle-center of the pyramid should be positioned opposite each other at the identical level at a distance of about 6 feet or the suggested focal length of the manufacturer’s specification. You can set everything at the distance from which you usually photograph the most or take advantage of the online hints from the LensAlign distance tool. If the location is correct, the rectangle will resemble a square in the lens.
2. Pre-configure the camera.
Open the lens to the widest possible aperture to achieve the smallest depth of field. This will simplify the process of determining the correct focus of the lens. Set the ISO to the lowest possible value (you only need to set it higher in low light). Then adjust the shutter speed according to other settings to produce an accurate exposure. You require a high shutter speed to take a clear shot.
Ensure that Live View isn’t enabled (if it is present at all). It uses a different autofocus system, and any settings you adjust won’t be visible with the Live View activated. Keep it turned off throughout the process. Adjust the autofocus value on the camera to “0” or simply disable it.
3. Focus and adjust.
Press “Play” and zoom in to see where the focus falls. The numbers above and below the centerline will indicate the areas with the clearest line. When using only the viewfinder, automatically focus on the bold centerline of the focus pyramid, and then take a shot. It is the central focus point.
If the focus is accurate, the centerline marked “0” should be the sharpest one in the shot. In case a line with a number higher than 0 is sharper, the lens performs the function of reverse focusing. In case a line with a number lower than 0 is sharper, it is the front focus.
Once you have determined the type of focus, proceed to the settings of the autofocus micro-adjustment parameters, and make the necessary changes manually. By default, it is zero. Add it starting with a small trial value, for instance, +3. For the reverse focus, you should lower the step.
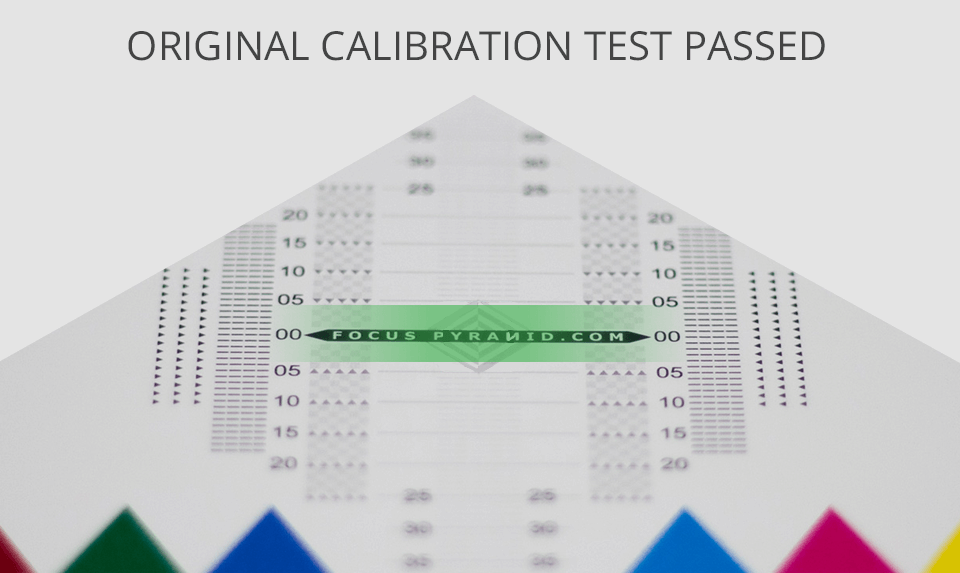
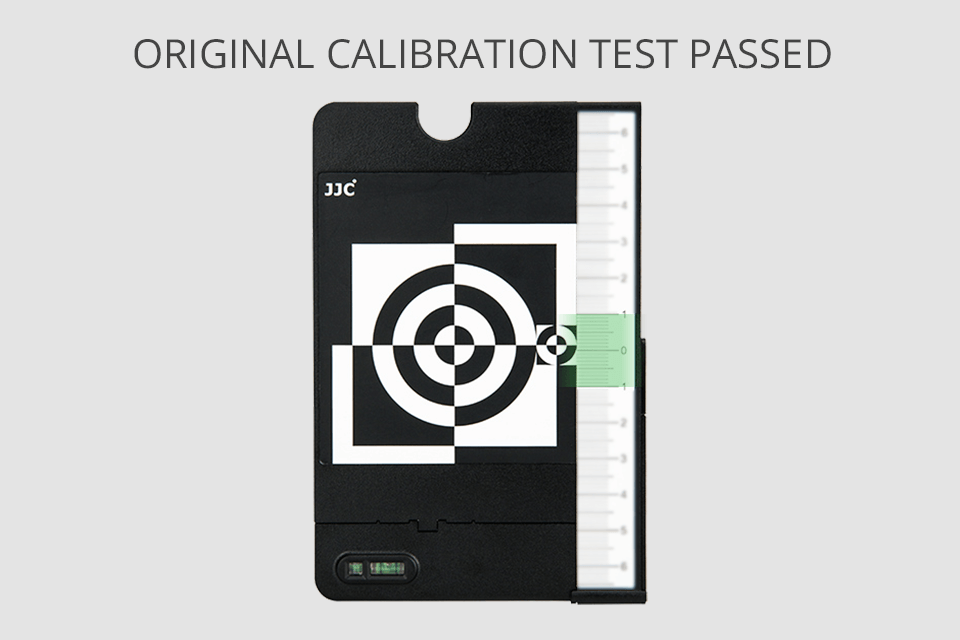
Way №2 – Test Chart Image Lens Calibration
Commercial method for high-resolution cameras
$
Rating ⊕ AF Fine Tune/AF Micro Adjustment
⊕ Bubble level is featured
⊕ 2-in-1 Gray & Black color balance card
⊕ Made of water-proof material
⊖ Without resolution targets
⊖ The lines’ size could be bigger
This method with the use of commercial tool kits requires investing slightly more money. But it is more accurate and suitable for expensive high-resolution cameras. A table printed from the Internet will do.
However, you can purchase a proven professional kit, like a popular one from JJC. Supposedly, you already own a laptop or PC. The algorithm consists of the same steps as the previous method of how to calibrate a lens, with some additional divergences.
1. Set up the camera and calibrator.
When the installation is complete (see paragraph №1 above), connect the camera to the PC using the supplied USB cable. Work in a proven picture editor, such as Capture One or Lightroom (provided that your camera supports the connecting method). Go to File - > Tethered Capture in Lightroom. In this way, you will display the calibration table on the monitor screen for a better scale and accuracy.
2. Pre-configure the camera.
Ensure that Live View isn’t enabled and focus using only the viewfinder on the crosshair in the center of a large circular target. Take a series of shots, and in between exposures, you should set the focusing ring so that everything appears blurry before the shot.
This way, you force the autofocus system to re-focus each time. As phase-detecting autofocus isn’t always accurate if you rely on a single exposure.
3. Focus and adjust.
If the focus is accurate, the centerline marked “0” on the ruler should be the sharpest in the shot. If not, as soon as you determine the type of focus (see paragraph №3 above), you need to enable fine-tuning of AF/micro-adjustment and set the value to compensate for the focusing problem.
Way №3 – Automatic Menu Settings
For modern cameras with integrated AF adjustment

This method to calibrate lens is suitable for owners of modern cameras from famous brands with the condition that the corresponding menu function is available in the settings. Each manufacturer has reserved this function in its own way. It is located in the Functions, Settings, or Setup Menu:
- Olympus – AF Focus Adjust
- Nikon – AF Fine Tune
- Sony – AF Micro Adjustment
- Canon – AF Microadjustment
- Pentax – AF Adjustment
Owners of Nikon camera can take advantage of a quick way to calibrate the lens with automatic focus. It lets the camera read the picture and automatically perform micro-adjustment. The majority of modern cameras now possess this extended function.
1. Set up the camera and calibrator.
Install the equipment according to the recommendations in paragraph №1 above. To simplify the process, you can use any stationary object with high contrast and detail, like a toy or a package with text, so that the camera is able to capture.
2. Pre-configure the camera.
Activate real-time viewing, zoom in completely, use autofocus, and pick the smallest focus you have. You don’t have to take a shot because the camera will do it in the next step. Hold the auto-focus selection button (often located on the auto and manual focus switch) and the video record button for a few seconds.
3. Focus and adjust.
If everything is done correctly (a suitable object, sufficient lighting, system stillness, proper shutter speed), a window will appear asking if you are sure. Check that you have the tripod securely fixed, and press "Yes" by lightly touching the button or screen (in case you have a Nikon touch screen) to confirm it. As any movement of the camera in the process won’t allow you to continue.
If the camera remains motionless, a screen will appear after a couple of seconds with the message “The new value has been added to the 'AF fine-tune' 'Saved value' list”. Now you can proceed to the exact menu and see what value was assigned to the lens in order to correct it.
I suggest running the automated procedure several times. Because each time you will probably get different values, as this isn’t an exact laboratory procedure. The optimal solution is to take the arithmetic mean of several test shots. For instance, the values -15, -19, and -13 are obtained for 3 shots. Add them up and divide by 3 to get the average rounded value of 16. Then enter this number as the best one.

Way №4 – Automated/Semi-Automated Software
Fast paid process for supported cameras
(4.5/5)
Platforms: Windows, Mac OS
Price: $89.99 one-time fee
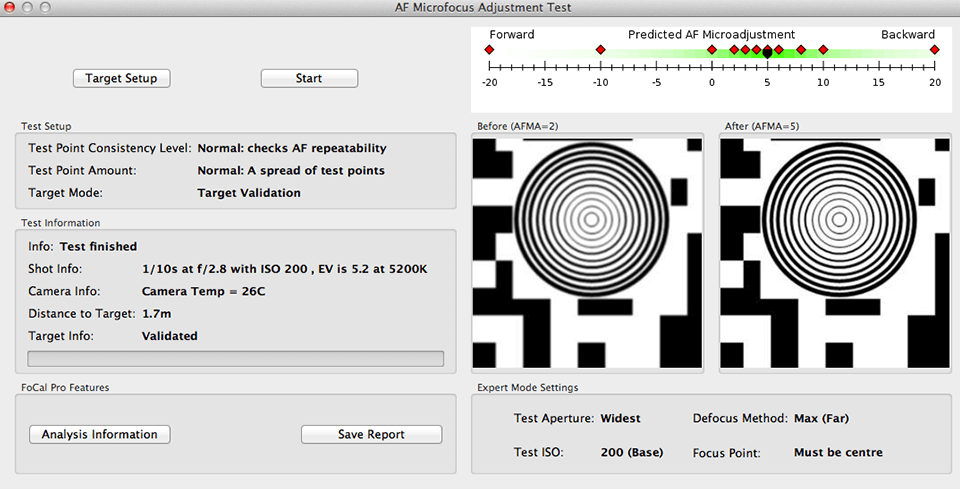
Verdict: Currently, Reikan FoCal is a leader in automatic calibration software. It doesn’t only perform automatic/semi-automatic calibration (depending on the supported camera) but also comes with fairly advanced reporting and testing capabilities for each individual focus point. This lens calibration tool will analyze each picture and will specify which autofocus adjustment value works best.
Currently, Reikan FoCal is a leader in automatic calibration software. It doesn’t only perform automatic/semi-automatic calibration (depending on the supported camera) but also comes with fairly advanced reporting and testing capabilities for each individual focus point. This lens calibration tool will analyze each picture and will specify which autofocus adjustment value works best.
The automatic testing and lens calibration procedure are currently accessible only for digital SLR Canon cameras. For Nikon DSLRs, you will have to use the manual settings change mode (MSC) for now. The software will indicate what to change on the camera, and you will have to type in the values manually. Here is the camera lens calibration procedure using the FoCal package:
1. Installation and connection.
A PC or laptop is required for fully automatic calibration. Connect the camera to the computer using the supplied USB cable, turn it on, and install the camera drivers first (if necessary). After installing and configuring the drivers, install FoCal. Once everything is checked, turn off the camera and disconnect the cable upon the end of the installation.
2. Check and prepare the surroundings.
A photographer needs to be in the space with plenty of light in order for autofocus to work correctly. If this isn’t an option, you will have to set up a powerful lighting source to properly set the focus diagram, since one light bulb in the room won’t be enough. Print the test table in PDF format that comes with the FoCal software on plain Letter paper. A qualitative inkjet printer is suggested.
Attach the test table to a flat surface or a straight wall. Locate the camera on a tripod at a particular distance directly from the map, depending on the focal length of the lens. The developer suggests aiming the focal length of the lens at about 25-50 times longer. So, in case you are calibrating a 50mm lens, you should test at a distance of 1.25 to 2.5 m. Ensure that the diagram is parallel to your camera, and that nothing is titled.
3. Initiate the procedure.
Connect the USB cable to the camera and the PC/laptop. Enable the Live View and use the software’s tips on how to move/align the test target. As soon as FoCal shows you a green checkmark, start the automatic or semi-automatic testing procedure. The camera is capable of taking pictures and adjusting the focus. Here is what the procedure looks like: