How to Measure Picture Frame & Mat Correctly

When you purchase through affiliate links on our site, we may earn a commission. Here’s how it works.

If you want to order a frame for your paintings or photos, it’s very important to understand how to measure a picture frame correctly. Even dealing with standard photo sizes the process can become rather problematic.

The photo often turns out to be larger than the section designed for it or the picture falls through even if its size fully matches the one shown in the frame description.

Measuring a Picture Frame: Aspects to Consider

This will help you avoid multiple mistakes that could lead to you ordering a frame of the wrong size.
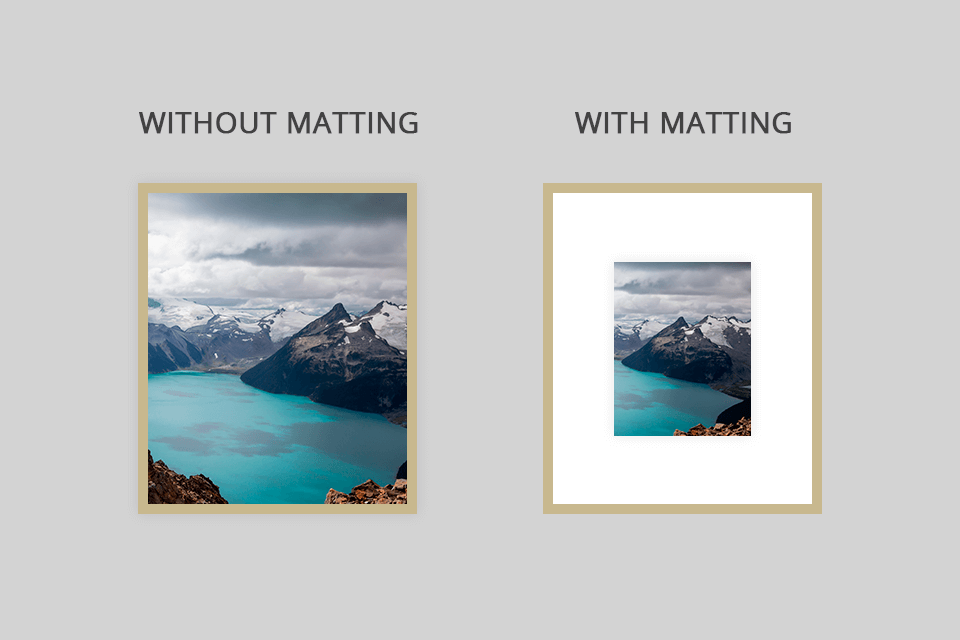
measure a picture frame with and without matting

Availability or absence of matting. Matting is a decoration element that is placed around the photo. It’s a white (or differently-colored) mat that will be visible even once you place the picture into the frame. You can account for this factor by tweaking the necessary parameters in your preferred photo printing software.

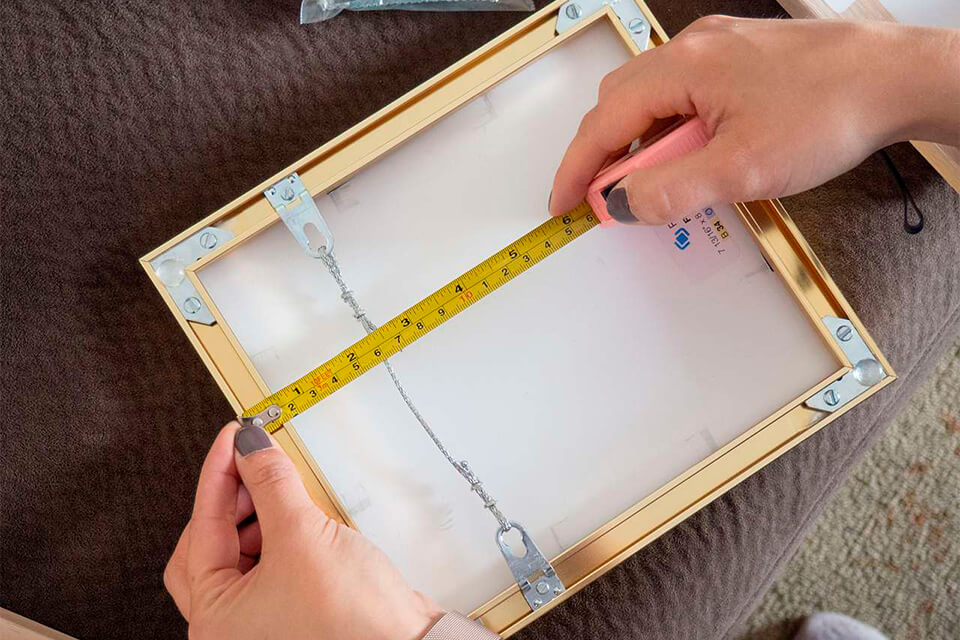
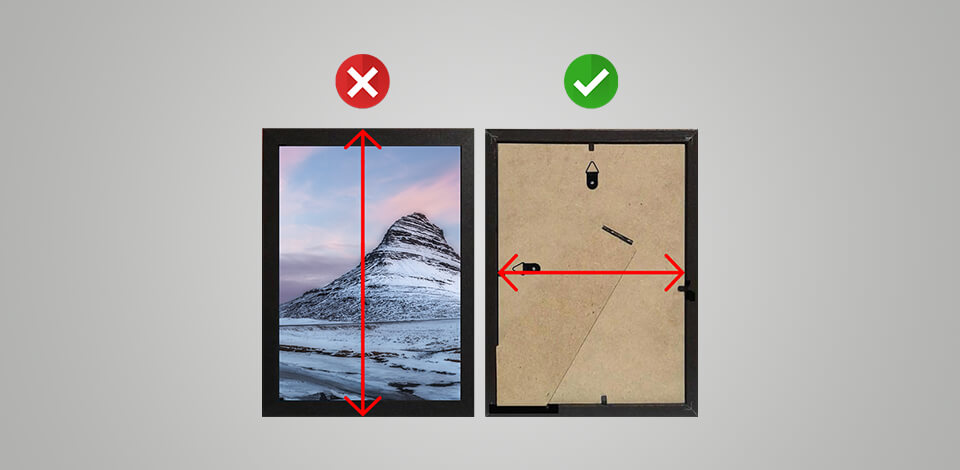
If you want to make sure you learn how to measure a picture frame size properly, you need to measure the height and width of the photo that will be visible inside the frame. The dimensions you get will let you know the exact size of the frame you need to buy/order.
measure a picture frame sizes

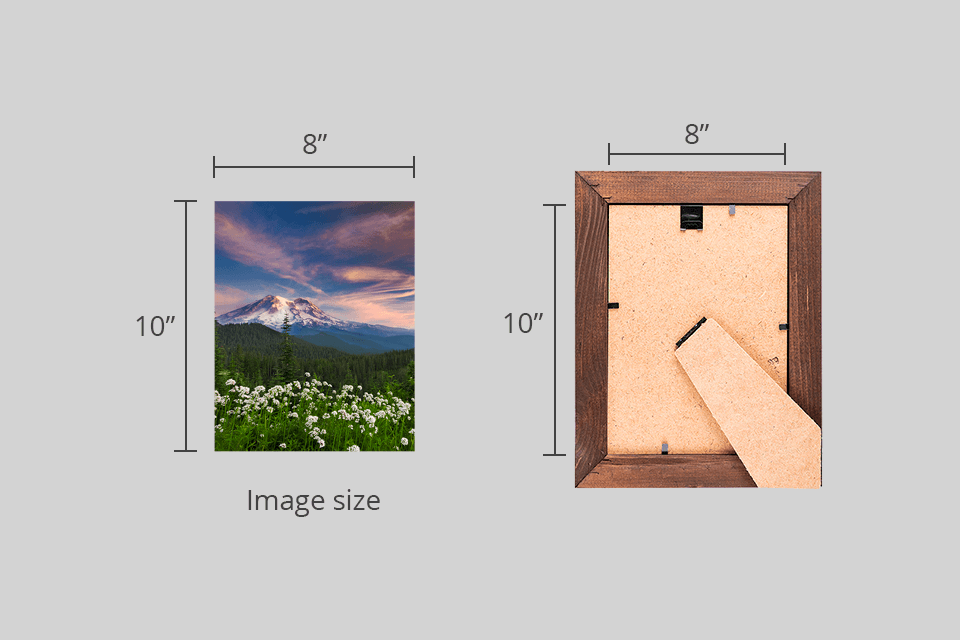
The size featured on the frame. Typically, the size featured on the frame matches the size of the picture you can place inside. As such, if a frame is marked 8x10”, that doesn’t mean it’s the size of the frame’s outer sides but rather of the opening inside that is large enough to host an 8x10” photo.

The height and width of the frame. A lot of people make the mistake of ordering the wrong frame because they can’t “read” the markings correctly. When measuring picture frames, you will notice that width is always indicated first. It is followed by the height, which is why the size is written as W x H. After taking a look at the higher value, you can understand which orientation an image has.

Pro Tip:

For example, if you have a frame with a size of 8x10″, you can be sure that the first number is the width and the second is the height. Since the height's value is higher, it means that the image has a portrait orientation, and if it’s lower – then a landscape one. As such, before you purchase a frame, you have to determine which of the two portrait vs landscape orientation options you need.

canvaschamp printing services

Want to Receive High-Res Printed Photos?

CanvasChamp will print out your pictures in standard or custom sizes offering many design options and quick delivery.

Photo size. There are 2 very common mistakes that people make when measuring picture frames:
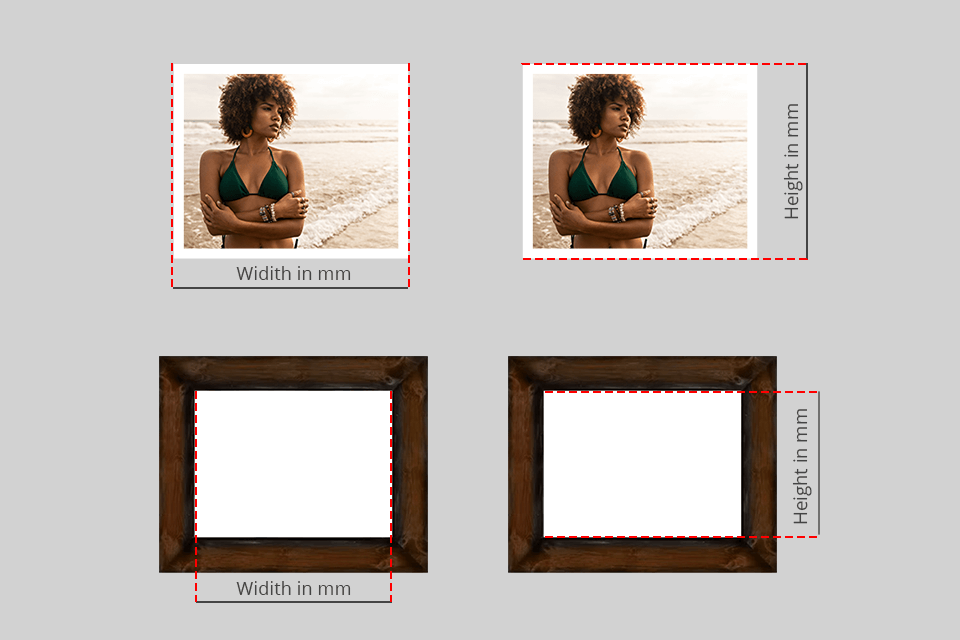
  • They assume that an 8x10" photo requires a frame of identical size. However, that is not the case since the picture simply won't fit into the opening of a frame of this size.
  • They crop the photo to make it match the size of the opening. In this case, the picture will simply fall through the opening and it won’t look aesthetically pleasing at all. It’s always a good idea to keep a few extra millimeters on all sides and order a frame while accounting for the parameters you've received.

Measuring the Frame Only

measure a picture frame without mat

If you want to frame a photo without the white fringing around the edges, cut it off before you start measuring frame dimensions.

  1. Place your photo on an even, firm surface.
  2. Use a tape measure instead of a ruler for determining the picture’s size, as it’s the same method used by most photo printing services that also handle framing.
  3. Write down the received values. If you have one of the standard photo sizes, you’ll have no problem picking one of the common frame sizes for pictures that are offered by photo frame manufacturers.

Pay attention to the measuring units and make sure the ones featured on the frames match the ones used by you. Most manufacturers use inches but some products are measured in millimeters so keep that in mind.
Measuring with a Mat

measure a picture frame with a mat

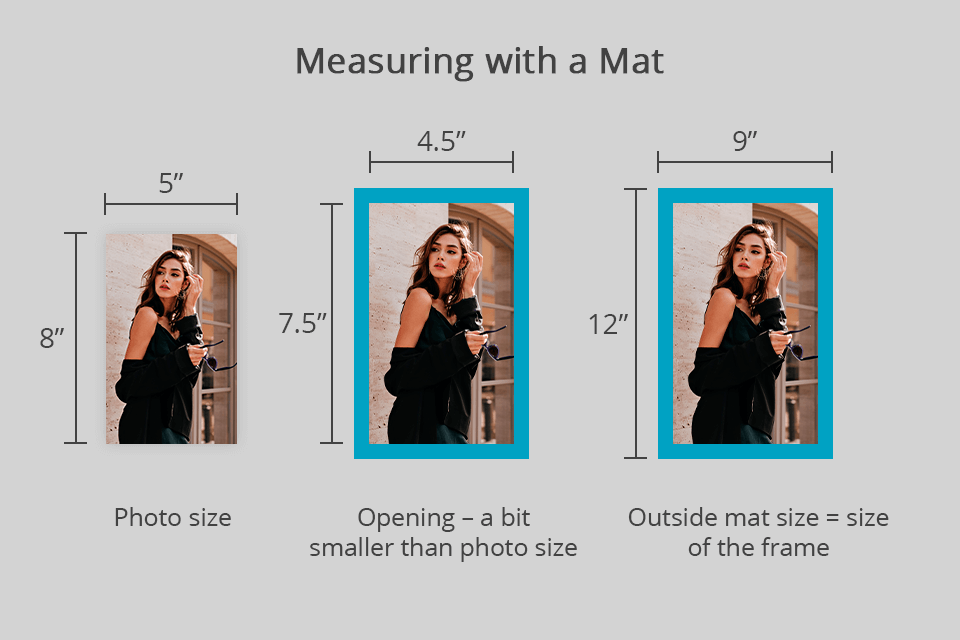
Some people like to bring more attention to their pictures by adding a mat board to the frame. To do so, you first have to determine the size of the mat that you want to see around your photo.

To understand what matting dimensions would suit your picture the best, experiment with different options using software for photo borders before you start printing photography.

Since this approach will most likely require a custom-sized picture frame, follow these steps to ensure you’ll learn how to measure frames for photos with matting properly.

  1. Measure the width and height of the photo on an even surface without accounting for the white matting.
  2. Measure the width of the white matting separately. For instance, you can add 2" of matting to all sides of a 5x8" photo.
  3. Add 4” to the height and width measurements of the photo.
  4. In the aforementioned example, you’ll need to purchase a 9x12” mat and a frame of the same size.
  5. I also suggest adding another half-inch to each side and ordering a frame that has a corresponding opening size (10x13”). The extra half-inches will be hidden underneath the frame and your photo won’t fall through the opening, which would be the case if the photo turns out to be even a millimeter smaller than the opening.

Accounting for these rules when learning how to measure picture frame size regardless of whether you want to order a regular wooden/plastic frame or a modern digital photo frame.

Measuring a Frame When You Want to Replace Your Old One

measure a picture frame for replacement

If you need to replace one picture frame with another for a photo of a specific size, you’ll have to measure the frame’s outer sides.

  1. The most convenient way is to measure the backing that is usually attached to the backside of the frame. Take it off and use a measuring tape to determine the width and height. Use those values for the new frame that you have to order/purchase.
  2. Separately measure the width and height of the opening to make sure your photo will fit into the new frame.

Use the received parameters when choosing a new frame for your photo or painting.

Tata Rossi

Tech Trends Journalist

Tata Rossi is a photographer-advisor, key contributor at FixThePhoto, sharing her expertise about photography and 55% of photos you see at our blog are taken by her. She is a Bachelor of Fine Arts in Photography from the Massachusetts College of Art and Design. She is the main so-called teacher in our team, conducting courses on photography and editing for beginners and anyone interested.

Read Tata's full bio

Tetiana Kostylieva

Photo & Video Insights Blogger

Tetiana Kostylieva is the content creator, who takes photos and videos for almost all FixThePhoto blog articles. Her career started in 2013 as a caricature artist at events. Now, she leads our editorial team, testing new ideas and ensuring the content is helpful and engaging. She likes vintage cameras and, in all articles, she always compares them with modern ones showing that it isn’t obligatory to invest in brand-new equipment to produce amazing results.

Read Tetiana's full bio

Contents:
SAVE UP TO 66% OFF SAVE UP TO 66% OFF