Even though I mostly rely on Photoshop and Lightroom for my image retouching work at FixThePhoto, I still like to use GIMP for handling some simple tasks, so if you’re interested in learning how to make a background transparent in GIMP, you’ve come to the right place.
This free software is perfect for beginners and retouchers on a budget, and using it is very easy.
Below, I’ll cover how to create a transparent background in GIMP both when dealing with simple single-tone and complex backgrounds with multiple colors or patterns.
GNU Image Manipulation Program or just GIMP is a free, robust, open-source photo editing solution. It’s perfect for budget-conscious and newbie users, and many employees who start their career at FixThePhoto to learn how to use GIMP before they advance to Adobe software.
GIMP was my first introduction to image retouching tools, allowing me to utilize pro-quality features without spending a single cent. Even today, I can still suggest it to aspiring photographers interested in making basic edits. It is compatible with Windows, macOS, and Linux, representing a versatile option for anyone who works across multiple devices.
However, learning how to use this software can be a bit challenging. If you’re still new to it and want to learn how to make a transparent background in GIMP, the tutorial below will explain everything in detail.
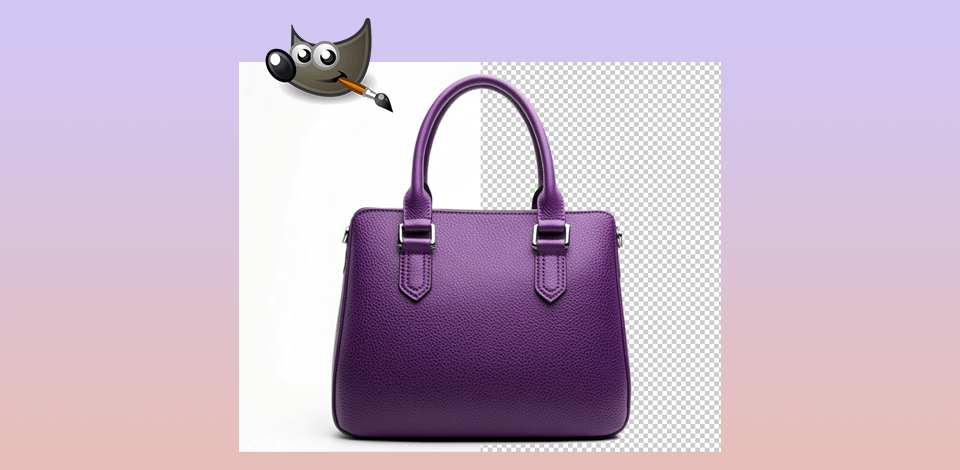
My first time creating a transparent background in GIMP was using a photo with a uniform white backdrop. The process was pleasantly straightforward even for a beginner. I performed the following steps:
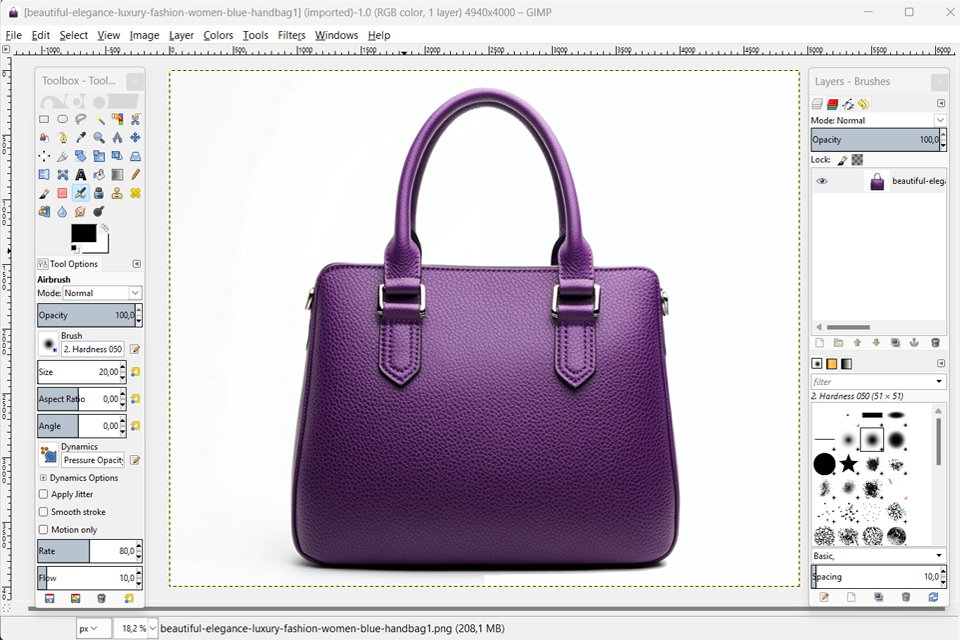
Step 1. Run GIMP and open the photo by selecting File > Open or dragging the image onto the workspace.
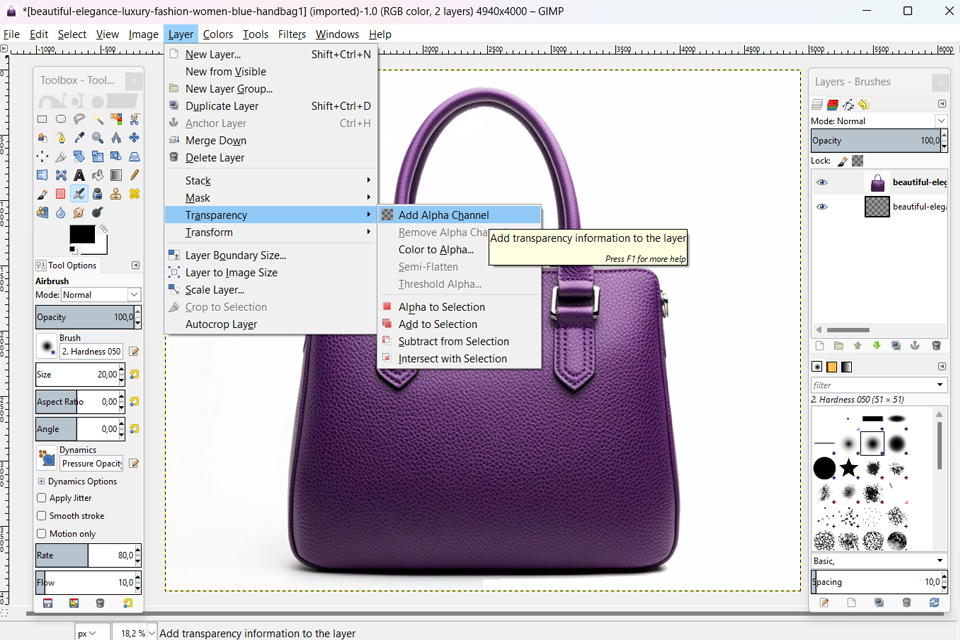
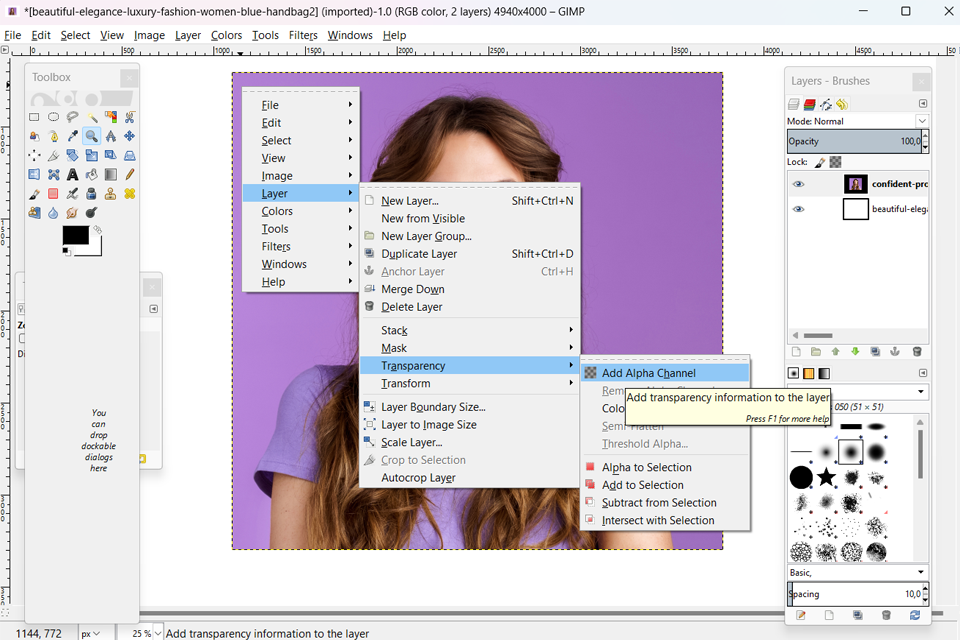
Step 2. Whenever working with a new photo, I look at the Layers panel to make sure it has an alpha channel. Right-click the Layer and pick Add Alpha Channel. If the option is greyed out, the channel already exists. This step is essential for achieving a transparent background.
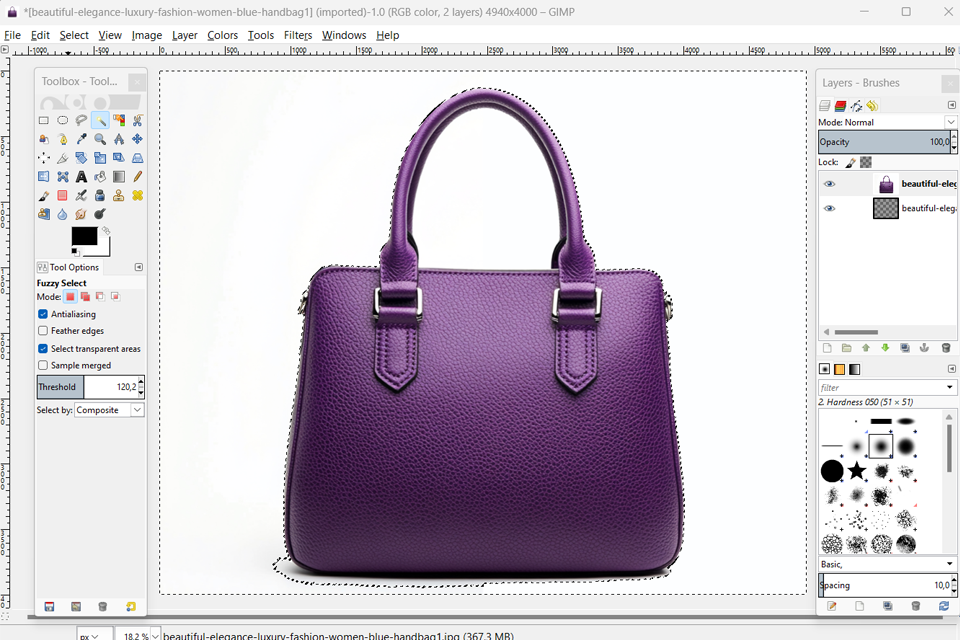
Step 3. Pick the Fuzzy Select Tool (magic wand icon) from the toolkit. Click anywhere in the background. Tweak the Threshold in the settings if you’d like to encompass more or fewer similar tones.
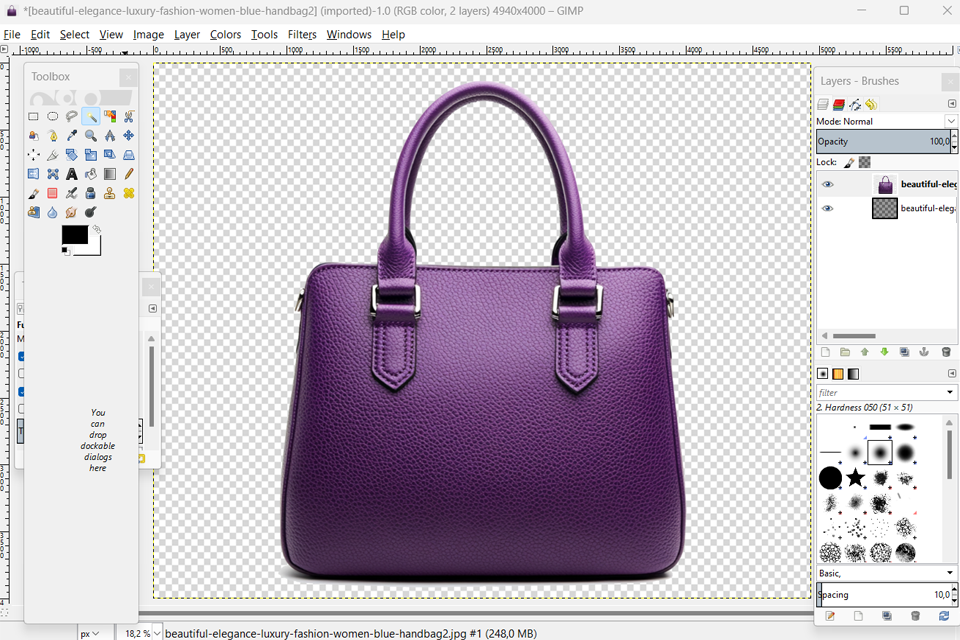
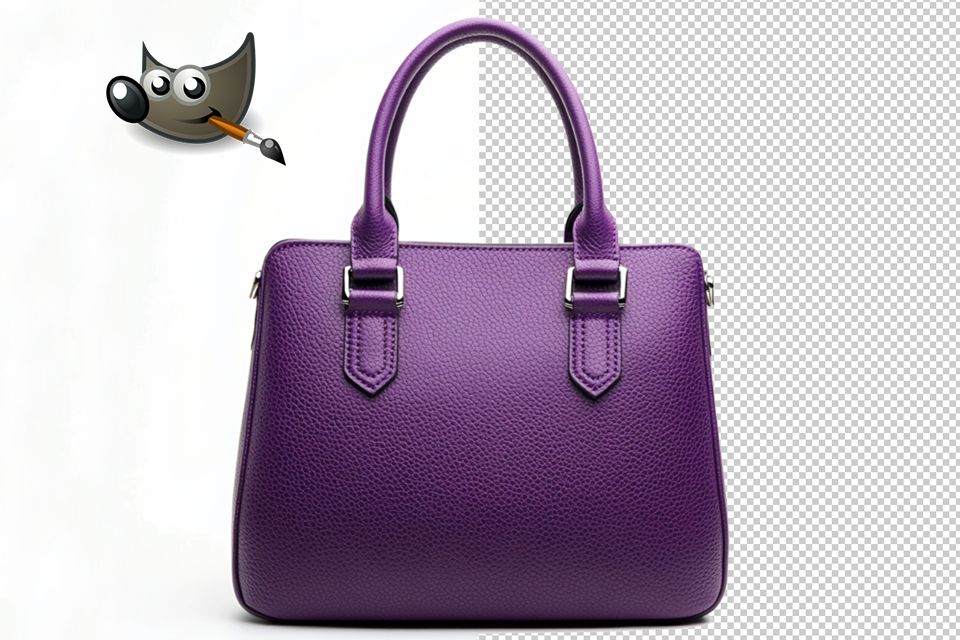
Step 4. Click Delete, and the plain backdrop you had before will be switched to a checkerboard pattern, which is the software’s method for displaying transparency. If you still notice parts of the background in the image, redo the selection and delete it again.
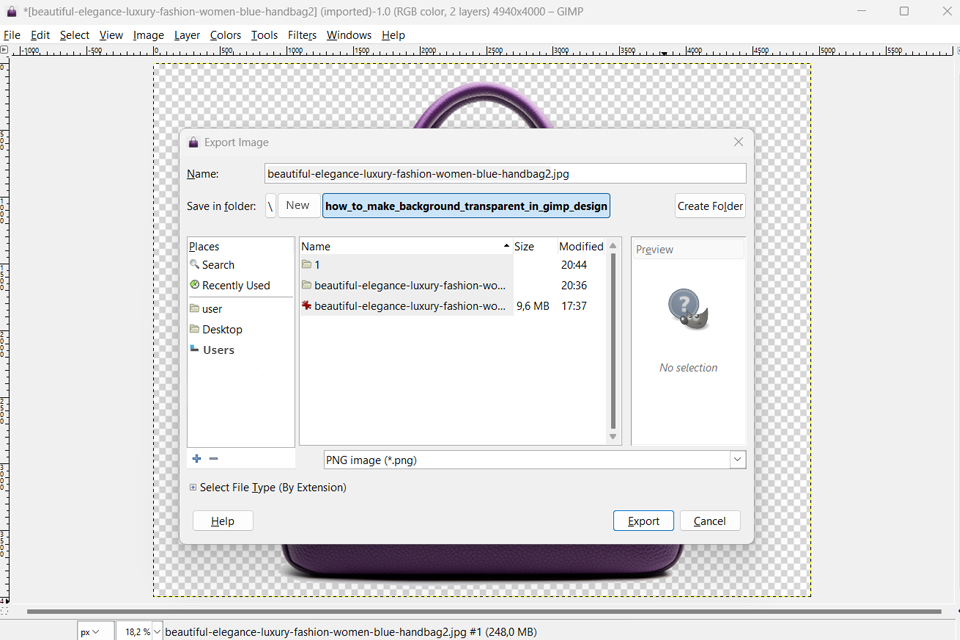
Step 5. Save the photo in PNG format to preserve transparency. Click on File > Export As, name the image, and pick PNG from the format list. This is the industry-standard format for this type of image.
Step 1. Pick the Path Tool, which has a pen icon.
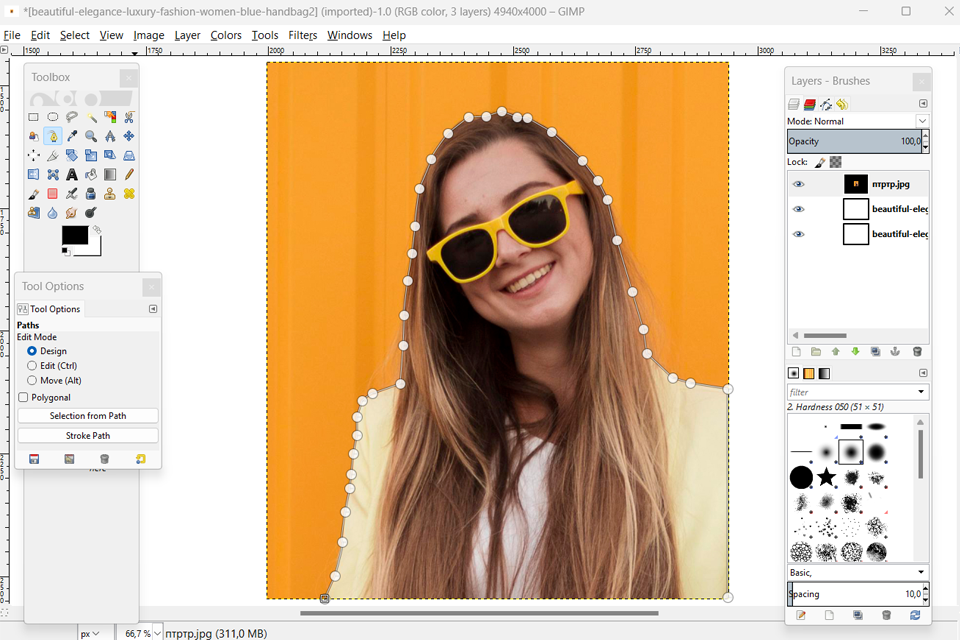
Step 2. Outline the subject. Click to add anchor points around its edges. Tweak the curve of the lines by moving around control handles until you’re satisfied with the outline.
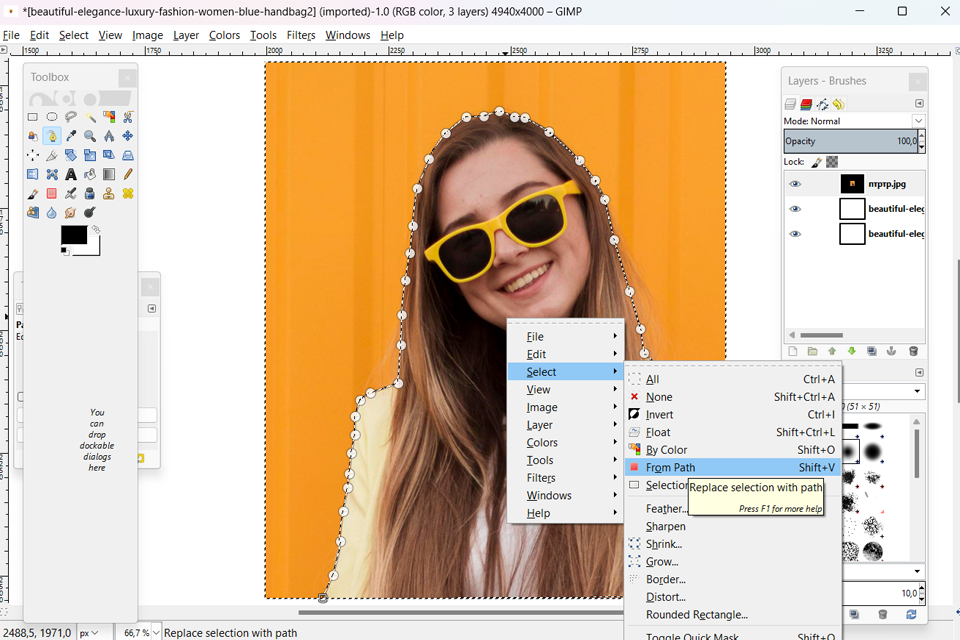
Step 3. Transform path to selection. After you’re done with the outline, right-click the path and pick Select > From Path.
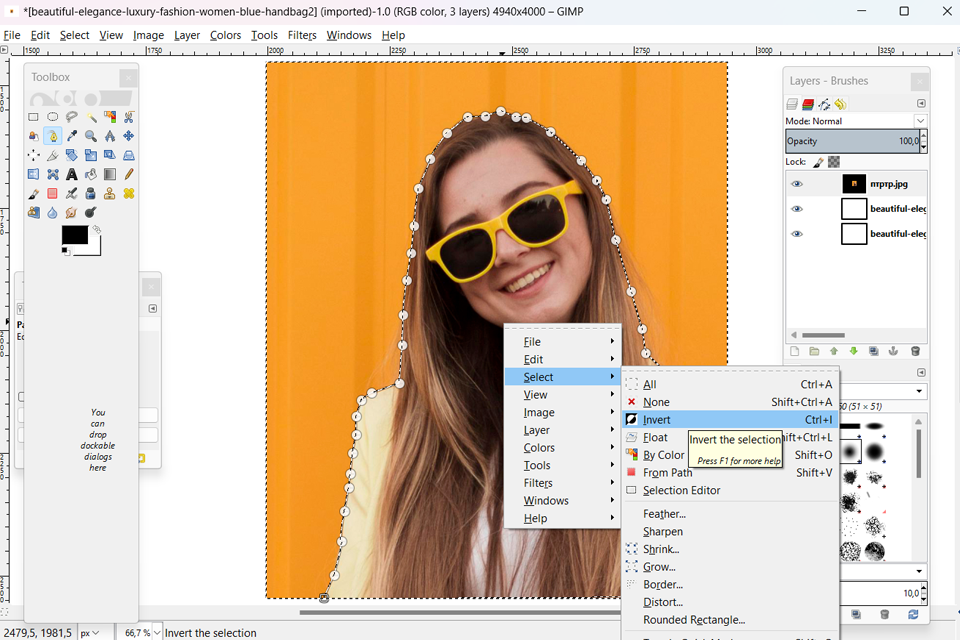
Step 4. Invert the selection. Click on Select > Invert to choose the background instead of the subject.
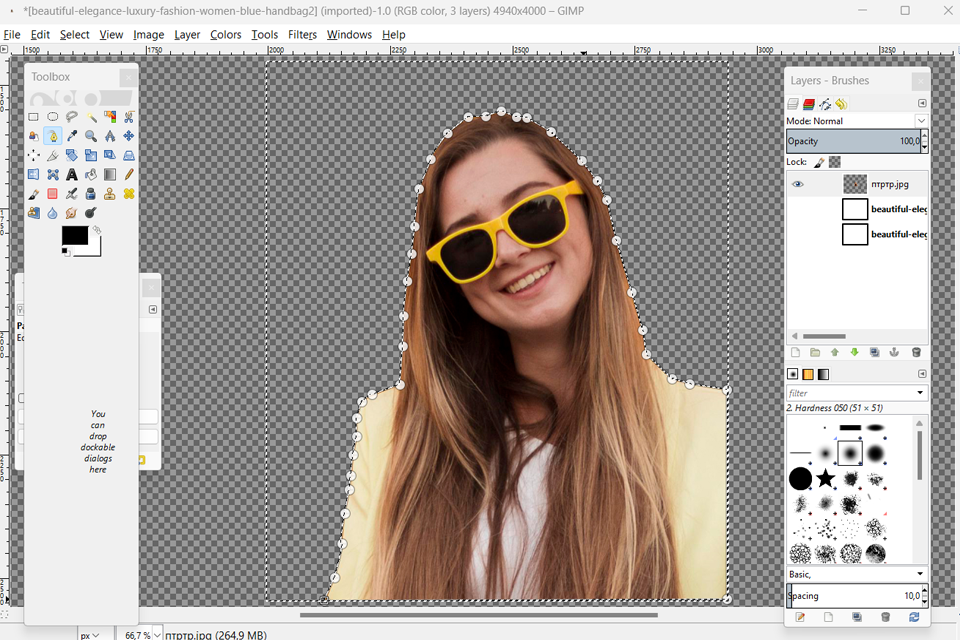
Step 5. Delete the background. Click on Delete to get rid of everything except the background.
Layer masks can be great when handling tricky elements such as hair or fur. They provide a lot of customization freedom, particularly when fine-tuning the edges. Simply follow this brief GIMP tutorial to learn how you can use them:
Step 1. Create an Alpha Channel (if it doesn’t exist already).

Step 2. Add a layer mask. Right-click the image layer and pick Add Layer Mask. Select White (full opacity).
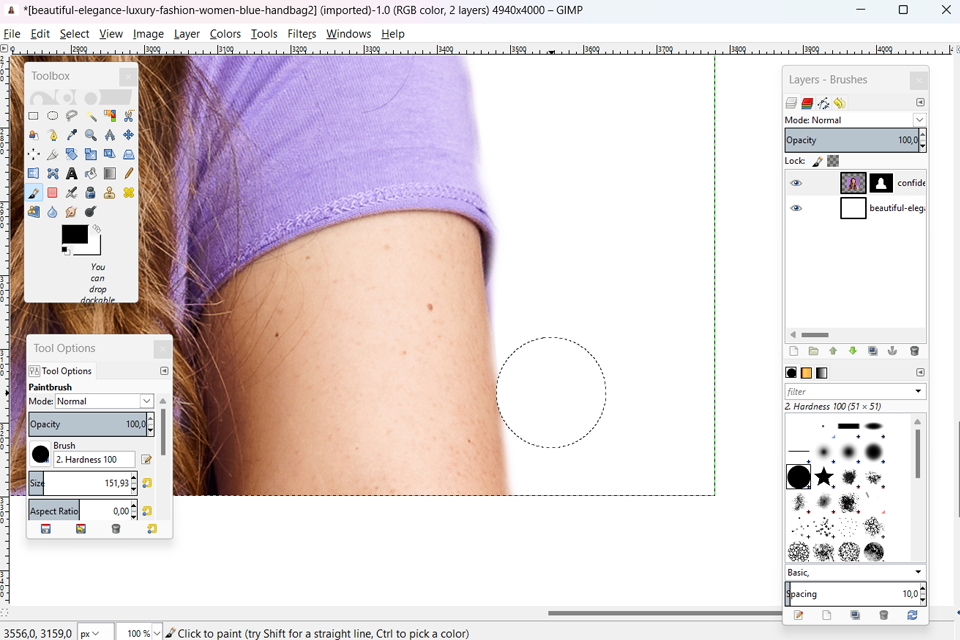
Step 3. Draw the mask. Employ the Brush Tool and draw over the parts of the image that you’d like to make transparent. Switch from black to white to recover areas that you masked by accident.
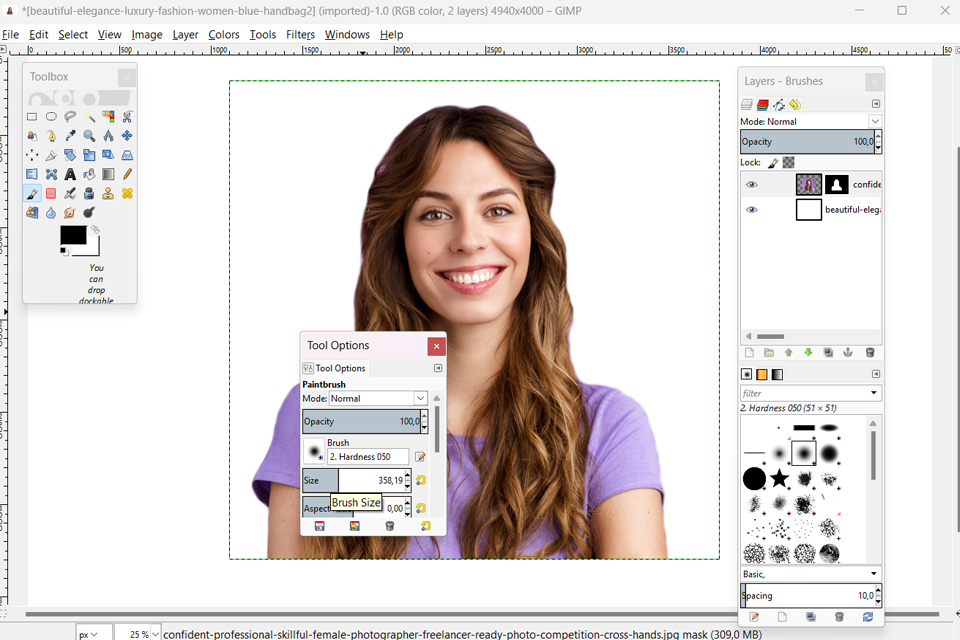
Step 4. Tweak the edges. Customize the brush size and hardness to ensure the selection and masking process is as accurate as possible.

If figuring out how to make a background transparent in GIMP requires too much time or skill, you can rely on our FixThePhoto Body Editor&Tune app to handle everything for you.
It only takes a couple of taps to get rid of any background in your photos and you can choose a lot of other image retouching features. Moreover, new users can receive the first photo for free:


FixThePhoto Body Editor&Tune offers a lot more than just background deletion. It allows you to experiment with a wide range of filters, body retouching, and even order Individual Retouching to fulfill unique requests:
Not really. Even though features like Fuzzy Select can make the process more efficient, GIMP requires manual edits to deliver accurate results.
Choose PNG, as it preserves the transparency and the quality of the original file.
Employ the Feather Edges setting or add a Gaussian Blur to soften the edges.
Yes! Once you’ve deleted the original background, create a new layer that will contain your chosen backdrop and fill it with the required picture.
I suggest leveraging the Foreground Select Tool in GIMP, which allows you to paint around the subject and then fine-tunes the selection area automatically.


![Turn Your Photos to GTA Style Online [free]](/placeholder-450x300.svg)


