Want to take fruit photography that looks yummy and appetizing? In this article, I will tell you how to choose the proper fruit photography equipment, lighting and give some useful tips and creative fruit photography ideas.
Fruit photography is a specific genre of food photography, which is used for commercial and creative purposes. If we treat fruit photography in a creative manner, it is commonly fruit still life photography or conceptual photos.
Commercial fruit photography is aimed at reveling and showing specific properties of a product (e.g. juiciness, palatability). Most often, it is an advertisement for various drinks, where the buyer must identify the fruit with the drink itself. If you have never taken the photos of fruits, check out my basic fruits photography tips on how to bring the quality of your fruit photographs to a professional level.

You may always edit your fruit photos in photo editing software, but it can be difficult for beginners to work with a rounded surface. So I recommend picking the perfect and fresh fruit to photograph. Choose impeccable fruits (the taste of which is not always as good as it seems).

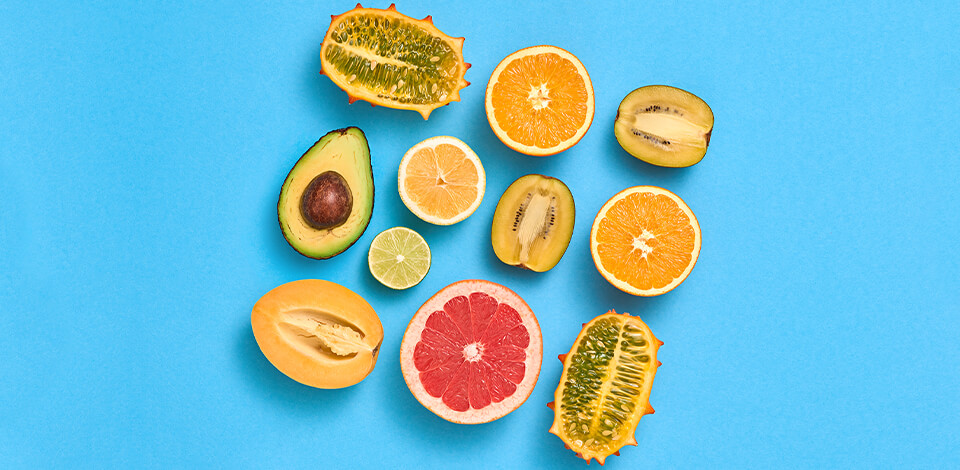
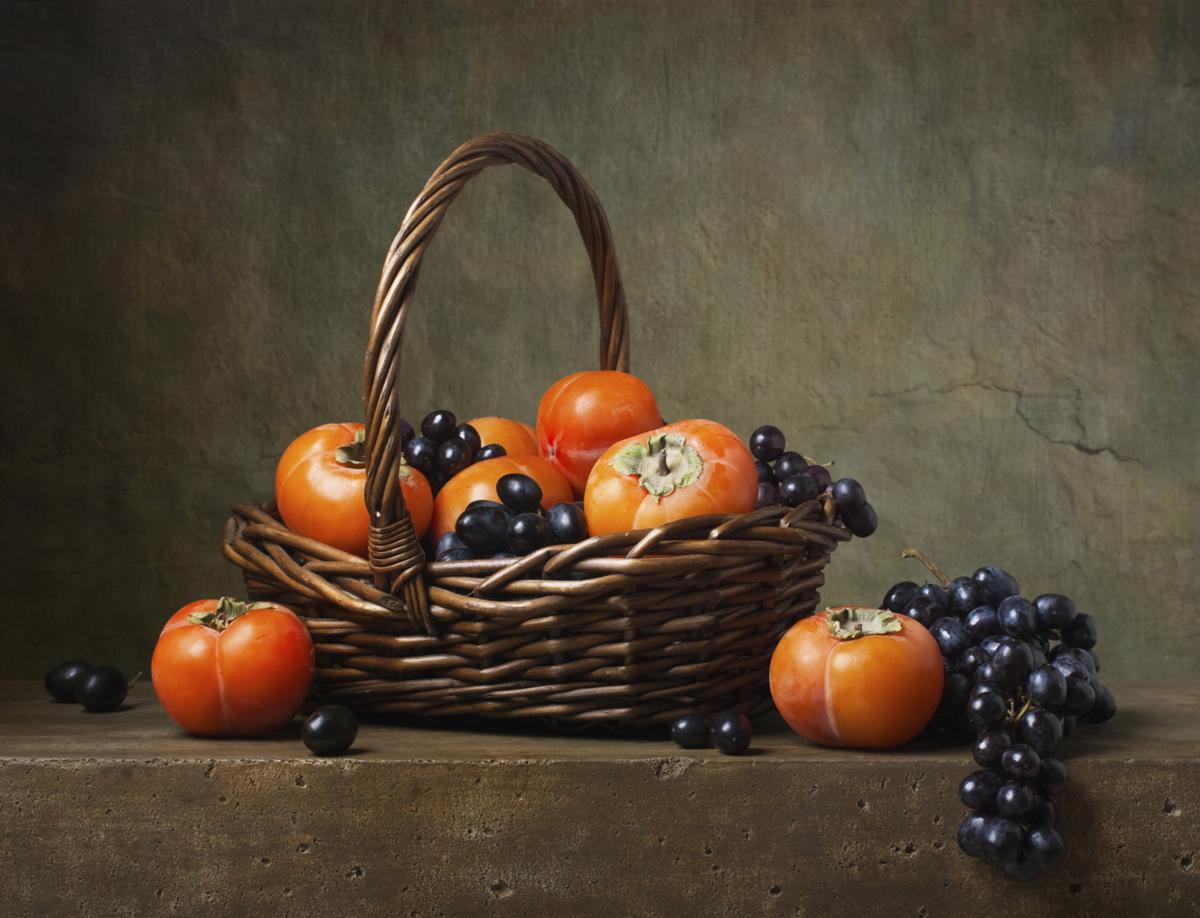
Attempt to arrange your fruit carefully and in a certain order. If you wonder how to photograph fruit, for instance, a bowl of apples and pears, try to give each type of fruit the same space. Arrange them so that they are all placed at slightly different angles – accidentally, but in an organized way.
If you have a small fruit bowl, consider using an odd number of items (three or five). It is based on the rule of odds, which states that people are more comfortable looking at odd groups of objects rather than even numbers (odd numbers are dynamic, while even numbers are static).
Need some inspiration? Check out these creative and surrealistic food photography ideas from professional photographers you can use to take beautiful photos.

As soon as your objects are neatly placed, mount your camera for food photography on a tripod and select a small aperture so you may get a decent depth of field from the foreground to the background. Depending on the amount of light passing through this window, you can use a slow shutter speed (hence the tripod).
Don't raise the ISO value. Your goal is to capture details, and higher ISO means increased digital noise and fuzziness of details.
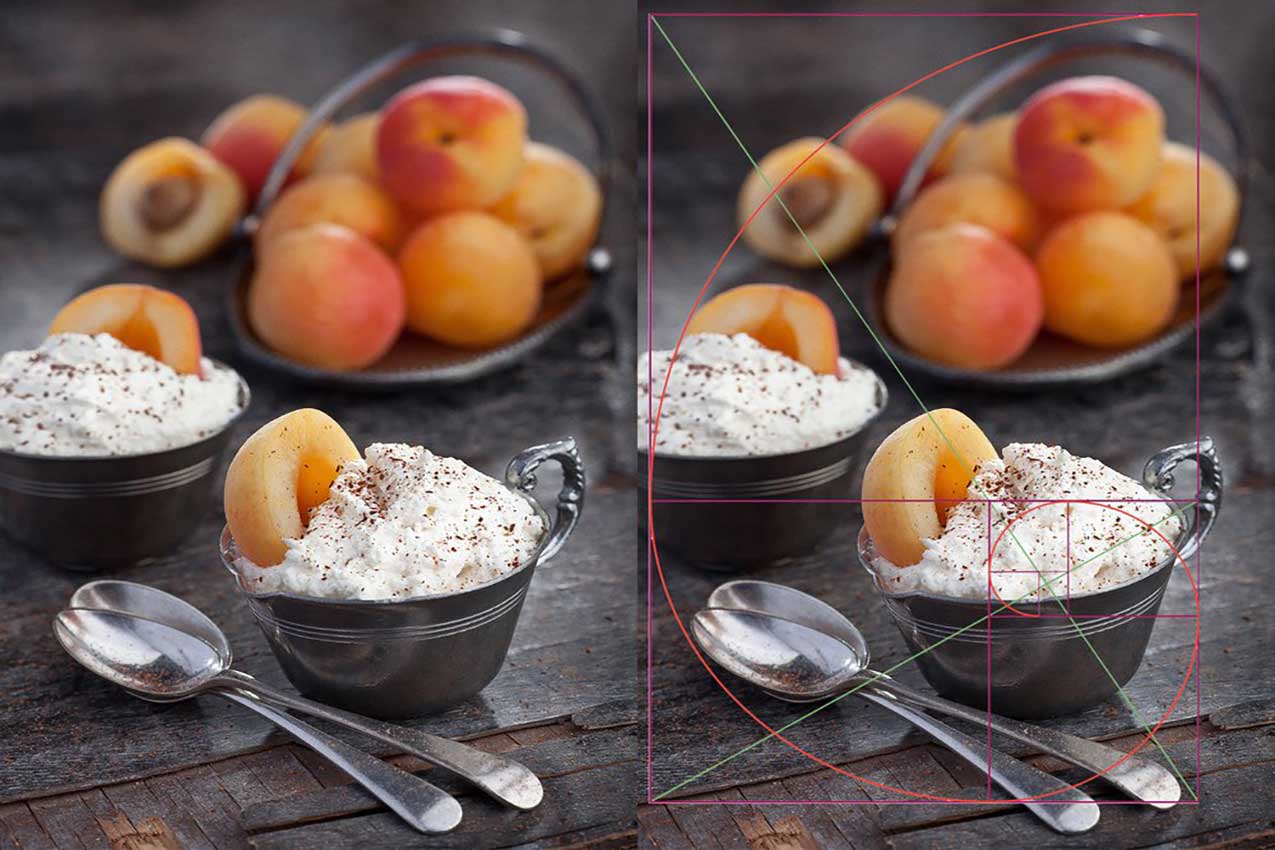
When composing fruit photos, it is important to remember the rule of thirds. Try not to place objects precisely in the center of the frame without a strong necessity. Don't forget about other composition techniques, such as rhythm.
Take numerous shots, try different versions of the composition, experiment, improvise with the composition and lighting. This will allow you to achieve interesting and unique shots.
As a background, you may use everything you can imagine. But you must remember that if the background is too colorful and diverse, it will interfere and distract the viewer from the plot of the picture.
A solid wall, some fabric or paper can serve as a perfect background for a fruit photo. Of course, you may use specialized photo-backgrounds made of paper, non-woven fabric (the cheapest and most practical) or plastic, which is sold in photography stores.

While preparing for fruits and vegetable photography, I prefer to stay close to the source of the produce. You may visit farmers’ markets with hundreds of shops selling fruits and vegetables picked the same day, or even contact the specific farmers directly.
Connection with the nearby farms is the best way to keep your products fresh, and hence, the freshness of images. It is also a great way to pick a wide variety of products in abundance. Most, if not all, fruits and vegetables from the local farmers are organic and look amazing in photos.
Each particular fruit or vegetable needs to be processed to look fresh. With herbs, I cut off their bottom and store them in a jar of water. This prevents them from getting limp before they have time to sink.
As for the salad, before shooting I put it in the tub with ice water for it to look fresh. As for most fruits, I spray them with a mixture of 50/50 water and glycerin to give them a fresh and juicy look.

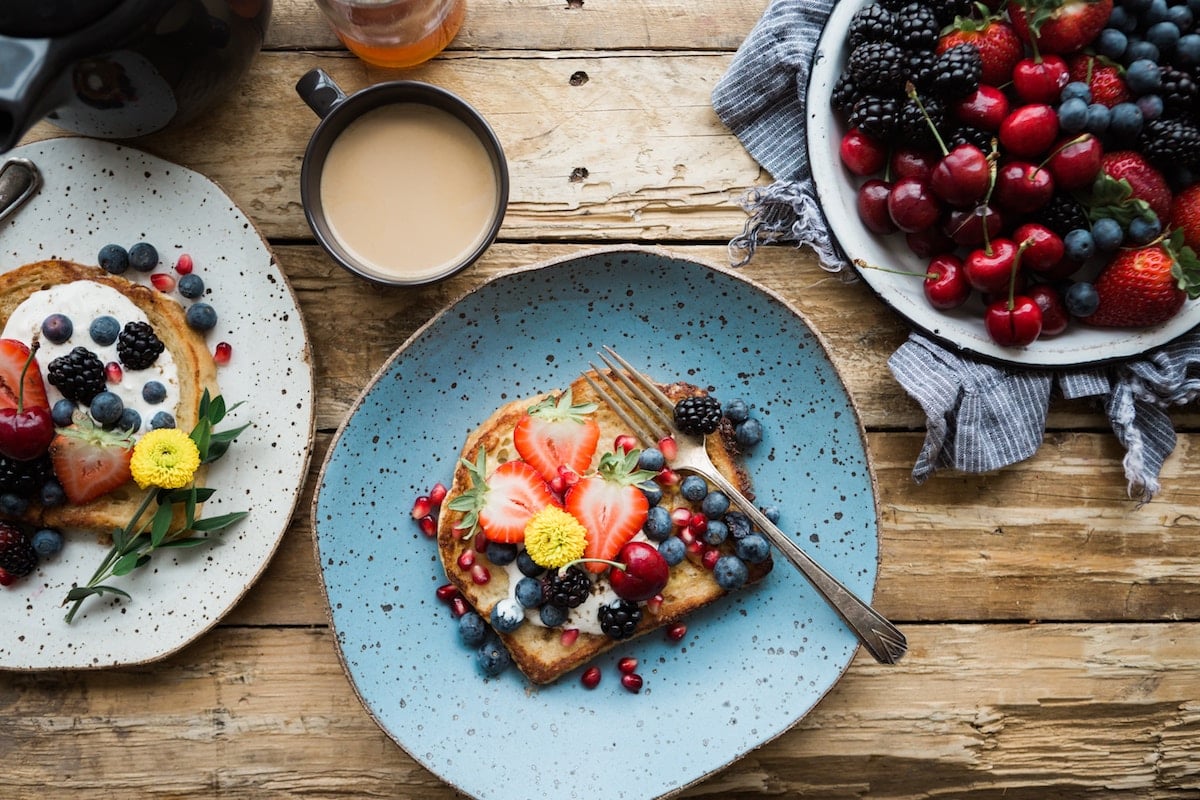
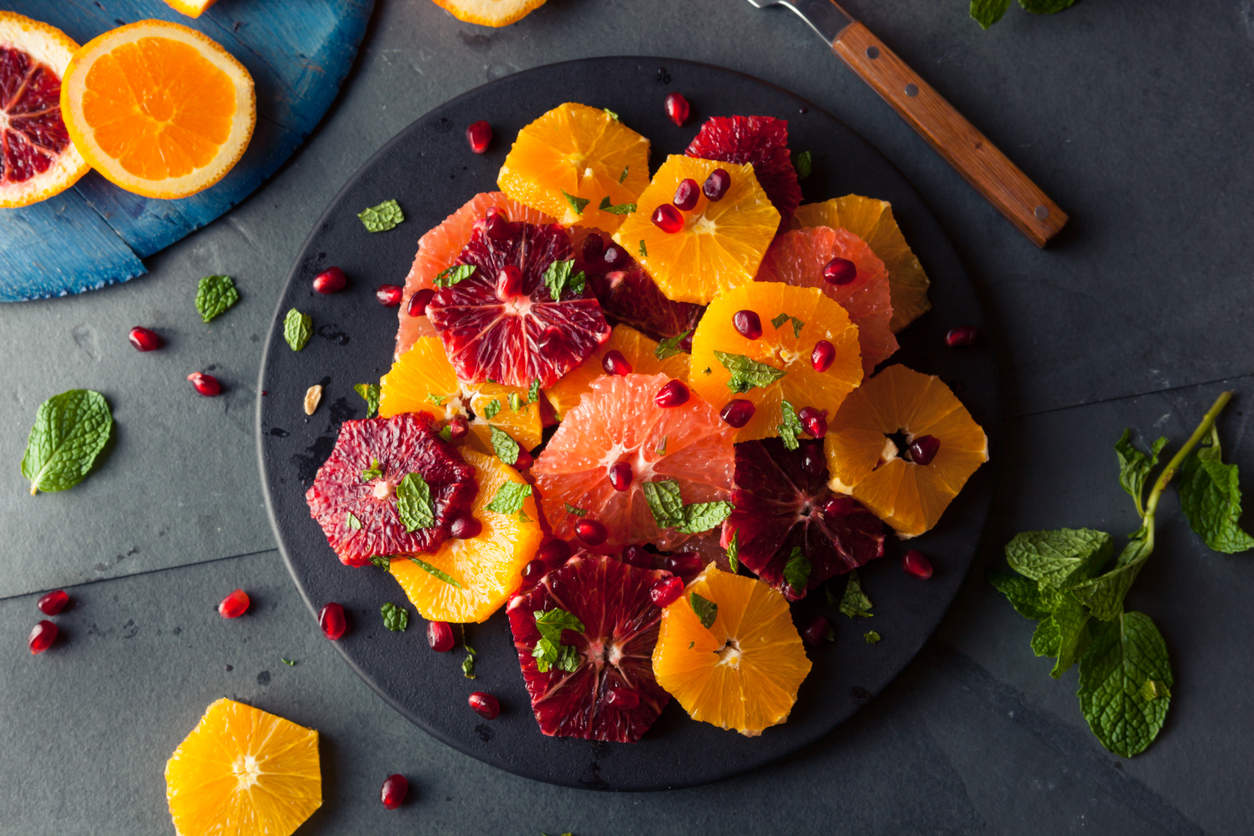
I have already mentioned a vast variety of decorative elements to enhance the composition, but in many cases, it is better to stick to minimalism. The colorful fruit with unique shape on a bright contrasting background calls for a simple composition. In this way, a picture of fruits will look more appealing and eye-catching.

Plenty of well-known fruit photography artists are recognized for their own peculiar style, for instance, black and white fruit photography. Their style is characterized by some dominant features which aren't found in other works. You start developing your style once you think about the subject, the arrangement and the decorations of a future shot.
When you are satisfied with the result, you do your best to have a consistent look in all of your imagery. Soon, your taste will become more advanced and your one-of-a-kind style will be more noticeable in the photos.
Many different ways of shooting fruits exist. You may enhance the most common fruit composition using props, change the scene or experiment with shape and texture. Below, I have prepared four of the most interesting ways to add visual interest to your fruits images.

For sliced fruit photography, you may use any fruit that may be cut in a relatively neat way. Hard fruits are the easiest to use. Once you decide on the fruit, you need to determine how to cut it. Some fruits are too soft to be sliced. Some fruits look best when they are wet. If you want, you can spray some water to make them look fresh.
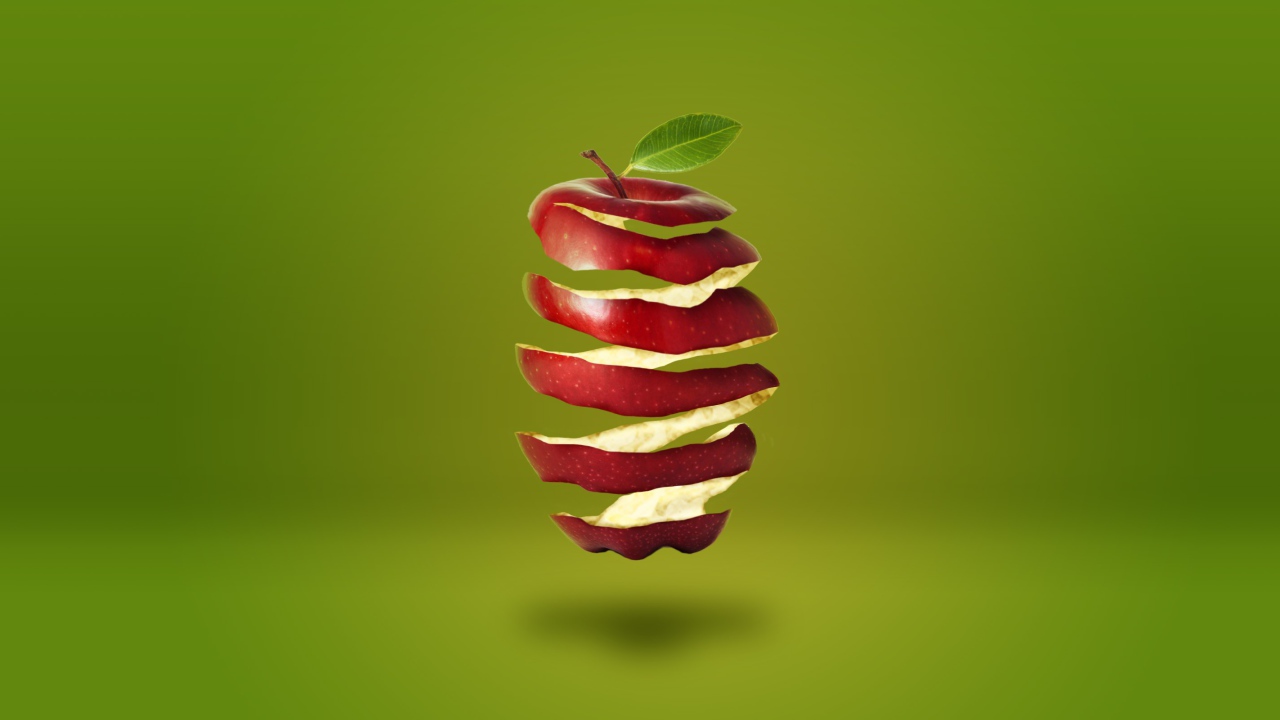
You can make fruit slices seem like they are soaring in the air. In most cases, I use toothpicks to fasten them. Later, the toothpicks will be removed during editing. The best way to arrange fruits and toothpicks is to imagine how the composition will look when the toothpicks are removed. First, carefully add the toothpicks, balancing the fruit, then attach all the necessary slices.
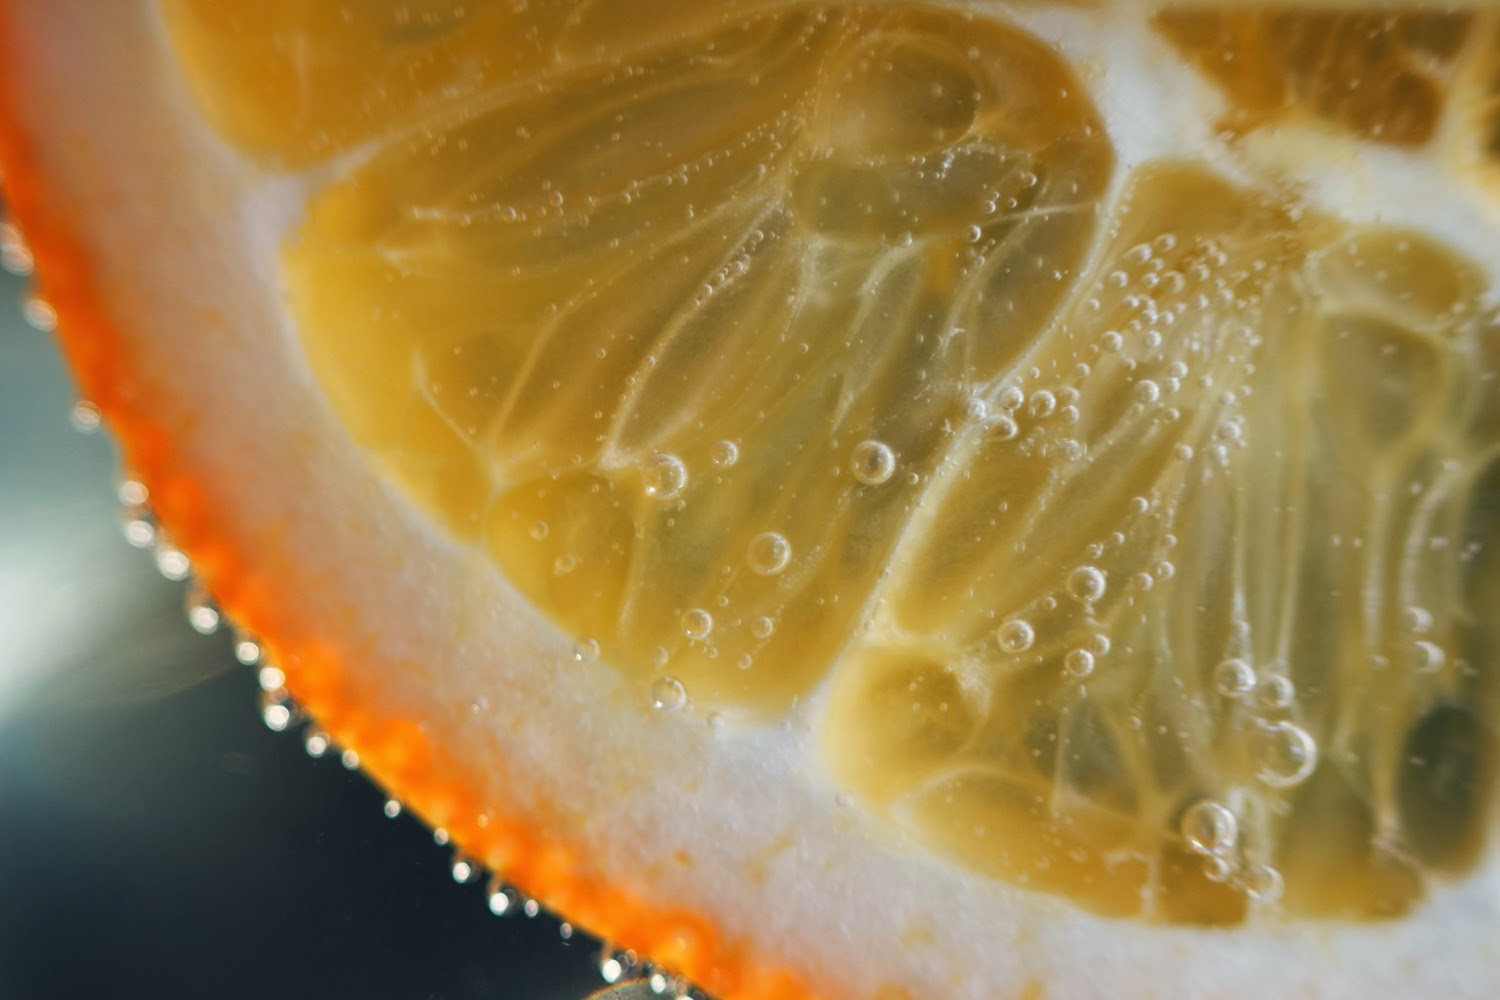
It's no secret that the texture of the fruit pulp itself looks intriguing. The main thing is to display it in an appealing way to the viewer. Food stylists and fruit photography artists, who are fond of macro photography, shoot products or any objects in carbonated water. The subject is "covered" with air bubbles, which contributes to the image’s airiness, brightness and beauty.
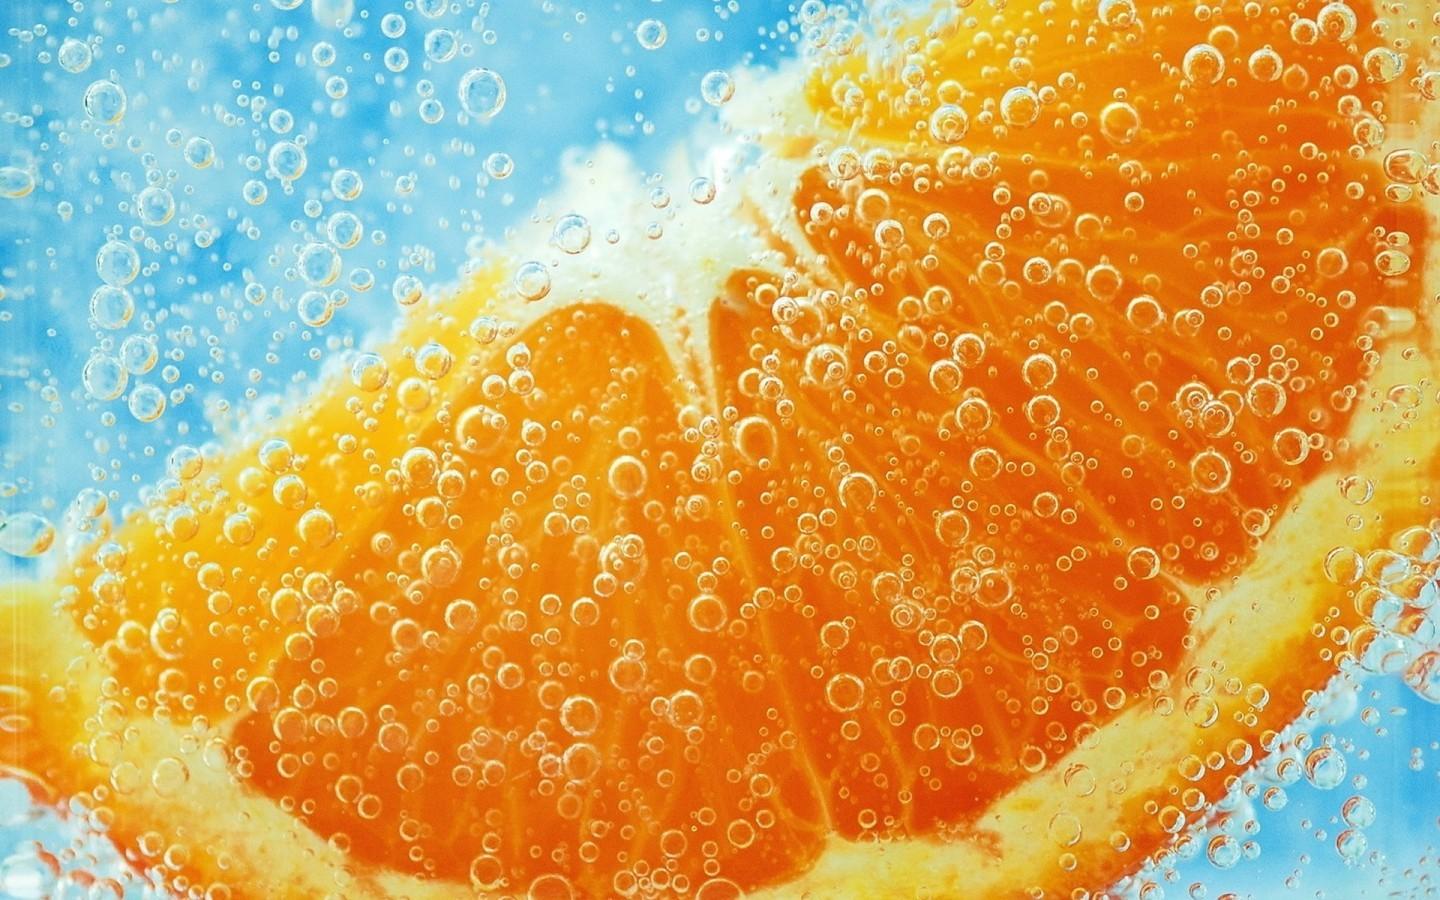
Choose highly carbonated mineral water because it has larger and more durable bubbles. You may use a glass cup or a plastic box as a container, in which you are going to take a picture of fruit.
It is convenient to use rectangular glass containers or shaped cans of dairy products. Of course, the containers should not leak and be sealed because the shoot may last from a few minutes to an hour or more.
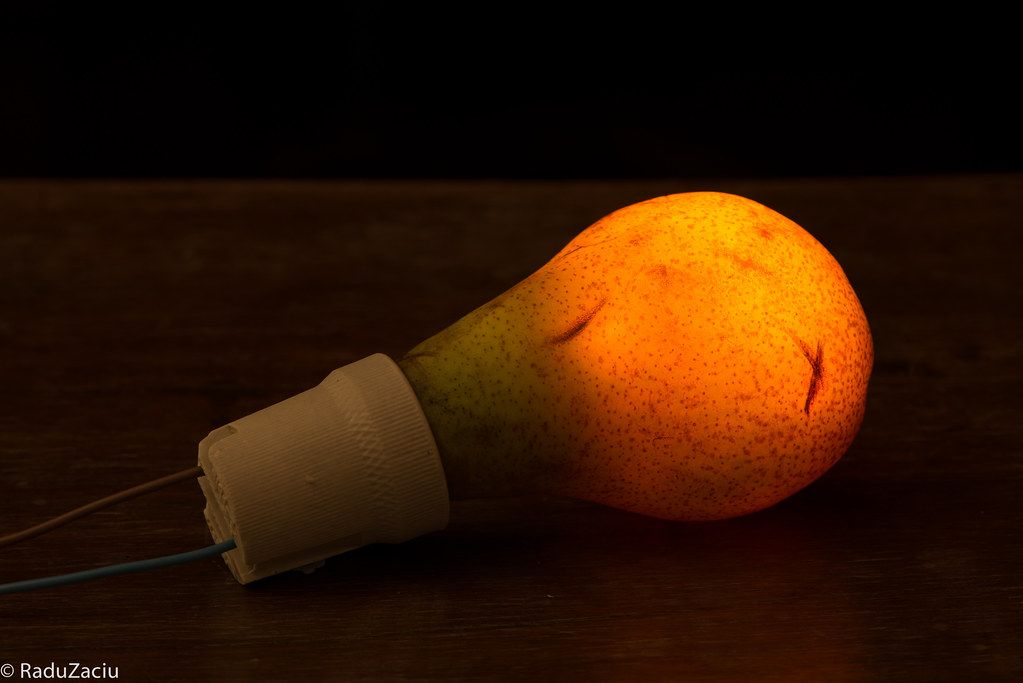
Romanian photographer from Bucharest, Radu Zaciu, made an experiment connected with fruits and vegetable photography using internal product illumination. He placed the lamp inside objects, which served as the main source of light for his series of "luminous" shots.
This creative fruit photography project is called “The Light Inside.” It gives us a different perspective on what we eat. The process begins with making a hole in the vegetable or fruit, for example, with a drill. The hole should be large enough to insert the bulb. At the same time, you need to leave the pulp, which gives a special, unique color to the glow.

Radu Zaciu worked with a variety of fruits and vegetables: kiwi, cauliflower, white cabbage, pineapple, potatoes, strawberries, pumpkins and others. For small ones – he brought into play the small light bulbs, for larger ones – 40W bulbs.
The lighting was very weak, so the photographer shot in the pitch dark at long shutter speeds (more than ten seconds to properly expose objects). Radu Zaciu adds a bit of light for the leaves to capture them as well.
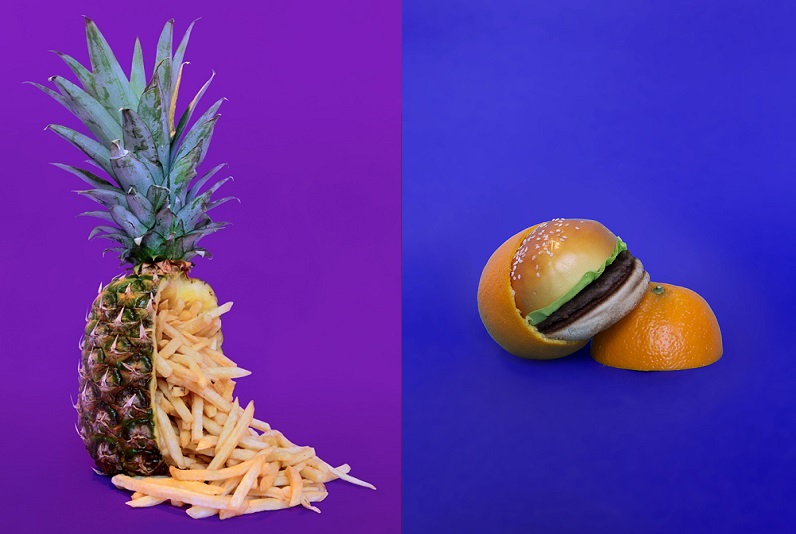
For the conceptual fruit photography type, you need to take two factors into account – personal creativity and props. Cubes of vegetables in the form of a Rubik's cube, banana as a shoe or a carrot instead of a lipstick – here you are limited only by your own ingenuity. It is important to use the props moderately because the main star of your shot is the fruit.
Since a fruit typically has a round shape, the light bounces off of it, especially if the light is correct. By correct light, I mean the diffused and soft one, which works for the majority of photographed objects. The light coming from the window is definitely a way out.
However, if you wish to take fantastic fruit photos, the sunlight shouldn't be direct and a window must have sufficient sun exposure. For the softer and more diffused light, it is recommended to hang a transparent curtain over the window.
Side Light
In case you need to drastically alter your fruit photos, experiment with the direction of the light. I suggest you locate a fruit plate near the window for the object to be illuminated from the side. In this way, you will increase the quality of a picture.
When you have one light source, the item will be greatly illuminated from one side, while the other one will be dark. By setting up sidelight, you can put emphasis on the texture of the fruit. All small elements and details of the surface are more noticeable if you stick to sidelight.
Front Light

This type of lighting is also commonly used. Position yourself with the camera in front of the window in such a way that the light comes straight from behind you. The light is supposed to strike the front of the fruit plate and, as a result, it will be even. Nevertheless, the front light is quite problematic, as it can make your fruits images flat. It means that the shot won't feature necessary highlights and shadows.
In case of shooting with front light, a fruit might lose its appeal in the picture. It is explained by the fact that the items illuminated from the front will have concealed shadows behind them. These shadows add more dimension and reveal the texture of an object, so you don't want to hide them.
Back Light

Last but not least, you may use backlight for your fruit food photography. Many food photography enthusiasts prefer this type of lighting, as it produces outlined highlights along the edges of the elements. Still, there may be some difficulties.
For instance, backlit items result either in a dim background with properly lit objects or a bright background with dark, barely visible objects in a shot. Still, if you opt for backlight, I recommend investing in a reflector which will throw light on the shadows and an object won't turn out to be underexposed.
Keep in mind that correcting minor lighting problems, such as slight overexposure or slight underexposure, is a simple and fast task thanks to ready-made effects. They can also help make photos more vibrant and ravishing.

This photo was taken by Nikon D7500
For fruit photography, almost any camera is appropriate. The main thing is the ability to adjust the shooting parameters manually. A good choice would be a DSLR camera, both the simplest ones like the Nikon D3200 or Nikon D3300 and more advanced ones like Nikon D7500 or Nikon D610.
Before purchasing, I suggest searching for reviews and visiting a nearby photography store to test them out. In case you manage to find the camera that seems convenient and meets your requirements, don't hesitate to buy it. Keep in mind that in fruit photography, the lens plays a more significant role than the DSLR. Therefore, it is better to buy a lens for food photography separately.
Read about my list of the best cameras for product photography you can buy for affordable price.

This photo was taken by Nikon 50mm f/1.4G
Perhaps the best choice for shooting fruits is a fixed lenses with a focal length of about 50 mm for cameras with APS-C matrix and of about 85 mm for full-frame devices. Popular lenses, such as AF-S NIKKOR 50mm f/1.4 G, AF-S NIKKOR 85mm f/1.8 G, macro lenses AF-S Micro-Nikkor 60mm f/2.8 G and AF-S Micro-Nikkor 105mm f/2.8 G VR meet these criteria.
Personally, I prefer fixed lenses, as they are typically inexpensive, compact and swift in comparison with zoom ones. Fixed lenses provide a rather wide aperture which is great for regulating the depth of field and ensure flexible shooting process.
Still can’t choose a good lens? Check out my review of the best lenses for product photography you can use to take awesome fruit photographs.
In case you prefer the side light and a dramatic-looking image isn't a desirable option, a reflector will come in handy. I use Neewer 5-in-1 Collapsible Light Reflector. Its function is to throw light on the shadows. Using a reflector, your pictures will have just the right amount of contrast and all the necessary details will be visible.

This photo was taken by Manfrotto 190XPRO
A tripod is needed primarily when shooting without flashes, with constant light. It will allow you to shoot even in low light with minimal ISO, at slow shutter speeds. Therefore, you will get high-quality shots.
Secondly, you will be able to accurately compose the frame, without tilted horizontal lines. Such shots are not taken on the first try. So, in order not to run with the camera in handwhile adjusting the composition, it is very convenient to put the device on a tripod.
If you’re not going to use a tripod for other photoshoots, choose among the best budget tripods that can also help achieve clear photos.
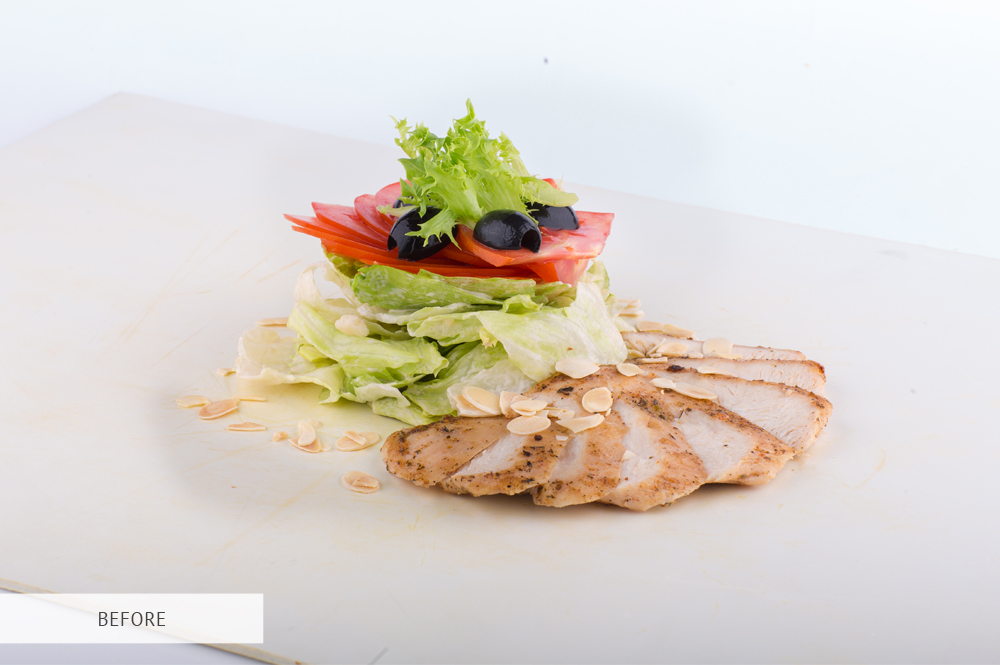
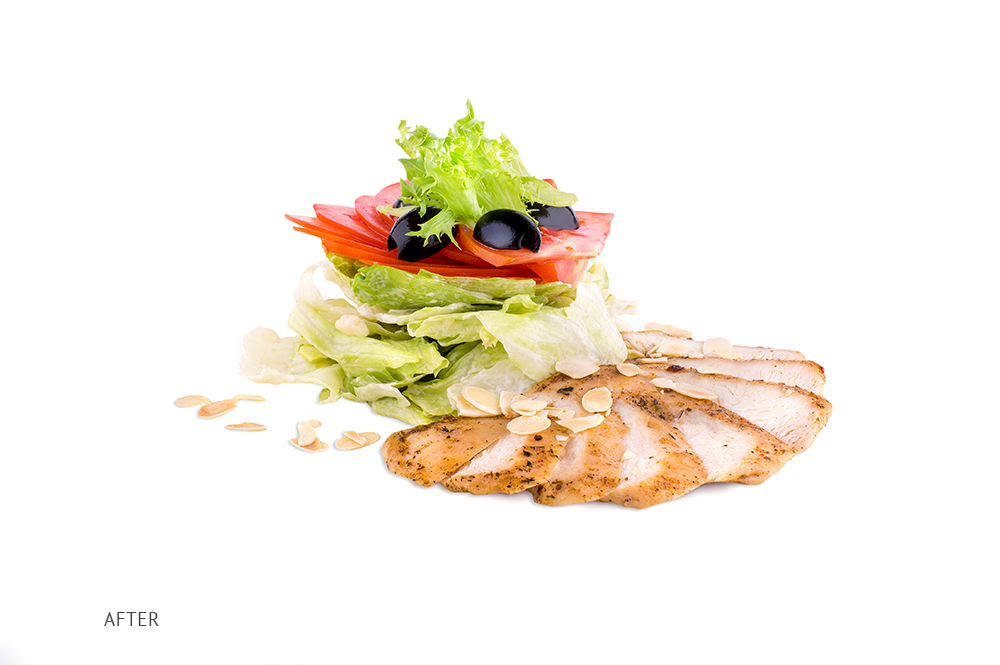
Since fruit photography is closely related to commercial photography, the photo must be flawless and good for printing in high resolution. You should do deep color correction, make the background white, add natural shadows, remove unnecessary objects, etc.
Get professional photo color correction for about $5 per photo.
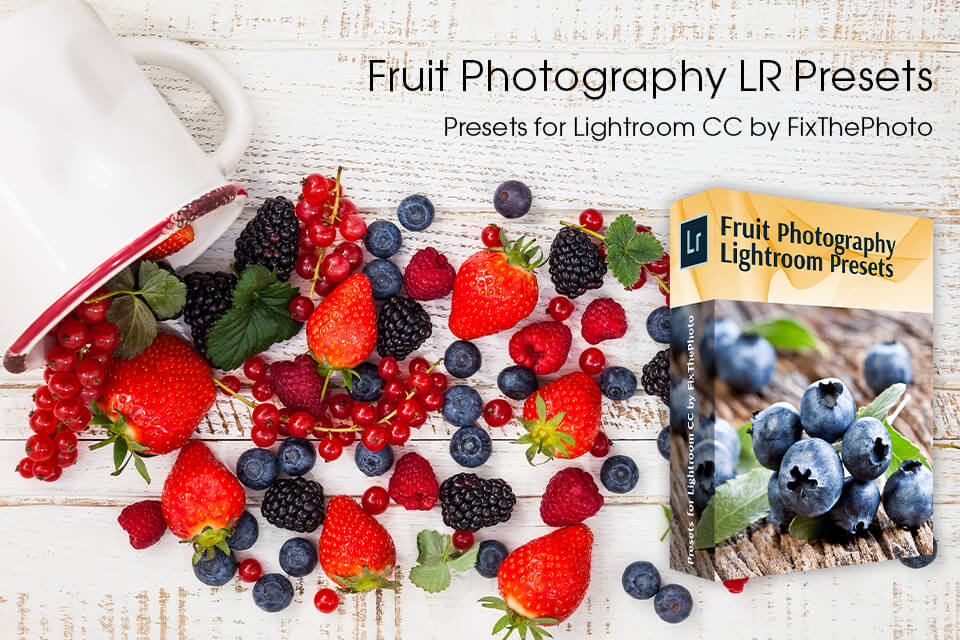
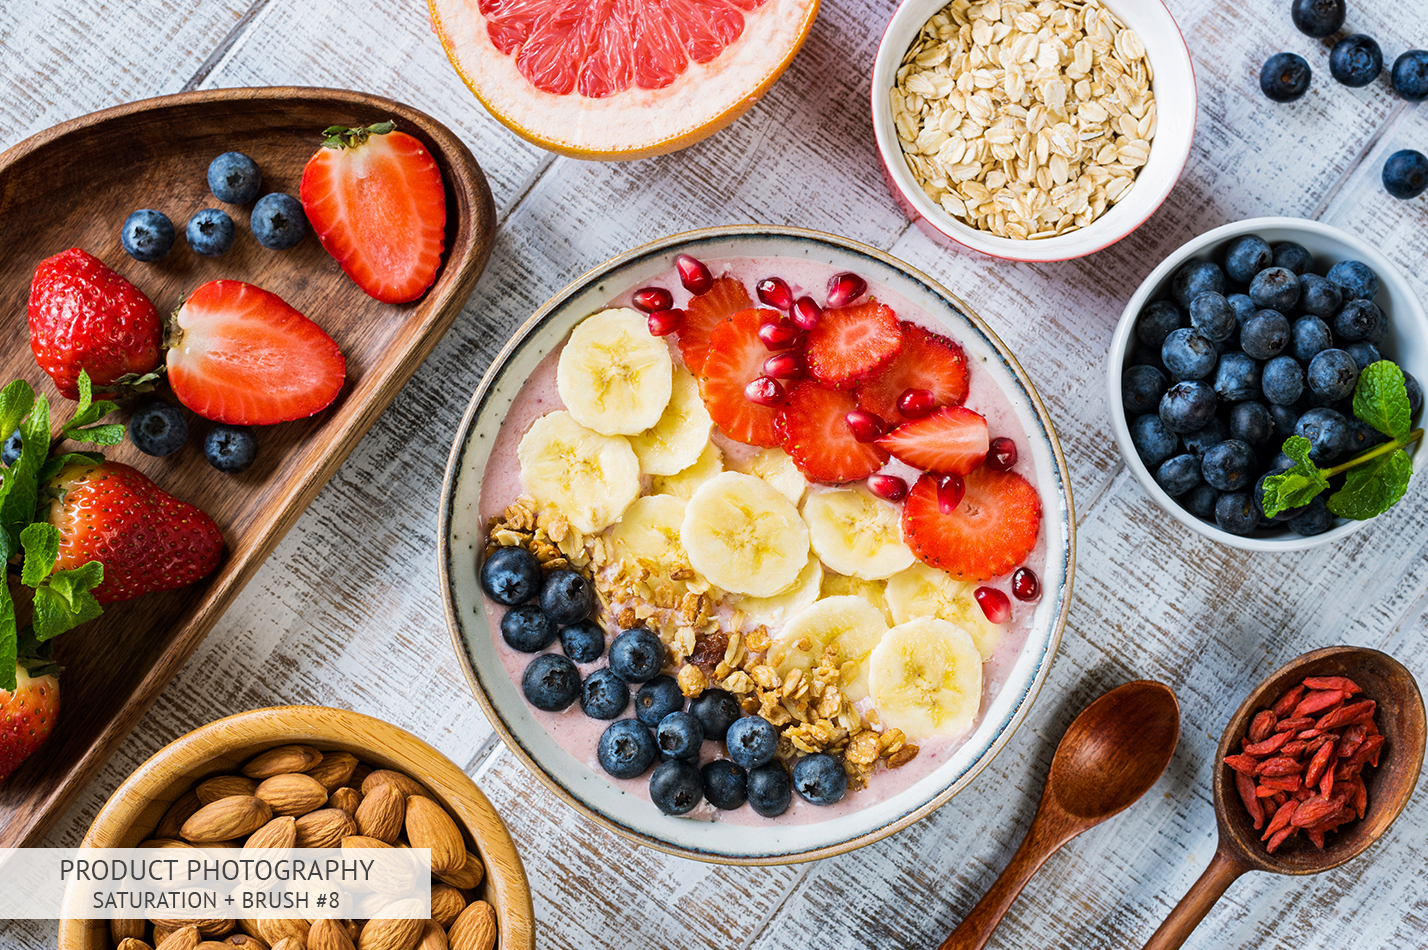
To make post-production faster and easier, use the following effects for Lr. Each has its own style, which will help improve the quality of your photos in several clicks.


