Note! This guide does not guarantee the complete safety of the equipment as you may damage it while opening the front or rear lens element. You should address authorized service centers where experts will remove dust in the internal parts of the lens. If you do it yourself, these actions can cause problems and forfeit the warranty!
When you find dust inside lens that you have used just a few times, you will probably be disappointed and start looking for solutions on the net. You shouldn't get upset since it is quite a common thing and there is a lot of info related to this problem. In this guide, you will learn why dust appears in a closed chamber, how it affects the quality of images, how to get it out with minimal expenses, and whether it is necessary to do it at all.
Dust is everywhere. It can even be in sterile optics factories where manufacturers do their best to remove it from the environment. Workers are in the controlled production space, dried with inert gas, and they wear vinyl overalls and gloves when assembling lenses. Even new lenses can have some particles inside when they are still on the conveyor if manufacturers neglect the rules.
If you have focused or zoomed at least once, your lens has "breathed". I'm not talking about the focus shift effect when the image is enlarged at the moment of adjustment (as if inhaled). It refers to the act of inhaling and exhaling. Lenses can "exhale" due to the movement of elements inside them when focusing and/or zooming.
From physics lessons, you remember what happens when pressure increases inside a hermetically sealed container. If you try to reduce the size of such a container by pressing on it, the pressure inside will only allow it to compress to a certain level before it pushes you back and returns to its original position. This is the simple concept of atmospheric pressure in physics.
You can apply this rule to lenses if they were fully sealed. You can only zoom to the limit when the pressure in the lens returns the aperture to its original position. This is especially true in zoom lenses. A similar effect will occur with focus. Therefore, manufacturers had no other way to design this photo equipment. Lenses with movable elements inside need to inhale and exhale air to relieve pressure.
The lens is a magnet for dust, especially if it does not have weather protection, transition pads, or electronic components (static effect). Dust naturally settles on the outer surfaces of the lens when you change it. The only way to avoid dust ingress is to photograph with a protective cover. It's better to come to terms with the fact that dust inside camera lens is a constant thing when you take images.

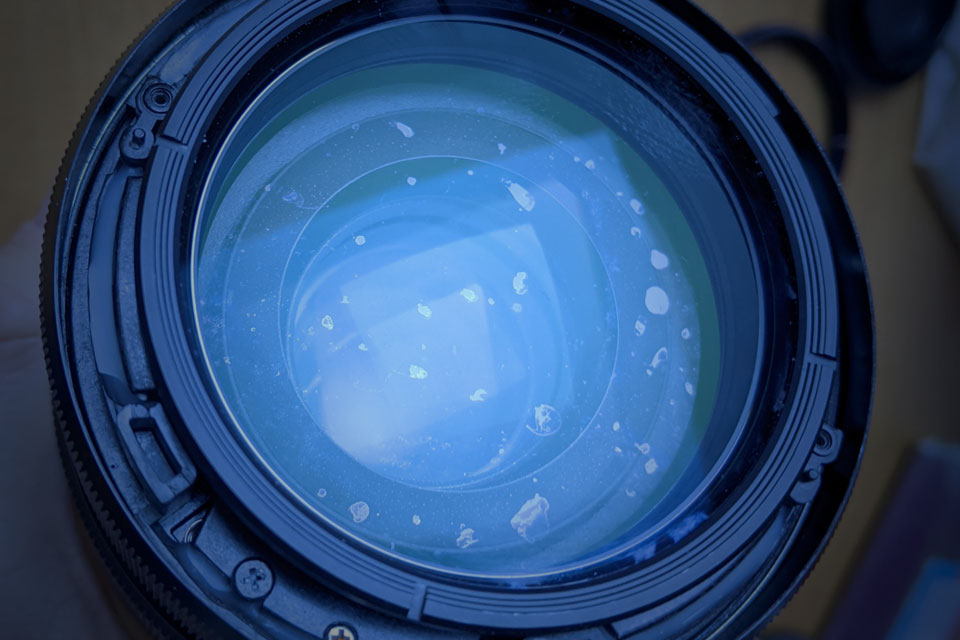
You may notice dust settling on various parts of a camera lens. You will find it outside the front element glass, between the front elements, outside the rear element glass, and between the rear elements. The front element is most exposed to dust. The best way to protect it is to install a quality filter that will act as a barrier.
A UV filter can be good protection from dust in lens and accidental damage. It is accessible and easily cleaned. But shooting with a filter can slightly distort the image affecting contrast. The rear lens element is less susceptible to dust because it is not accessible to the environment when installed.
Beware of smudges on the rear lens as they will have the biggest impact on image quality. Light enters the front lens from different angles and is altered by other elements. Light hits the sensor directly on the back of the lens. As a result, everything that blocks the light will also be displayed on the matrix (especially when it is large).

Let's experiment. Go to the window and look through the glass outside. Even if there are dust particles on the glass, you will not notice them unless they are large. We can say the same about dust inside lens. You don't have to worry if it doesn't interfere with framing, covering part of the view, and as long as it isn't visible in your shots.
Your composition may be distorted if there is too much dust on the glass. A good photographer will definitely want to remove it. The first method to locate dust particle is to observe the floating elements in the pictures. Wipe the outer lenses first. If you still see a stain in the same place in all photos, then cleaning is obligatory.
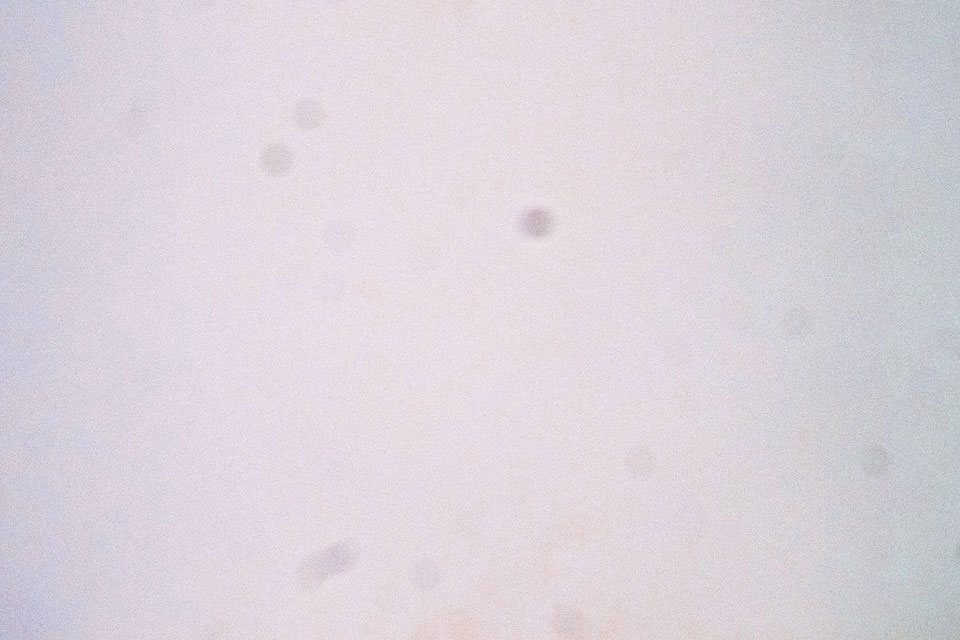
The second method is to photograph a white uniform surface in a well-lit environment. For example, it could be a cloudless sky away from the sun. Take a few shots using the following settings. Choose ISO 50 – 100 to avoid confusing noise with sensor dust. Also choose aperture priority, matrix metering mode, and exposure compensation – 0. The aperture should be between f/16 and f/22.
Some photographers use blur for finding dust inside camera lens. You need to disable autofocus and set the lens out of focus. Choose the maximum focal length. If you can't use these settings on your camera, just shoot on a white surface. In this way, you will see if dust affects pictures. You should view photos on your PC at 100% scale, sometimes zooming in on the image.

The third method is to use the Visualize Spots feature in desktop Lightroom versions. It helps detect dust spots in photos. The picture is displayed as a high-contrast black and white image to highlight areas of dust:
STEP 1. Upload an image with dust particles. When using Lightroom Classic, you also need to switch to the Develop module.
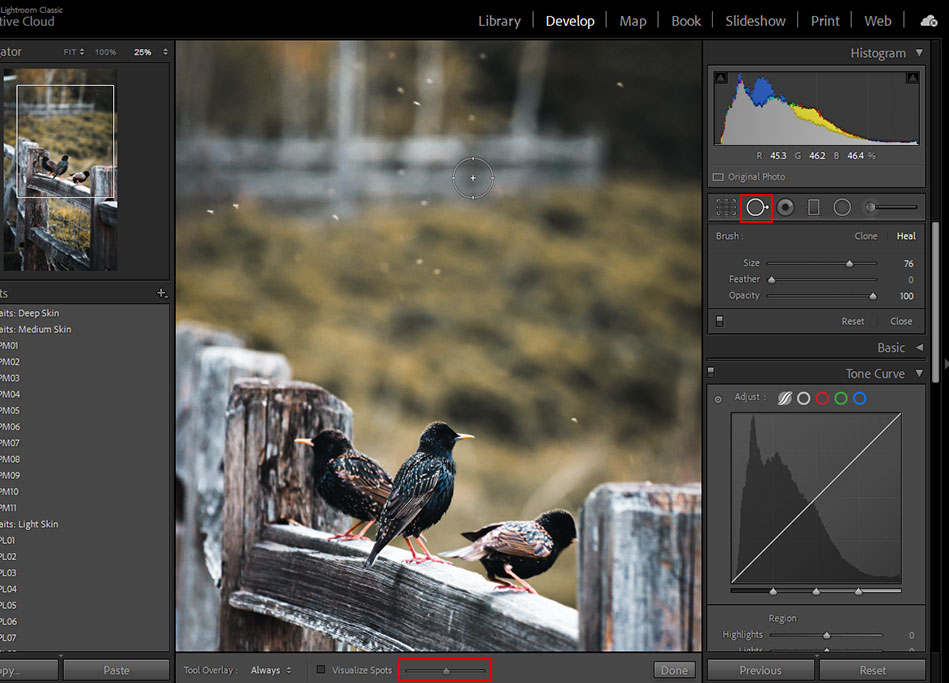
STEP 2. In the Classic version, select the Spot Removal tool or press the Q key. In Lightroom CC, press the H key or choose the Healing Brush. You can find it below the edit bar.
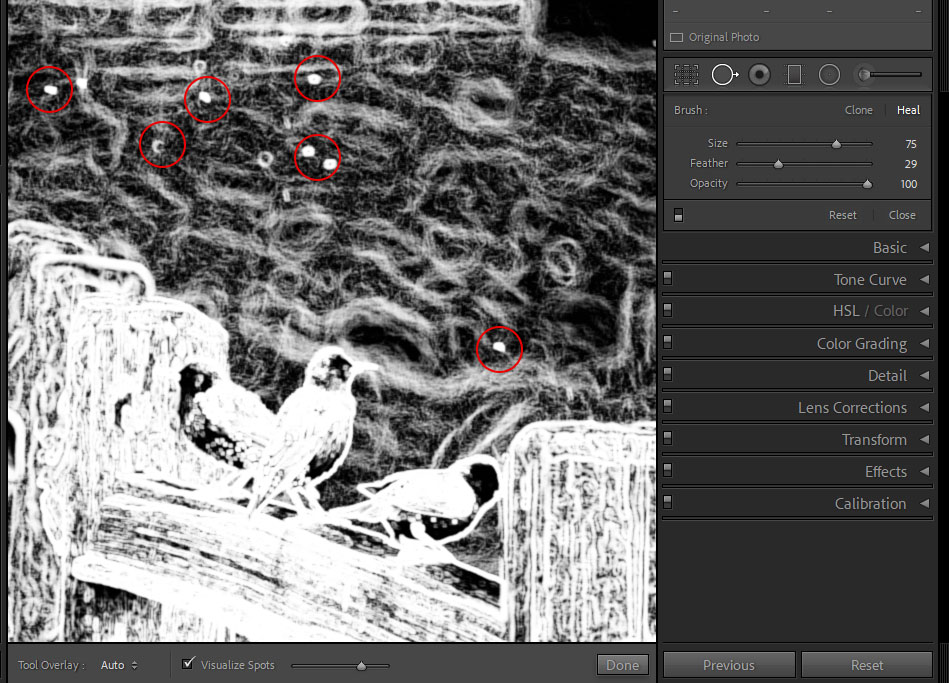
STEP 3. Check the Render Spots box. It's right below the photo in Lr Classic or to the side of the picture in the CC edition. Now use the Spot Visualization Threshold slider to get detailed spots. Dust is all noticeable circles that are not related to the picture content. You need to remove them.
Another situation when you need to remove dust in lens is a noticeable speck that floats inside when the lens is rotating. You can see it through the viewfinder. There are cases when glass particles break off after falling. Even if you use weatherproof lenses, insects may get inside. There are no lenses without holes. Even if it is the only obvious hole in the rear part.
Note: Only professionals in authorized service centers should ditch dust inside camera lens. Sometimes you may experience difficulties, trying to put the lens back together on your own. Sometimes it needs to be aligned, centered and optically adjusted after assembly. These manipulations cannot be done at home. Any warranty on the lens upon disassembly will be void.
First, contact the manufacturer's technical department and ask if your lens can be disassembled. If yes, find a reputable service center and learn the cost of cleaning. If it is equal to the price of the lens, you'd better buy a new one, and hone your cleaning skill on a dusty lens.
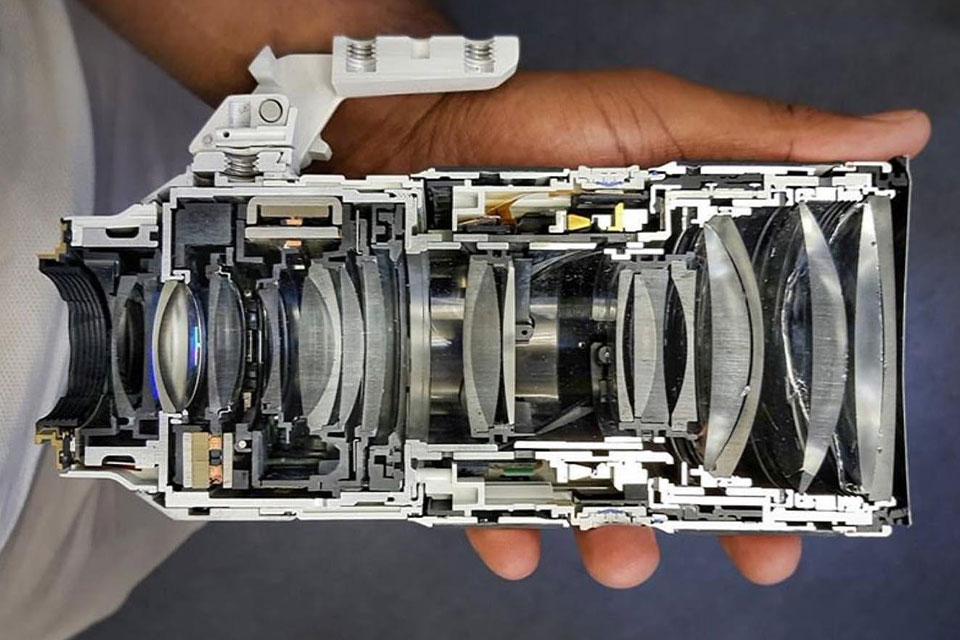
Don't risk taking apart expensive professional lenses. They usually come with autofocus and you may have to deal with thin connections, electronic circuits and circuit boards inside the lens. All these parts are easily damaged.
Items I used in the guide:
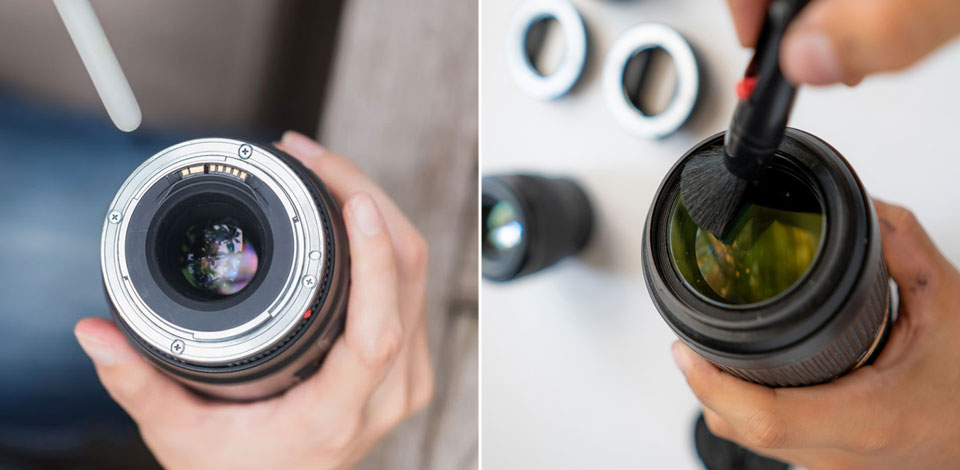
This is the bare minimum to clean the lenses inside. The best camera lens cleaning kit usually contains most of it. I recommend stocking up on two microfiber cloths (you'll need one for wiping and the other for putting parts on), a carbonized lens pen for glass polishing, and cotton buds for cleaning grooves and hard-to-reach areas. Watch some videos showing the disassembly of lenses for cleaning between the front and rear elements.
First off, remove the protective ring from the front. Put protective gloves on to avoid leaving fingerprints. Look for a gap and pry the ring up with a flathead screwdriver. If you don't have one, you can use a credit card or mediator. Carefully remove the ring without pulling to avoid tearing. Put all cleaned parts on a separate cloth.
The inner surface of the ring always contains dust. You can get rid of the dry dust in lens ring with a blower. Use a dry, then soaked cotton swab to remove any residue. Finally, wipe the ring with a cloth. The ring has no optical coatings, so there are no strict solution requirements. This can be isopropyl alcohol or an alcohol-based solution, deionized water, or any other optical cleaning solution.
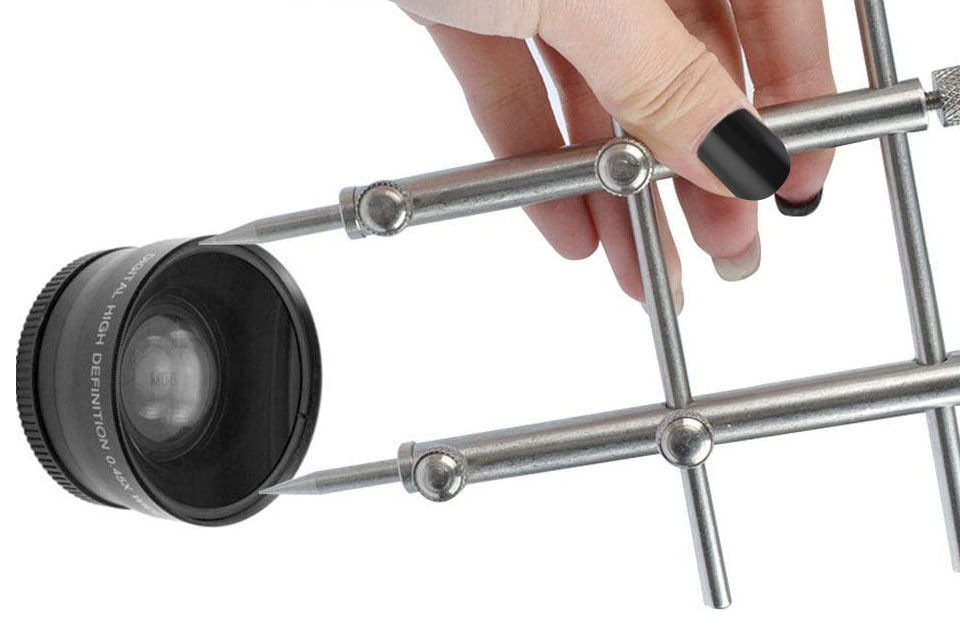
Now you need to get the front element of the lens. Before removal, professionals recommend marking the levels of the lens along a straight line to return everything exactly to its original position. The mounts may vary but most often you will find symmetrical holes for the lens spanner. You must place it in diameter and make twisting movements counterclockwise. The step-by-step instructions here are similar to the how to remove fungus from lens guide.
Depending on the model, you may have to unscrew several additional screws or use rubber vacuum lens pads when no holes are provided. You can remove the front element with a twisting motion in some simple lenses. Once you've removed all of the fasteners, carefully pull the front element out onto a pre-lined napkin. Cover the resulting hole with the lens cap for now. There are no problems with cleaning the front glass from dust, here are a few tips:
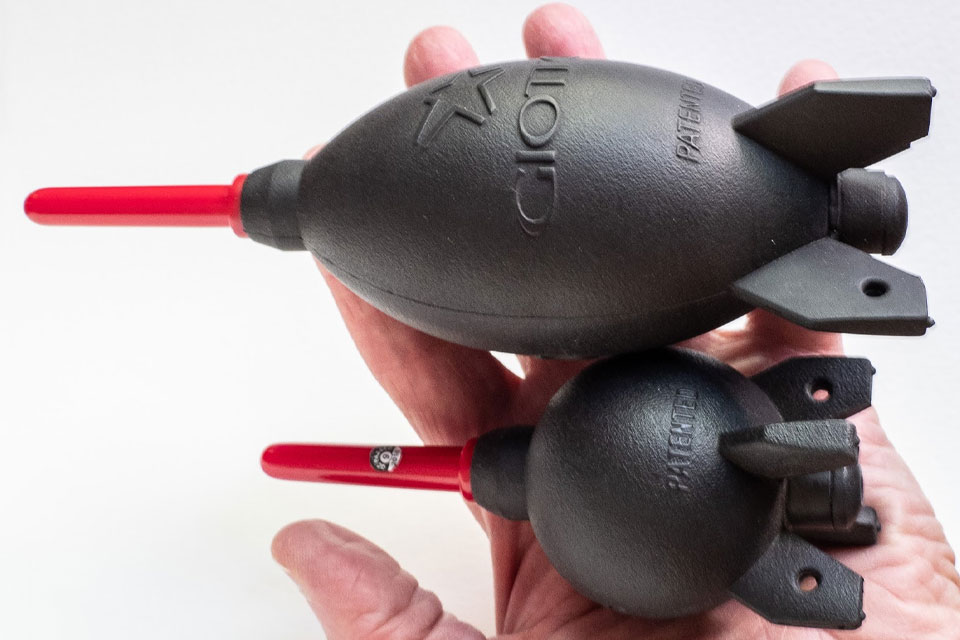
Be careful and try not to touch exposed parts or lens elements from the inside. When using the blower for zapping dust inside camera lens, keep it at a safe distance so as not to hit anything. In the end, slightly tilt the lens with the hole down so that dust does not fly back under the force of gravity during the last few blows.
Zoom in to the maximum to get closer to the inner lens. If necessary, use a soft brush and wipe the glass with a Lenspen, for example. Finish cleaning with a blower, return the focus to its original position, and reassemble the lens to its original state.
You usually need to remove a few screws from the back of the lens mount. Then gently lift the rear element and use a blower to get rid of the dust. You can clean dust from the next lens element inside. Zoom out so that the element moves down towards the back, and then blow the dust off it using the same rocket blower.
Be careful not to touch parts or elements of the lens from the inside. When using the blower, keep a safe distance so that you do not accidentally hit anything. When returning the screws, do not overtighten them. If they are marked with a different color, return them precisely to their place.
Take a non-colored LED flashlight. Remove the lens and open the aperture. When it is fully open, point the flashlight at the back of the lens in a dark room. Look at the front lens element at an angle. If you didn't notice the dust in lens before, you'll see it now when a bright light source passes through the lens.
Consumer zoom lenses with retractable bodies can draw in outside air and blow it into the camera chamber. Plus, the long body has a lot of weak spots. Professional retractable zoom lenses, such as the best 24-70 lenses, usually have better weather protection and rubber seals all around. Models with a fixed focal length are the least prone to dust.
Most likely you have a dirty sensor. Some chambers have a built-in sensor cleaning system or you can blow out particles with a hand blower. If you have a DSLR, you need to lift the mirror first. There are special cleaning kits but you risk scratching the sensor module. Sometimes it's better to send your camera to a certified repair shop for cleaning, lubrication, and tuning.
Avoid dusty environments. Clean and change the lens in a tidy, low-humidity places. When changing, hold the camera with the lens down so that less dust settles on the sensor. If you are in field conditions, reduce the time for replacing lenses.
Good habits. Cleaning is not included in the cost of warranty service. But a service center can offer it along with regular maintenance.
Use solutions and materials recommended by optics manufacturers. They don’t leave lint, small particles and do not affect the quality of lenses and coatings. Do not use regular wet wipes as they may contain moisturizer, oil, antiseptic, and other abrasives, or impregnations. Do not take a cotton T-shirt. This material leaves tiny fibers of cotton. Even soft toothbrushes can damage the lens coating due to varying bristle lengths and densities.
Cotton swabs can be used to clean lens ends and lens grooves. However, they must be with tightly twisted heads. Don’t do more than one or two strokes so that the cotton wool does not stick to the lens.
Apply the cleaning solution to a napkin or cloth rather than directly onto the lens to prevent liquid droplets from dripping along the edge of the lens into the lens barrel. Even with weather-sealed lenses, liquid can enter the barrel due to a capillary effect.
Inside, the droplets act like a lens and can focus light to a point on the glass surface, creating an overheated damaged area. Soft liquids can be corrosive if they are in contact with the surface for a long time.
Do not blow on the lens with your mouth. The breath is naturally hydrated, and saliva splashes can only make things worse. Also, do not use compressors or compressed air to remove dust inside lens. They will have too much effect on thin glass or connections.
Avoid frequent or unnecessary cleaning. If there are a couple of dust particles, don’t worry. However, make sure the place where you keep your camera bag and lens is tidy. Put all cleaning supplies in separate bags. Excessive cleaning can damage the coating and scratch the glass.
Don't try too hard. Clean the lens gently without much pressure. Do not press too hard when cleaning with wipes.
Don't clean the lens connections, especially if lens errors occur. The fact is that any solutions or other cleaning materials can seriously damage or oxidize the sensitive metal. If necessary, use a very soft brush or delegate this task to professionals.
Don't use the same cloth for the glass and body, as dust from the body adhering to the fabric may damage the lens coating. Do not wash microfibre cloths with fabric softener as the chemicals may scratch the glass or affect the optical coatings.
Don’t use household chemicals, acetone and its solutions. It is an excellent cleaner and solvent, but it can adversely affect the plastic and paint of lens barrels and optical coatings. For the same reason, household window cleaners are not suitable either.
Many lens manufacturers sell special cleaning solutions for optical coatings. If such solution is not available, technical isopropyl alcohol will do. Distilled water is safe. But it is only effective for removing water-soluble stains.