I love capturing special moments in life, especially with timelapse videos. It’s so fascinating how we can turn hours into seconds using a special timelapse creator and watch the world move in a way we don’t usually see.
On my recent road trip along the Gulf Coast, I visited some amazing places. I saw bright sunsets in the Florida Keys and peaceful mornings in Galveston. I took thousands of photos and videos, all to create beautiful timelapse videos that show the magic of these places.
Since I work as a software expert at FixThePhoto, I know that making a great timelapse isn’t just about speeding up a video. It takes skill, like fixing flickering, keeping the camera steady, and making the colors real.
There are so many free timelapse editing programs available, and picking the best one can be tricky. I wanted a tool that’s powerful but still easy to use, for both beginners and pros. So, I tested over 20 free timelapse software to find the best ones. After weeks of trying them out, I finally picked perfect ones for anyone who wants to make awesome timelapse videos.
Choosing the right timelapse editing software depends on your experience and what kind of video you want to create. Here’s a simple breakdown:
For beginners. If you’re just starting and need an easy way to turn photos into a timelapse video, TLDF or GlueMotion are great choices. They are simple to use and won’t overwhelm you with too many options.
For intermediate editors. If your timelapse has steady lighting (like a clear daytime scene), LRTimelapse + Lightroom Classic is a good combination. You can edit your photos first, then turn them into a smooth video.
For advanced projects. If your timelapse includes changing lighting (like a sunset or sunrise), you’ll need more advanced tools. Adobe After Effects, DaVinci Resolve, or Premiere Pro offer advanced color grading and stabilization tools.
For hyperlapses. Hyperlapses require extra stabilization. Premiere Pro and Adobe After Effects (with the Warp Stabilizer effect) help smooth out shaky footage and make the project look flawless.
No matter your skill level, there is a great tool that will help you create high-quality timelapse videos.
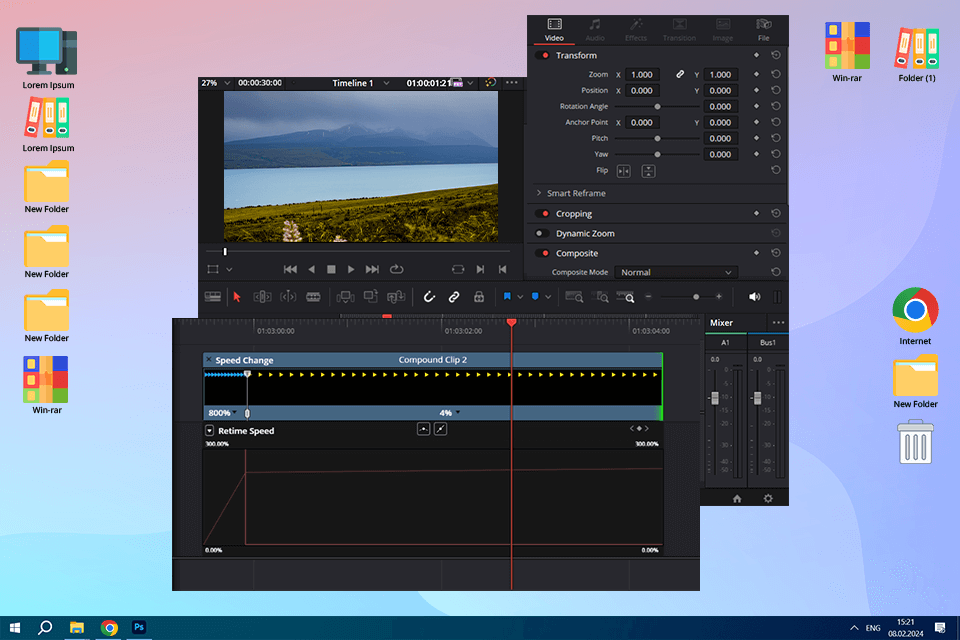
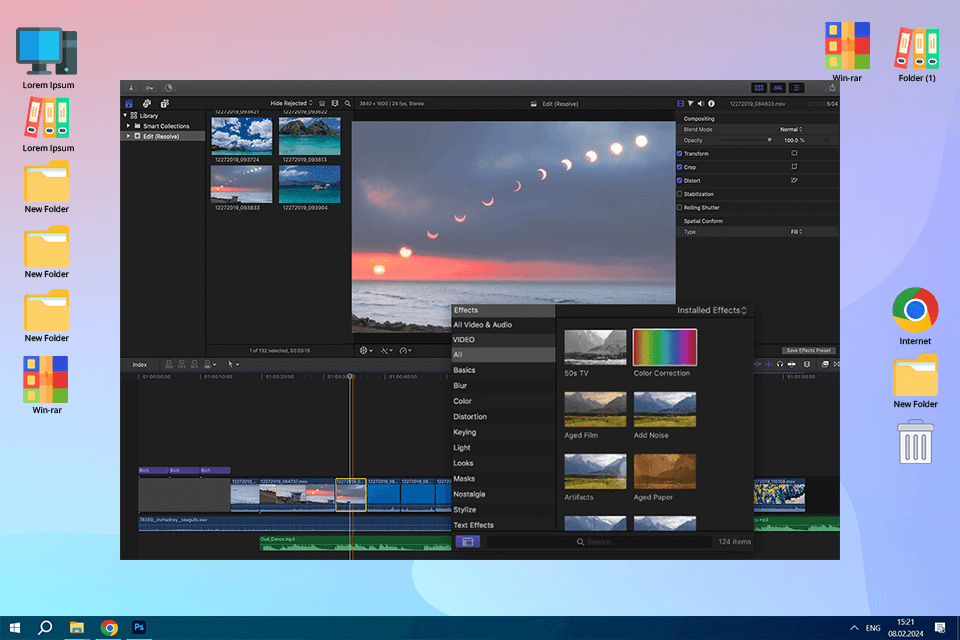
People on Reddit say how amazing DaVinci Resolve is, especially because the free version has so many features. So, I decided to try it and see if it could handle my timelapse footage from my Gulf Coast trip.
One of the clips I tested was from Pensacola Beach, where I filmed storm clouds rolling over the ocean with my timelapse camera. The lighting kept changing as the sun peeked through the clouds, making it tricky to edit.
I was impressed by Resolve’s color grading tools – they’re super powerful and let me adjust the colors to make the scene look more dramatic. The Color tab felt just as advanced as anything in Premiere Pro.
Although I liked the tools of this free timelapse software, the editing process wasn’t as smooth as I hoped. Setting up a timelapse sequence took more steps than in Premiere, and I had to manually adjust the frame duration for each image, which Premiere does automatically.
One thing I liked was how Resolve handled stabilization. It wasn’t quite as smooth as Premiere’s Warp Stabilizer, but for a free program, it did a great job.
Overall, I think DaVinci Resolve is a fantastic free timelapse creator, but it didn’t completely replace Premiere Pro for me. Nonetheless, if you’re just starting or don’t want to spend money, it’s one of the best free editing tools available.
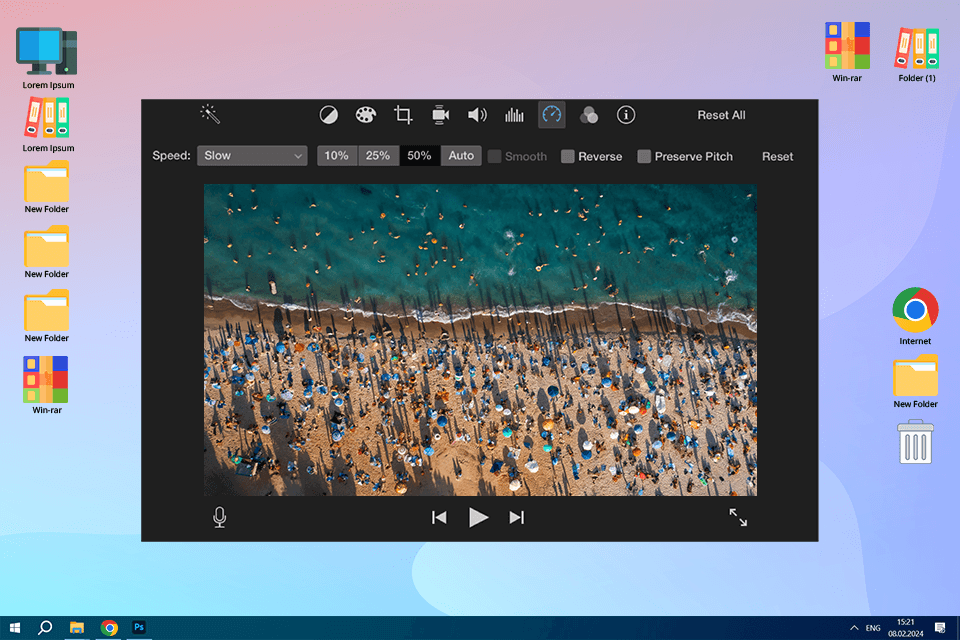
When I first started editing videos, iMovie was my go-to. It was simple, easy to use, and free, which made it perfect for me as a beginner. I hadn’t used it in a long time, so I wanted to see how well it works for timelapse videos today. Since it’s still a completely free timelapse software and popular for Mac users, I thought it was worth testing.
To try it out, I used a video from my trip to Gulf Shores, Alabama. I filmed a long beach with colorful umbrellas and people walking along the shore.
iMovie made it super easy to speed up my video. With just a few clicks, I set the speed to 20x, and that was it. Compared to more advanced programs like Premiere Pro or DaVinci Resolve, this was a much simpler and faster process. But that simplicity also meant fewer options. iMovie doesn’t let you adjust speeds in an advanced way or work with image sequences.
One thing I still liked was how smooth and user-friendly the app feels. For quick edits or simple projects, it works great. But, comparing iMovie vs Premiere Pro, if you want to do more advanced editing, you’ll probably outgrow iMovie, just like I did. For beginners, though, it’s still a solid choice for making timelapse videos.
I’ve been using Adobe Premiere Pro for years, both for work and my own creative projects. So, when it was time to turn my Gulf Coast footage into timelapse videos, Premiere Pro was my first choice, and it did not disappoint.
One of my favorite timelapses was a sunset on Sanibel Island. The sky changed from golden to deep purple, while gentle waves rolled onto the shore. Editing this kind of changing light can be tricky, but Premiere Pro made it straightforward.
The Lumetri Color panel helped me adjust the colors, and I used keyframes to slowly brighten or darken parts of the video as the light shifted. The result looked smooth and natural, not over-edited.
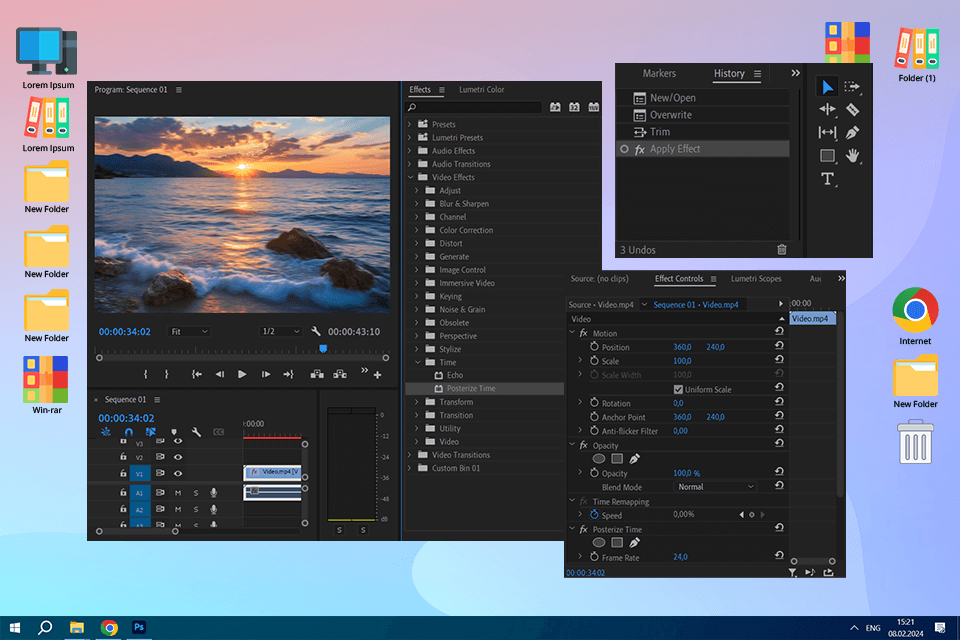
What makes Premiere Pro stand out is how powerful and flexible it is. It works with RAW images and 4K videos without any issues, which is perfect for my high-quality DSLR footage. Plus, its Warp Stabilizer effect helped me fix shaky hyperlapse shots, saving me a lot of time.
While Premiere Pro might feel a bit complicated for beginners, it’s an amazing choice for experienced editors who want professional results. In my opinion, it’s the best timelapse editing software available.
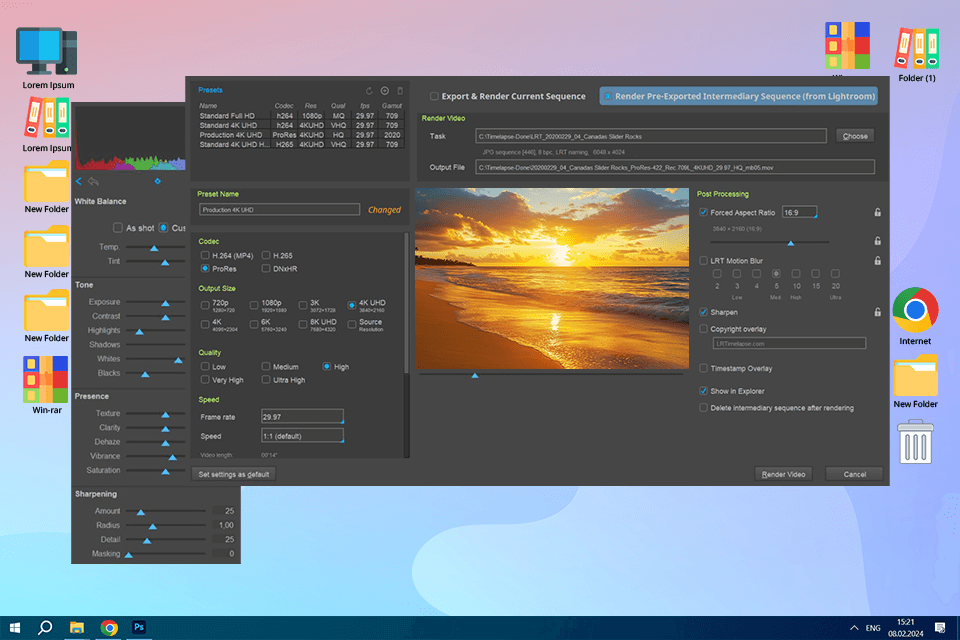
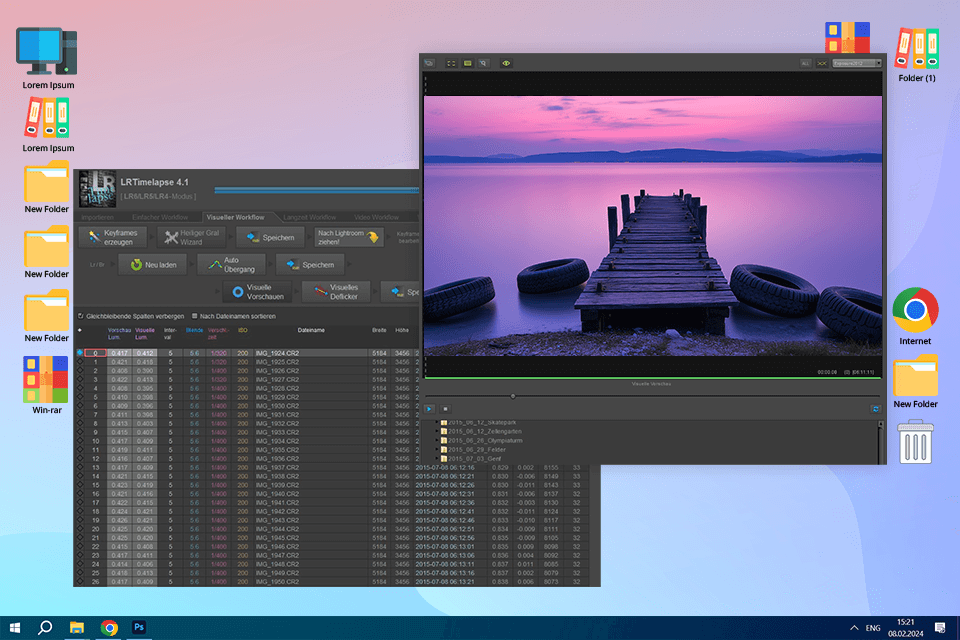
I’ve heard about LRTimelapse for years – people talk about it on Reddit all the time and even some of my FixThePhoto clients recommend it. So I wanted to see if it was really as good as everyone says.
Spoiler alert: if you’re serious about timelapse videos, this Lightroom plugin is amazing. To test it, I used a set of RAW photos I took at Dauphin Island during sunrise. The light changed a lot as the sun came up, and I wanted to see if LRTimelapse could handle those shifts smoothly and I was seriously impressed.
It removed flickering and evened out the brightness changes so well. Since it works with Lightroom, I could make small color and brightness adjustments easily, making the video look perfect.
Compared to iMovie, this timelapse software is on a whole different level. It’s built specifically for timelapse editing. But that also means it’s not as easy to use. The interface looks a little complicated at first, and it takes some time to learn.
That being said, LRTimelapse is the best choice for photographers who want full control over their timelapse videos. It’s not an all-in-one editor, but if you want smooth lighting transitions and a cinematic look, it’s hard to beat.
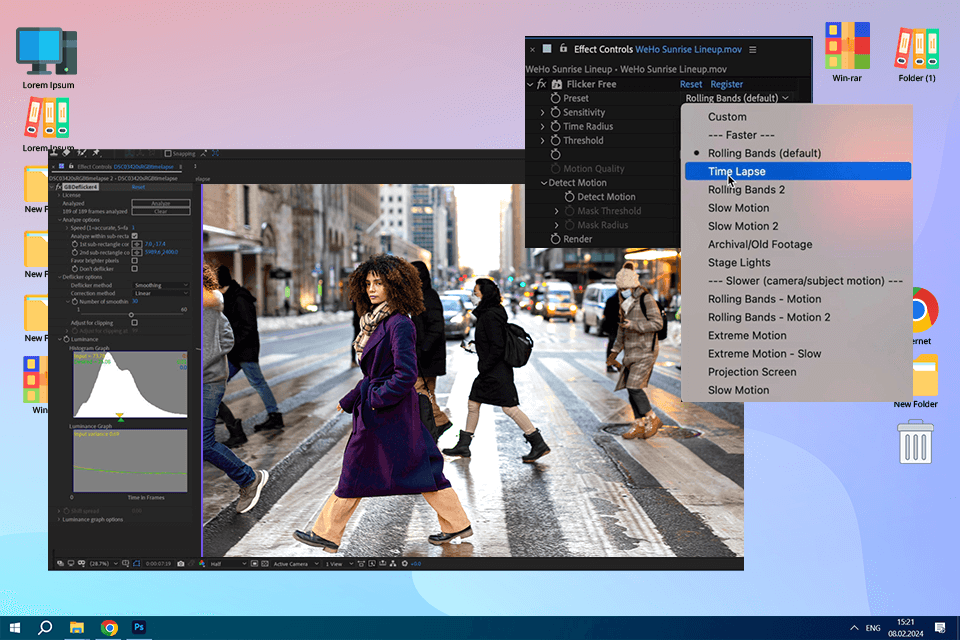
When I first found out about TLDF, people on Reddit were saying it’s great for fixing flicker in timelapse videos. Since flicker is one of the hardest problems to fix, I was really curious to try it.
For my test, I used a set of photos I took at Pensacola Beach, Florida, with my GoPro alternative camera. I filmed a pier at sunset, where the light changed a lot, from bright gold to soft blue as the sun set. This kind of lighting change is perfect for testing flicker, so I was excited to see how TLDF handled it.
I was really impressed with how easy TLDF was to use. The program is super simple – just upload your photos, tweak a few settings, and let it fix the flicker. In just a few minutes, it smoothed out the lighting changes and made everything look seamless.
Unlike more complicated programs like Premiere Pro or DaVinci Resolve, TLDF only focuses on what it does best – fixing flicker. If you’re looking for a simple and quick way to fix it, TLDF is perfect, but it doesn’t do much else.
I’ve been using different versions of Adobe After Effects for years to make animations and motion graphics. But strangely, I never tried making a timelapse with it until now.
For my test, I used a video I shot in New Orleans, where I filmed the French Quarter at twilight. There was a lot of movement in the scene, like people walking, cars driving, and neon signs flickering, so it seemed like the perfect chance to try After Effects for a timelapse.
The results were amazing. The timelapse software gives you so much control over every little detail. I used the Warp Stabilizer to get rid of any shaky camera movements, adjusted the color to enhance the sunset and streetlights, and added a little motion blur to make everything look more cinematic.
However, it’s not the easiest tool for beginners, especially if you compare iMovie vs After Effects. But if you’re comfortable using it, the creative opportunities are endless. For me, this experience showed again why After Effects is such an important tool in my timelapse editing setup.
My colleague Tetiana loves Final Cut Pro X because it’s fast and easy to use, so I decided to try it out for making timelapses and see if it really lives up to her praise. Spoiler: I get why she loves it, but I do have some thoughts.
I used a beautiful video of a beach sunrise in Destin, Florida, to test it. The waves were crashing, seagulls were flying, and the colors in the sky went from soft pinks to bright golds.
While I don’t use Final Cut Pro a lot, I figured out how to edit pretty quickly. The “automatic speed adjustment” feature made turning the video into a timelapse super quick. The magnetic timeline helped keep everything organized. Also, the color editing tools were really good and helped me make the sunrise look softer and warmer.
One thing I didn’t like as much was the stabilization tool. It didn’t work as well as Adobe After Effects’ Warp Stabilizer.
If you’re a Mac user and you want a tool that’s easy but still professional for making timelapses, Final Cut Pro is a great choice. Tetiana was right – it’s really good, especially if you want something quick and simple.
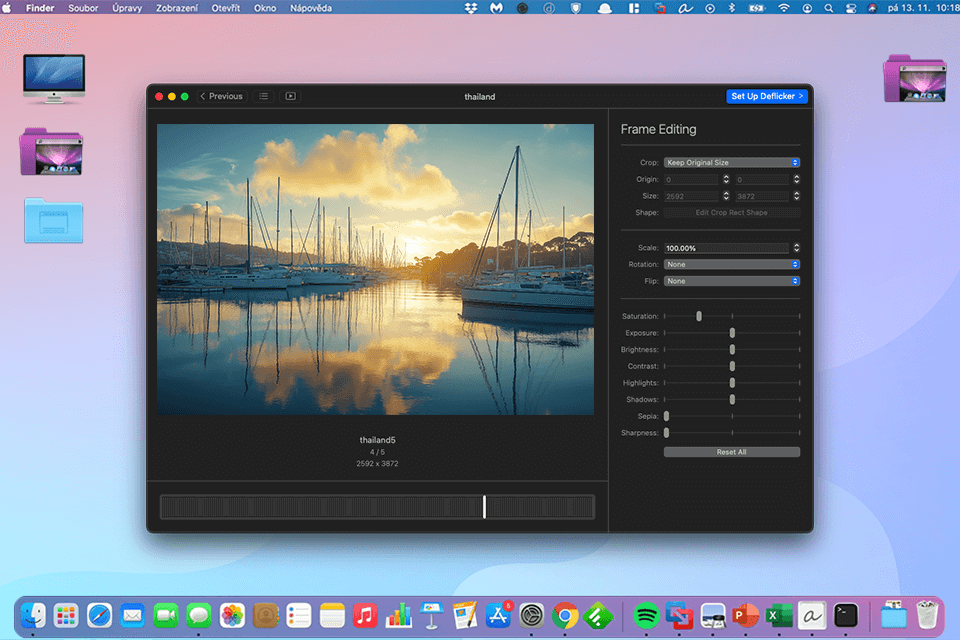
I found Glue Motion while looking through the App Store, and it caught my attention because it promised an easy way to create timelapse videos. For my test, I used a bunch of photos I took on a foggy morning at Mobile Bay, Alabama. The fog slowly cleared up, showing sailboats in the water and sunlight coming through.
Importing my photos, fixing the flickering, and making the video were all quick and simple. The app automatically fixed most of the flickering. It’s great for beginners or anyone who doesn’t want to spend a lot of time adjusting settings manually.
However, the app isn’t as powerful as tools like LRTimelapse or DaVinci Resolve. It’s good for basic timelapses, but you won’t find things like keyframing or detailed color editing.
Overall, Glue Motion impressed me with how easy it is to use. If you have a Mac and need a simple way to make timelapses, especially for quick projects or webcam videos, it’s a great choice.

Step 1. Import your photos or video clips into Premiere Pro. If you’re using photos for a timelapse, make sure your pictures are numbered in order. Go to File > Import, and when you choose your photos, check “Image Sequence”. This will group them into one video clip.
Step 2. Drag your photos or video clip to the timeline. If you need to, change the sequence settings to match the resolution and frame rate you want. 24 or 30 frames per second (fps) works well for a smooth, natural look.
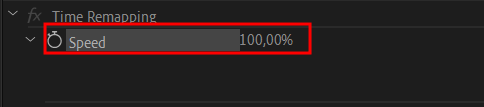
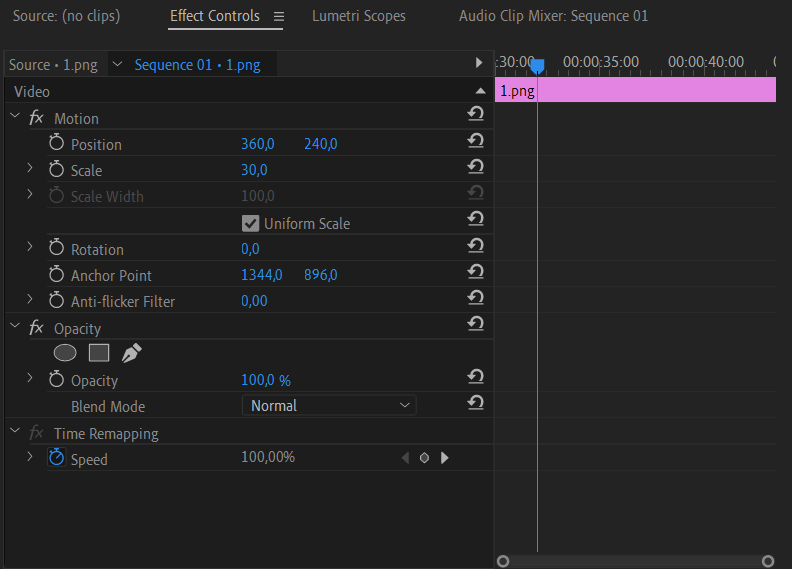
Step 3. To make the video faster, right-click on the clip in the timeline, choose Speed/Duration, and adjust the speed percentage. A higher number makes the timelapse go faster.
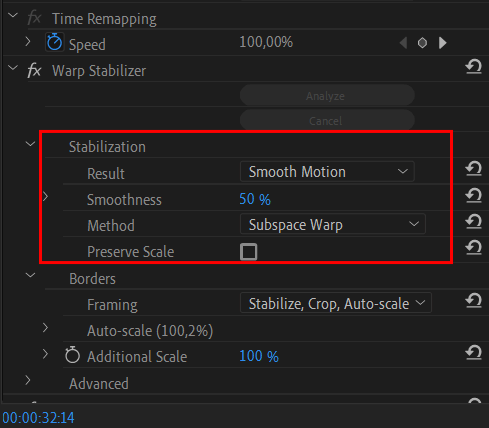
Step 4. If your video is shaky, add stabilization. Go to the Effects panel and select Warp Stabilizer. This helps smooth out shaky shots, especially if you filmed it by hand.
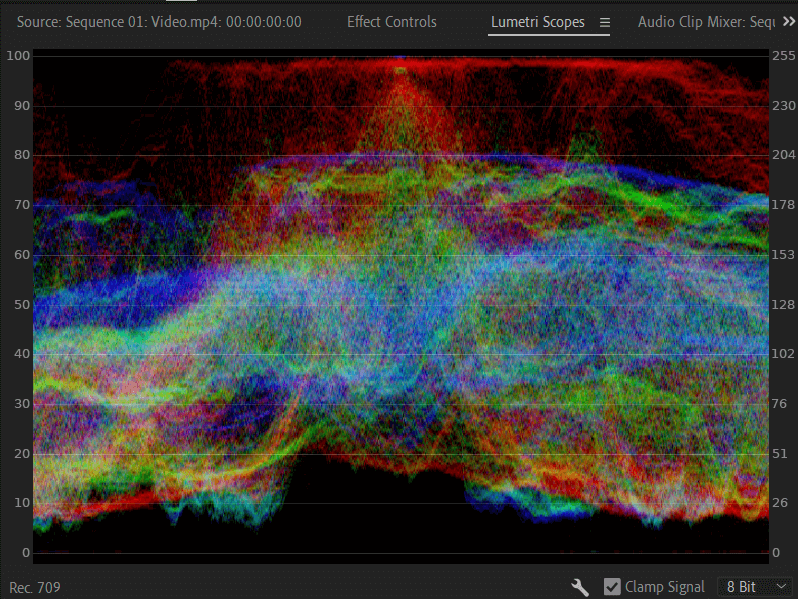
Step 5. You can change the colors of your timelapse with Lumetri Color to make it look even better. It’s easy to adjust things like brightness, contrast, and colors in Premiere Pro. If you want more details, check out the Effects Control tools or try using transitions to make your video stand out.
If you want to get better at timelapse photography and editing, I recommend checking out Michael Shainblum’s YouTube channel. He shares lots of useful tips and creative ideas for making awesome timelapses.
One of my favorite videos is his complete guide to timelapse editing.
He also has a playlist with stunning timelapses, which is super inspiring. Michael’s videos make hard concepts easy to understand, whether you’re just starting out or already know a lot. His channel is a great way to learn new skills and get better at making timelapses.
When testing timelapse software, I wanted to make sure each program could handle real-world projects and still give great results. I work on both personal videos and client projects, so I focused on how easy each program was to use, how much editing you could do, and the quality of the final video.
FixThePhoto team and I tested more than 20 different timelapse programs like GoPro Quik, Filmora, Video Velocity, VideoProc, etc. While each program had something cool, not all of them made it to my top picks because of some problems.
First, I checked how easy each program was for beginners. I looked for things like drag-and-drop features or step-by-step guides that would make importing videos, setting frame rate, and overall editing easier.
Then, I checked how much you could customize your timelapse. I tested how strong the editing tools were and how much control I had over the final look. For example, I changed the exposure and contrast on my sunset video to see how well each program could handle changes in lighting.
Performance was really important. I worked with large RAW photo files and 4K videos to see how fast the programs were and if they would lag or crash while loading or rendering. The timelapse software that had issues with lag or crashing didn’t make it onto my list of recommended options.
Lastly, I checked how the programs export videos. I wanted to find software that could create high-quality videos in popular formats, so they would work well for social media or any client needs.


