Follow these product photography tips to take photographs that SELL. You know that 22% of returns occur because the product looks different in person. So, if you want eye-catching product images that will bring you a thousand website visits and sales, you are in the right place.
In the world of Amazon, eBay, and ETSY, product photography is king. 75% of online shoppers rely on product images when deciding on a potential purchase. You might have a great title or affordable price, but your product images are the first thing potential buyers will see when they’re browsing goods in your listing. Test your product images with Splitly app to 100% discover which type of product images work best for your goods.
There is no need for you to waste funds on bulky equipment or outsource workers to give your shop a trustworthy look and an increasing client turnover. Just study this simple guide on how to take pictures of products professionally on a low budget.

A professional shooter always tries to diffuse studio lighting in order to spread it across and around the item. In most cases, harsh shadows can easily spoil your photo, unless you plan the composition beforehand.
Moreover, diffused lighting works great for white balance, unlike a spotlight. Using proper product photography equipment can help to achieve a better result. Take photography umbrellas to disperse and soften the light.

Best option: Manfrotto 190XPRO Aluminum 4-Section Tripod
If you need to take just a few product shots for your commercial website, then you can shoot without a tripod. However, with the development of your business, you will need more pictures. You will have to take product photos and you may have some difficulties with the focusing on the product in each picture.
To solve this problem and achieve consistency across your product images, you need to add a tripod to your product photography equipment. A flexible tripod or mini tripod are a good choice for taking clear product photos in any light.

This photo was taken by Canon EOS REBEL T7i
Product shot photography is not too demanding on camera functionality. As a rule, simple DSLR cameras can bring your ideas to life and shoot the product in the best possible way. Therefore, do not waste your money on expensive cameras.
If you can’t choose a camera body, check out this list of best cameras for product photography for any budget and purpose. If you take photos of bracelets, rings, earrings, or necklaces, choose one of the best cameras for jewelry photography.

Are you shooting for Amazon, eBay, ETSY, or take product photography for Pinterest? Then be careful and find out their photo editing requirements. If not, then pay attention to these well-known e-commerce giants which have a good idea of the right product photography and you can still use some of their rules.

High resolution images are a must for photography products. It will help to grab customers' attention at every detail that is important for them. As a result, they won't be eager to go somewhere else to look for a necessary product.
Read more about the difference between JPEG and PNG to decide what photo format is better for detailed product images.

Product shot photography needs some preparation. Wrinkled or dirty clothes are unlikely to attract customers. One of the most useful product photography tips is to prepare a product in advance. Wrinkled or dirty apparel is unlikely to attract customers. Iron your clothing, bring gloves, napkins, and lint-free towels to wipe items when needed.
Even small imperfections like smudges may spoil your product image and customers will go to your competitors. You can avoid it, if you spend some time ironing clothes before shooting or you can make it in Photoshop. Watch a video tutorial about how to remove clothing wrinkles in Photoshop.

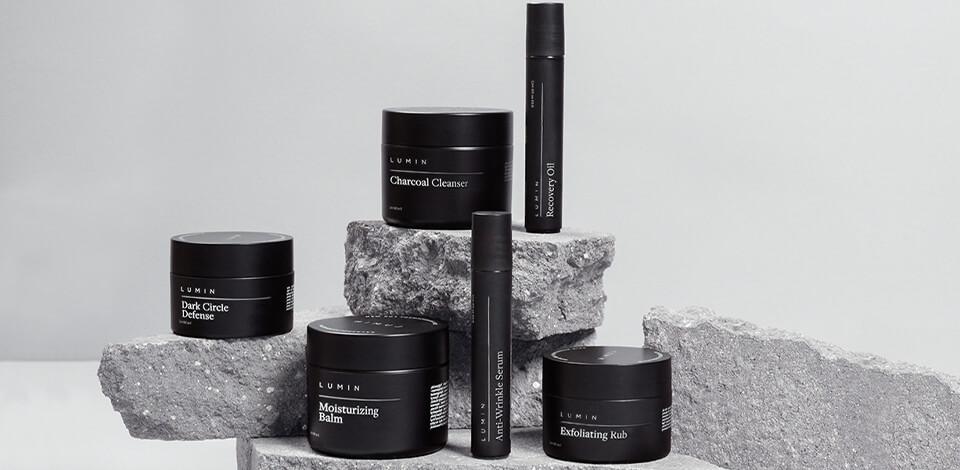
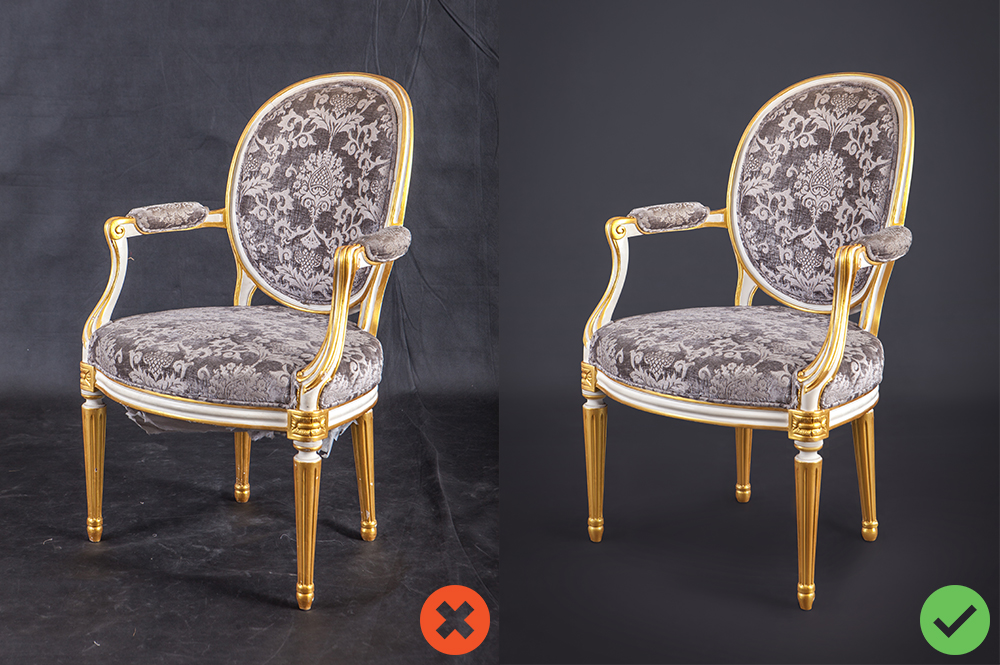
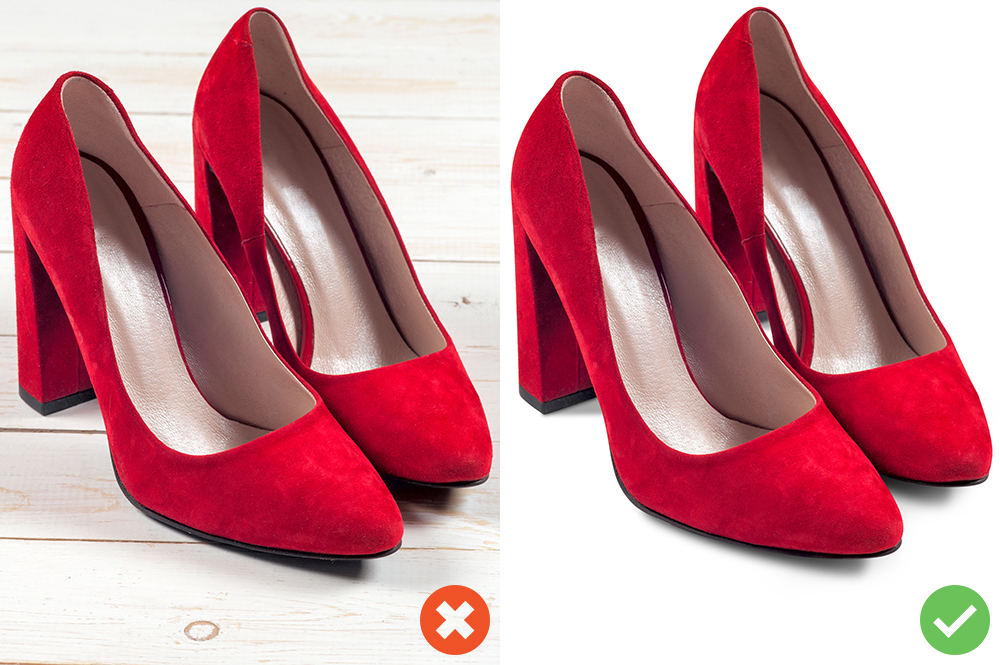
Additional patterns, objects, and props will distract the customer's attention from the main product. It's better to give preference to a simple white background to make an accent on a necessary item.
If you have no money for a professional photography backdrop, then use a white sheet or a poster board for a product photoshoot. Minimize the number of additional things in the frame and keep the focus on the product.
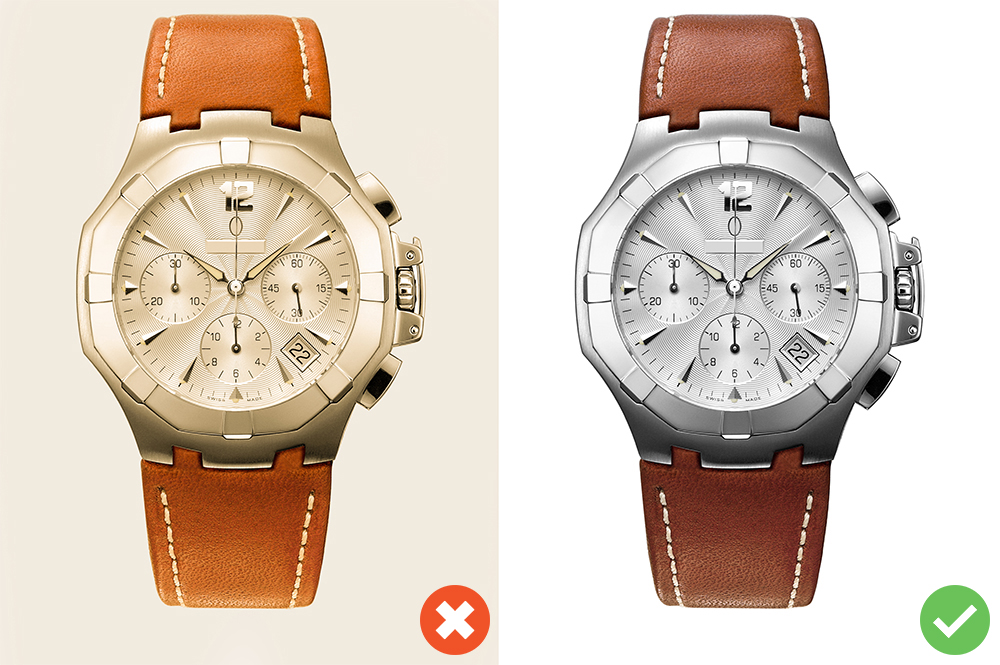
Many product photography mistakes are related to incorrect white balance, so make sure you use the proper bulbs and flashes. Remember to check white balance and correct the camera settings in accordance with the light used. View more about photography light bulbs to know what the best light temperature for clear and sharp product photography is.

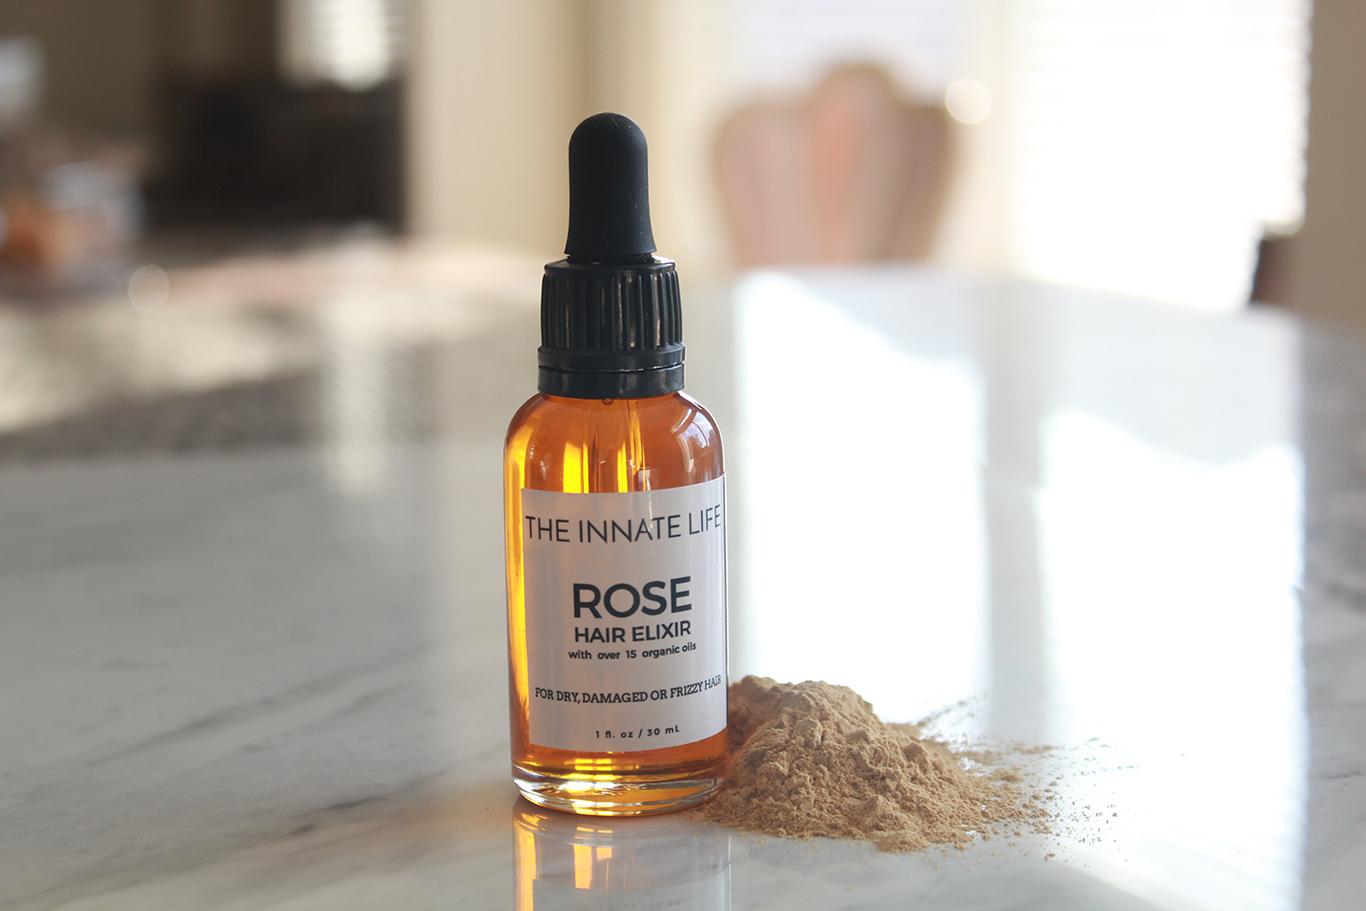
Give potential buyers the opportunity to get an idea of how this product works or imagine it in their home. Think about how to shoot product photography in the most realistic way. Add some props that will help you show how this item can be used.

Using different props for product shooting is a very reasonable thing. This way you can demonstrate the functionality and scale of the item, as well as tell its story. Product photography props must fully match your subject in color, style, size, and shape.
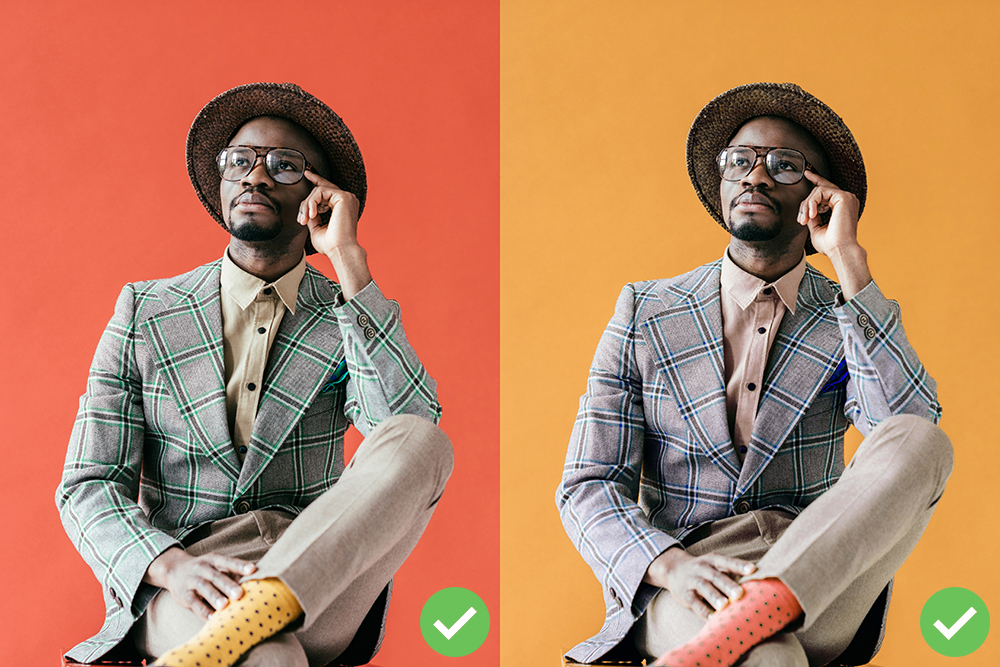
However, you must be careful. On the one hand, you can add new colors and shades to the color gamut of your photo, making it more interesting and attractive. On the other hand, incorrectly chosen colors and busy patterns can spoil even the coolest product photoshoot.
You should use jewelry photography props since you will hardly take a winning jewelry photo without them.

It is a study of colors and their influence on a person. To be precise, some colors or their combinations can easily affect customers to buy your products. Those shooters who know the main principles of this theory understand how to attract customers with the right color mixing. There are numerous ways of using complementary colors in photography.
Read a 48-page eBook called Captivating Color written by award-winning photographer Mitchell Kanashkevich about how to take images that evoke emotion, making people feel as attached to the images as you are and making them want to buy your products.

This photo was taken by Canon EF 24-105mm f/4 L IS USM Lens
While choosing a product photography lens, opt for a universal model. You can use it in most cases by selecting the necessary settings. For example, a zoom lens will be indispensable if you need to take pictures of more than fifty pairs of shoes with multiple angles of each.
Thus, you do not need to move the tripod from one place to another to get the right angle. This is especially valuable if you are limited in time. Choose a product photography lens for jewelry, shoes, furniture, or attire photographs that will be sharp and high quality.
.jpg)
Try to achieve the minimum noise using the lowest ISO settings available to you. If you increase the ISO value, you can make some elements invisible and reduce the severity of other details. After you mount your camera on a tripod, adjust it to the minimum ISO value. Then begin to increase it until you get the desired result.
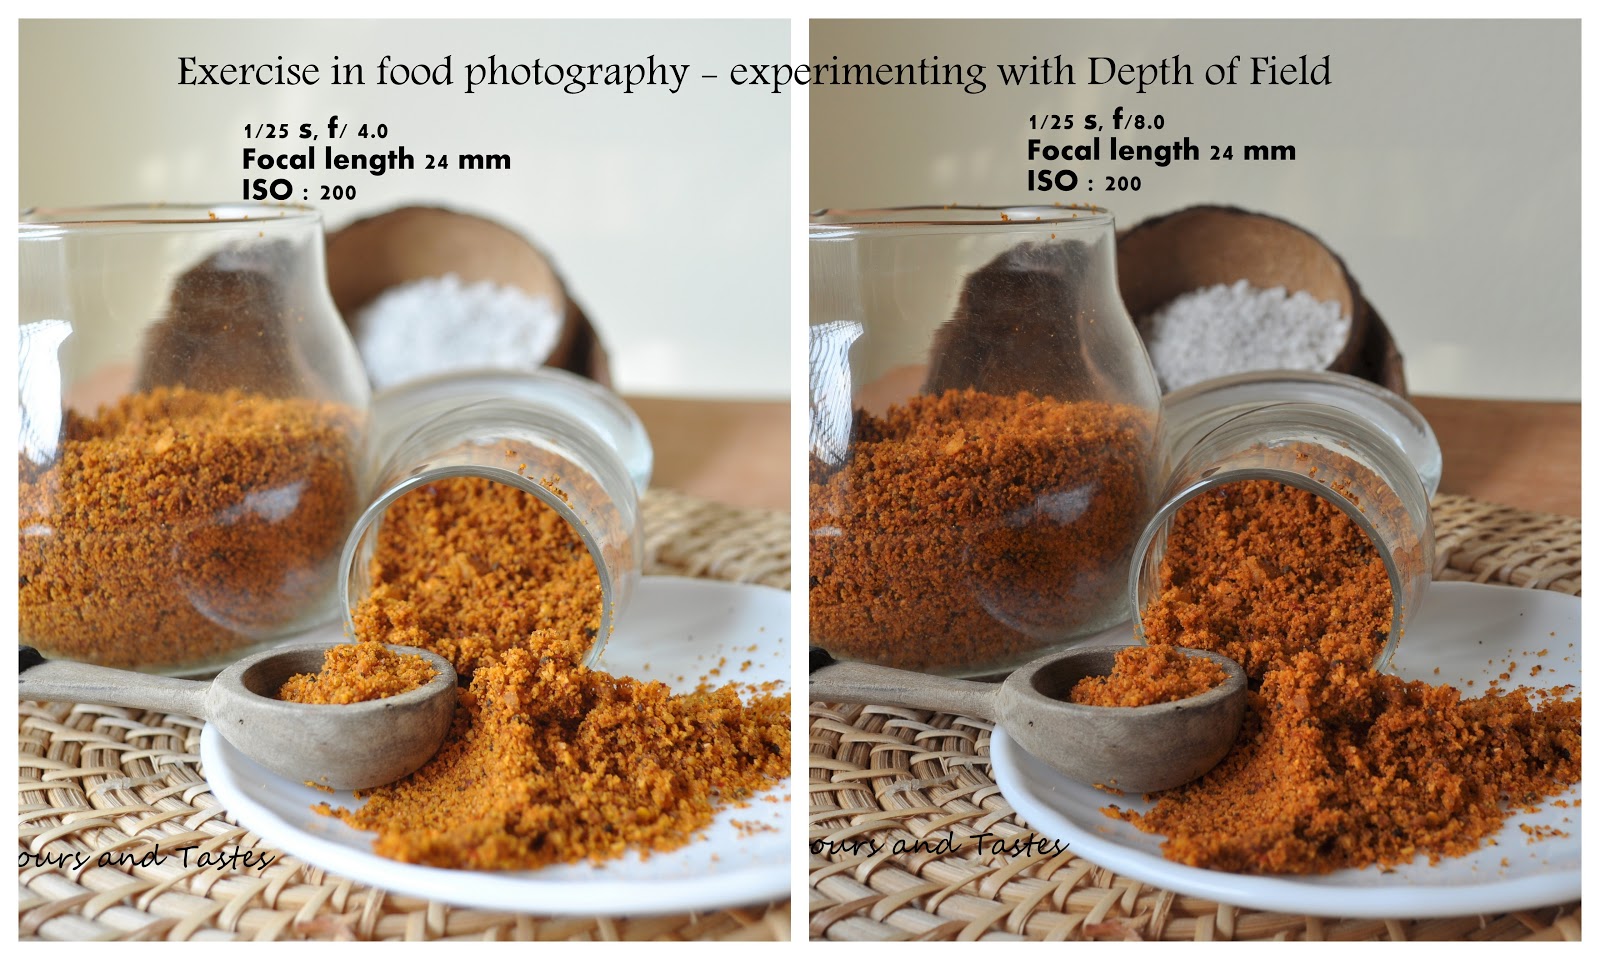
To take a picture of your product in full focus, you must use the maximum F-stop. For example, it could be F16 or F22. Using a wide aperture, you will get a narrower depth of field and some parts of the product will be out of focus.
However, if you need to focus on a specific part of the object, such as a buckle on a belt or a knife handle, you can set up a lower aperture for your product shoot.

Since you do not need to shoot moving objects and usually you use a tripod for product shots, blurring is not a common problem. The camera will not shake, and slow shutter speed will be enough to get clear and sharp photos.

At this stage, you should not forget about one of the most important product photography tips – before you begin to change the image, decide what final result you expect. If your pictures are for an e-commerce website, then take into account how they suit the overall concept of the page and if they are consistent with other products.
Your incredible product photography ideas can be ruined by any unwanted blemishes in the image. To fix such flaws, you can use the “Spot Healing” tool. If the spots are small and are on an almost uniform surface, this Photoshop tool will easily cope with them. You can also use a Clone Stamp tool to hide blemishes.
It will be much easier for your customers to navigate the website if you take care of the coherent look of all the photos. This is especially important if you intend to get flat or simple product images.
One of the most common editing options is background removal. If you want to cope with this task with the help of software, I recommend using a white product photography background. This technique allows you to add a color that is more suitable for your product, eliminate hairs or frayed threads, and get a cleaner and more aesthetically complete image.
If you need to change either the background color or the color of the product, I recommend using the Hue/Saturation tool. For example, you need to take pictures of a dozen shirts of various colors. Not to waste time on stacking and photographing each color variant, you can capture one color and then make the necessary changes using this tool.

Frankly speaking, you need to think twice before starting to take photos. It is very important to understand where they will be used. Different sources require various photo formats.
Instagram has several standards for the aspect ratio. However, the main one is 1:1 (square). Etsy requires 4:3 photos from sellers, while Amazon uses both square and horizontal photo formats.
Even 20 product photography tips aren’t enough to outline this topic to the fullest. This genre allows for running your imagination wild, so it’s never late to learn something new. With this in mind, I have collected more tips on how you can showcase your product in the best way.
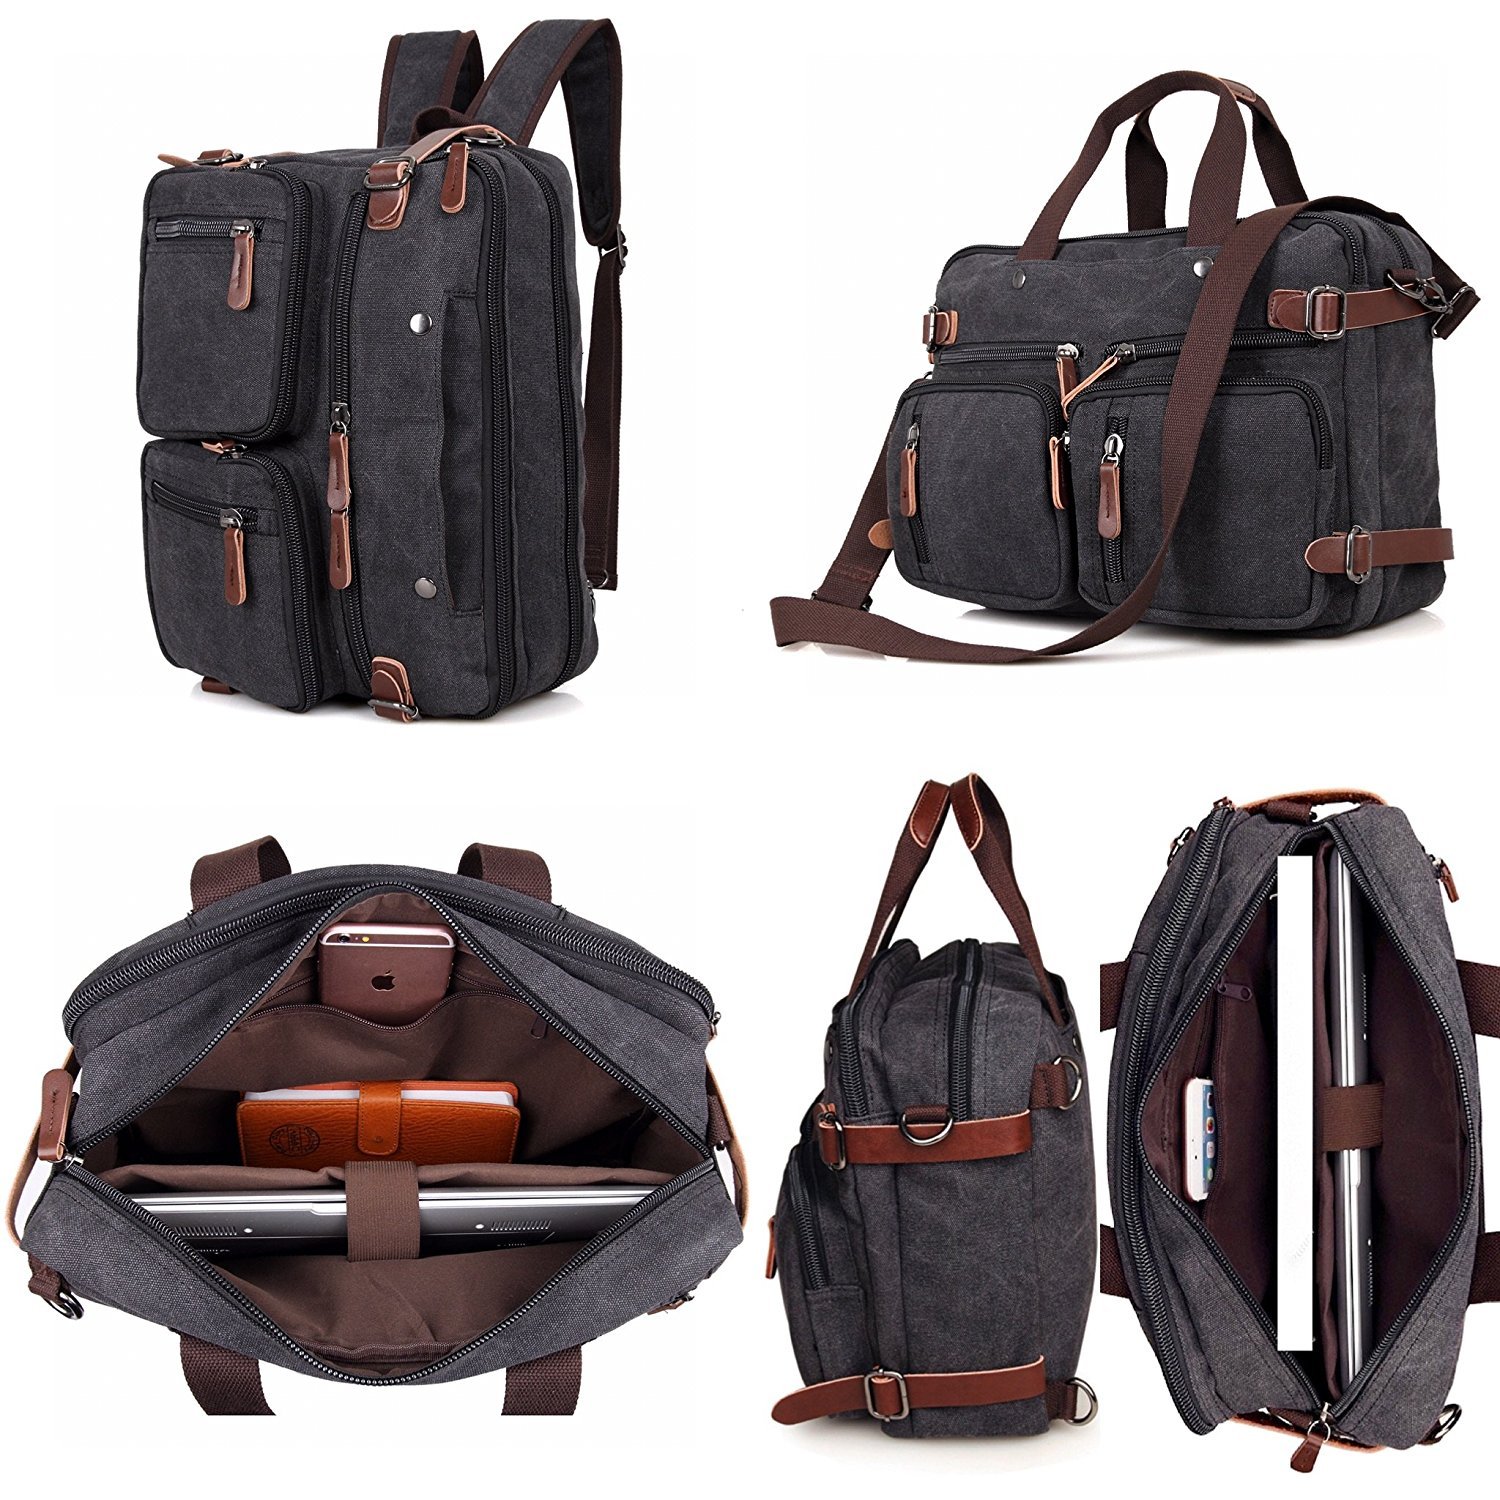
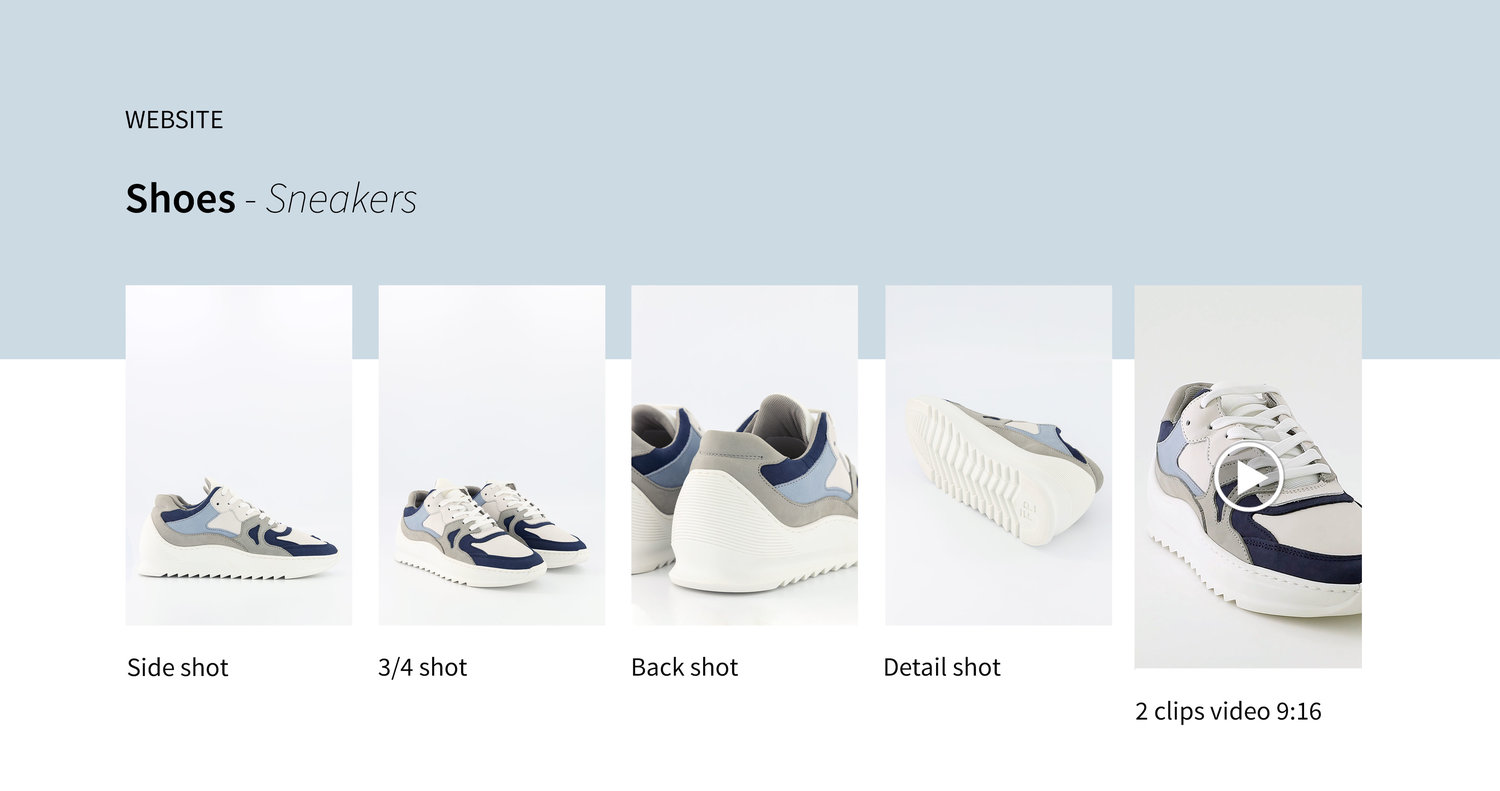
Visiting any online store, people want to see the item from various angles. So my recommendation is to take products photos from all possible sides. It will be great if you can manage 360° photography but don't get upset if you lack either experience or equipment. Just devote some time and take a close-up detail image, an angled shot from the front and top.
A professional product photograph is about successful advertising of goods. So, check whether the logo is perfectly visible. Do it before you press the shutter. Otherwise, a client can mix up your product with other similar goods.

A reflection will add some depth so that a photo will look interesting and dramatic. Avoid using only a mirror. Think of another tool to achieve an astonishing result. For instance, it may be a reflection in the water. Adjust product photography lighting setup well in order to increase the reflection.
It is rather difficult to get a good reflection since you may not have enough light. Fortunately, it is possible to create a reflection in Photoshop.

Another challenge while selling products online is the impossibility to demonstrate their actual size. Actually, you may use an item that is well-known and take lifestyle product photos using it.
An effective and easy way to demonstrate the size of a product is to indicate its width and length. Thus, it is easier for a customer to visualize this object.

You should choose either an artificial or a natural source. Otherwise, a customer will be confused. For example, applying natural light to an artificially lit image increases chances to soften the product, which is meant to be sharp.
Find out how to make a cheap DIY light box or buy an affordable but high-quality product photography lighting kit.
This is one of the most complicated product photography techniques. Nevertheless, it allows you to take professional-looking pictures like those you see on magazine covers. You need to take a dozen of photos of the same subject in the same position.
However, it is necessary to change the light to illuminate different parts of the subject. After that, you can combine all shots using photo editing software.
You can also try taking one long exposure shot in absolute darkness. Illuminate the subject with a flashlight moving from one side to another. View my list of the most creative product photography ideas you may try to repeat with your products and make sellers stay satisfied with results.

Best option: Datacolor SCK200 SpyderCHECKR 24
The colors of your products photos often affect the customers’ choice. If after the purchase the client discovers a discrepancy to what he/she saw in the picture, there may arise an unpleasant situation. To avoid such cases, check if the colors in the photo are true to life. You can do it with Color Checker.


According to all product photography tutorials from advertising photographers, using only the built-in flash often results in poor quality of your images. If you use only a flash, then you will get too harsh light. As a result, your photo will be filled with hot spots and unflattering shadows.

After you finish work with picture and get your great product photography images, you just have to make the last adjustments and start using your shots. At this stage, you can apply various free filters, presets, and many other things that will make your photos even better.


