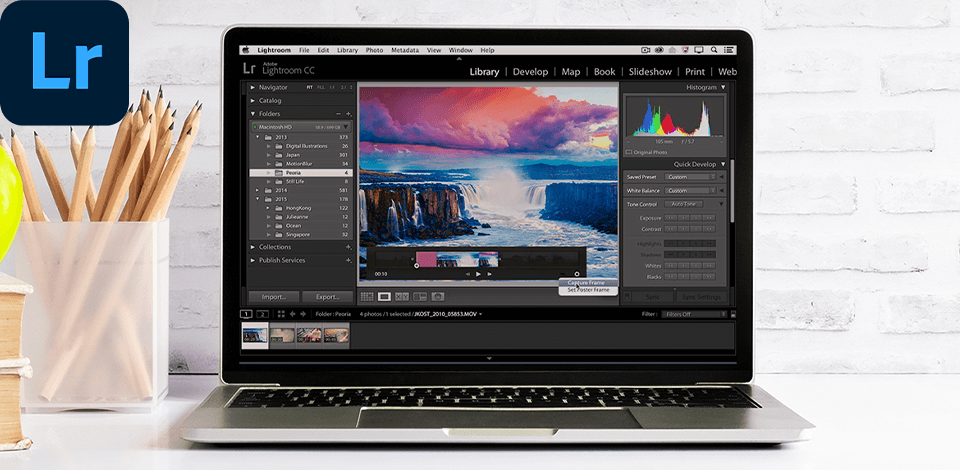
I'm sure that more than 50% of Lightroom users do not know about Lightroom video editing. This is why many people start wondering if it’s possible to edit videos in Lightroom. This software indeed comes with handy video editing tools. Read on to discover how you can process your video footage in Lightroom.
Lightroom is known as the best program for color grading, but you may use some of these functions in Lightroom for video color correction as well.
Press the video clip and then press “D” on the keyboard to go to the Develop module. In the central area of a preview, you will see the message “Lightroom Video is not supported in Develop.”
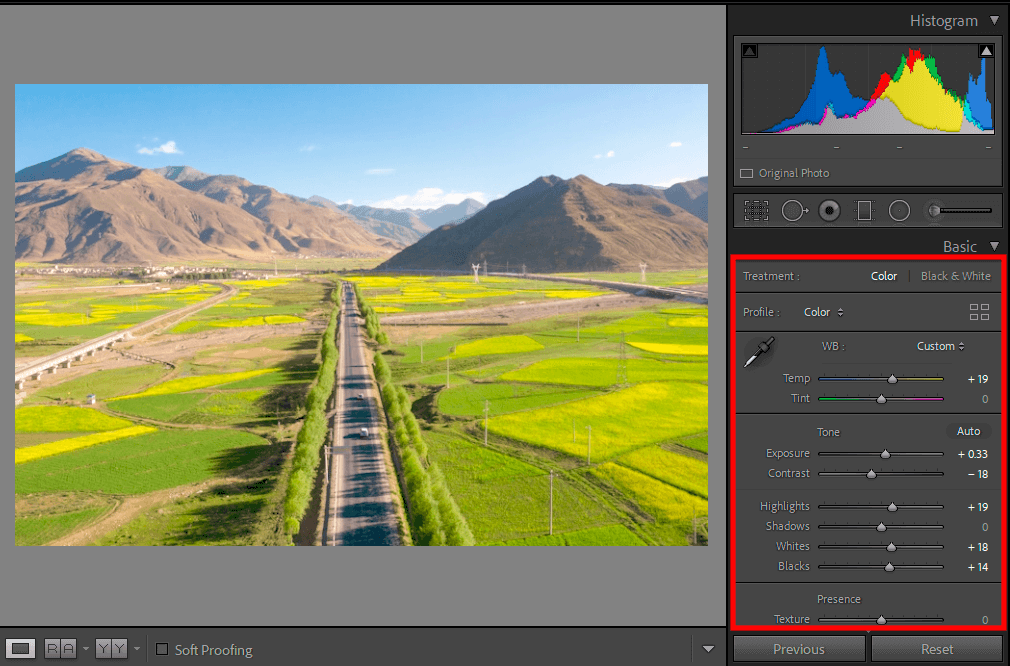
Don’t worry, just press “G” to return to the Grid view of the Library module, and then look at the right area of the panels. Do you see the controls on the Quick Develop panel? You may use them for Lightroom video editing.

To apply a setting, double-click on the video clip, then click the settings button three or four times. The action doesn’t just affect the thumbnail, it is applied to the entire video.
You have already noticed that many of the controls aren’t there, so you can’t use all the tools in the Quick Develop panel for your video. For instance, you can’t apply Clarity or use the Highlights and Shadows controls.
In Lightroom, you may change the white balance or increase or decrease the brightness of the entire video clip using Exposure or Vibrance controls. I am sure that there are still a lot of things you would like to do that are only available in the Develop module.
We have learned before that the Develop module doesn’t support video. So what should we do? We will resort to tricks within the program itself. There is a wonderful workaround that allows you to use more (though not all) controls of the Develop module.
It involves taking a single frame out of the video, processing it in the Develop module, adjusting it there by dint of all means, from the Tone Curve panel to the HSL. When these corrections are applied, the same editing techniques are applied to the entire video in real time.
So, let's try out this method to edit videos in Lightroom. Click the Reset All button at the bottom of the Quick Develop panel, then capture a frame somewhere in the video. After that, when the JPEG image appears at the bottom, in the Filmstrip panel next to the video clip, press D to go to the Develop module.
Now use the Auto Sync function available in Lightroom. It applies any effects, already applied to one image, to all other selected images (and even to the video clips, as in our case).
Note: Remember that all the edits you make here are “non-destructive.” So if you apply these effects to a video and then decide that you don’t like them, you may remove all these effects by clicking the Reset All button at the bottom of the Quick Develop panel.
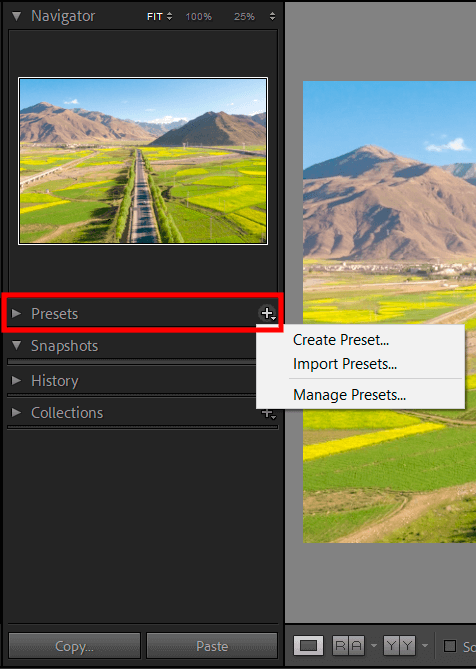
What to do if you have performed video color correction and think you could use the same settings again in another video clip? Save it as a preset, and then apply it with a single click on the Quick Develop panel in the Library module. To save Lightroom video presets, you need:
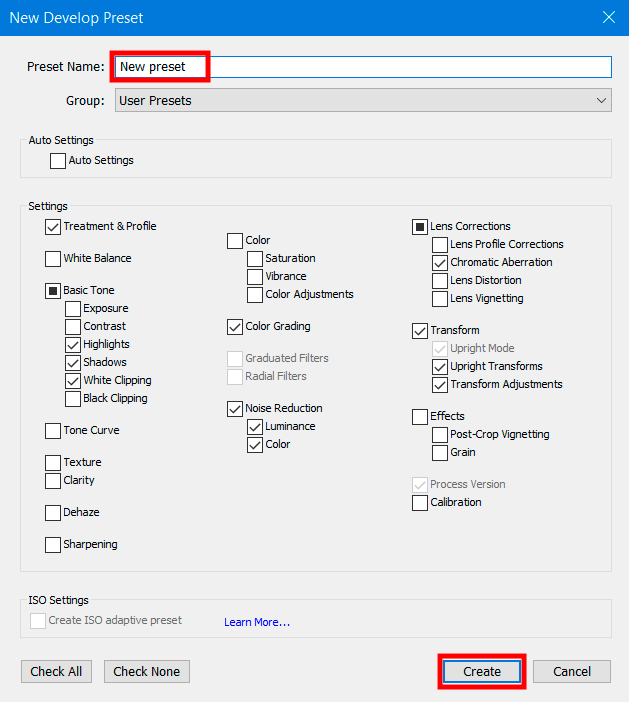
STEP 1. Go to the Presets panel (in the left area of the Develop module panels and click the “+” button at the right end of the panel header).
STEP 2. When the New Develop Preset dialog box appears, first click the Check None button, then check the boxes for the adjustments you have just made.
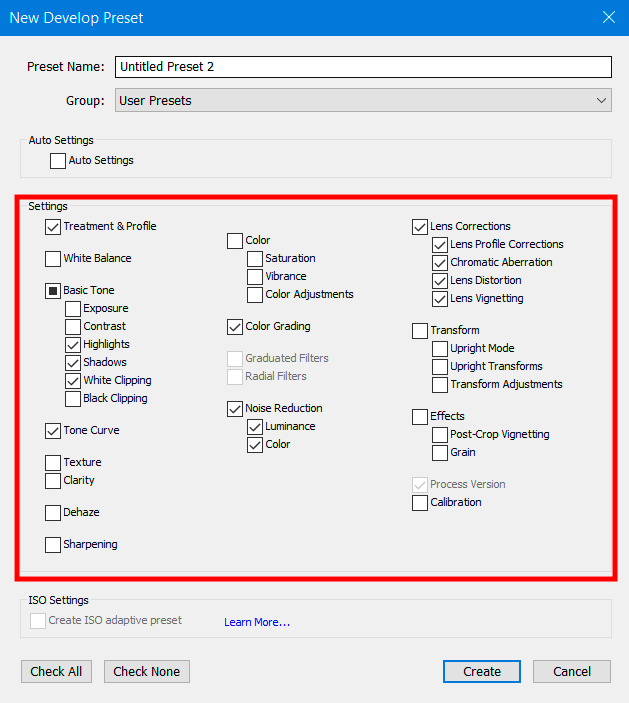
STEP 3. Give the preset a descriptive name and click Create.
Pro Tip: I advise you also to learn how to install Lightroom presets to edit multiple photos and videos at once. This knowledge will be useful for you if you download presets that allow you to edit photos in Lightroom and enhance videos.
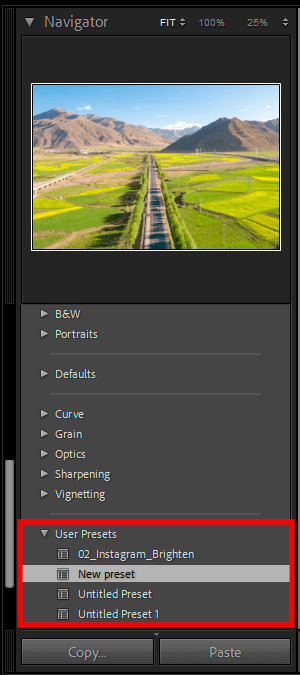
Now you have a preset, you may use it directly from the Library module. Just select your video, then click Saved Preset on the Quick Develop panel. After that, go to the list of User Presets and look for the preset you have just saved.
If you need to use additional presets, I recommend you download this all-in-one set. This bundle includes high-quality LR filters that will give your photos a unique look.
Using these advanced presets created for professionals who specialize in photography and videography, you can edit thousands of photos without wasting a lot of time. You can apply them with one click. If you want to use Lightroom for video editing, these presets will give your content a more attention-grabbing look.
One more interesting video editing technique for Lightroom users involves taking a single frame out of the video and turning it into a still image. It may be done in the same way as in the previous step. Find the part of the video that contains the still image, then click the Frame button, but this time choose Capture Frame.
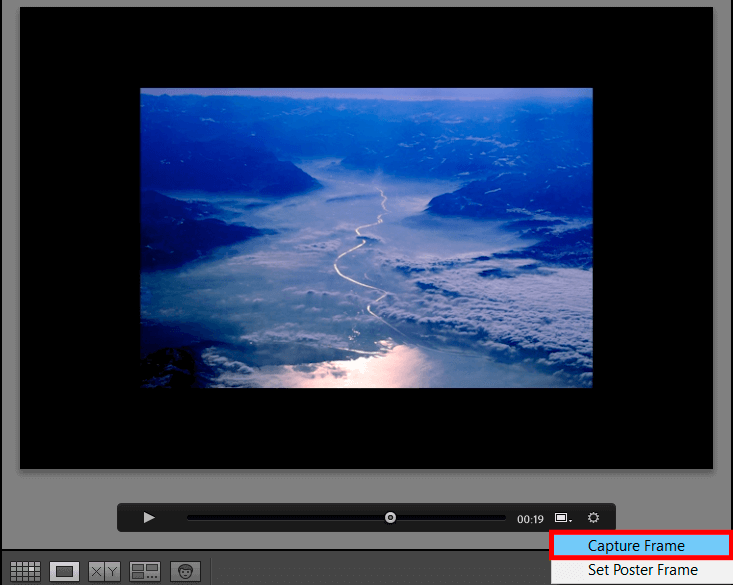
This will create a second file (a JPEG image file, exactly the same as any other snapshot) and place it in the Filmstrip panel to the right of the video clip. The possibility to create a snapshot of a still frame is really important because this technique will be used to apply effects to video clips.
If you need to edit video in Lightroom, for instance, crop it (in case you need to slightly cut edges or trim it in such a way that it starts after a few seconds), you may click the Trim Video button. It is a small gear icon on the right end of the control panel. There are two ways of cropping your files when editing videos on Lightroom:
1 method. Start by opening your video using single-item mode in the Library mode. Make sure not to do it in the Develop module if you don’t want to get an error message. Below your video, there will be the playback bar with a play button and other options. You will see the timecode and two icons. Click on the cogwheel icon to access the settings.
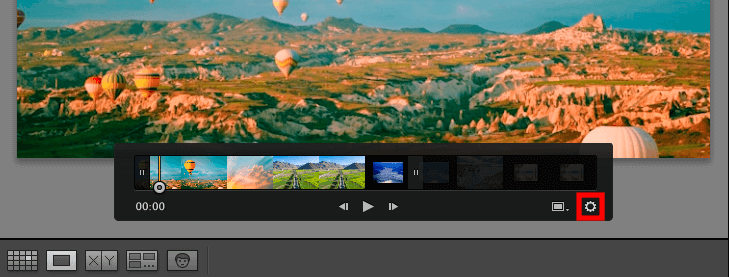
By clicking on this icon, you can expand the playback console. On it, you will see a thumbnail timeline of your video and additional buttons.
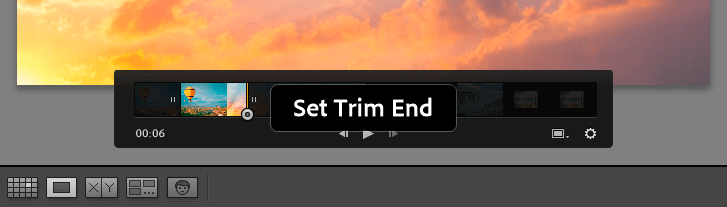
Take a look at the frames that are located at the ends of the video timeline. You will see two small handles. Drag them to any position to set start and end points of your video.
2 method. The second way is to play the video by pressing the spacebar. Then, when you reach the point where you actually want to start the video, press the Shift+ I shortcut. It sets the starting point of the clip. When you reach the point where you want to end the clip, press Shift+O, which sets the end point of the clip.
Both ways (dragging markers and using keyboard shortcuts) do the same thing, so choose the one that suits you best.
Note: It is very important to know the following about cropping video clips: being non-destructive, it doesn’t crop the video leaving the original protected. Cropping is applied to the copy when you export the file. So, although the exported video will be cropped, you may go back to the original video clip at any time.
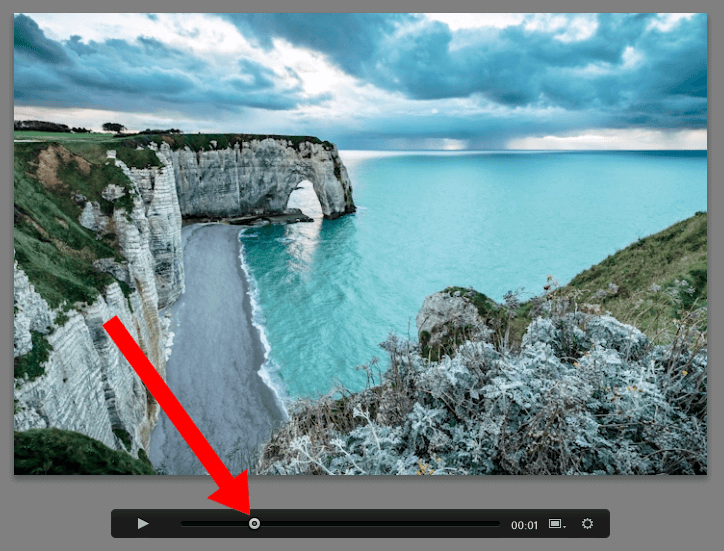
To view a video clip, double-click on it, and it will be opened in the Loupe view. To play the video, click the Play button in the control panel below the video or simply press the spacebar on the keyboard to start/stop the video.
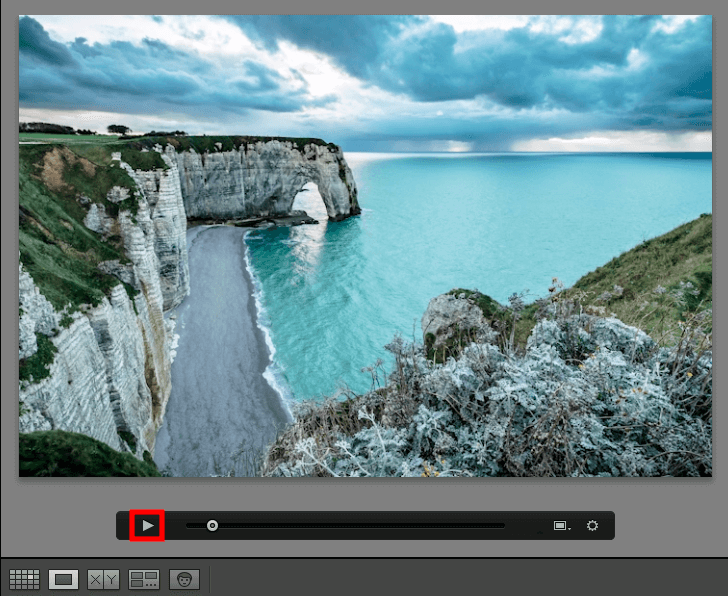
If, instead, you want to go through the video (simulating fast-forward or rewind), you can simply drag the slider to the control panel.
Note: When you play a video clip, both video and sound are played. However, there is no volume control in Lightroom CC, so you have to control the volume using your computer.
Keep in mind that you can always outsource video editing to the FixThePhoto team that will enhance your footage at an affordable price. FixThePhoto provides a range of video editing services and can edit your RAW videos quickly. If you don’t want to spend a lot of time on post-processing, our team will help you cope with tedious tasks in no time.
Note: Unlike Adobe Premiere Pro or Sony Vegas Pro, Lightroom doesn’t allow you to work with video and audio. However, the program enables you to make small changes, which will be enough in 70% of cases of video editing. Why is it convenient? Because you can use Lightroom for video and photos at the same time, without changing the program and having to get used to the new interface.
The possibility to select a poster frame is especially useful if you have four or five similar clips. You can choose the frame that is most characteristic of all the clips. This poster frame will be visible in the clip not only in Lightroom but will remain in the clip even when it is exported outside the software.

To select the poster frame, firstly, find the section of the video with a suitable frame. Then go to the control panel, click and hold the Frame button (a small icon in the shape of a rectangle to the left of the Trim Video button in the form of gear).
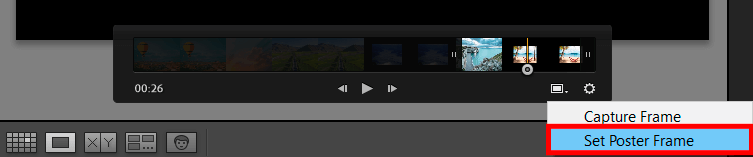
In the pop-up menu, select Set Poster Frame and a thumbnail of the video will look the same as the poster frame.
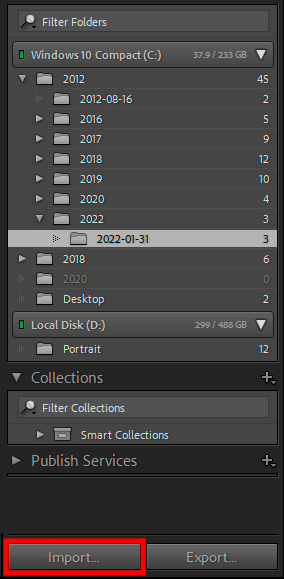
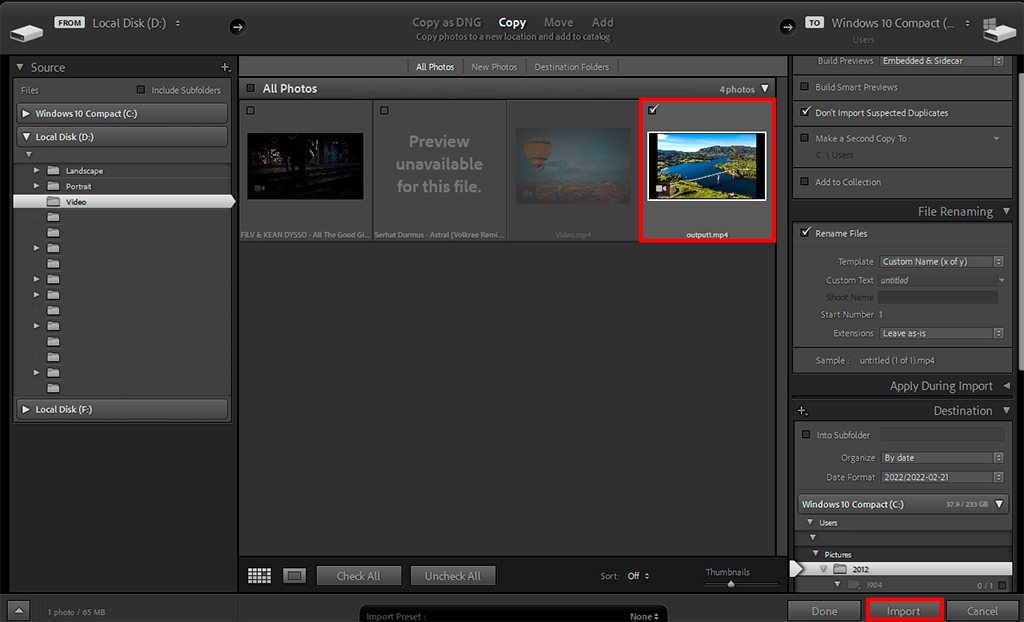
You can add your video to Lightroom by following these simple steps. For instance, you can click File > Import and find the video stored on your device or simply drag and drop your file into the software.
Pro Tip: Use Library Module to perform this task since Lightroom doesn’t support video editing in Develop mode.
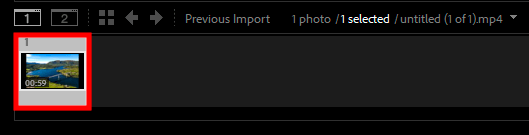
Once the video is in Lightroom, you may do whatever you normally do with the image, for instance, place it in the collection, add checkboxes, metadata, etc. When Lightroom video is imported, the small camera icon disappears. Instead, the video timeline is displayed in the lower-left corner of the thumbnail.
After you’ve got the desired video, you will probably want to save it. Although you won’t be able to send the video directly from Lightroom via email, you can send the video to Facebook or Flickr using Export. To do this:
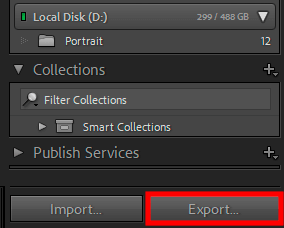
STEP 1. Select the video clip you want to export.
STEP 2. Then click the Export button at the bottom of the left panel area.
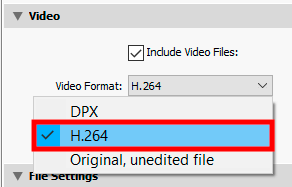
STEP 3. In the Export dialog box, if you scroll it down a bit, you can see the area related to the video export.

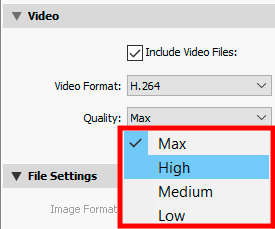
STEP 4. The checkbox in the Include Video Files window should be set by itself, so you have to set the two parameters, Video Format and Quality.

STEP 5. Select the format. I use H.264, as it is a widely supported format that compresses a file without visual quality loss.
STEP 6. Next, select the compression ratio. It depends on the selected Quality settings. The higher it is, the lower the compression ratio and the quality of the video itself.
STEP 7. Click Export.

Since Lightroom can’t be considered as professional video editing software, a great variety of settings won’t be available here. Still, for most situations, the offered functions will be enough.
Pro Tip: If you want to edit videos in Lightroom, note that it doesn’t have audio settings, so you have to work with them in another program. This is one of the reasons why this software isn’t popular among professional video editors. For working with audio for video, I advise you to use Adobe Premiere Pro, Final Cut Pro X, for instance.

Now that you know more about Lightroom video editing tools, try using these LUTs to process your files like a pro in several minutes. There is no need to spend hours on manual adjustment of the settings. Any of these LUTs will help you quickly process hundreds of frames, which makes this collection especially suitable for wedding photographers and videographers. Before installing them, make sure to learn how to use LUTs in Lightroom to avoid any installation issues.


