Prism Photography
When you purchase through affiliate links on our site, we may earn a commission. Here’s how it works.
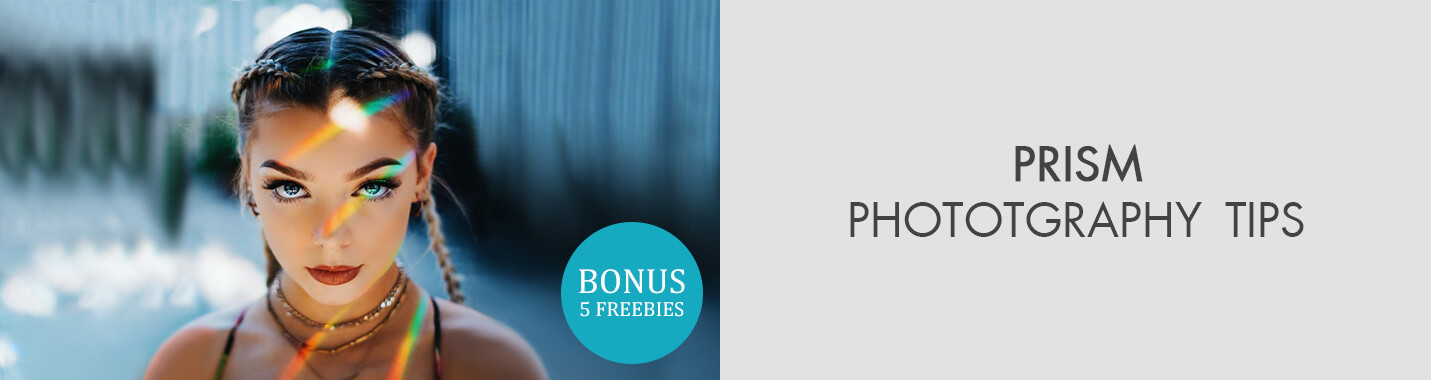
Prism photography is the way of capturing people, objects or locations with the help of refracting light that comes through prisms. You can get these glass reflections or rainbow colors to convey any mood or when they need to cover or remove undesired elements from the picture.
Read this guide to know all prism photography tricks and ways to get creative effects.
Prism Photography Guide: How to Use Prisms for Creative Effects?
I am sure you have noticed how fascinating dispersed sunrays look while they are coming through a light catcher. Now you can reflect the beauty of this effect in photography as well.
Keep reading and you will come across plenty of creative prism photography ideas and tips to achieve awesome results.
1. How Prism Works in Photography
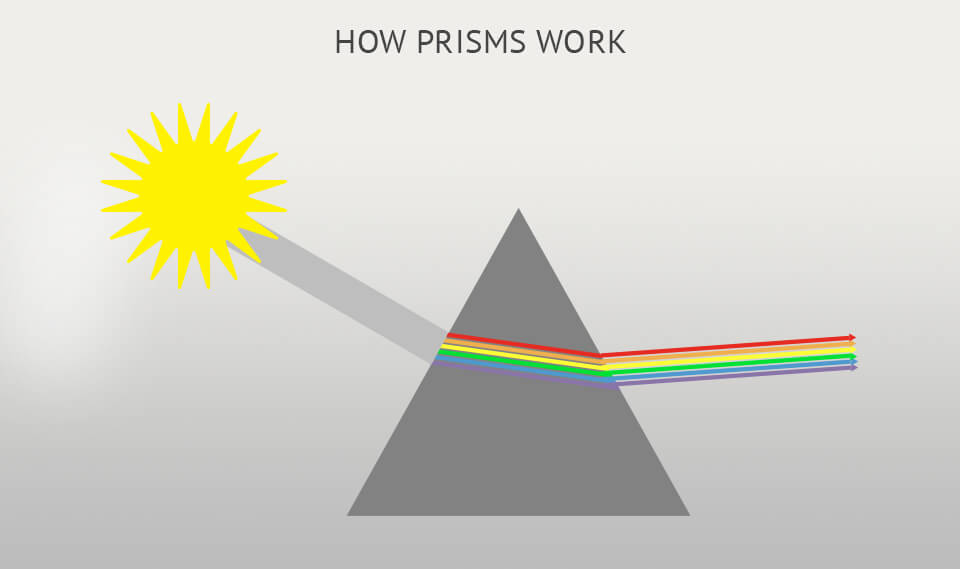
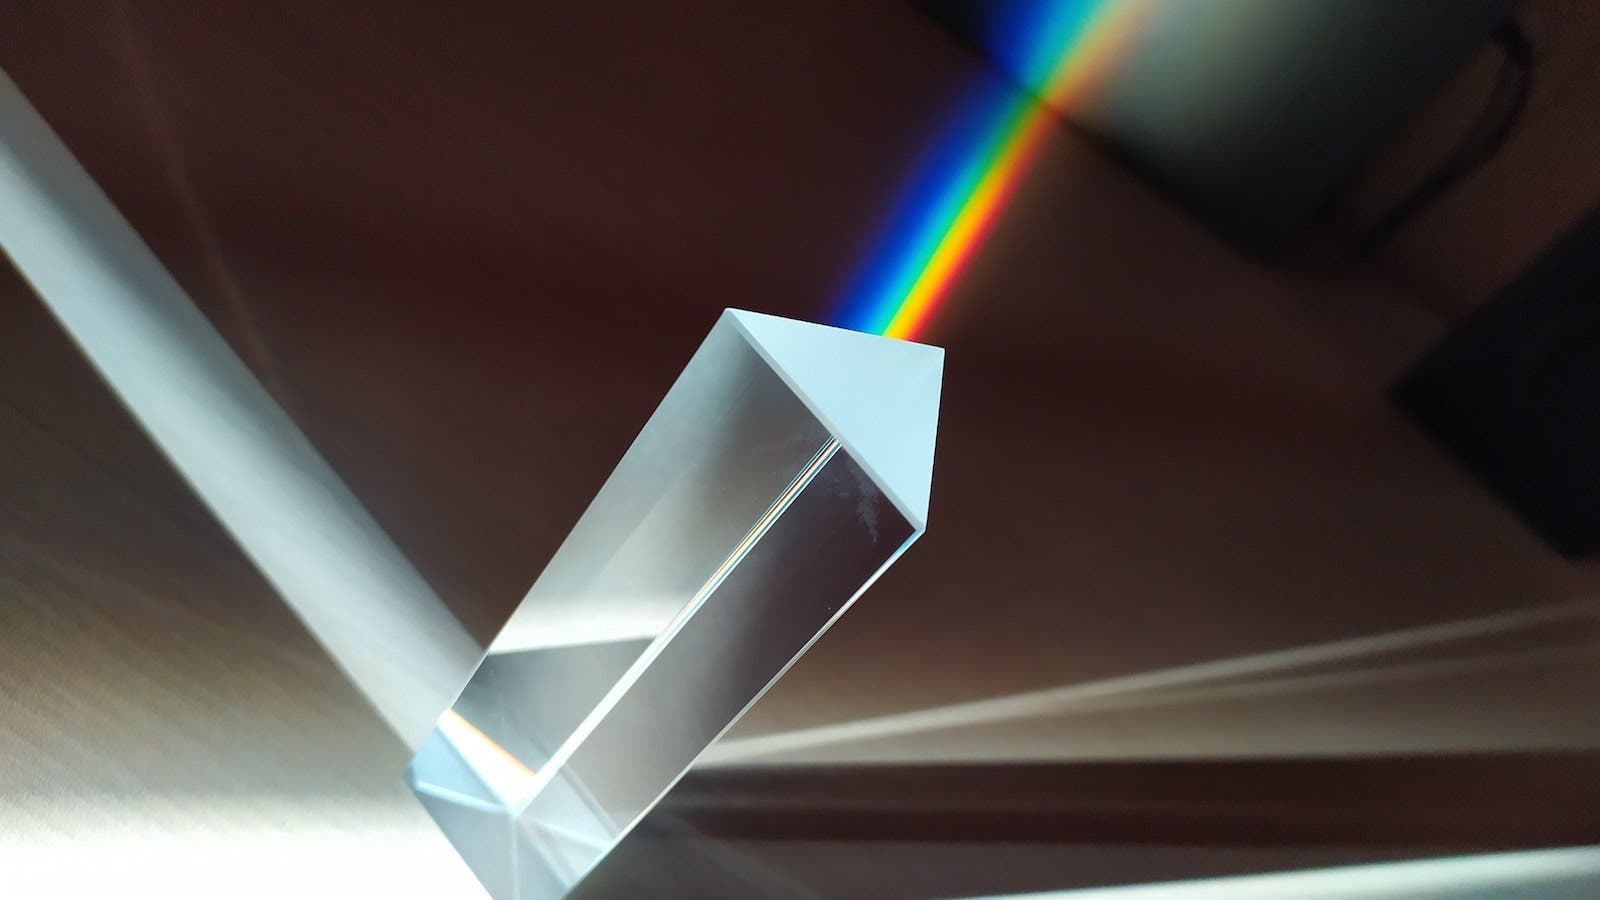
A prism is a transparent item refracting light, with the minimum of two sides having an angle between them. Whenever light goes from one side to another, it produces a refracting effect.
As a result, the direction is changed. Various wavelengths, which usually move together, are being dispersed. But people perceive them individually, in the form of a rainbow.
2. How to Work with a Prism
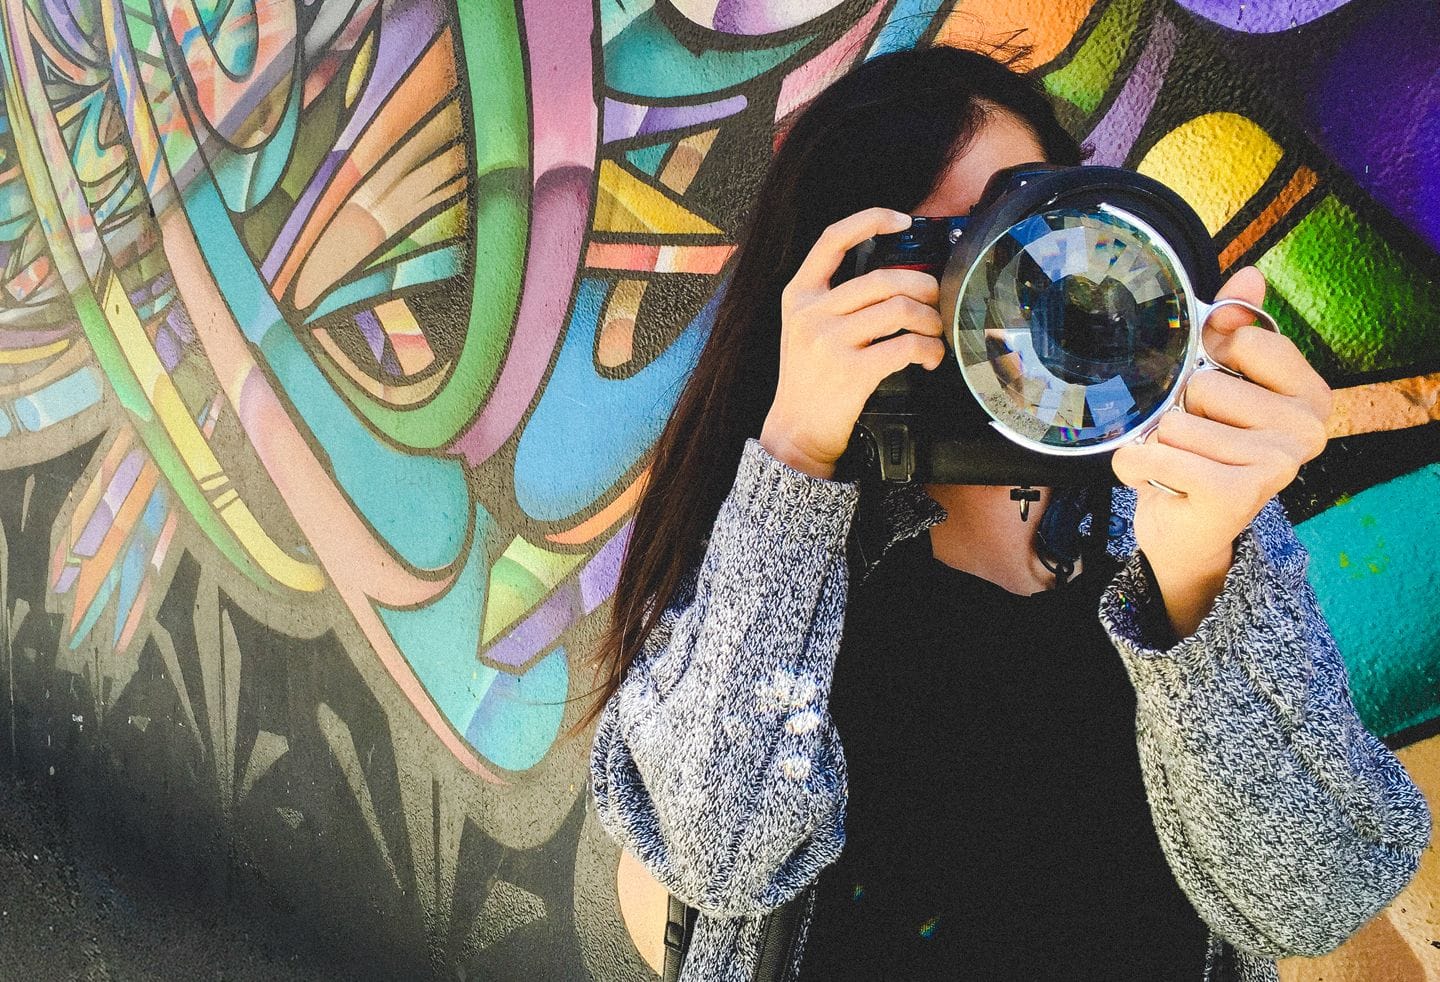
The prism photographic is very simple. You should hold the camera in one hand, and with the other hand, move the prism closer to the lens.
Changing the position of the prism, you will see how glare is refracted and various reflections appear. By the way, you can use any glass objects as an alternative.
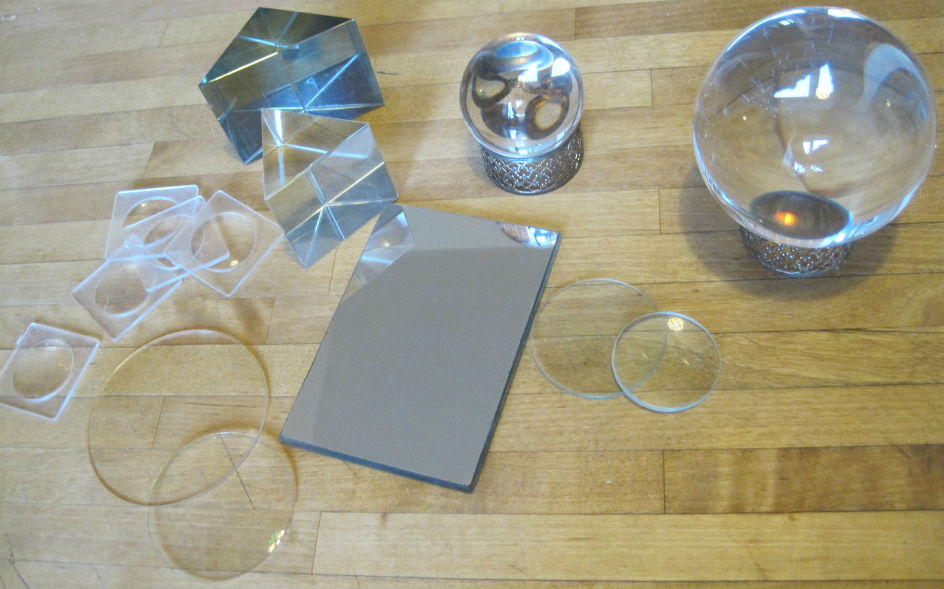
3. Pick the Size of a Prism

The prism is supposed to easily fit in front of the lens and can’t be larger than the shooting gear. Also, an appropriate prism shouldn’t be too small for you to conveniently hold it in the hand and play around with it in any way you want.
The most optimal variant is a 6-inch prism. It is steadily placed in front of the camera, reflect the items around and isn’t difficult to set up.
4. Shoot in Live View Mode
For successful prism photography, you always have to follow how the light is coming through the prism and influencing the frame. You won’t be able to do it constantly looking in the viewfinder and still try to manage the prism.
Therefore, you should stick to the Live View mode to capture the produced prism effects. Besides, in this mode, you won’t have any difficulties tweaking the prism till you are satisfied with the reflection.
5. Use the Leading Lines as the Background
Leading lines are the background that draws attention to the images inside the prism. It can be a tunnel or a road that goes to infinity.
6. Use Textures and Patterns for the Background

Experiment with various prism tricks, incorporating textured and patterned backgrounds. Put the prism in the right place, and you will be able to achieve a popular “double exposure” effect.
These are usually imitated in Photoshop. Adjusting the prism in a proper way isn’t a quick process. But if you do it, you won’t spend so much time in picture editing software.
7. Use Symmetry Capabilities in the Background

Since the prism divides your image in the middle, using symmetry on both sides of this division is a pretty effective strategy.
8. Use a Dispersion Prism
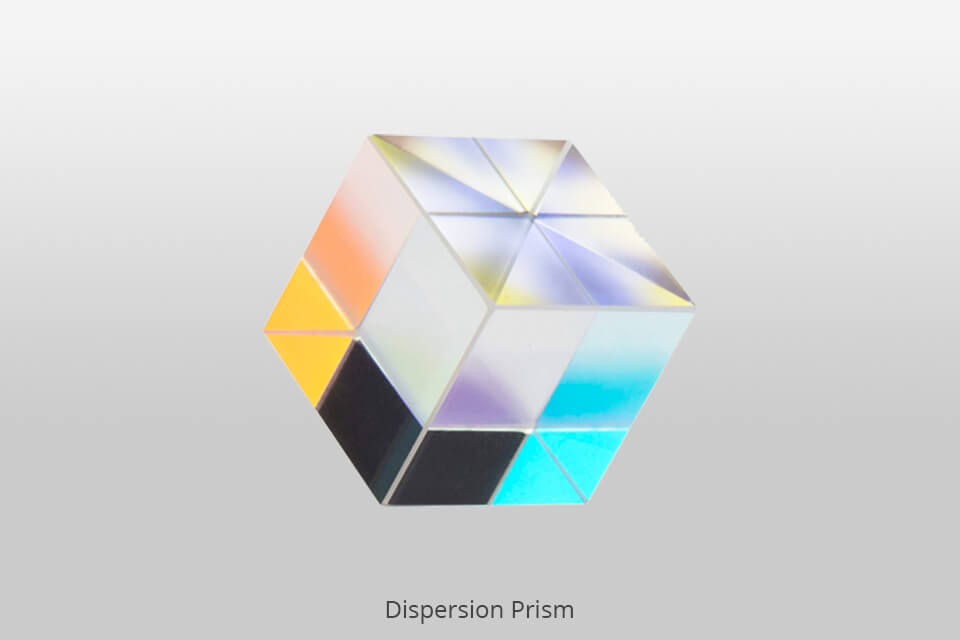
This is a cube-shaped prism, where small colored inserts are located on different sides. Thus, using the dispersion prism, the resulting rainbow can disperse in different directions and add a more unique look to the prism photo.
- Use this dispersion prism to disperse the rainbow in the shot.
9. Use Balls for a Photo
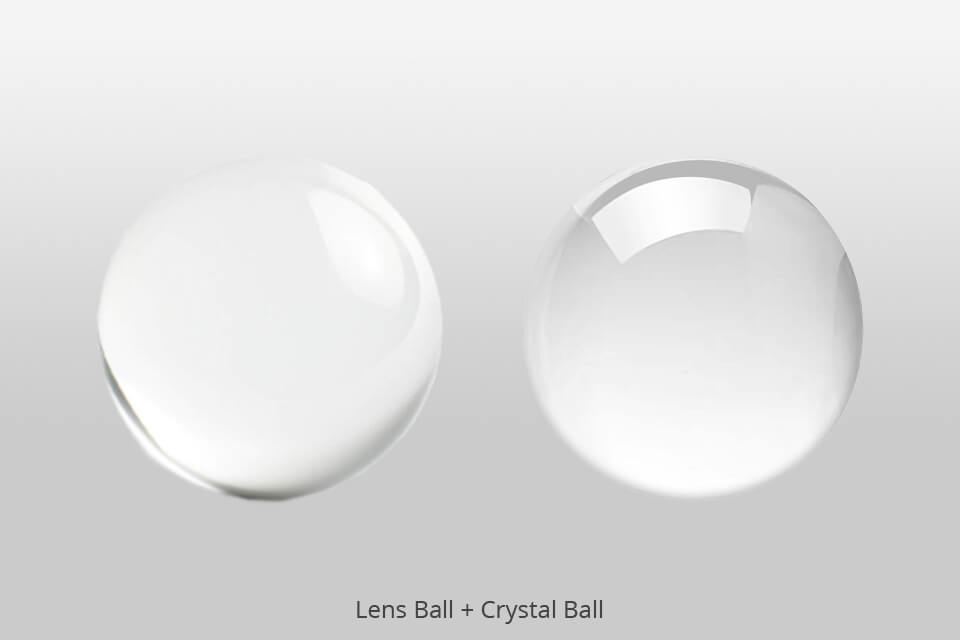
There exist two main types of such balls – smooth and crystal balls. Using a smooth ball, you can get the effect of an inverted picture inside the figure. The crystal ball can add distortion and even create a rainbow effect in a picture.
- Read more about how to take crystal ball photography.
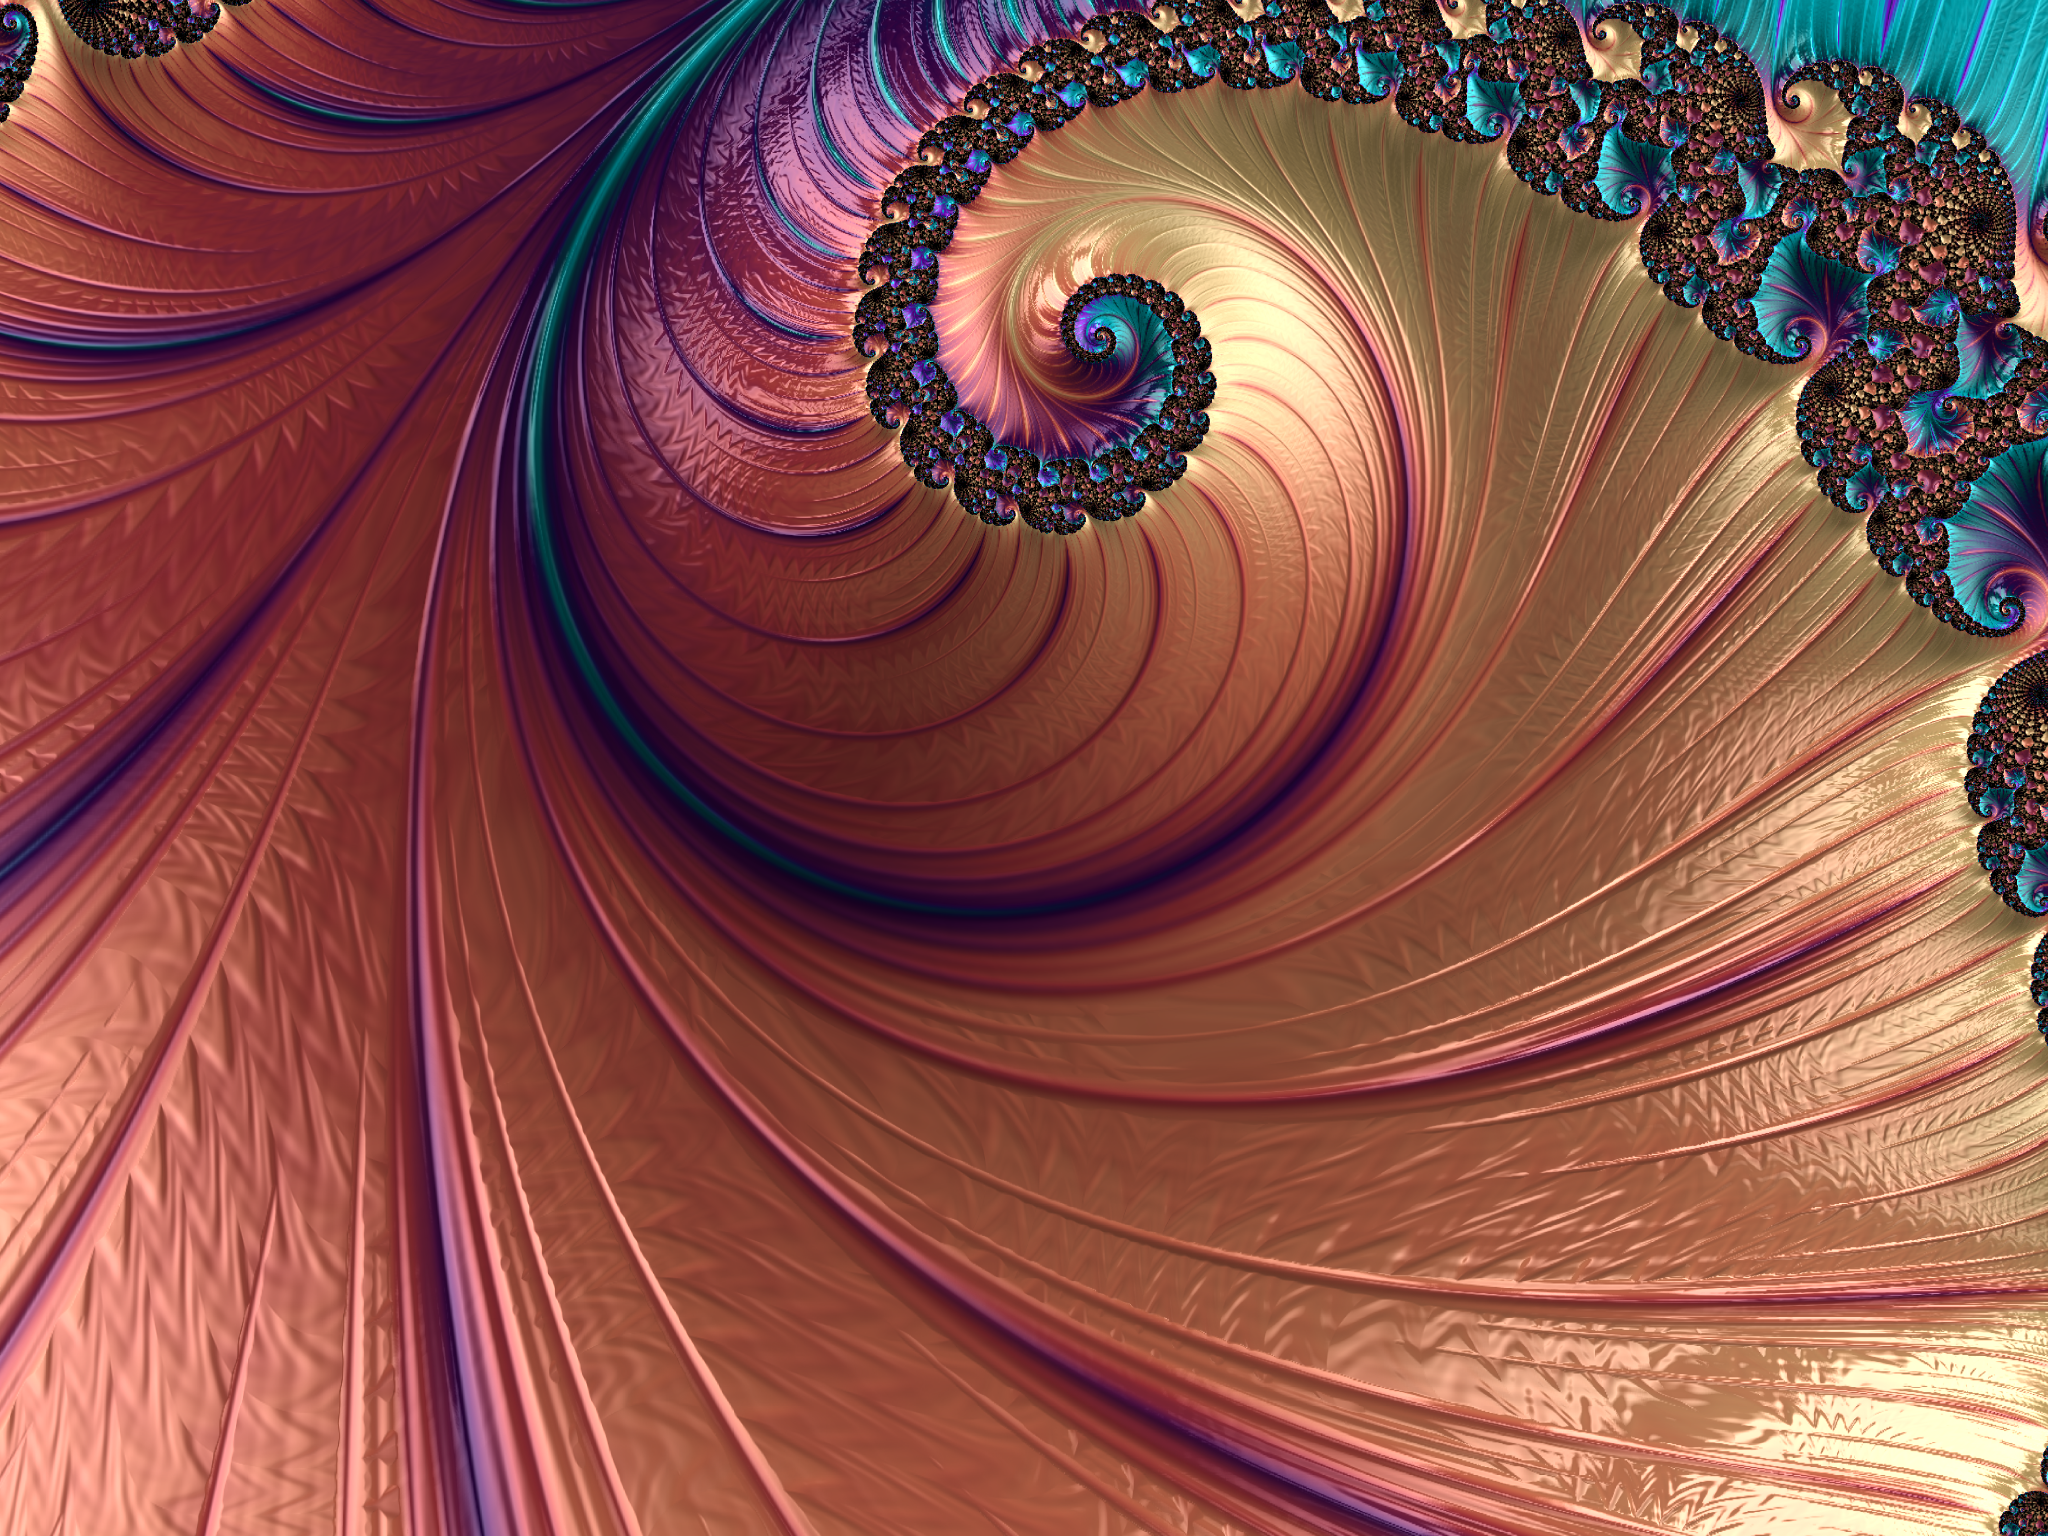
10. Use Fractal Filters
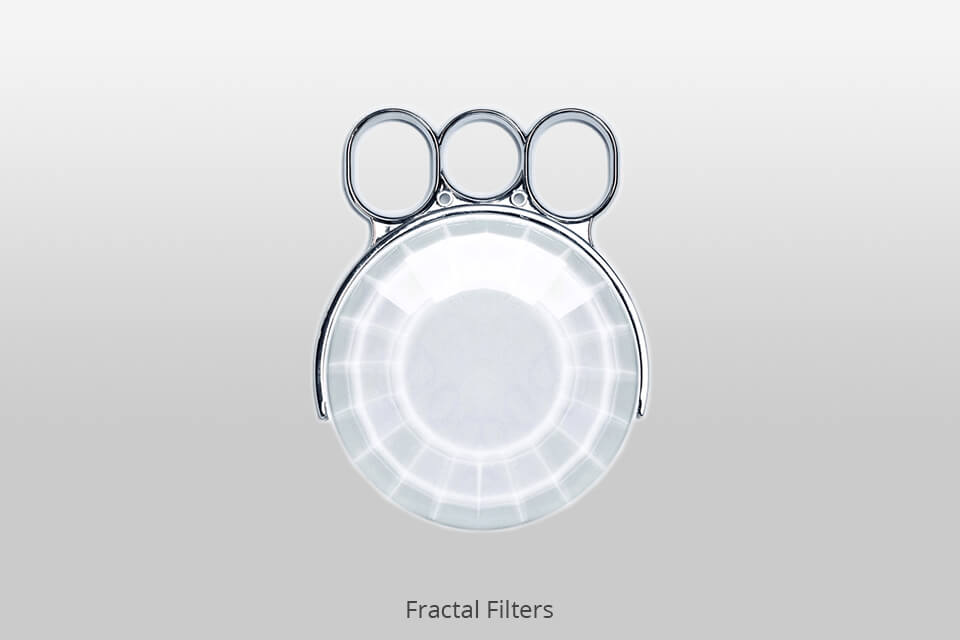
Fractal Filters are developed by Nick Wong for creative photography. Fractal Filters use the PrismaLed faceted glass elements that are put in pictures of reflections, rainbows, halos, glare and kaleidoscopic effects.
At the moment, Fractal Filters are sold as a set of three filters "Classic 3 Pack" and they are quite convenient to hold in front of the lens.
- Use this set of Fractal Filters.
11. Use a Prism Pyramid
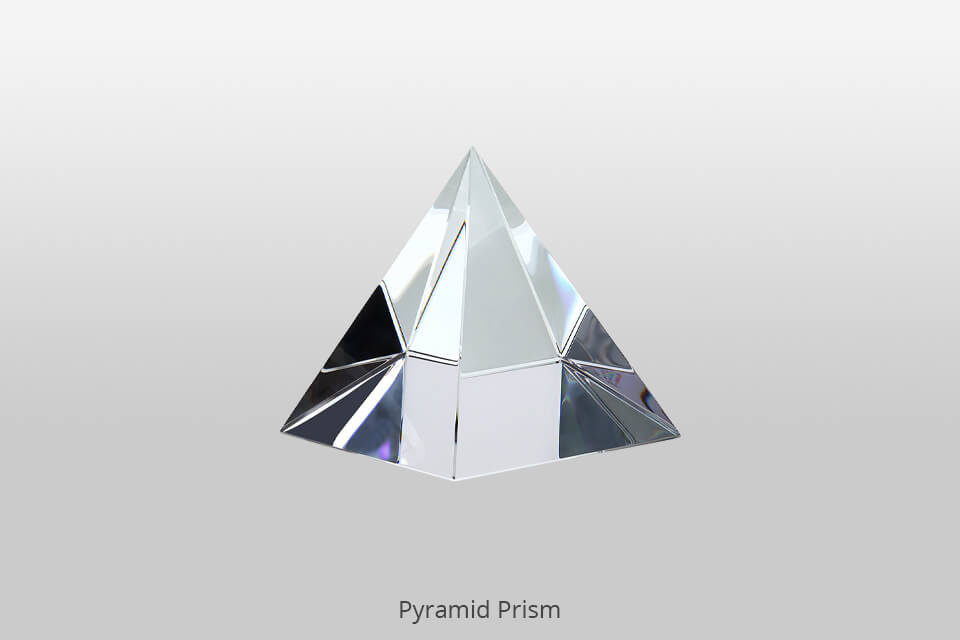
In the resulting effect, the pyramid prism is somewhat similar to the dispersion one. But it has a more unique look and lets you achieve a more dispersed rainbow effect on the object.
- Use this compact pyramid prism while travelling.
12. Use an Improvised Alternative
For cheap prism alternatives photography, you may use almost any glass item you find. Starting from a simple glass of wine, which will give the necessary distortion and ending with an old CD, coated field glasses lens, plastic with 3D glasses or an ordinary lens, as well as crystals from your chandelier.
13. Create Your Own Prism Filter

Prism Lens FX Company has recently released three lenses to create different effects in prisms photography. You can easily imitate one of them yourself using the alternative materials. Glue a few small crystals on any protective filter for the lens to get different effects in the shot.
- Use this protective filter for your lenses.
14. Pick an Appropriate Camera
To take qualitative prism photos, you need a full-frame camera. Beginners can easily start taking prism pictures using their smartphones. Fortunately, modern models can produce a high-quality image.
15. Use a Wide-angle Lens
A wide-angle lens lets you add a full background image to a photo. The edge of the photography prisms becomes more visible in the frame.
16. Gave a Macro Lens Too
The majority of prism photos are taken using it. This lens lets you focus closer to the prism and avoid hand capture in the frame. The transition from the background to the image in the prism is also harder to detect.
17. Use Manual Focus to Take Sharp Images

It is better not to take glass prism photography with auto-focus. Why? Because the camera won’t be able to locate a focal point and it will be constantly refocusing. Moreover, the pictures will lose their sharpness.
Therefore, stick to the manual focus. I suggest selecting auto-focus but don’t use the prism at first. For a nicer picture, you should select a manual mode, put the prism and take a shot.
18. Choose Small Aperture for Creating Smooth Prism Effects
Whatever lens you choose, it is most likely to be suitable for prism photography. However, don’t forget about a few factors.
To create a smooth transition between the parts of the lens with and without prism coverage, set smaller apertures – from f1.8 to f 3.5. For high contrast between both parts, increase the aperture. Mind that these changes may affect the depth of field.
19. Set the Right ISO

Together with shutter speed and aperture, ISO affects exposure. This parameter is responsible for the camera sensor’s sensitivity that influences the exposure of the shots.
In order to lower the noise in the picture, you should adjust ISO to 100. If you do it, incredible prism photos are guaranteed.
- Read more about editing photos like Brandon Woelfel.
20. Choose the Correct Shutter Speed

Shutter speed is a time span when photoreceptive elements or image sensor are exposed to light. The best shutter speed value is 1/160. It will be quite quick to limit ambient light and simultaneously to coordinate with the flash.
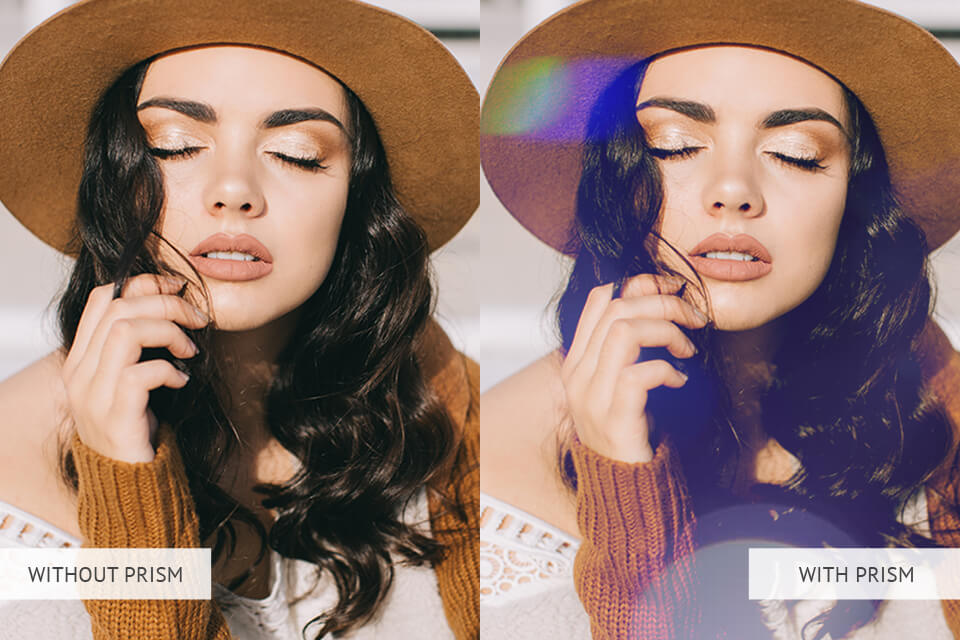
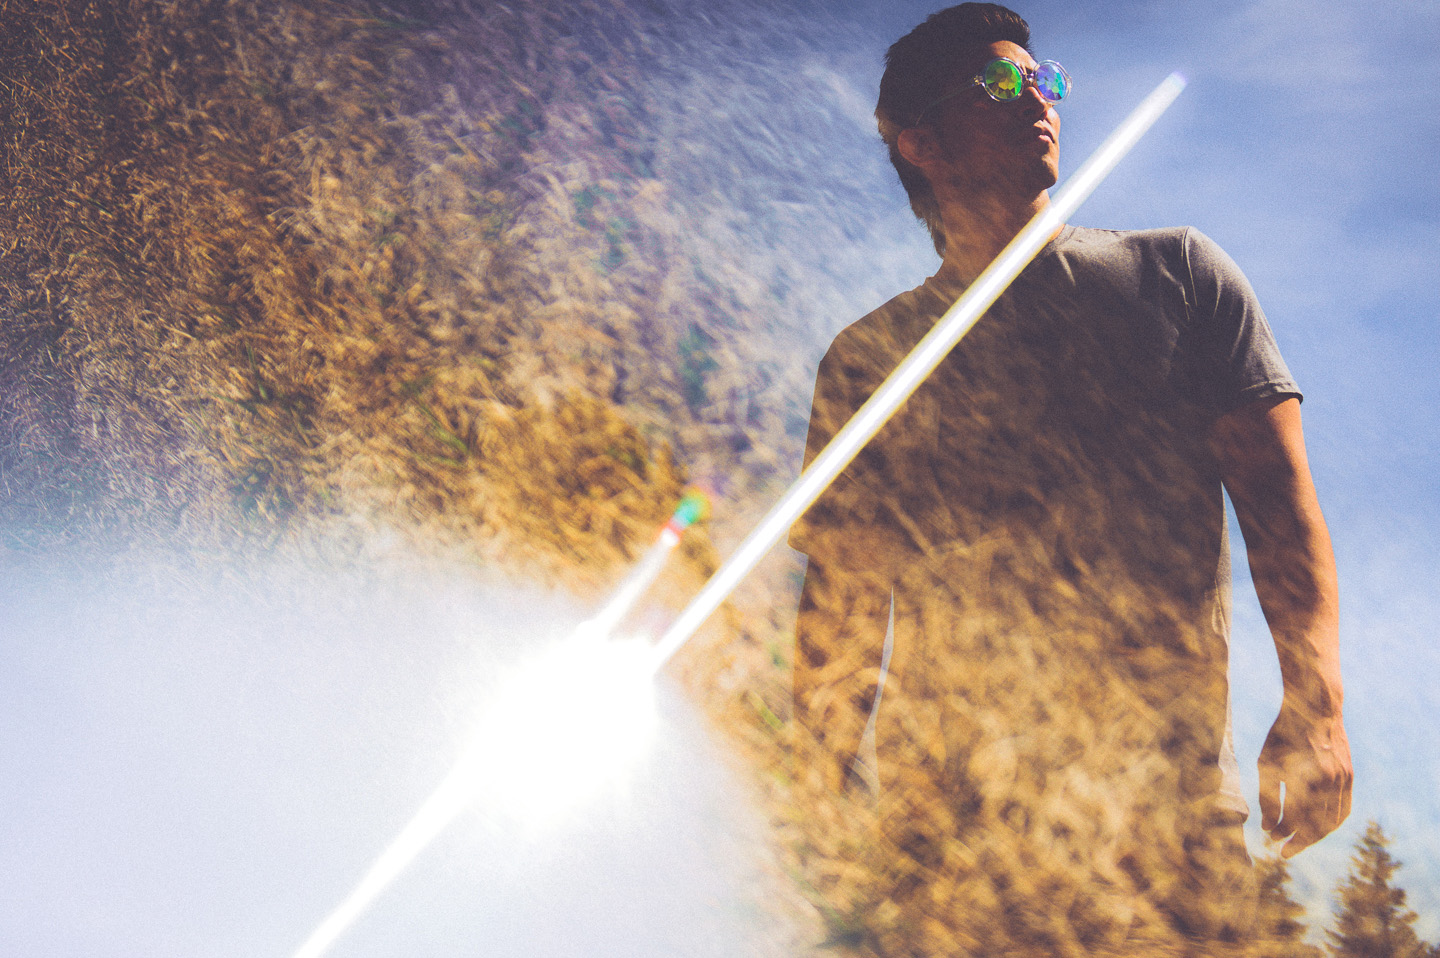
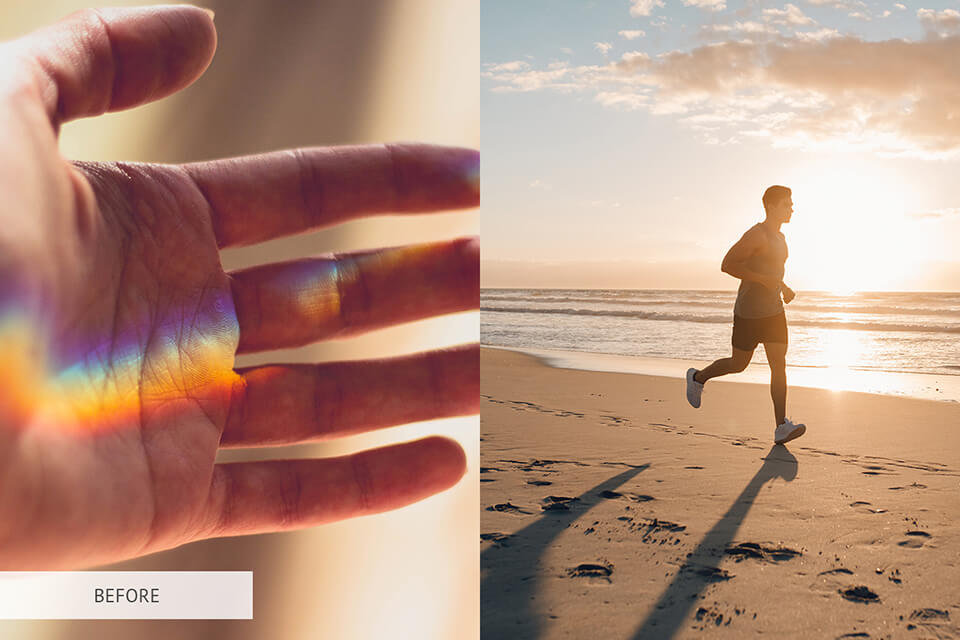
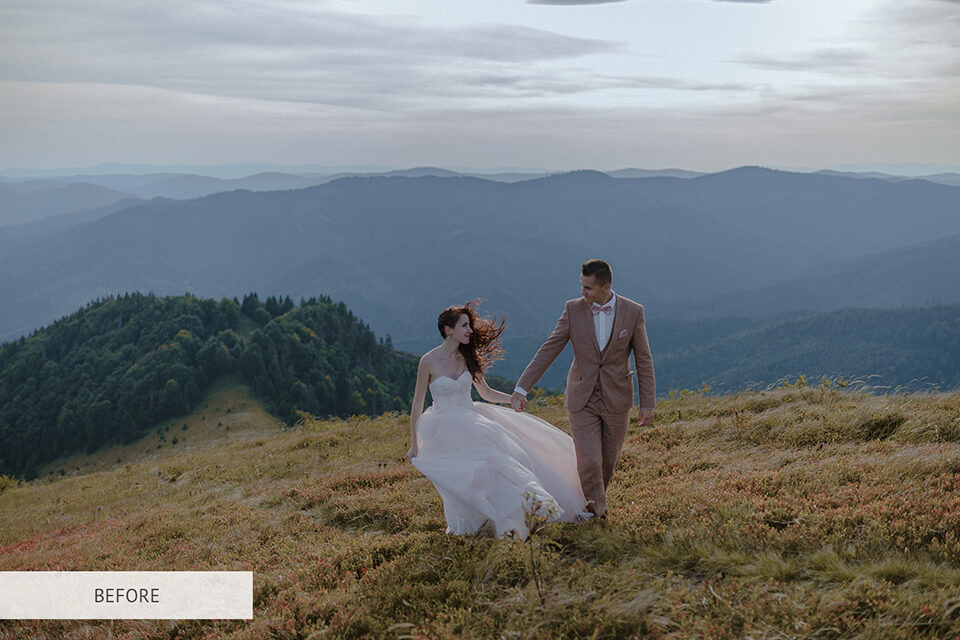
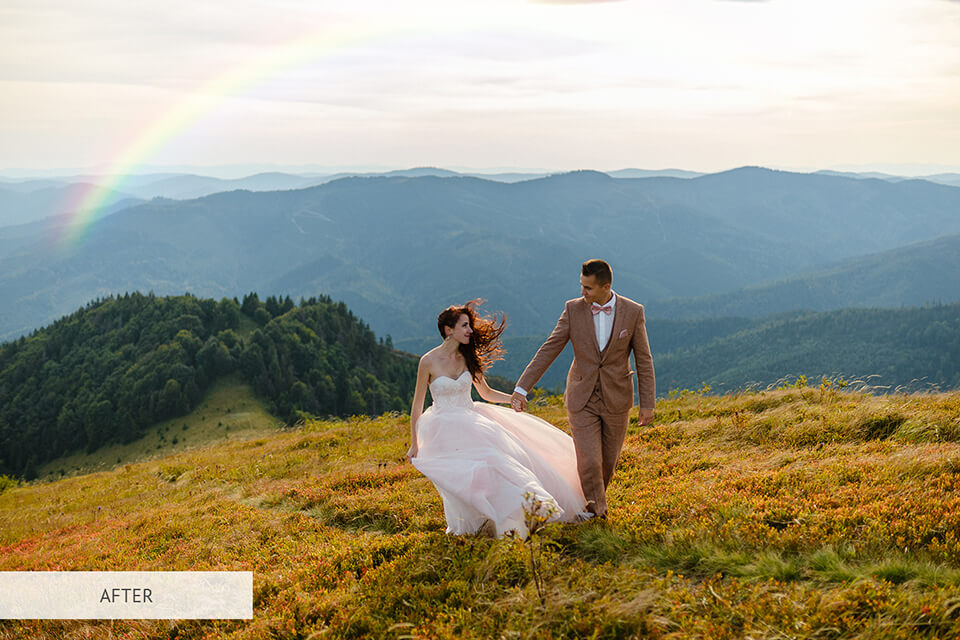
21. Use a Prism to Create a Rainbow

Prism rainbow photography is also a great idea. The larger the prism is, the larger the rainbow will be. Another way to influence its size (make it bigger) is to increase the distance between the prism and the surface onto which you project the rainbow.
The difference between these options is that with the increase of the above-mentioned distance, the rainbow light becomes more dispersed and less intense.
22. Use the Rainbow as the Main Object of the Picture
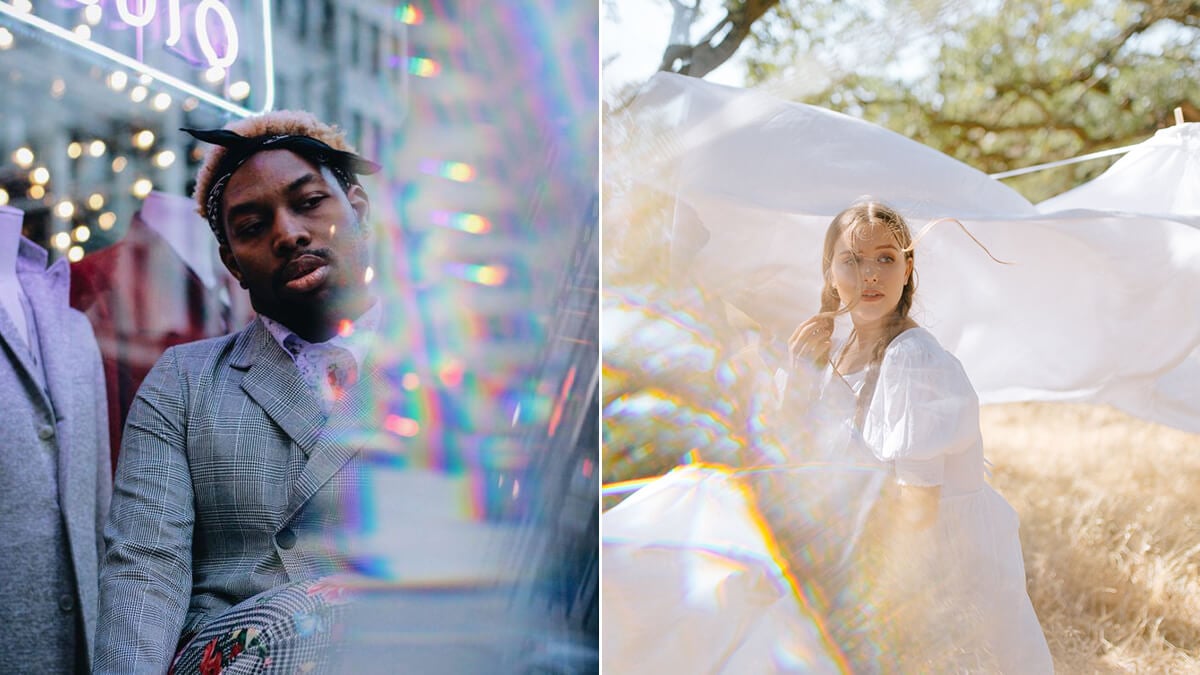
The rainbow light is very colorful. When projected onto the surface, it can create an interesting prism photo effect. Look for a surface that has a neutral color (for instance, gray or white). Pay attention to the surfaces with a pleasant texture.
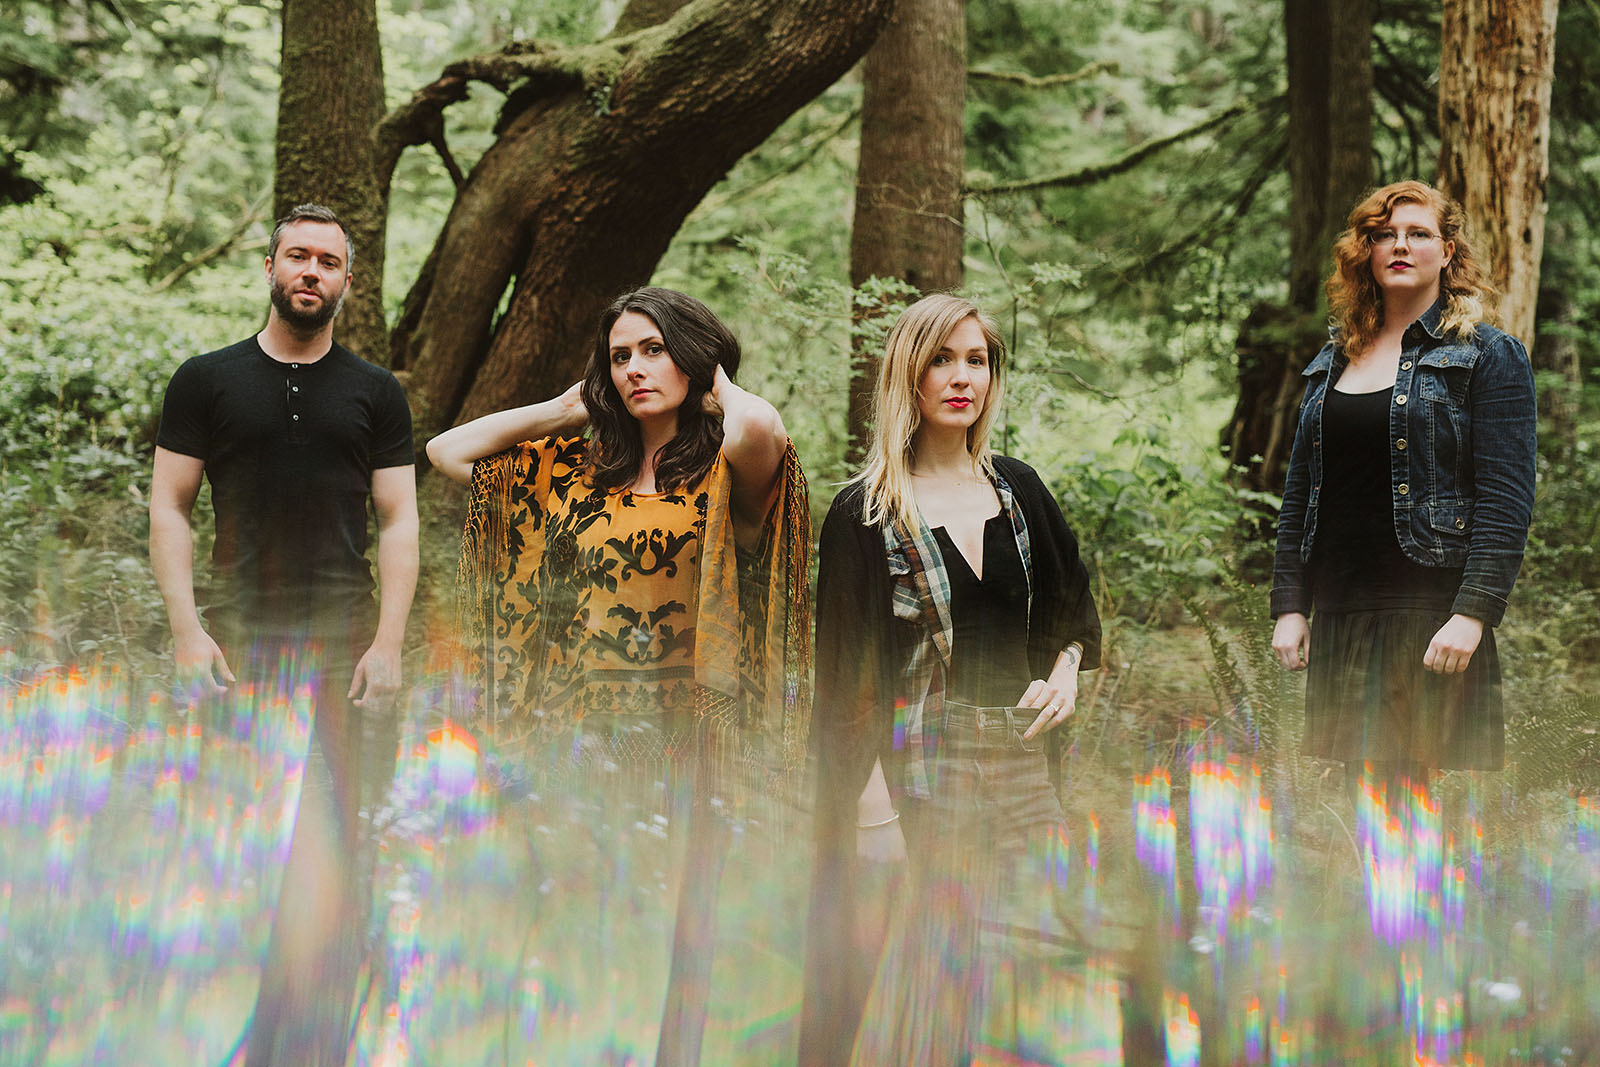
23. Use the Rainbow in Portrait Photography

Undoubtedly, one of the most popular forms of prism photography portrait is the projection of a rainbow on the model’s face. The rainbow won’t end up being big. It would be great if another person held the prism while you are taking pictures.
- Read this portrait photography guide to know some shooting tricks.
24. Get Multiple Images in One Frame

You can photograph those objects that appear inside the prism through the glass. You will see images inside. But they won’t be the same ones that are right in front of you.
Depending on how you rotate the glass prism, you can see one or two images. These are the ones you can work with to create unique multi-exposures at the touch of a shutter button.
25. Use a Prism when There Are a Lot of Unnecessary Details

Do you have plenty of excessive elements in the frame and you need to hide the surroundings as much as possible? Then you can safely move objects in front of the camera in order to properly compose the shot.
This prism photography technique is universal and suitable for any location, whether it is a hotel room or a park-estate.
26. Use a Prism to Focus Attention

In this way, you will be able to highlight the object compositionally, for instance, while taking a portrait. Pay attention to the horizontal light lines that are the basis of picture composition.
27. Use Prism to Add Movement

Repeating patterns will add movement to your photos. This trick can help make static images more dynamic, think about photographs of a bride getting ready.
Make sure the shutter speed isn’t longer than 1/250 because when you’re trying to take a prism photograph of a moving object while holding your camera with one hand, you can get a blurred image.
28. Hide a Part of the Background
When you are an expert in creating a good prism photography portrait, you have probably tried using it to conceal the background that is distracting or, perhaps, doesn’t look nice.
It’s a great trick when you are unable to change the place of the photoshoot. Place the prism on the lens and move until you get the effect you want to hide the part of the background.
It’s a win-win option, as you’re not only hiding something ugly, but also adding a decorative element to the image.
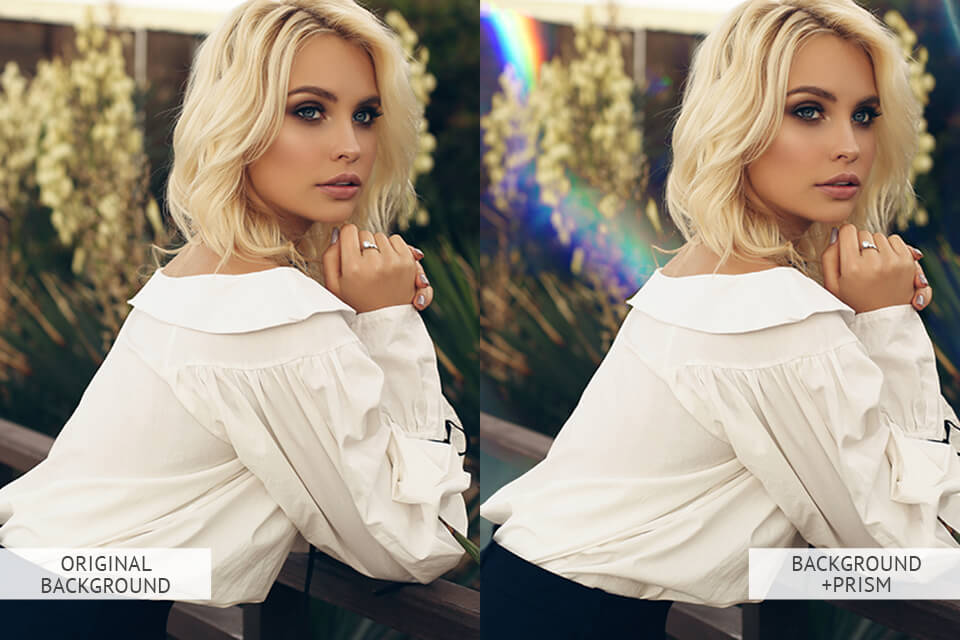
29. Get Additional Light for More Interesting Prism Effects
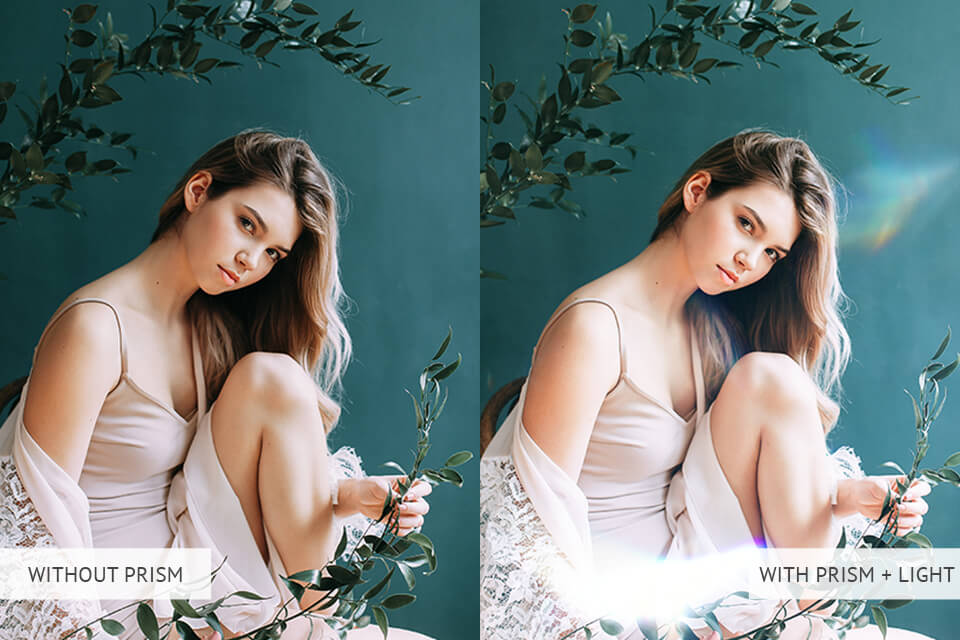
This is one of my favorite things to do with a photography prism. By placing the prism at any side of the lens and shifting it slightly, you can get more light in the shot.
You need to be careful, though, as it is very easy to get a picture overexposed. All you need is to manipulate it carefully not to cover the whole lens.
30. Create Mirror Images and Ghosts by Dint of Reflections

Prism photography is all about reflections and, if used skillfully, they can help you take outstanding photographs. Place your prism on the lens and start moving or rotating it to achieve different types of reflections.
You can multiply objects in the photos (a really fun thing to add to a picture) or even create partial reflections that will look like ghost reflected off the surface of water or glass.
31. Try a Kaleidoscope Effect
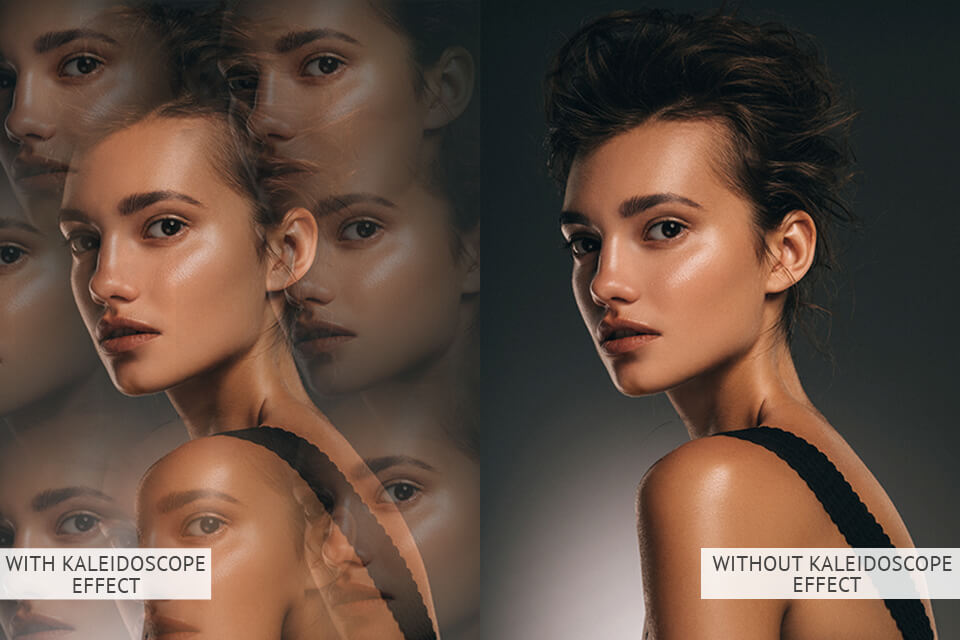
The kaleidoscope prism photo effect can be achieved by placing the prism with its base towards the lens. All you need to do after that is to find a fun or unusual object to shoot.
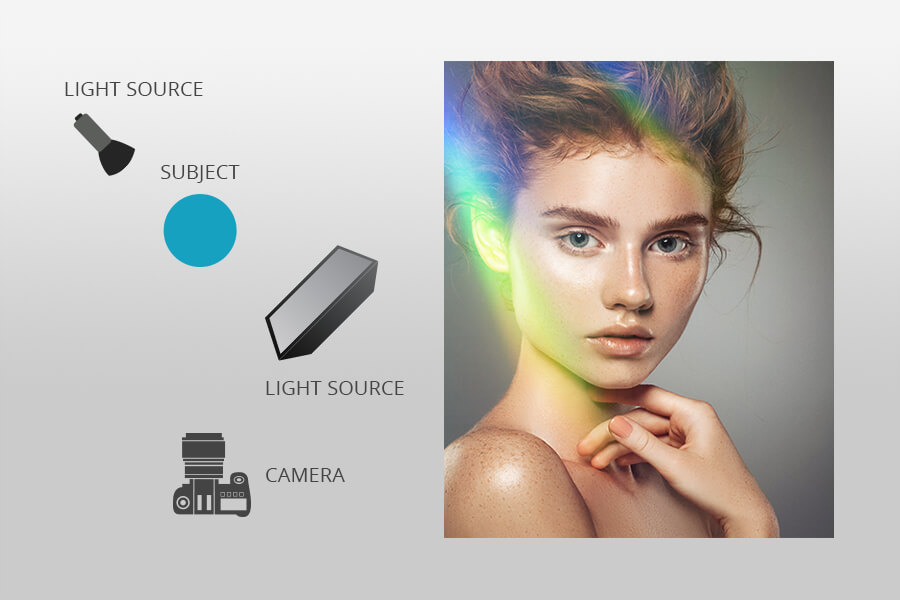
32. Prepare Your Camera
To get the best results with prism photography, it is recommended to shoot with an aperture of around f2.8 to f5.6. If you photograph in a studio, it’s better to work in manual mode with the ISO of 100 and shutter speed of 1/160. This will soften ambient light but will be synchronized with the flash.
33. Set Up Your Key Light
 Taken by Canon EOS 5D Mark IV + Canon EF 24-70mm f/2.8L II USM
The key light for taking glass prism photography should be about 2-3-feet away from the model, don’t forget to angle the light down a bit. The background should be at approximately the same distance away from the model as the key light. This way the model will be lit and the background will get some light as well.
34. Select the Key Light Modifier
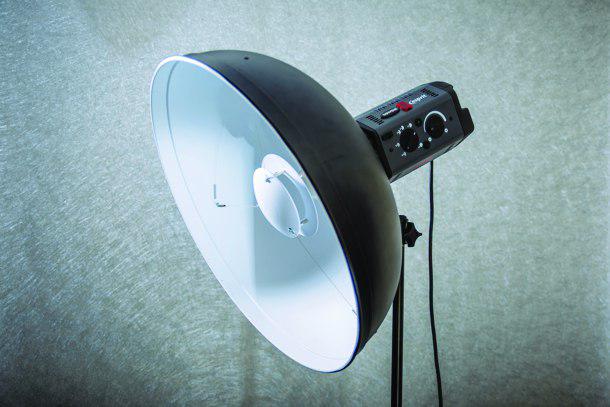
Opt for a 22-inch dish light, a 60cm softbox, or umbrella light. These light tools are quite large and the light they give is quite soft and very flattering on the skin of your model. It will guarantee that the model looks just perfect in your prism photos.
- Read more about the best studio lighting kits.
35. Set Up Your Backdrop

When you shoot in a studio, remember that the prism causes distortion of the field of view and don’t forget that your backdrop needs to be big enough to make up for that distortion. Prism effects look great even when the setting for your photoshoot isn’t expensive.
36. Hold the Prism
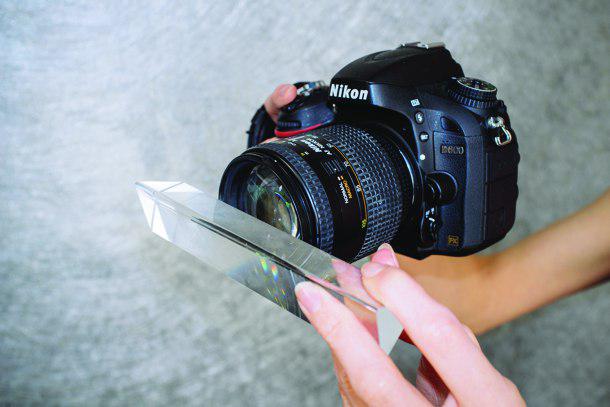
When it comes to using the photography prism itself, there’s nothing special or too difficult about it. Just hold it in front of your camera lens, not too far from it, and rotate it to get different angles.
You can literally position your prism in any way, twisting and moving it, and each time you’ll get a different effect.
37. Edit Your Photo
Take care of blemishes or unnecessary items that you don’t want to be visible in a prism photo. Take a very close look at the picture and decide what is redundant. Top straps? Hair out of place?
38. Add Depth
In order to add more depth to the image, you will need some Photoshop prism tricks. Start by creating a new layer with “Soft Light” chosen in the Mode menu. You need to check the ‘Fill with Soft-Light-neutral color (50% gray)’. This is the layer on which you can draw white to dodge and black to burn.
39. Sharpen Your Image
To effectively sharpen your prism photo, select the top layer and press Cmd/Ctrl + Opt/Alt + Shift + E combination. Thus, you will combine all the layers into a single top one.
Press Cmd/Ctrl + Shift + U to remove the color, go to Filter > Other > High Pass and select a 5-10 pixel radius, accept the changes with OK. Change the blending mode to Soft Light and adjust the opacity.
40. Edit Final Color Tone
In Layer > New Adjustment Layer > Curves select the necessary color from the RGB menu. This will allow you to change the Curves for the corresponding channels individually and add the final touches to your prism photos.
41. Mix the Subjects in the Frame
By putting different subjects in the frame you will be able to create the so-called ‘multiple exposures’ effect. It’s the most amazing one you can get with prism photography.
42. Add the Reflection

Turn the buildings around or add reflections to the foreground with your prism for photography. You need to remember that the signs and people will be inverted.
43. Dispersion of Light Effect
If you are shooting on a bright sunny day, try reflecting rainbow spectrum from the clouds or create flare on the metal objects or surfaces. It’s a great prism photo effect.
44. Create Interesting Buildings

Shooting unusual buildings with prisms for photography, you may get fun and unusual effects.
45. Take a Portrait on a Sunny Day
Make portraits more vibrant with prisms for photography.
46. Create Double Exposure

Prisms for photography can help you get this effect without additional photo editing. It will make your photos even more inventive.
- Read more about double exposure photography technique.
47. Have a Tree in the Frame
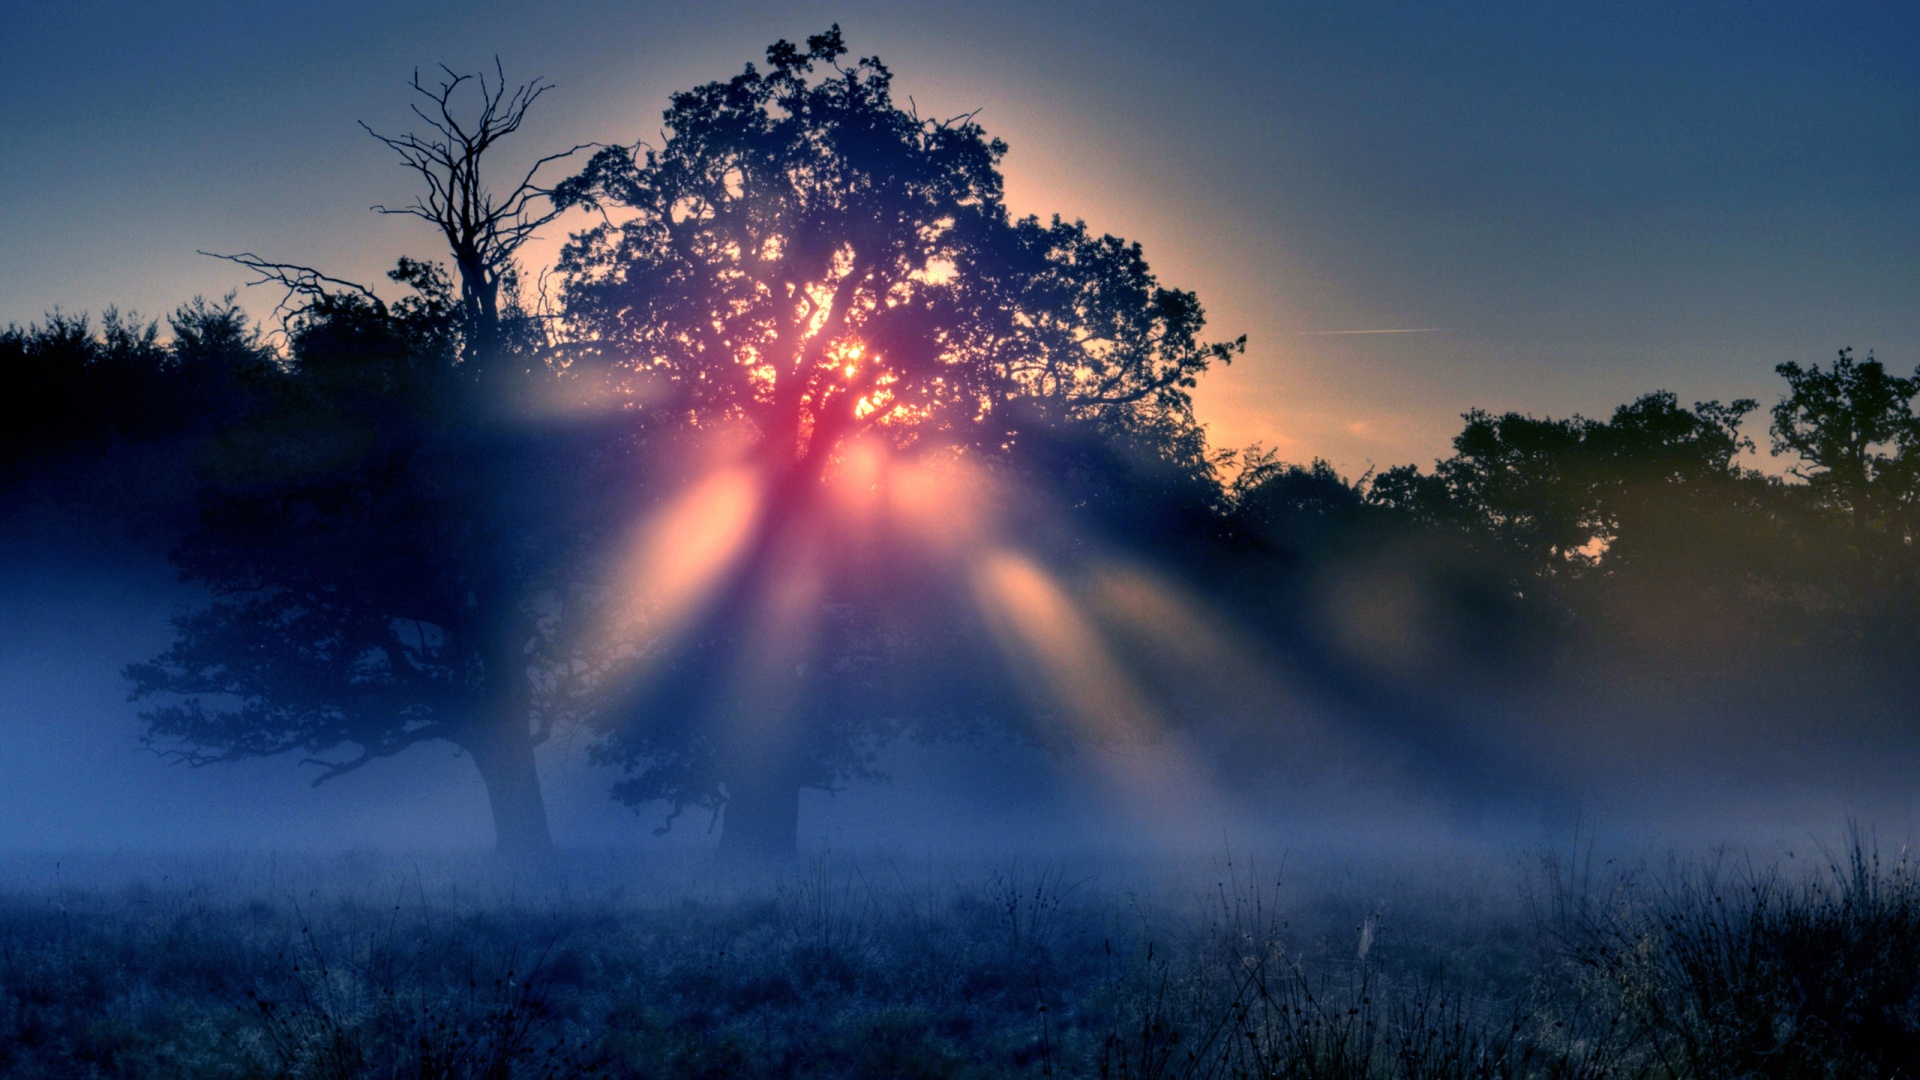
A picture of a tree shot through a photography prism can turn out unusual and sort of magical. Definitely try doing that.
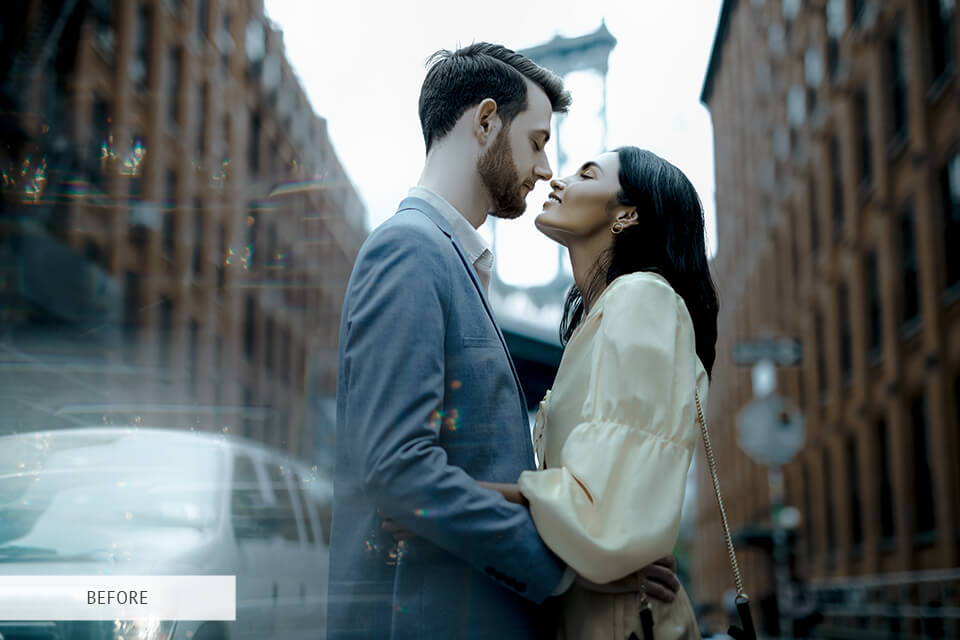
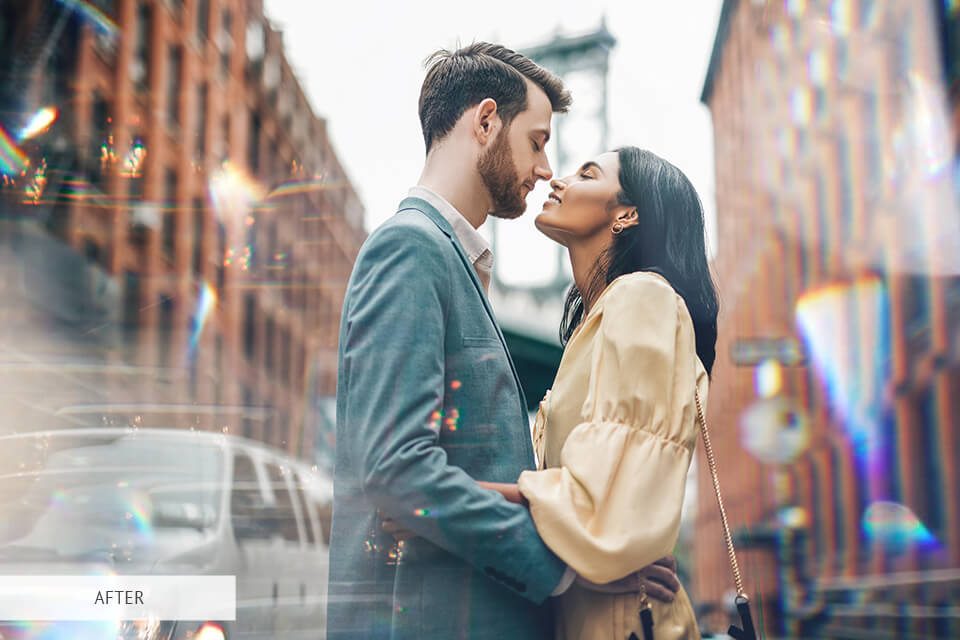
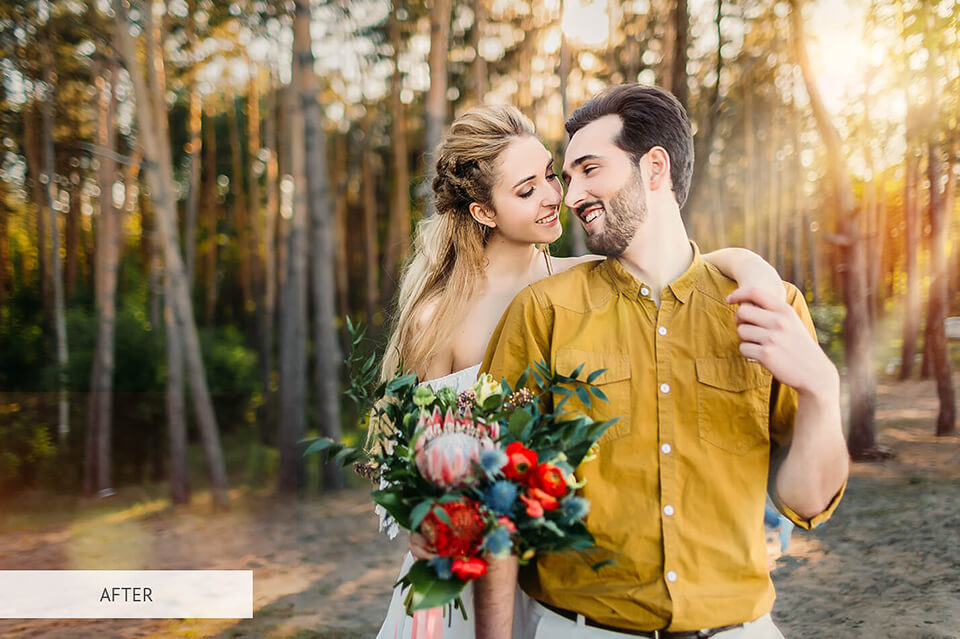
48. Photograph a Couple in Love

A prism photograph will help highlight the emotions of two people in love.
49. Take a Shot in the Wood

You can really get beautiful effects with prism photography when shooting in the wood. It’s a great place to have fun and try out something new.
50. Use Prism for Wedding Photos

Prism wedding photography looks enchanting, wedding photoshoots are definitely made for using the prism.
- Check out more wedding photography ideas with prisms.
51. Capture the Everyday Things

Are you involved in something creative? Why not use some prism tricks to capture that?
52. Catch a Rainbow

Get the rainbow to appear through the prism and find a nice spot to direct it to (like your model’s face, for example). Prism rainbow photography always looks stunning.
53. Photograph Children in Motion
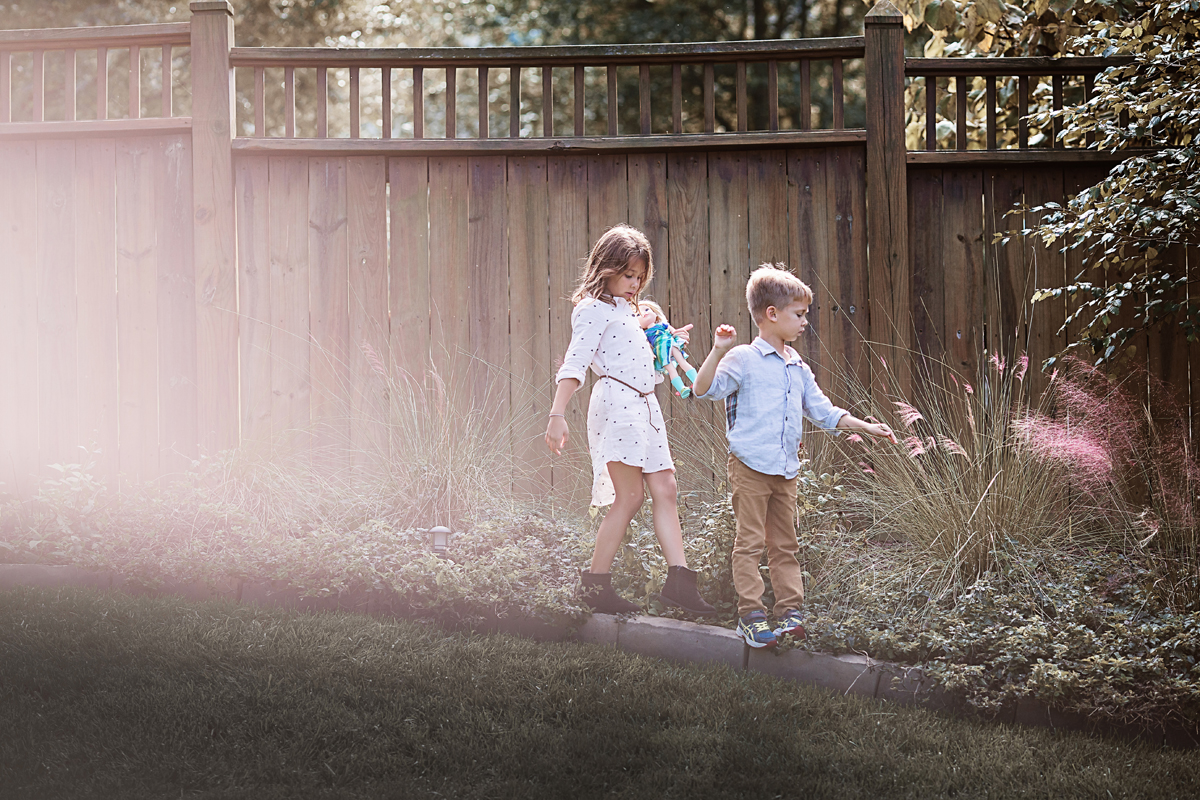
Children are amazing natural models, add a prism photo effect to your next photoshoot with kids to get some great results.
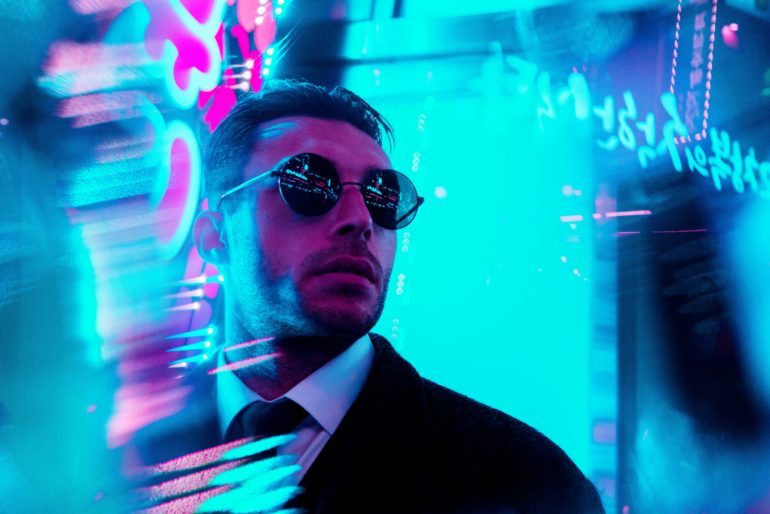
54. Use Neon Signs

Don’t be afraid of artificial lighting, make neon signs the focal point of your glass prism photography.
- Read these basic neon photography tips to get professional photos.
55. Transfer Images

With the help of a prism, you can transfer the images of people onto other surfaces and create interesting and mysterious shots.
Freebies for Editing Prism Photography
There’s no doubt that Lightroom presets and Photoshop actions can make your task of photo editing more efficient. For your prism photography, I have selected only the best plug-ins.
Free PS Action “Ultra Violet”
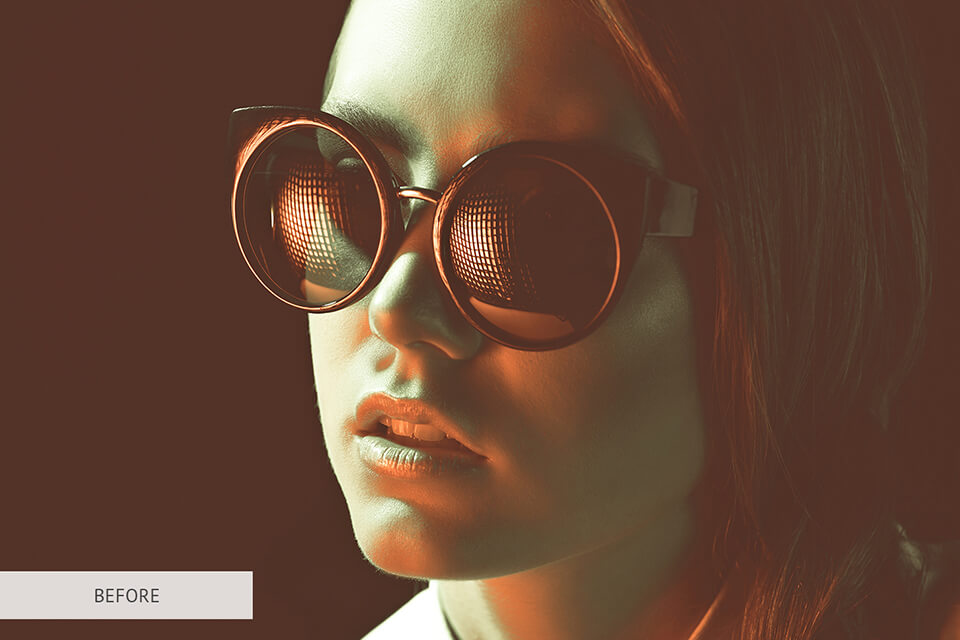
This action will totally transform your prism photos by adding subtle purple tones and making them darker, more saturated, and, thus, more interesting. This action is perfect for portraits.
Free PS Action “Gradient”
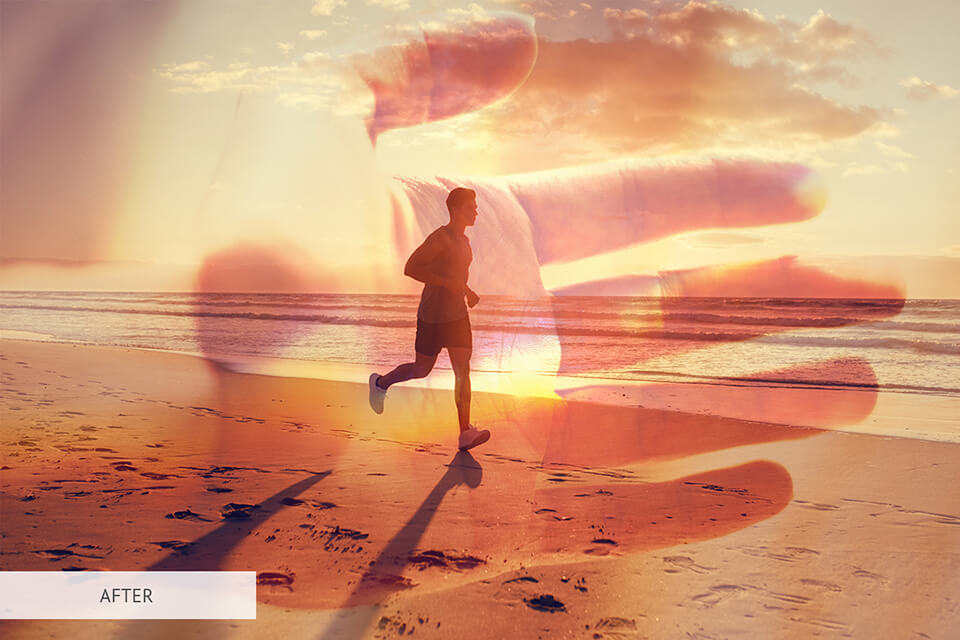
This action will help you create pictures with double exposure. It will help combine several shots into a beautiful single one.
Free PS Overlay “Rainbow”
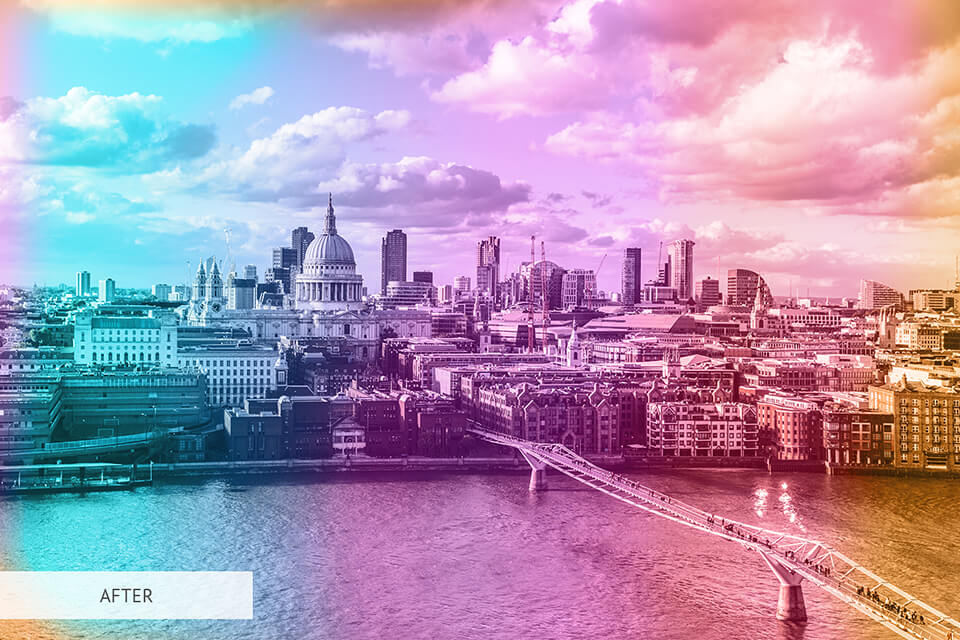
This overlay will help you to make a dull photograph more vibrant and colorful. The vertical lines of red, purple, orange and blue will help transform the image.
Free PS Overlay “Sun Flare”
This overlay will create interesting colorful tones in the photos and make them more creative. With its dark green and dark red shades, this overlay will definitely add more charm to your prism photography portraits.
Free PS Overlay “City Magic”
With this overlay, you can add a bright and vibrant rainbow to your photos. You can use it if the rainbow prism photo effect wasn’t really prominent or you used just for the sake of creating distortions in the image.


