Double Exposure Photography Guide - Multiple Exposure Photo Ideas
When you purchase through affiliate links on our site, we may earn a commission. Here’s how it works.
Double exposure photography is created by combining two and more pictures in one photo composition, which at the technical level means overlaying a few exposures in one frame to achieve a surreal photo.
You can make it with your camera or with the help of Photoshop. Read more about creative multiple exposure photo ideas and a step-by-step guide how to make a double exposure in Photoshop in several clicks.
12 Creative Double Exposure Photography Ideas
Look though these 12 double exposure ideas that I like the most and which can be inspirational for you. Take a look at the following pictures and my tips how to repeat this idea.
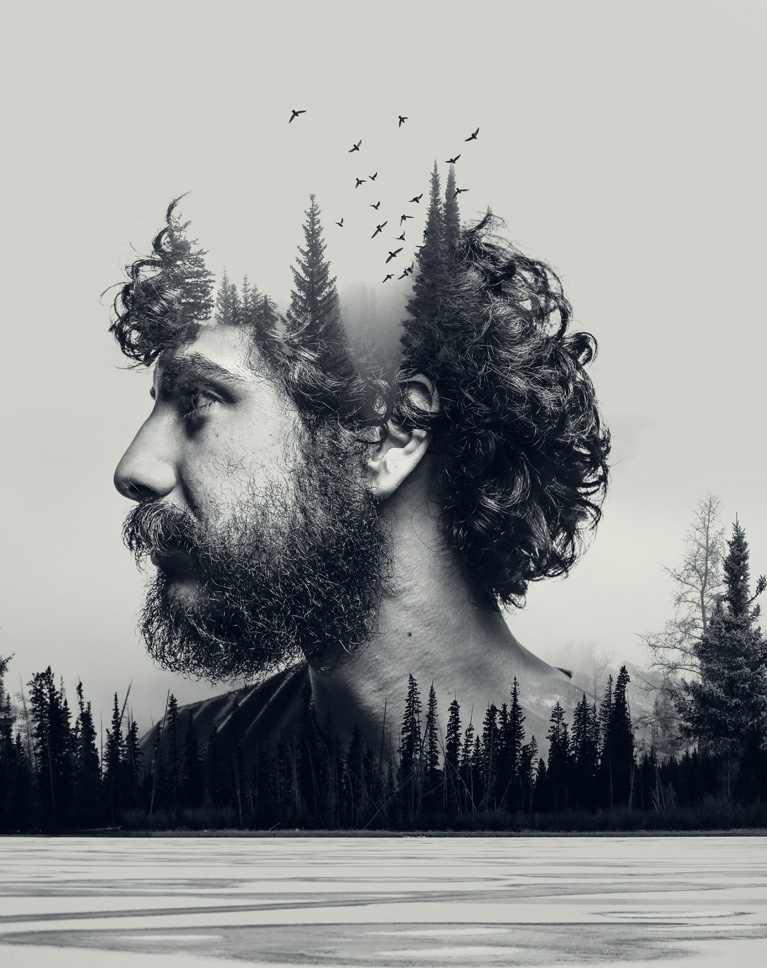
1. Create Double Exposure Portrait

The most attractive double exposure photos are created from a portrait with an abstraction or a picture of the scenery and adding multiple fascinating textures.
HOW TO DO IT: Shoot the first picture by pointing your camera straight at the person. Measure the picture from the darkest part of the subject or place it opposite bright light (for instance, the sun).
In case you have doubts regarding the way of measuring, underexpose your photo by 1–2 stops. In this way, you are sure not to overexpose everything on your photo. The second picture should consist of something with plenty of color and texture. Pay attention to how you shoot as it is supposed to have sufficient light. Examples of the second picture can be fall and spring backgrounds, dawn, the sky, etc.
2. Work with Silhouettes

Take a photo of a silhouette on the white background. If you’re working outside, lower your camera in order to get a clear white background without any obstruction.
HOW TO DO IT: Search for the texture of the background. I suggest paying attention to color, additional lines and forms. As in the case with the silhouette, opt for a texture on the white background with not much of the surrounding mess.
Switch the camera into live view mode. Then choose basic silhouette on your SD card that you will see on the screen.
Align your photos and point the lens at the textured subject using the silhouette that you can see on your screen. Having done it, you will see the texture (trees, plants, rocks, etc.) in a black silhouette.
Specify the effect of your texture by managing angle, zoom, settings on exposure. As soon as the overlayed texture matches the silhouette, go for it. Your camera will combine these two pictures and create a double exposure photo.
3. Create the Ghost Illusion
If you want to get a ghost look in your double exposure pictures, take a series of pictures where a person is moving.
HOW TO DO IT: Pick two pictures, one darker for the base photo and one bright which will serve as an overlaying picture.
Clear translucent figure: such ghosts have a sharper focus, that’s why you need to use faster shutter speed. Otherwise, the person in the photo will be motionless during an exposure.
Blurred motion photo: let the person move during a long exposure in order to get a blurred ghost.
- View more about double exposure photography.
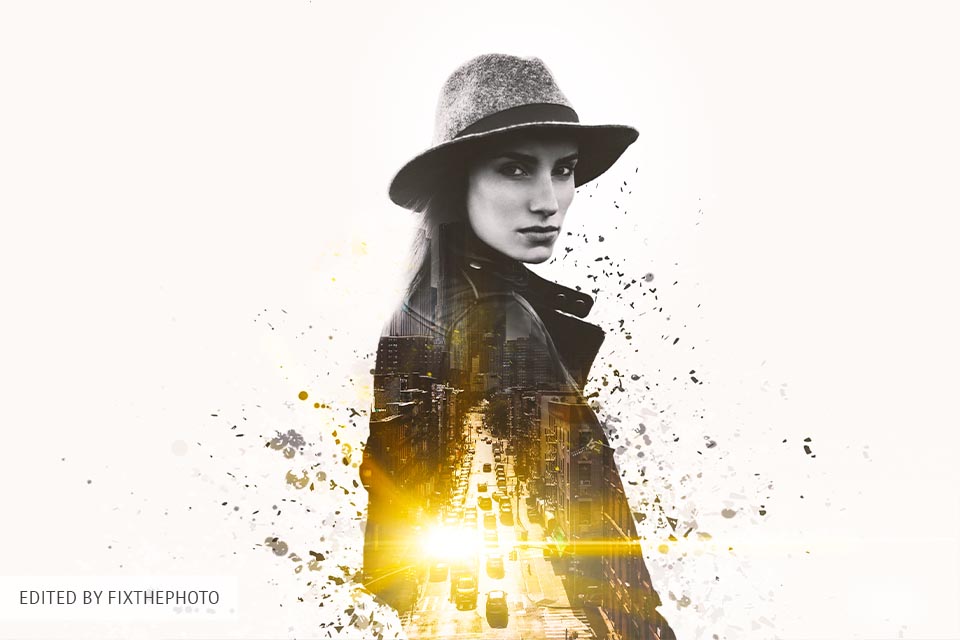
4. Revel the Model’s Identity
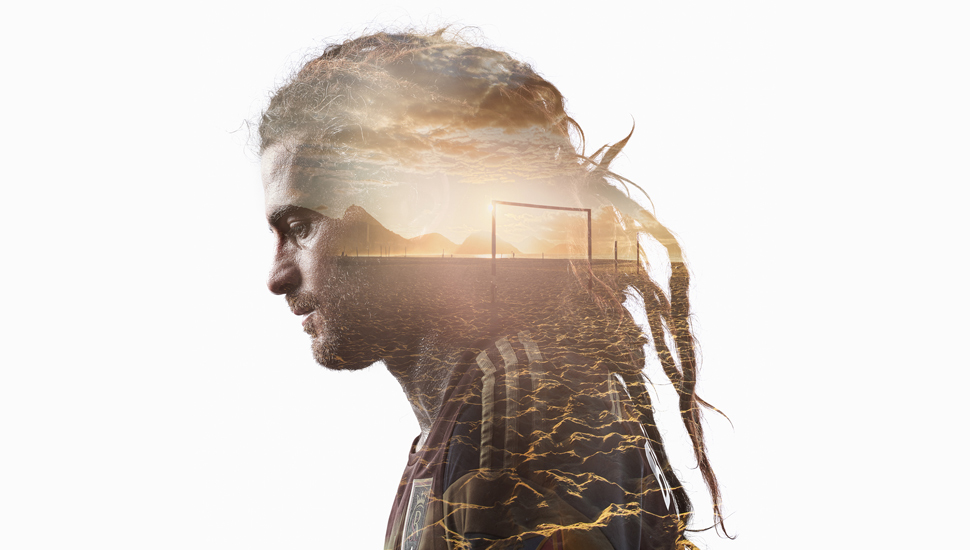
It can be ideal for capturing sportsmen or someone with an active lifestyle.
HOW TO DO IT: For the base picture, shoot somebody close and for overlaying picture, shoot them moving from the distance.
For example, if this person is fond of running, take the first picture as a portrait in the outfit and the second one your model running distantly.
Use the following DSLR cameras with multiple exposure feature to create a double exposure:
Canon: EOS 6D, EOS 1DX, EOS 5D Mark 3
Nikon: D300S, D700, D800E, D3X
5. Make Flower Compositions

Blend flower images with portraits to achieve a romantic result. For instance, combine pictures of women with flowers and create breathtaking double exposure photography. It’s very important to choose a background in one color with flowers.
HOW TO DO IT: In your camera menu, choose the Multiple Exposure option since the standard option of this function is off. Switch it into ON. In some cameras, when you click ON, you will have a choice of series photos (it will remain until you switch it back to OFF). For a single photo, that will take only one exposure.
Then choose a number of pictures you want to have in your double exposure photo. In some cameras, you can pick up to 10 of them.
The next function is Auto Gain. If it’s ON, the camera will control exposure gain for adding each chosen picture. If OFF, you have to do it manually.
Make sure Multiple Exposure is ON and press OK.
You’re all set, so adjust the exposure and focus like with any photo of flowers.
6. B&W Double Exposure on Film

If you’re aiming at expressing emotions and making photos dramatic, create monochrome and colorless double exposure images.
HOW TO DO IT: To achieve it, I recommend to use black & white or color negative film since they possess nice latitude of exposure. This means they perform good overexposure and make measuring simpler.
I advise you to use the black & white anyway because its colorlessness emphasizes pictures overlapping and has the greatest latitude of exposure. Despite the fact that you can take double exposure pictures on E-6 slide film, you will have to focus on measuring, as it has less latitude of exposure and is less forbearing during overexposure.
- Read more about film photography.
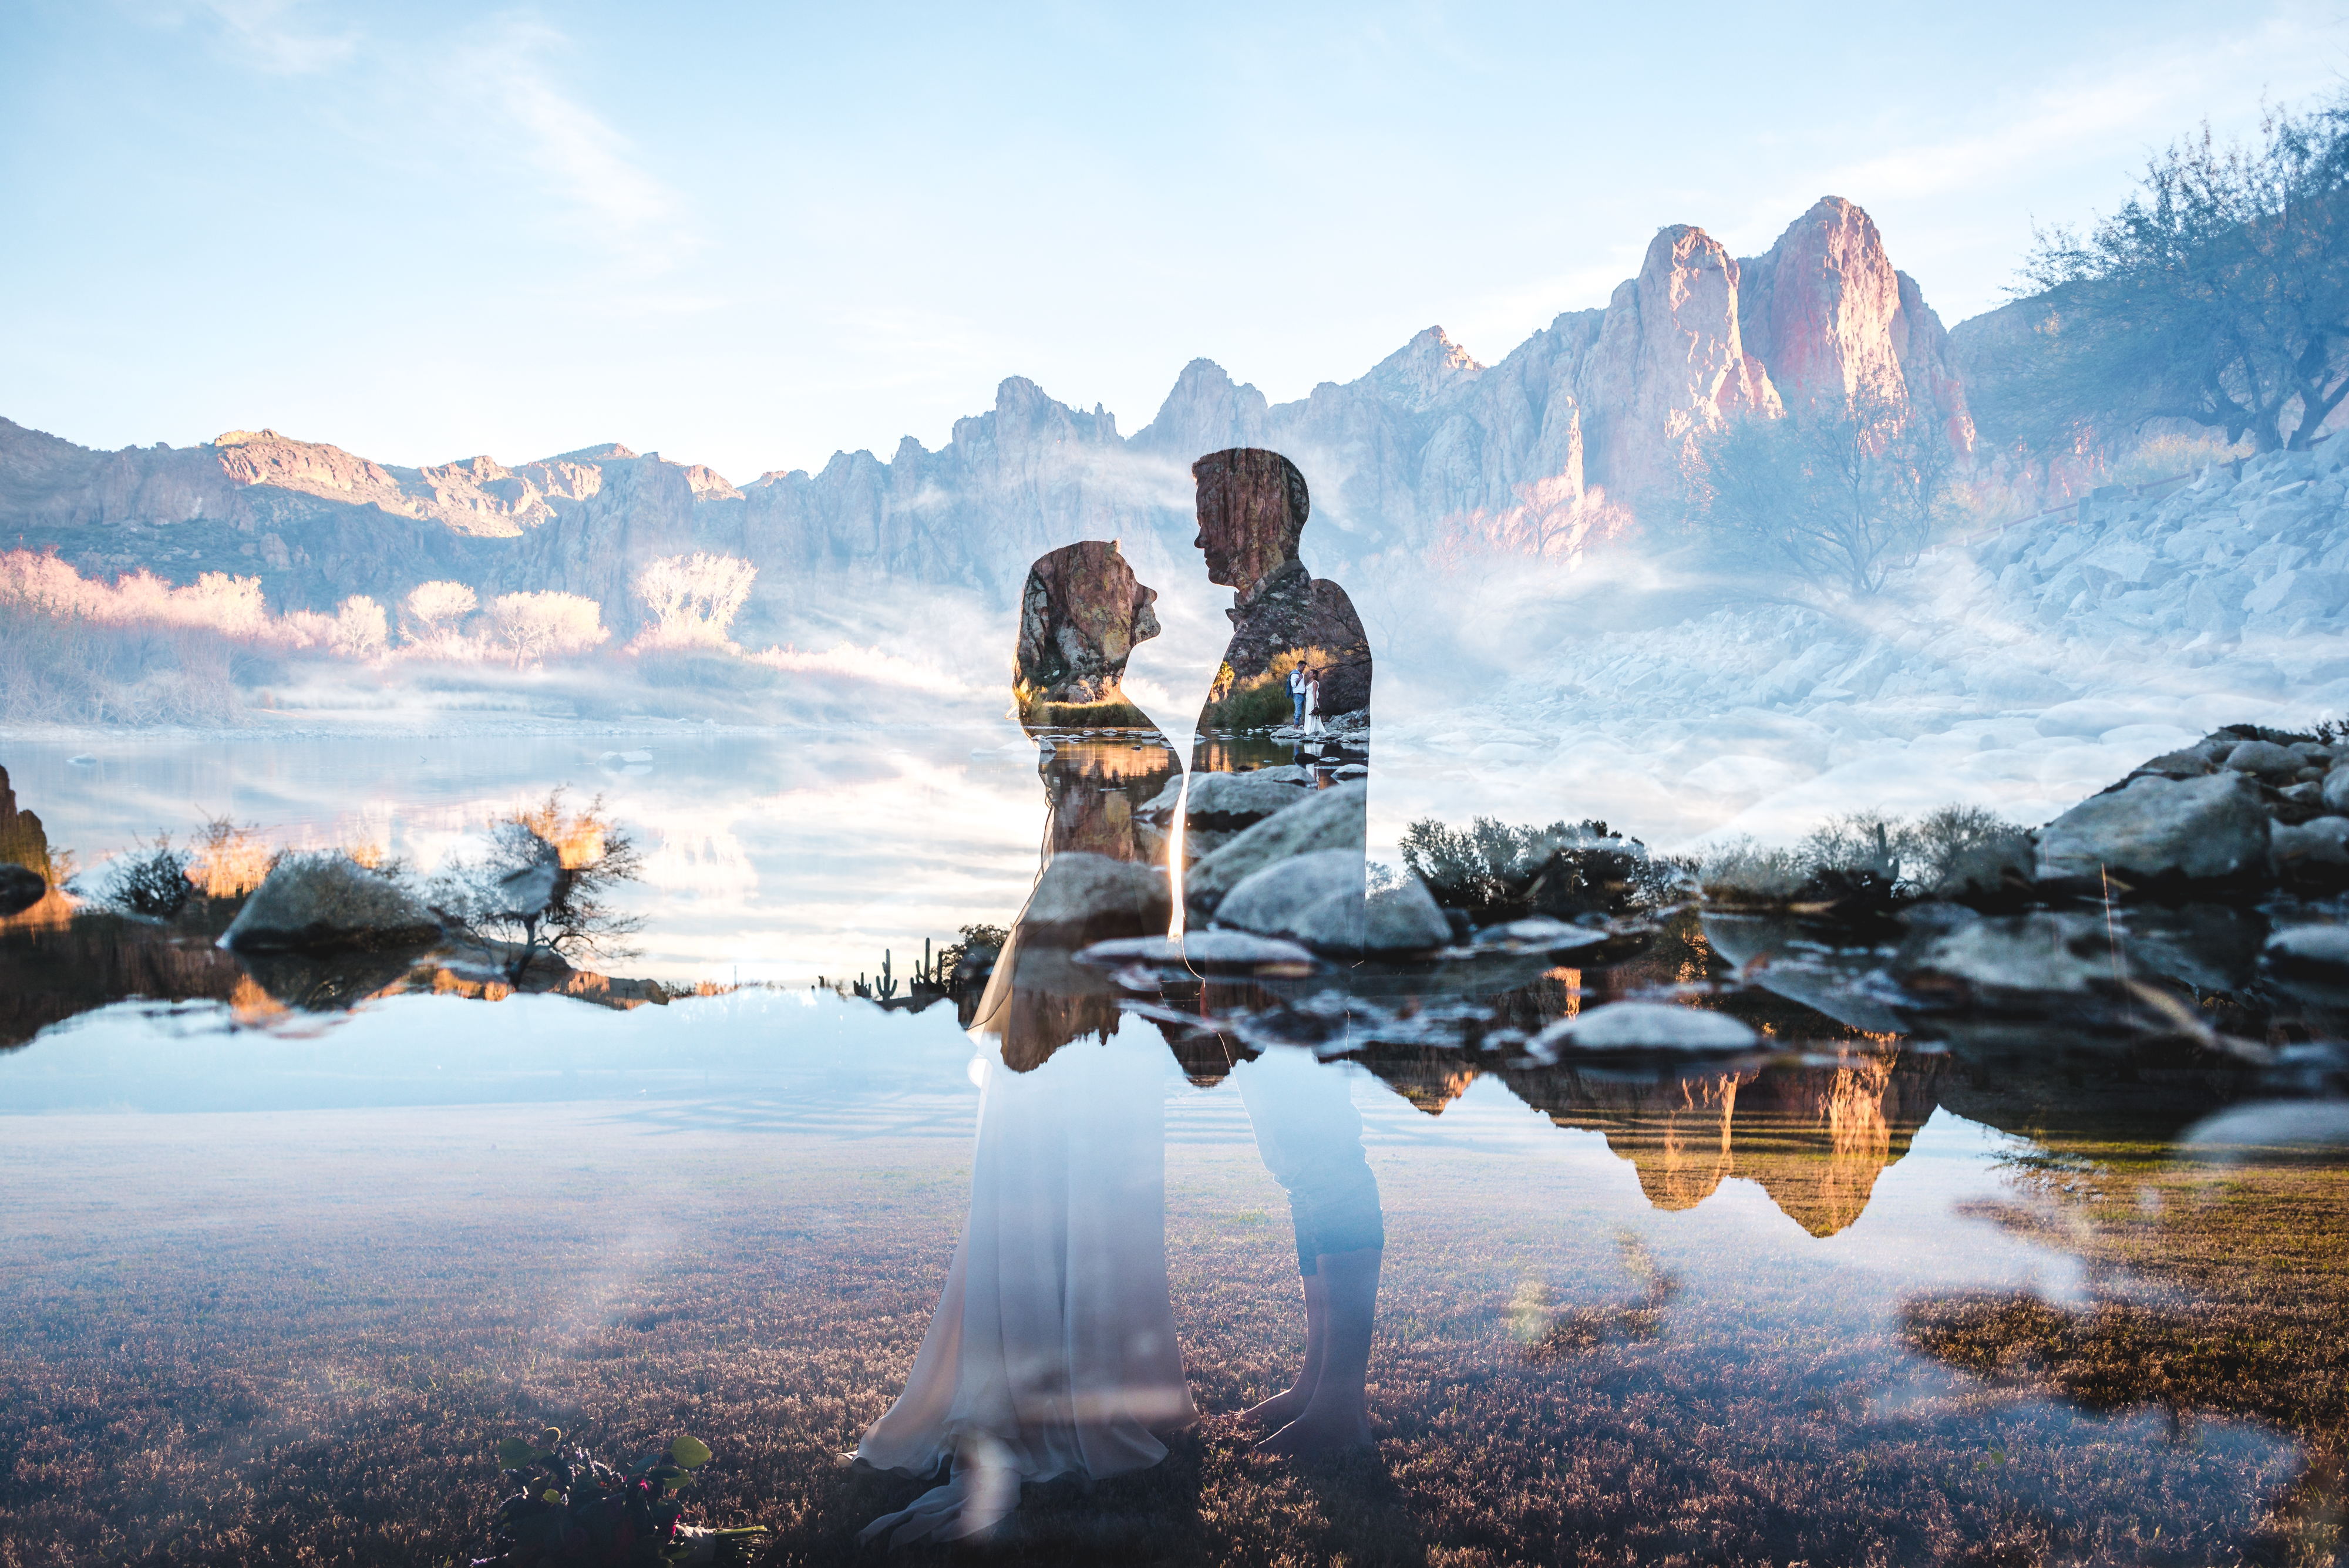
7. The Silhouette on Nature
If you opt for a classic variant of silhouette photo with the dual exposure, use nature palette. Choose a clean background with not much light. The best options are the sky, water, mountains, trees.
Put the silhouette in the frame without irrelevant details. You can work with a person or any subject. For a better result, try placing the photo inside your silhouette.
HOW TO DO IT: To take this kind of double exposure photography, you need to expose the frame to light two times so that you have a possibility to cut exposures in half in order to align them.
Remember that white and bright colors will remove the data, and black and dark colors will keep it for the next exposure. In this way, the second photo will fill the shadows from the first exposure shot, and the highlights from it will practically disappear.
From the example of a 3 part picture, you can see that if the first exposure is a silhouette, then black silhouette will keep the data of the second picture and the white area of the first exposure will eliminate it.
8. Create Double Exposure with Snapseed


Double exposure photography isn’t difficult. Sometimes you can take it by means of your phone and a special app within 10 minutes only.
HOW TO DO IT: If your base photo is a regular colorful image, you’ll need to have a white background. To achieve this use Selective Adjustment and it will do the trick.
Click on the background and place a point there, swipe right and maximize the brightness.
Expand the focus area. To select a few of them, click Plus and pick the starting point. If you have critical dark parts there, use the Healing tool which will help you smooth them out.
When the background disappears, you can make the main subject darker. For this, select Brush > Exposure and choose exposure level of about -0.3. Move the subject to make it darker.
In order to create a layer of the second photo, click Tools > Double Exposure and press the first icon. Pick a photo and click Lighten to blend.
Move the Opacity slider to the left side and correct the transparency of your picture. Stretch it and rotate as you see fit.
9. Create a Fake Reflection

Another great method is taking pictures through the window.
HOW TO DO IT: It’s better to shoot various reflections. Combine them with pictures of people, animals or regular objects.
This technique will help you achieve dramatic, abstract pictures and become a significant feature of your portfolio.
Personally, I enjoy adding such details as raindrops. They give nice textures to double exposure photos.
For the reflections, you need to set a large depth of field. In this way, the picture will be focused and the reflections clean.
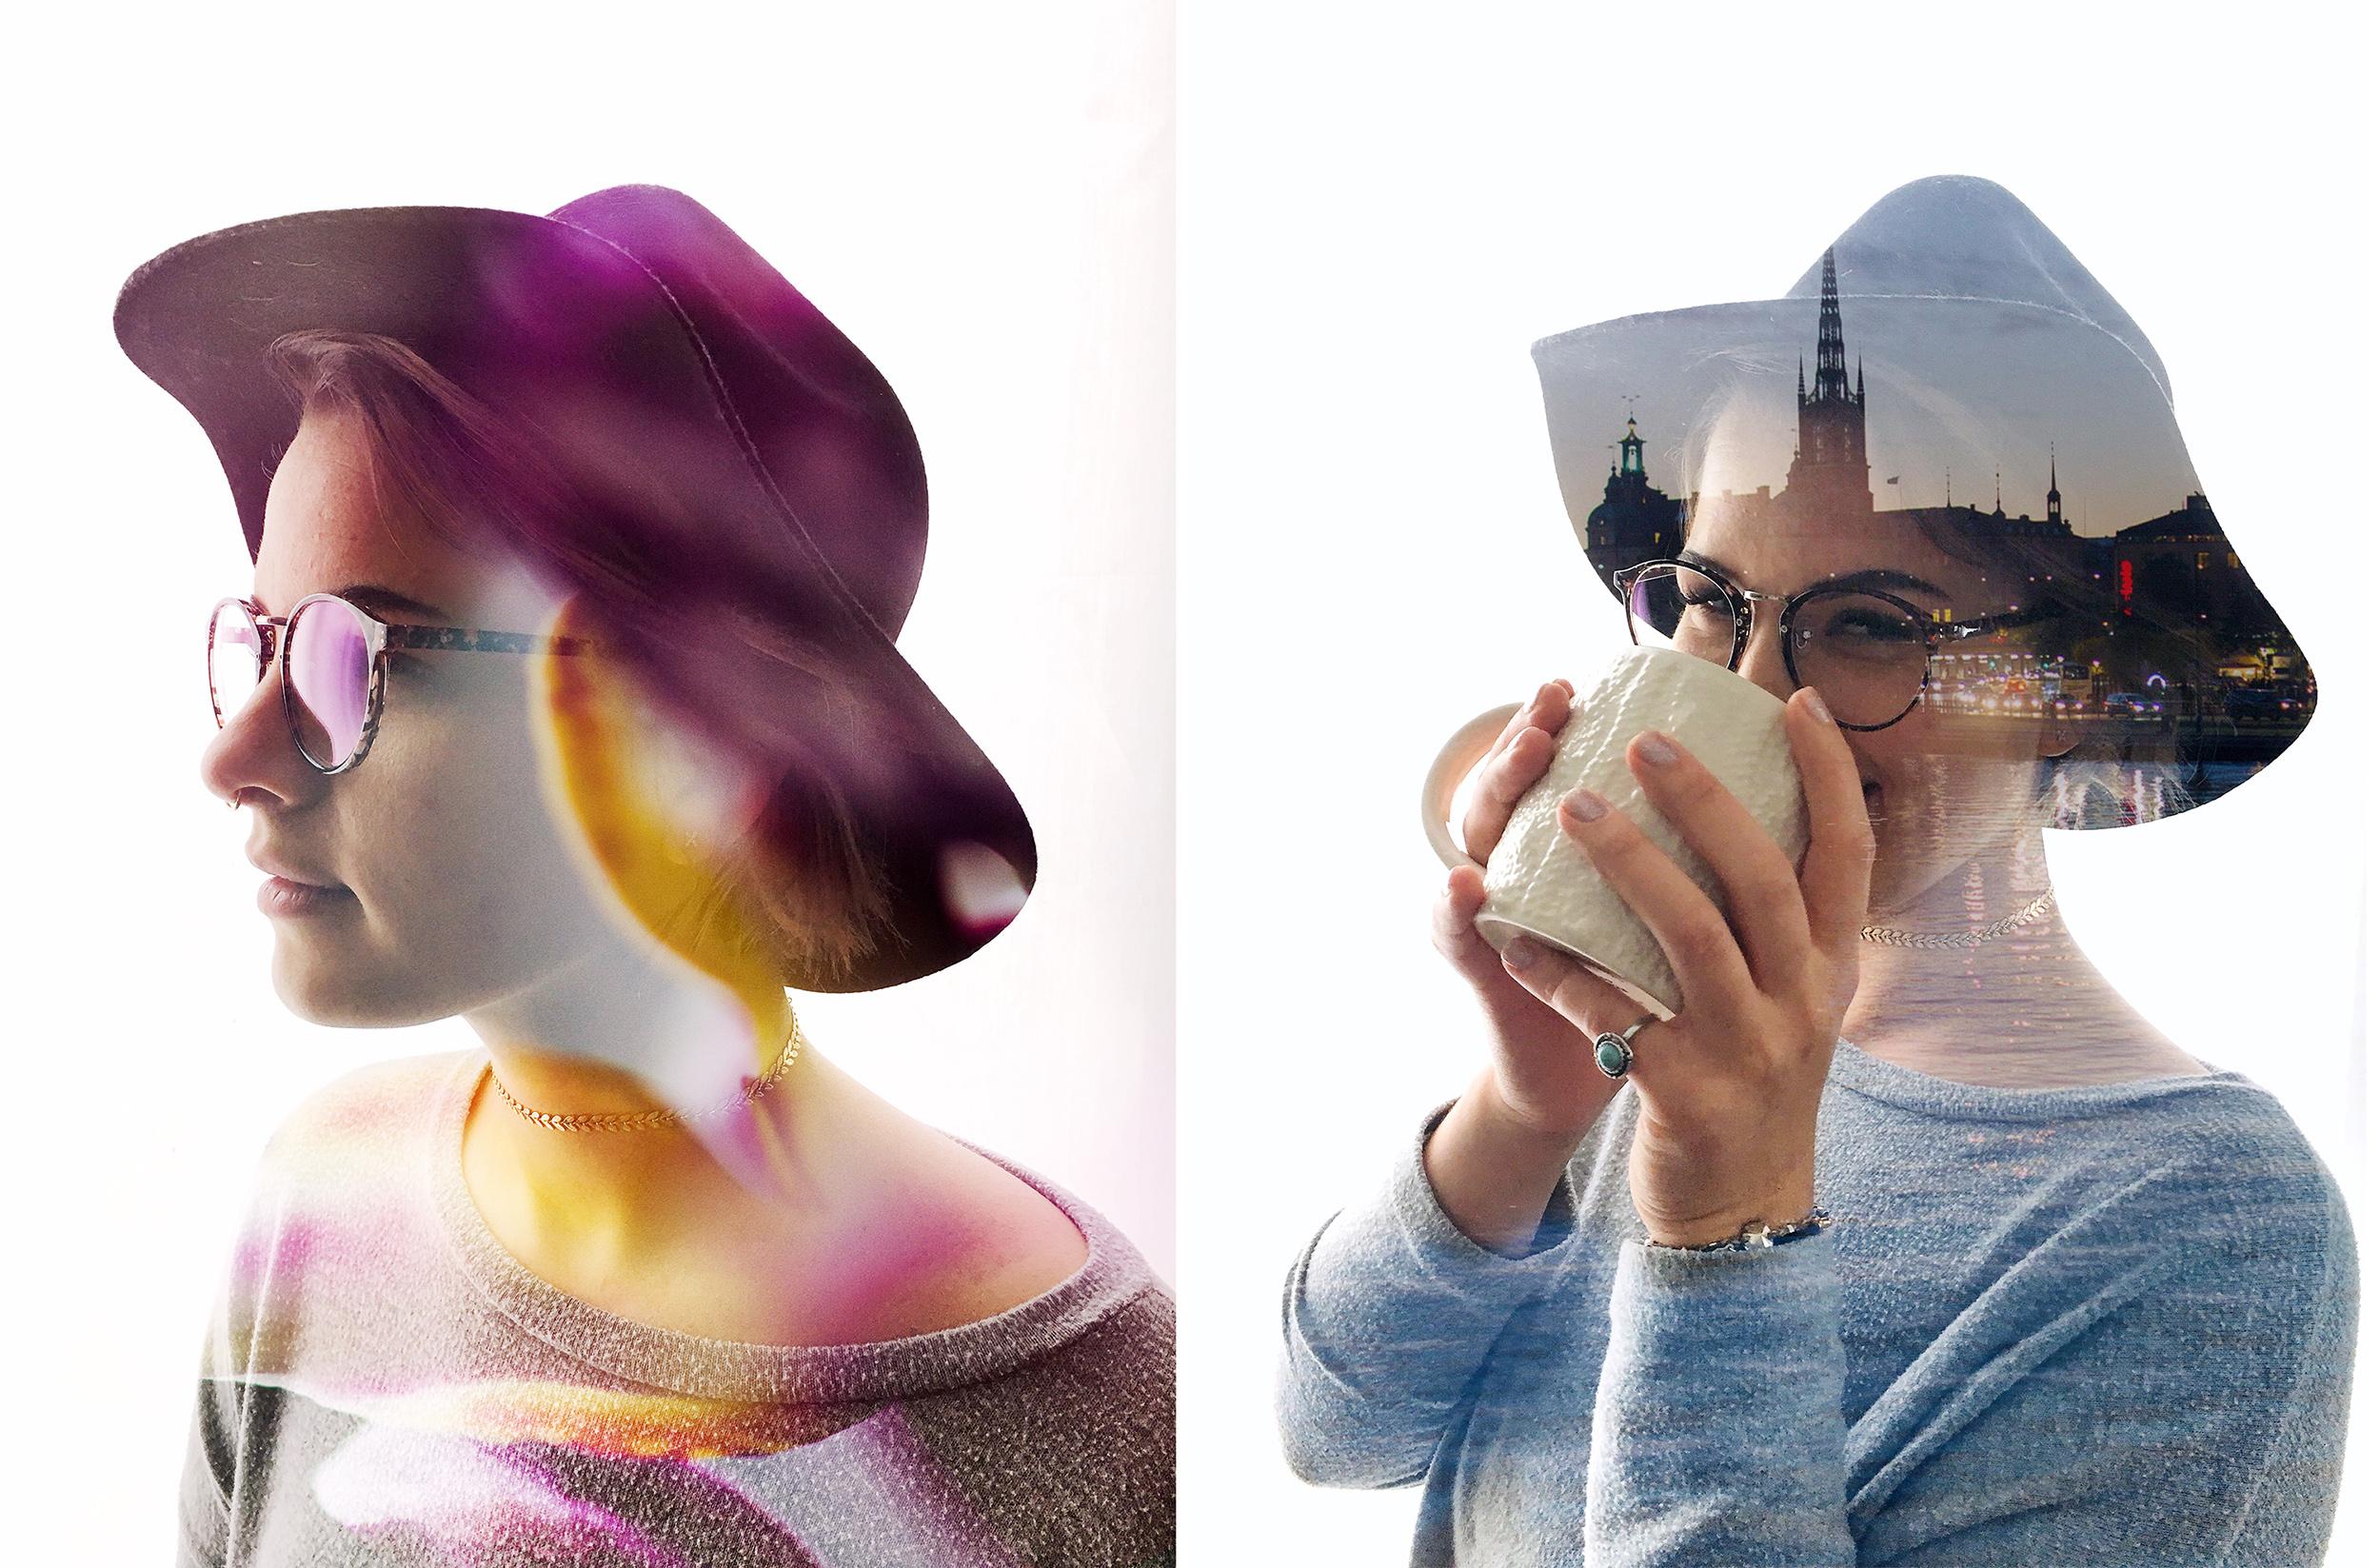
10. Double Exposure Self-Portrait

Another great variant of double exposure photography is self-portraiture, which is pretty emotional whenever I take it. I like to merge portraits with pictures of streets.
HOW TO DO IT: Use timer, remote control or another person to take multiple portraits in the studio. Work with different angles, zooms, looks and use a simple white background. Think about the sizes, placement and rotation of the photos you’re going to add, locating a person, balance, lighting, lack of irrelevant details and the vibe of the picture.
- View more about self portrait photography tips.
11. Use an Animal Silhouette 

Combine people with animals. It will look especially outstanding if you work with your own pet.
HOW TO DO IT: In case you don’t have any pets or animal pictures, the Unsplash. It provides thousands of photos that you can use for free.
The best way to capture animals is in their natural environment. In this way, wonderful animals will be emphasized by nature and it will produce a great harmony between them.
Merge images of scenery with wild animals that live there and turn them into one portrait. They will match each other greatly as they are very connected to each other. One can’t exist without the other.
12. Pick Two Random Photos
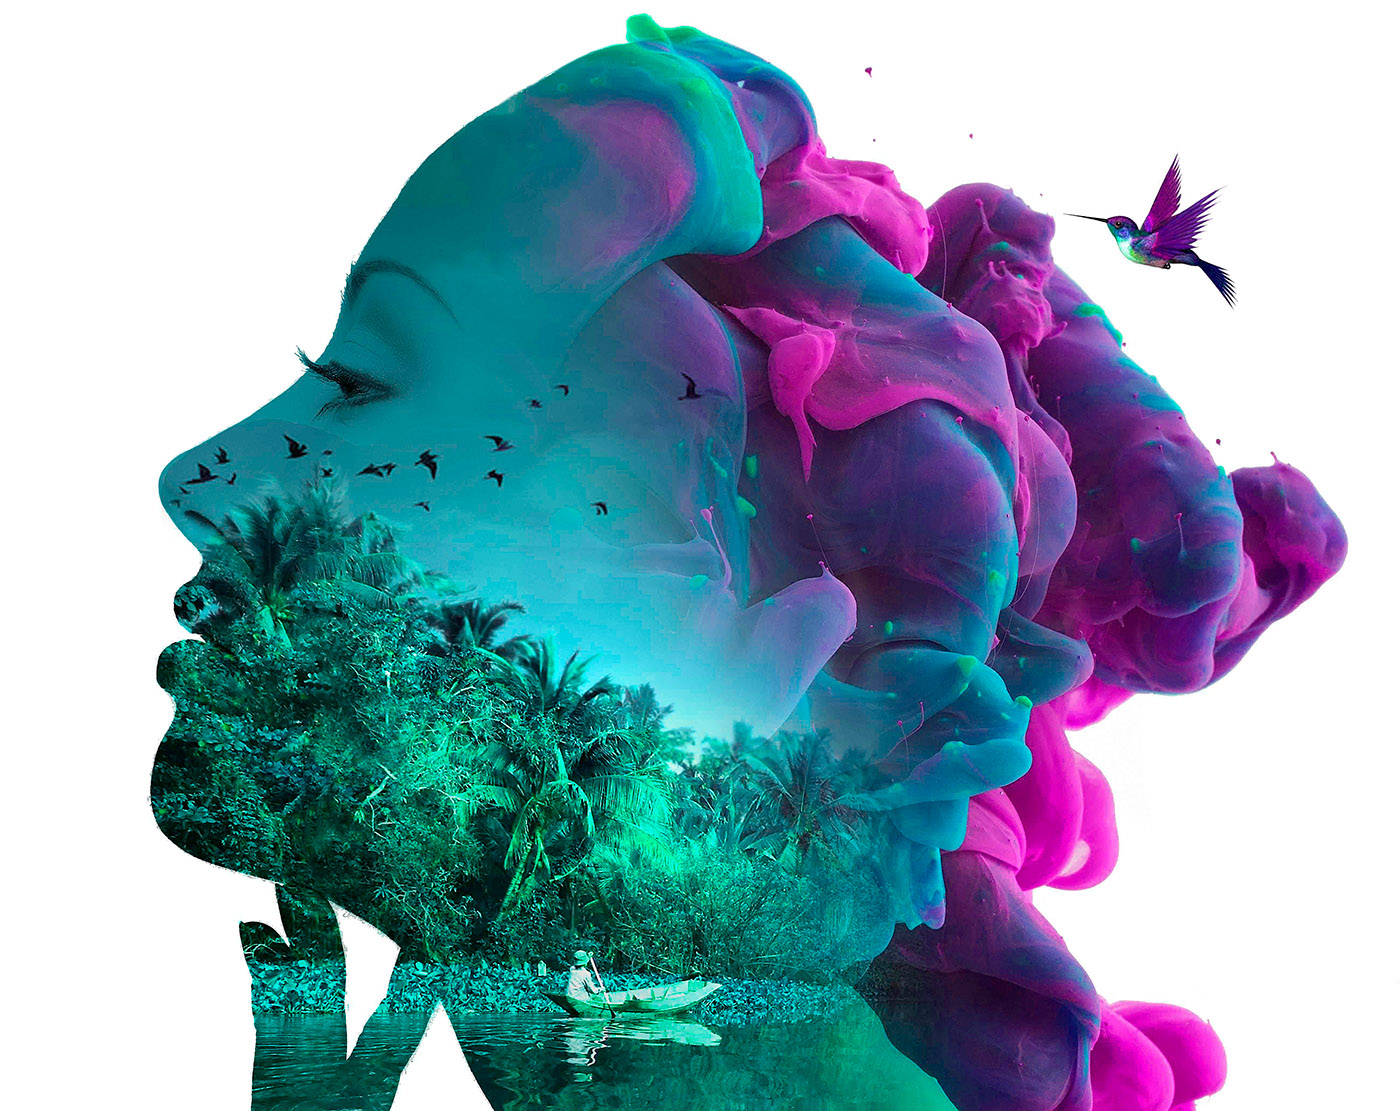
If you want to experiment for fun, combine several random pictures. When I don’t know how to engage interesting photos, I use this technique.
HOW TO DO IT: Try not to think of other double exposure ideas. Instead, pay attention to textures and shapes.
How to Achieve Double Exposure in Photoshop?
Learn how to do create a double exposure in Photoshop really fast and easily.
1. Pick the base photo. It’s better to have the subject in the foreground and background in bright, neutral colors without distracting objects. This option is great for beginners.
2. Use the Quick Selection or Magic Wand Tool and click somewhere on the background in order to select the area. Proceed to Select > Inverse and choose the main subject. In this way, you will be able to eliminate the background.

3. Use Refine Edge to ensure that you’ve selected all you need with Magic Wand Tool.

4. Upload the second image (better with the background) into your next layer. Put the background picture over the main subject picture. Select the second layer, click Control key and Layer Clipping Mask of the layer under. You will have your subject selected with the marching ants above the background layer.

5. Clipping mask will help you choose the layer with the main subject. Copy it pressing a combination of Ctrl+J, then drag and drop it above the background layer.

6. Right-click on the layer mask and Apply Layer Mask in a drop-down menu. In the Layers panel, change the Blending Mode of the base layer to Screen.

7. Regulate the background opacity according to your preferences.
.jpeg)

8. Improve your picture using multiple Photoshop tools.

- Read more about how to get Photoshop for free.
Free Double Exposure Photoshop Actions
With the following FREE Photoshop actions, you will be able to turn your pictures into stunning double exposure photography in several clicks.
Free PS Action "Three Colors"


With this action, you can make double exposure effects with colors. The action provides 5 various color presets using which you can create many double exposure effects.
- View more about how to install Photoshop actions.
Free PS Action "Black and White"


This action is more difficult to use but the result will look like it has been done by a professional.
- Learn more about how to create an action in Photoshop.
Free PS Action "Dispersion Effect"


This action will help you achieve photos with a more artistic concept by means of creating a dispersion effect.
- View more about how to use Photoshop actions.
Free PS Action "Gradient"


With this action, you have an opportunity to get double exposure pictures that can be used for different posters, banners, magazine covers, etc.


