Tired of creating clothing photography that’s doesn’t attract any customers? Want to take professional apparel photography for fashionable brands? In this article, I’ll cover everything you need to know about shooting clothes that will SELL faster: necessary preparations, gear, camera settings along with appropriate image post-processing.
Many photographers believe that learning how to take pictures of clothes isn’t as complicated as jewelry photography or other types of product photography. They are mistaken. This type of shooting requires more preparation than any other, so I wrote a step-by-step guide on how to take clothing photography.
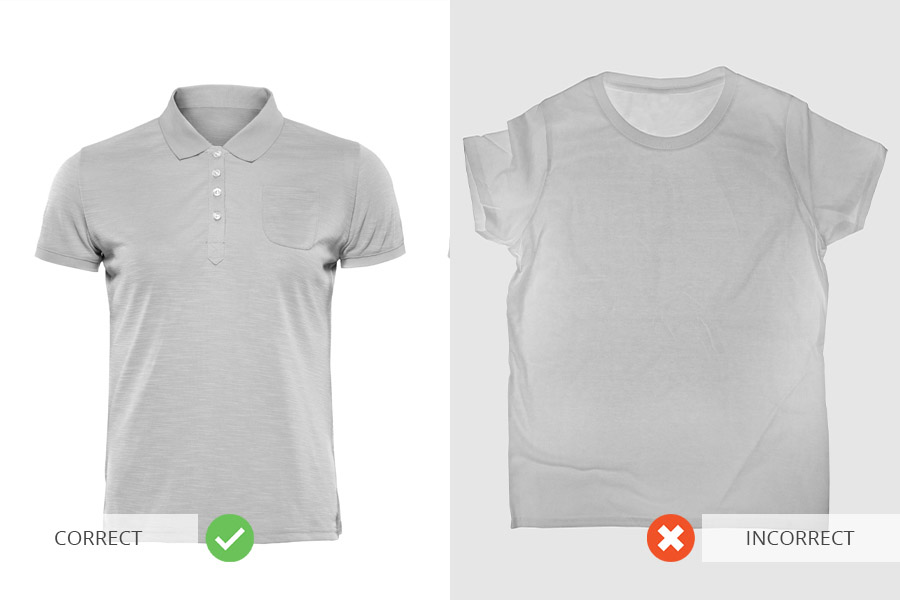
There are several basic types of clothing photography that you can use to advertise or sell your products. Depending on the type, you need to make the necessary preparations and stock up with the correct equipment.

Use mannequins. When you are unable to hire a model, use mannequins and ghost mannequin photography techniques. They are cheap and working with them doesn’t require extra efforts. Besides, while you are photographing clothing on mannequins, you may gain some experience and retake shots as many times as you want. I recommend taking pictures of clothes on models or mannequins in order to show the way the item fits the body and its shape.
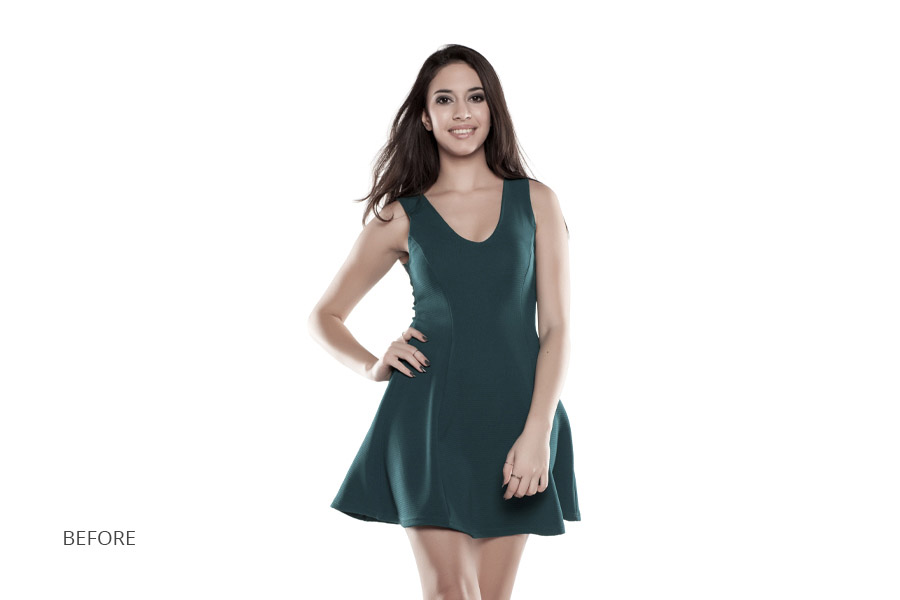
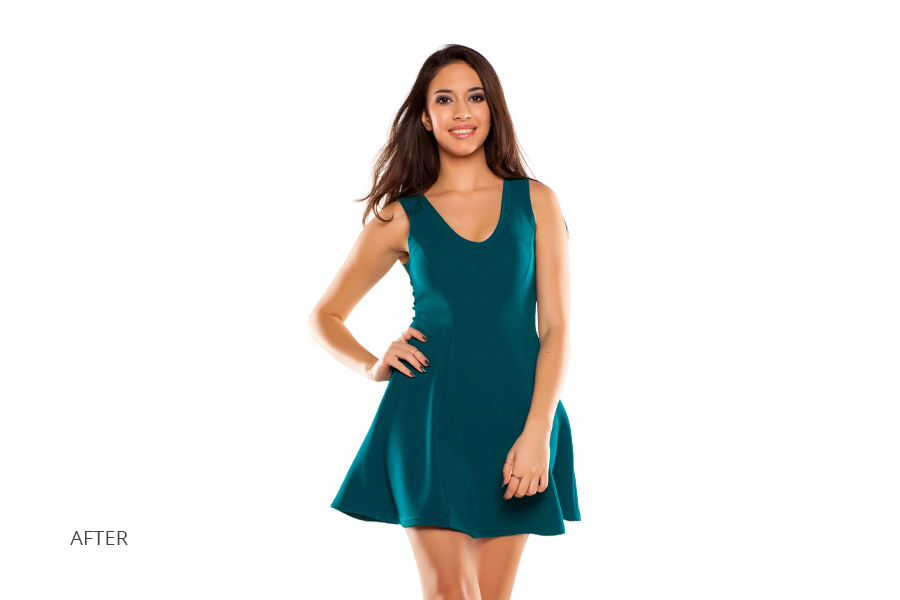
Hire a model. In case you have an opportunity to hire a model, you should absolutely do it. They can take different poses for you to choose the most flattering angles to showcase your product. Moreover, you will get excellent examples of lifestyle photography of your clothing items to post on social networks or show in the online store.

Try out flat lay. An alternative way of how to take pictures of clothes for online store is flat lay or tabletop photography. It is very simple since you don’t need any mannequins or models. You just have to lay out the clothes and take a shot.
But it won’t be exactly suitable for online stores. Flat lays work mostly for publications on Instagram. If we are talking about such clothes as T-shirts, jackets or shorts, they might suit e-commerce photography as well.
360 product photography. 360 clothing product photography demonstrates an item in full rotation so that the client can look at it as in real life. This 3D format imagery gives a more complete picture of a product, its size, dimensions and the combination of its elements.
It seems to be quite a challenging task, but in reality, you can do it with the help of certain gear. Keep in mind that you should pick the correct size for holding a human or mannequin.

Take a camera for product photography. It isn’t obligatory to shoot with the best camera. However, to achieve professional photography results, a decent lens and camera are the must. To prevent your clothing images from looking unprofessional, I suggest picking the proper camera. With DSLRs, you are more likely to get stunning apparel shots because of their studio lighting connectivity.

Choose a lens for product photos. Use lenses with focal lengths over 50mm. If you are going to take photos with short focal lengths such as 18mm or 35mm, your apparel photos can get a fisheye effect – your clothes will look bigger than they are. You may use an 18-55mm kit lens, all you need to do is just set the zoom all the way up to 55mm.
Use a tripod. If you want to know how to photograph clothing and get clear images, you must buy a tripod. Unfortunately, you are unlikely to get qualitative images without blur if you shot with a camera holding in hands. Pick the best budget tripod and start shooting.

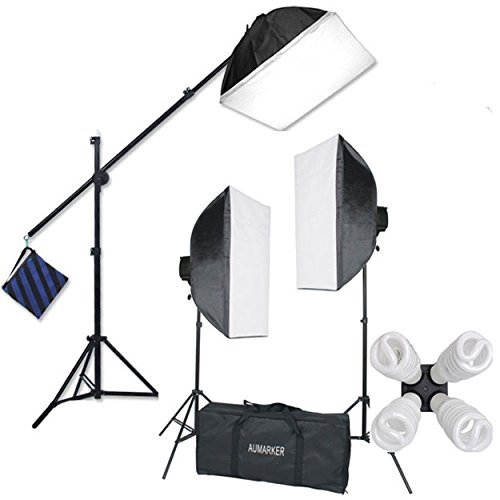
The light sources should illuminate the garments properly for all the important elements to be visible. Poor lightning may worsen the quality of the T-shirt on the picture even if the best t-shirt design software was used to make it. So, you need to invest in the lighting kit. The best variant is the one featuring three lights. In this way, a three-point lighting setup may be realized (one key light, a back or hair light and one fill light).
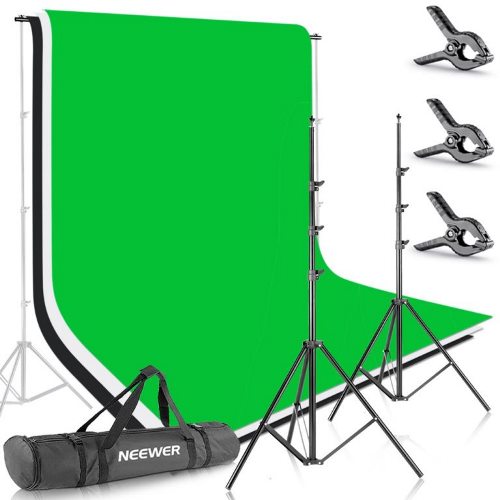
To achieve a clear look of your clothing product photography, you need to set up a backdrop. I suggest finding a solid green or white backdrop that comes with a stand. While selecting a backdrop, remember that it should be pretty wide and tall for you to shoot mannequins and models at full height.

Iron clothing beforehand. Such minor defects as creases on clothes might ruin the success of your photography for ecommerce. That’s why I suggest bringing an iron or a steamer to the photo session to instantly get rid of wrinkles on garments. If you were unable to iron some parts of the clothes, you can remove clothing wrinkles in Photoshop.

Remove price labels. Don’t hesitate and take your time to prepare clothing items before doing ecommerce product photography. Get rid of every sticker and price tag, and you will thank yourself later. You can always remove these unnecessary elements at an image post-production stage. Still, I recommend getting the clothes ready in advance to save time spent on picture editing.
Use a lint roller. It removes lint, dust and minor spots of dirt from clothes. Prior to taking pictures, go through the garments with a lint roller after ironing. You will make use of a lint roller when preparing clothing items of dark colors.
If you don’t do it, due to the increased exposure, the dust particles will become visible in the shots. (I recommend using a stiff brush for suede, nubuck, faux fur, and similar materials).

Use a coat hanger. It sounds pretty trite, but you should have at least a dozen hangers with you to keep your clothes smooth after ironing. You should not hang it on a hook or place it on a chair.
Mind white balance. I believe you have seen some apparel shots that look as if they were taken with an orange or blue filter. Photography light bulbs produce various warmth referred to as a color cast. These bulbs complicate the task of determining real white for your camera. Therefore, you must adjust the white balance in accordance with the chosen kind of a lighting source.
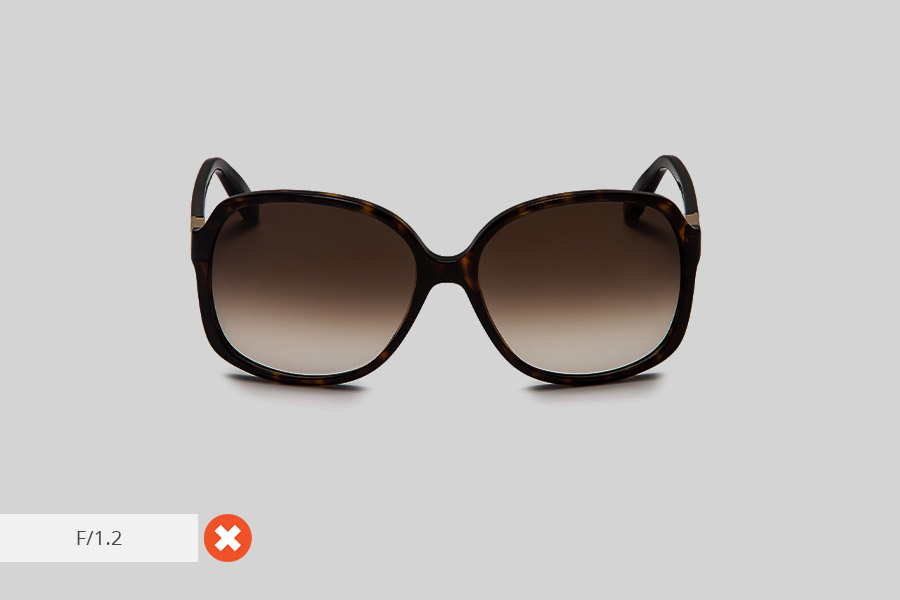
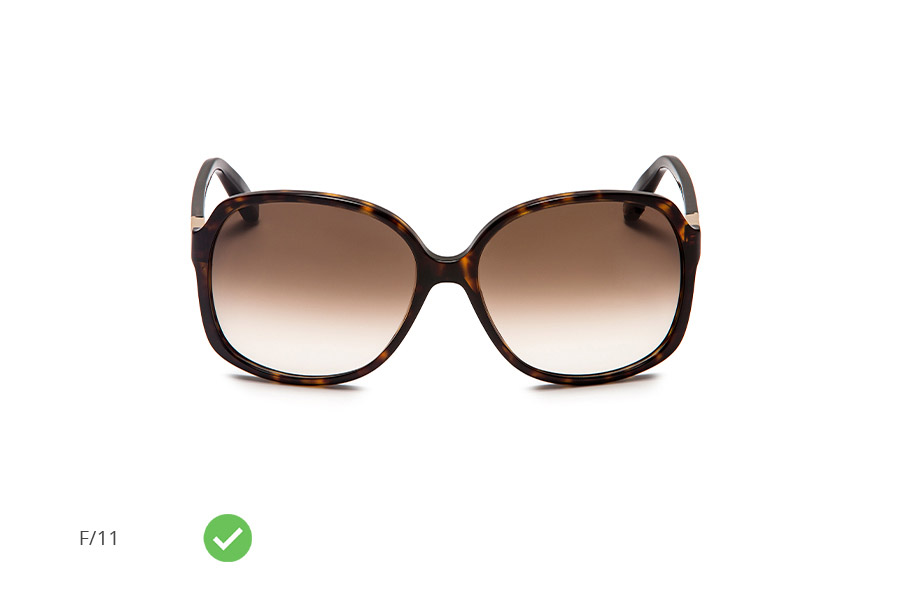
Choose the correct aperture. Photographing clothing, it is recommended to choose a high f/stop, between f/8 and f/11. As a result, you will be able to focus more properly on the item. In case you want to put emphasis on certain elements, for instance, buttons. For shallow focus, you should set a lower f/stop (2.8).
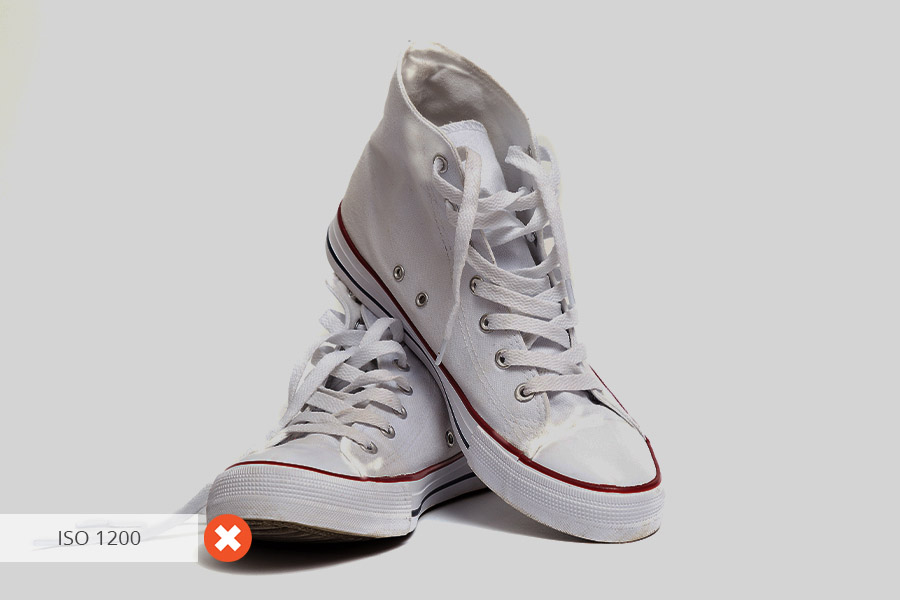
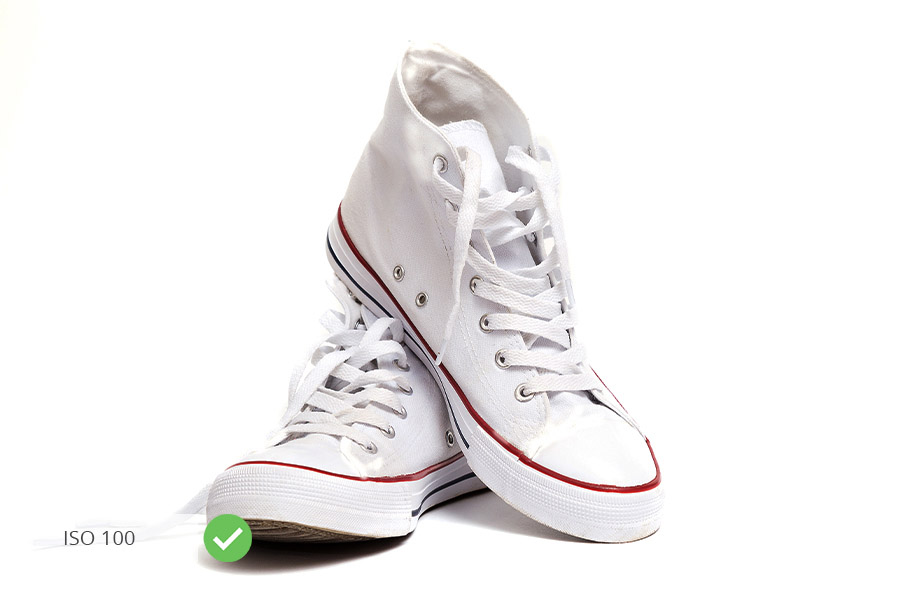
Keep your ISO low. For clear and sharp clothing photography, set ISO to 100 or 200. The more you raise the value, the more noise will appear. Moreover, at high ISO, the camera can’t produce sharp images and the details will be softened.

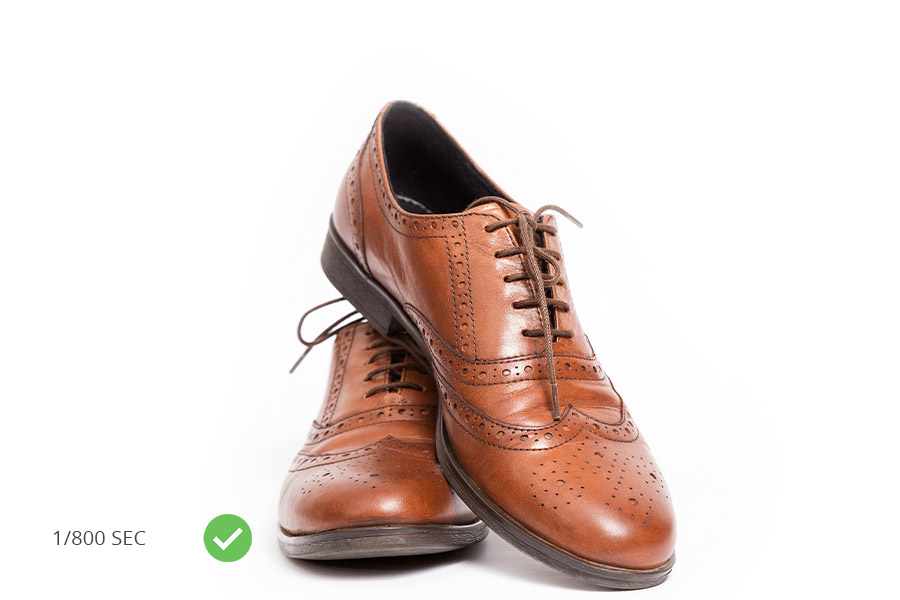
Mind shutter speed. While realizing your photography clothing ideas, shoot with a slow shutter speed to get a smaller aperture. A camera on a tripod in stable light may produce a slow shutter speed, so set a low value, for instance, 1/30. But when photographing models in dynamics, you’d better increase the shutter speed till you get rid of blurry areas.

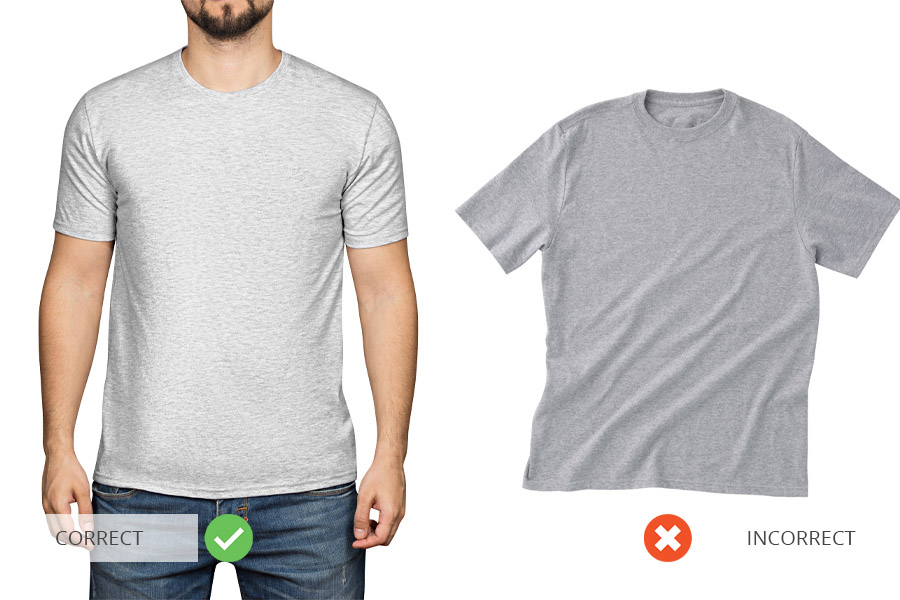
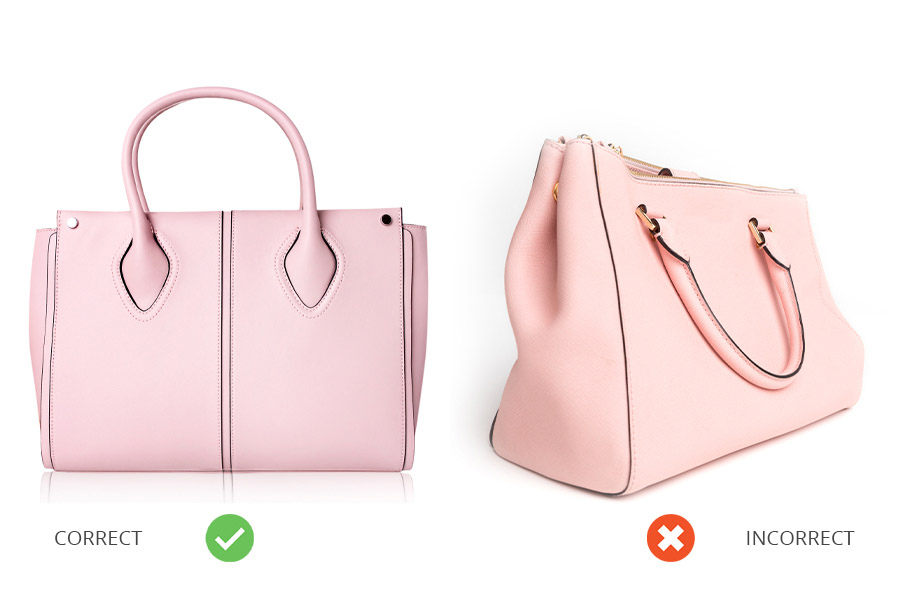
Consider the placement of your camera. It should be located precisely in front of the captured piece of clothing. For instance, if you are shooting skirts, locate the camera across the hip area. When shooting shirts, the camera must be placed in a chest area.
For a clothing item to take up the whole frame, you may want to zoom in. As a rule, cameras feature a digital and optical zoom. Even though zooming is known for eliminating distortions, one of the most significant clothing photography tips is not to shoot with the digital zoom. It crops the picture and will eventually worsen its quality.

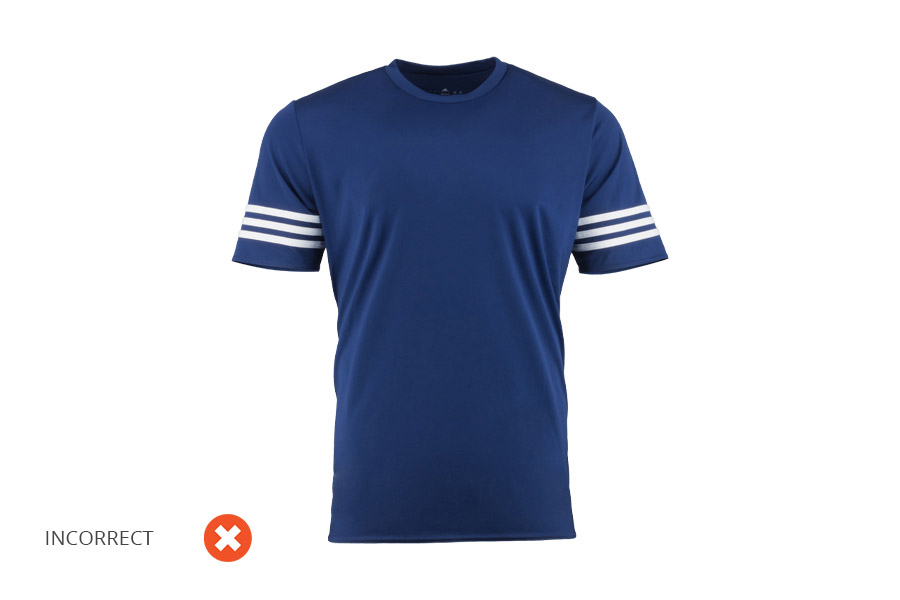
Highlight unique features. While people are browsing through online clothing stores, they search for an eye-catching item. They are more likely to pay attention to the pictures featuring an intricate and unusual element. While photographing clothing, the task of a shooter is to put emphasis on such peculiar and elaborate details so that it looks natural and coherent.
Provide multiple images. If you provide clients only with one or two pictures of the product, they won’t be able to look at all the details and materials closely. For apparel photography, it is essential to take three, ideally, from five to ten pictures of one item. You are supposed to capture front, back and side views of the garment.
Also, don’t forget about focusing on such important elements as zippers, buttons, patterns or logos which differentiate this particular product from others.

Make sure to edit your images after shooting. You need to perform a lot of manipulations, such as color correction, white balance adjustment, and background enhancement, since it is impossible to take a perfect picture.
If you don't want to spend time finding out how to use photo editing software, you can contact a professional photo editing service, and they will do all the work for you. However, if you prefer doing everything on your own, then I will tell you what you should pay attention to.
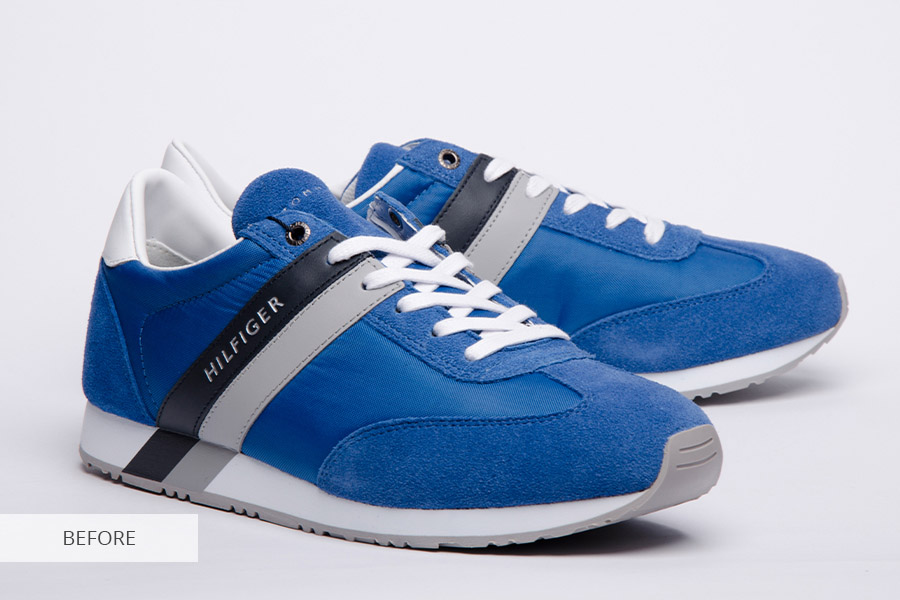
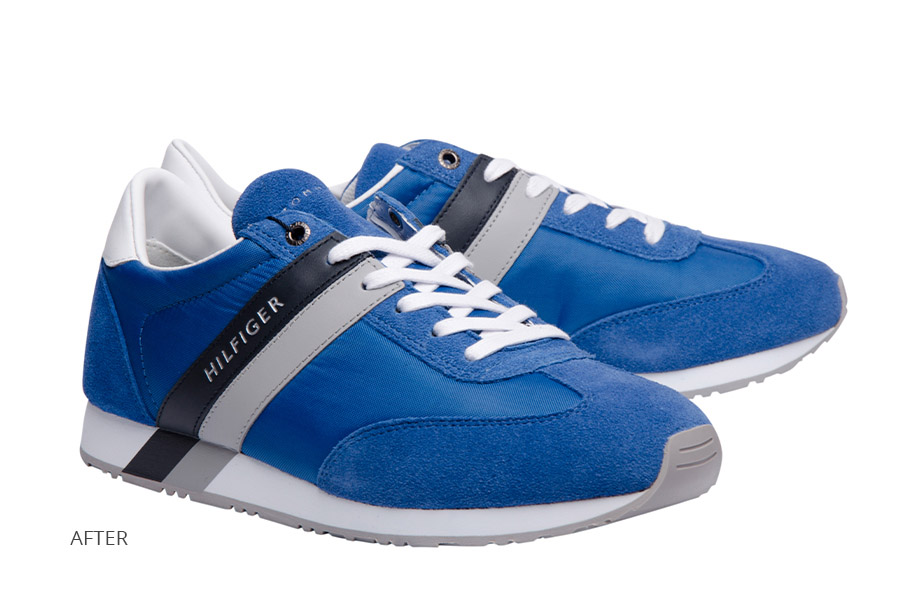
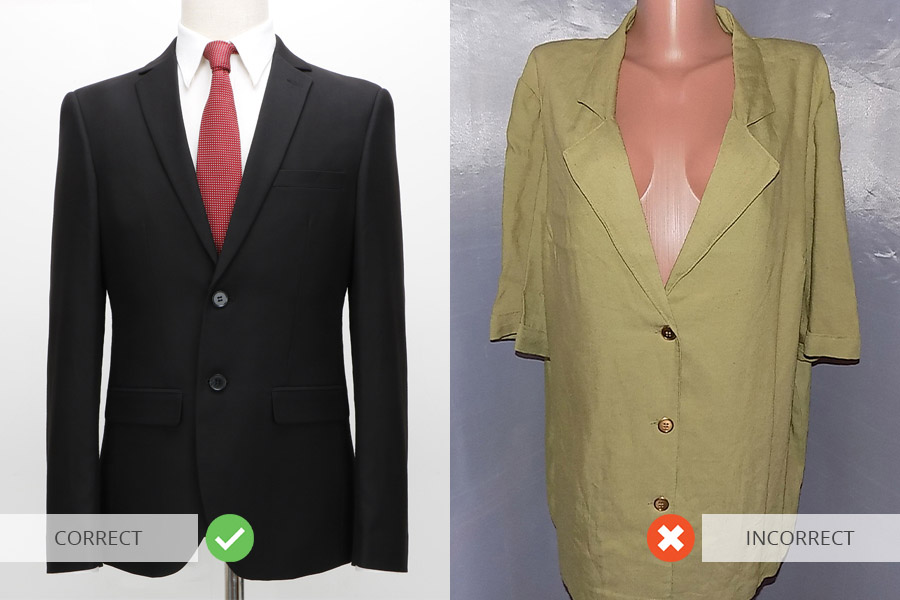
Remove background. Any photography clothing guide typically suggests shooting on a white background. However, you may ‘break the rules’ and totally neutralize potential distracting details by getting rid of the background. In this way, you can add a professional finish to your imagery.
The style of the store is supposed to determine a suitable background color. The most universal variant is the white one since it doesn’t conflict with other colors and attracts attention to the garment. To save time and money, use printing services like Printify with in-built mockup generators that allow you to preview how your products will look against a solid-color background.
Make color correction. Although you may properly adjust the white balance, such colors as pink, neon and red are tricky to capture with a camera and require image editing. If the colors are reproduced incorrectly, the clients will think that they are deceived. Therefore, spend some time in Lightroom and fix the color rendering of the items. Your final aim is to render the colors in images as accurately to real-life ones as possible.

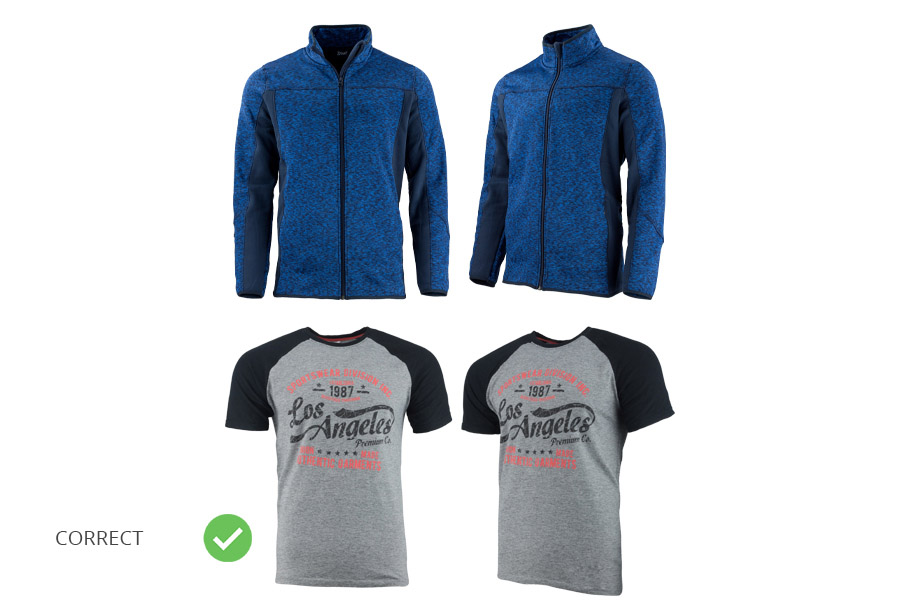
Crop photos. Your apparel imagery should look identical, so crop it accordingly. This ensures the smooth shopping process for the buyers. In case the online store has certain rules when it comes to size and format of the pictures, just stick to them and there won’t be any problems.
Are there any other photography rules aside from cropping? Go to Amazon product photography guide to learn more about photo requirements for online stores.
Use pins and clips. All the same, not every piece of clothing can fit the mannequin flawlessly. You will need to bring safety pins and sewing pins to the shooting.
To give the clothes tighter, form-fitting look on the mannequin, draw the fabric back using these pins. There are also clips which may be called a more ‘profound’ variation of pins. Their purpose is identical, but clips are capable of holding various types of fabric in a tighter manner.
Use masking tape. When shooting clothing, precise positioning is key. Masking tape comes to the rescue by securely holding fabric folds, cuffs, or collars in place, helping to maintain a desired shape or silhouette throughout the photoshoot.
By using it strategically, photographers can eliminate unwanted wrinkles or uneven drapes that may detract from the overall aesthetics of the clothing.
Moreover, masking tape proves invaluable when dealing with loose or flowing fabrics. By discreetly taping them to mannequins or models, photographers can achieve a controlled and consistent look, capturing the true essence of the garments. It prevents distracting movements, such as billowing or misalignment, allowing the focus to remain solely on the apparel itself. Purchase double-sided masking tape to fix the straps in one place. What is more, this kind of tape won’t damage the mannequin’s surface as much as other types.
Use fishing line. If you wonder how to photograph clothes ‘in the air’, you will need a fishing line. It comes in handy for defying gravity still being invisible in the frame. A fishing line may be used for holding the bags’ straps or hanging clothes to give the impression of a ‘hovering’ item. Don’t worry, the camera won’t capture this thin line. Similar techniques are also used in shoe photography.
Stuff the clothes with tissue. The significant drawback of flat lay clothing photography is that the items lying on a smooth surface distort their real size. In shots, the clothes look wider than they actually are and it doesn’t make them appealing at all. To solve this problem, you may give some volume to the clothing items by taking crepe paper, cotton wool, some tissues and putting all that inside.

To make color grading faster and easier, you just need to install this set of effects for Lr. With it, you can edit your image in several ways. These effects will enhance colors, improve clarity and contrast thus making your pictures more attractive.