All photographers try to find the ideal shooting angle not to remove double chin in Photoshop while editing the image, because it is difficult to do naturally. Nevertheless, if you are a portrait photographer, it is very important to learn this technique to make your clients be satisfied with their photographs.

Reshaping body and face are important steps while photoshopping portraits. Read our tutorial to make a double chin removal easier in Photoshop. Download Photoshop free if you still don’t have it on your laptop.
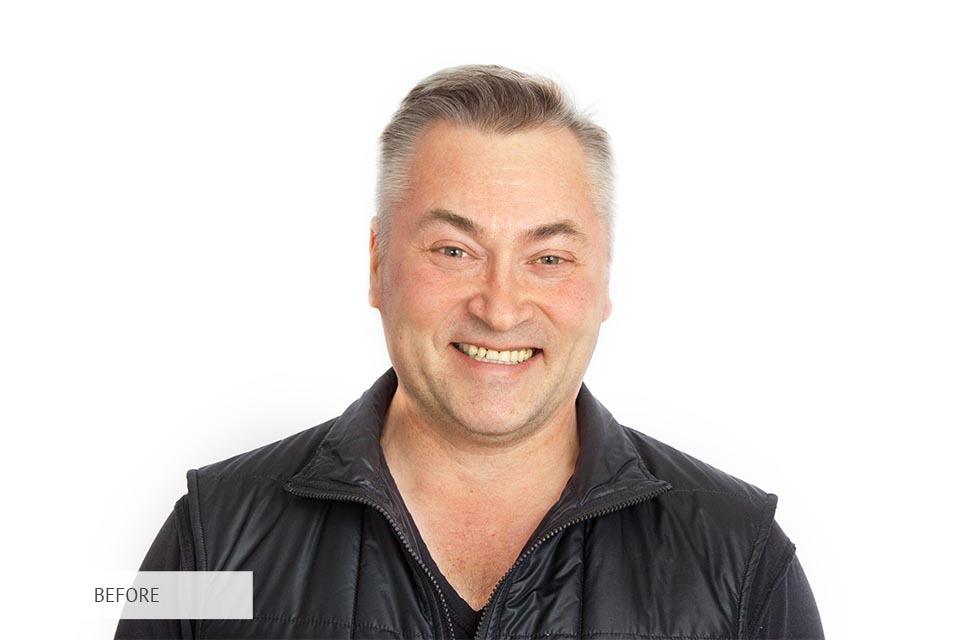
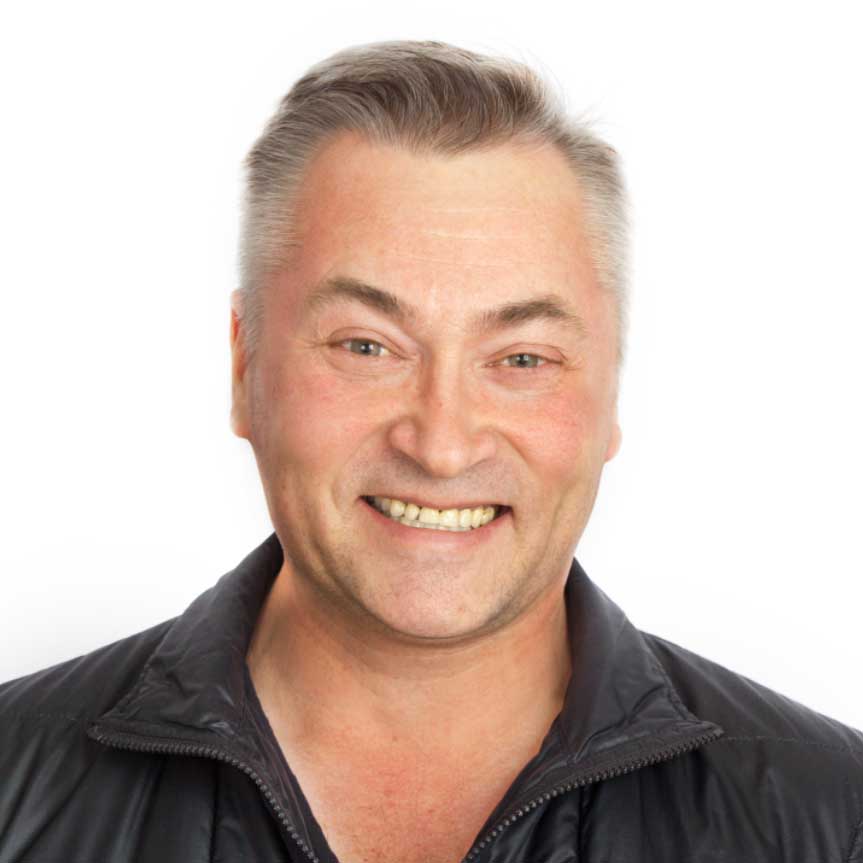
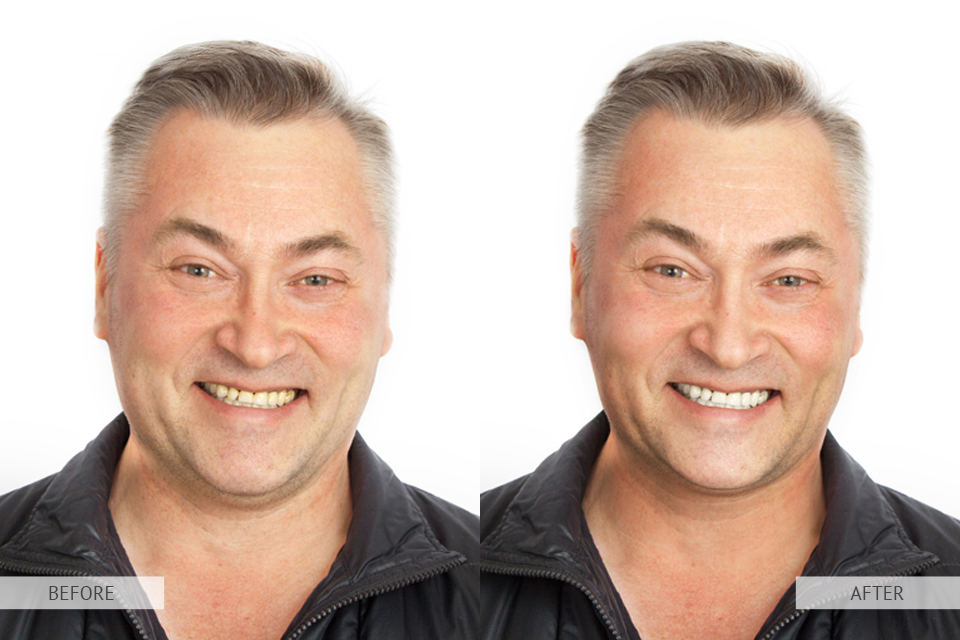
Fortunately, there is an effective method of removing a double chin. Look at the “before” picture above and examine the chin area. Don’t focus on the general look of a person, but pay attention to the way the pixels differ in various parts of the face and the neck.
Theoretically, the neck should look darker as the result of the chin shadow. However, in most cases, the chin and the neck are almost of the same bright color as there is no shadow.
STEP 1. Create copies of your background to make sure that the changes won’t affect the original image.

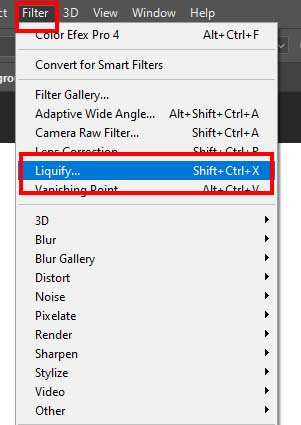
STEP 2. Use the Liquify Photoshop Tool to get rid of the double chin. Go to Filter > Liquify, or use the shortcut by pressing Shift + Ctrl + X.
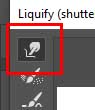
Click on the Forward Warp Tool, which is the best tool to change the face features and to remove double chin Photoshop. You can also use the shortcut key “W”.
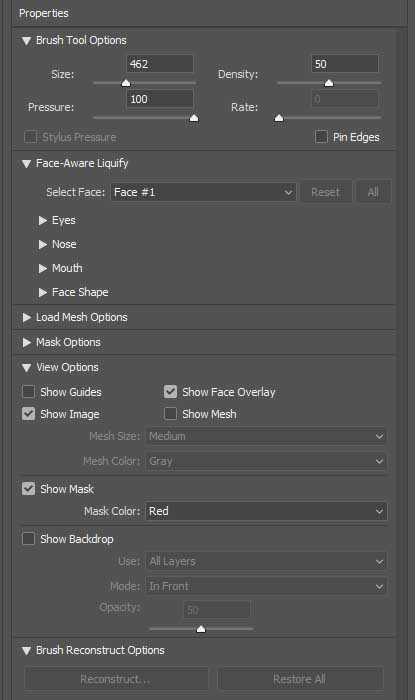
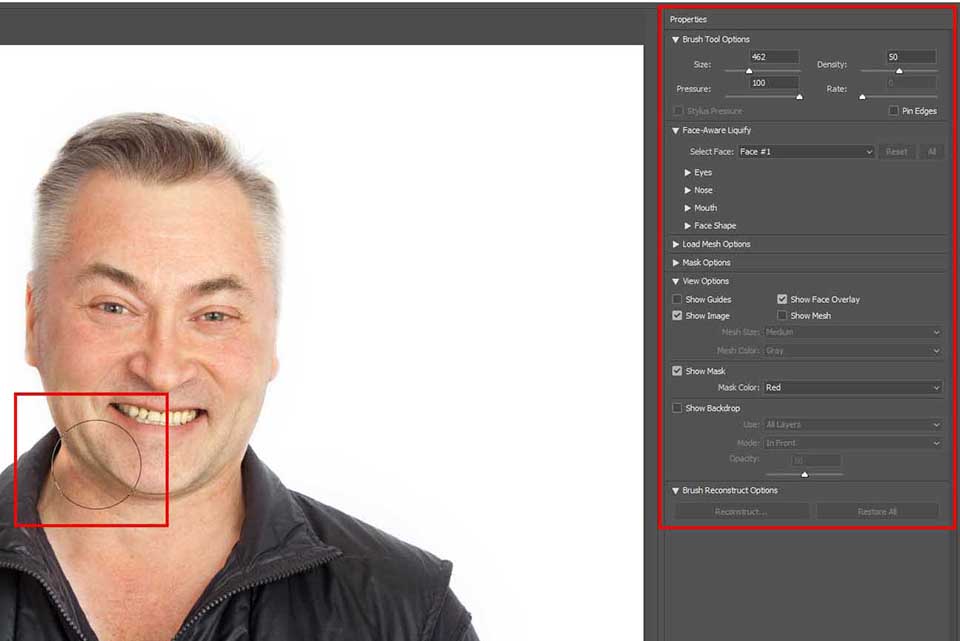
Choose the properties on the right panel. Here, you can alter the size, density, pressure and rate of the brush. Check out the properties that I used in the picture below.
Start using the tool by clicking and dragging. Play around to figure out how you can achieve the best result. Make sure that you don’t exaggerate the effect of the Forward Warp Tool, as it’s really easy to get carried away and distort the face.
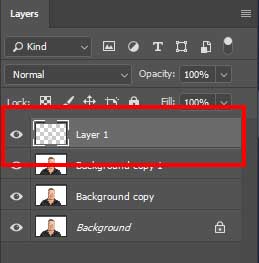
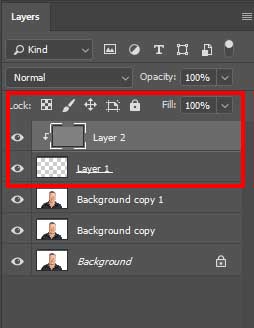
STEP 3. Next, we need to work with the Liquify Tool. Go to Layer–New–Layer to create a new empty layer. You can also use Shift + Ctrl + N for PC, and Shift+Command+N for Mac.
Click on the History Brush Tool icon on the right panel, or press the “Y” shortcut key.
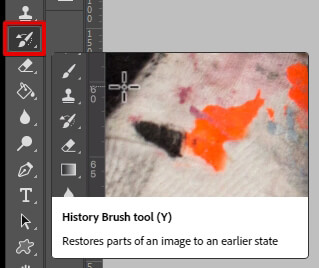
Now, start painting over the areas that need to be restored after the Liquify Tool. For example, shadows and moles on the neck under the chin, which moved when using the plastic filter.
STEP 4. Now, you’ll need to create one more empty layer and fill it.
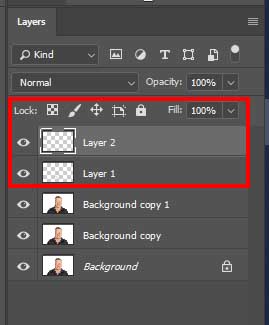
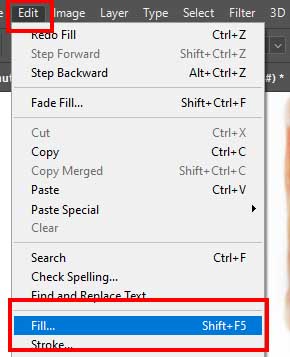
Select Edit> Fill (press Shift+F5 for a shortcut).
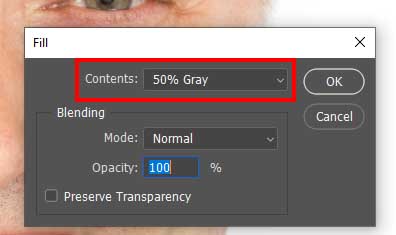
Set the fill parameters: 50% gray and 100% opacity.
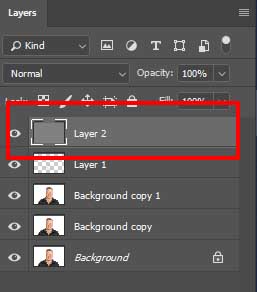
The layer’s thumbnail will now appear grey.
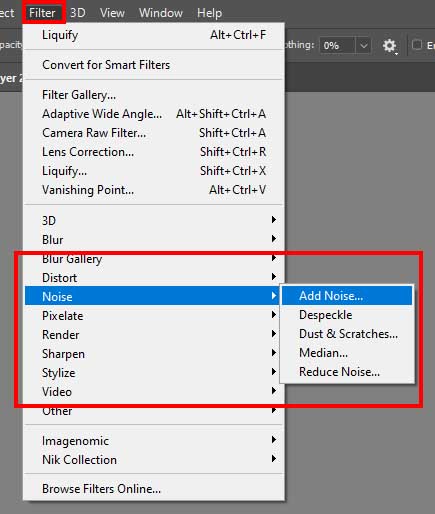
STEP 5. The next step is adding the noise to our photo. Go to Filters> Noise> Add Moise.
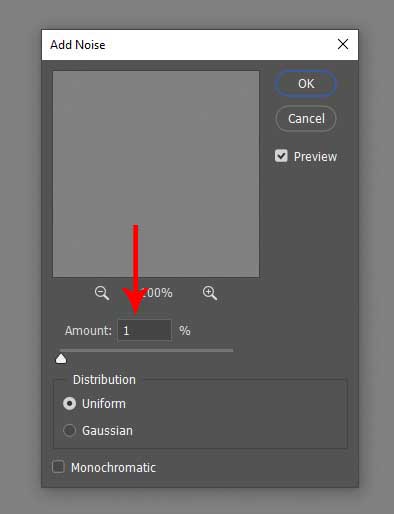
Once the “Noise” dialogue pops up, set the parameters. I’m using 1% grain, but depending on your picture the amount can vary.
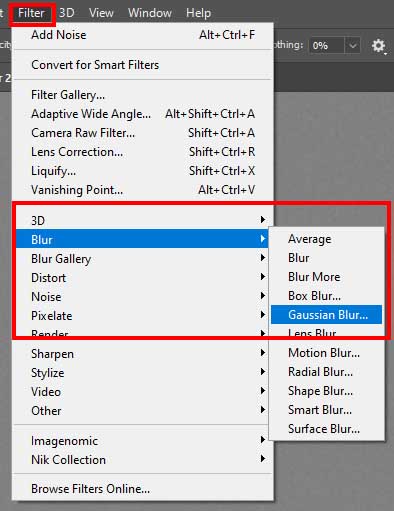
STEP 6. Then, we have to blur the noise. Go to Filter> Blur> Gaussian Blur.
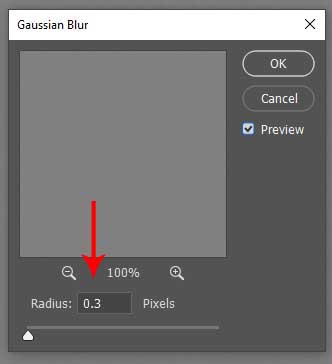
Modify the radius of the blur. I set it to 0,3 pixels. Remember, the bigger the radius, the blurrier the image.
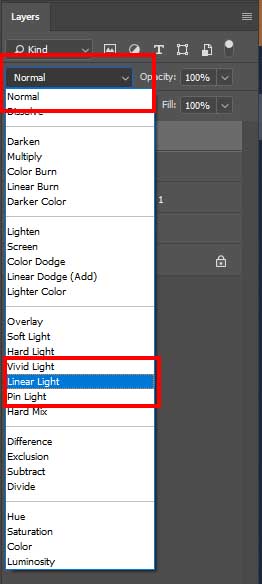
STEP 7. Change the blend mode to the Linear Light to imitate the texture.
STEP 8. Now, you need to create a clipping mask. Simply select the top layer with the texture and choose ayer> Create Clipping Mask.

That’s how my picture looks at this point. To make it even better, we’ll now work with creating realistic shadows.
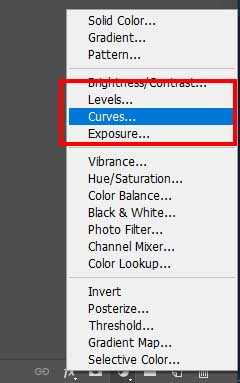
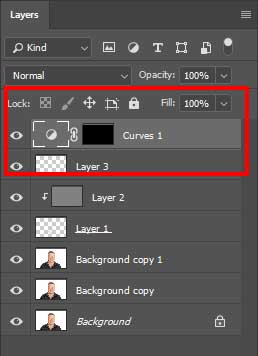
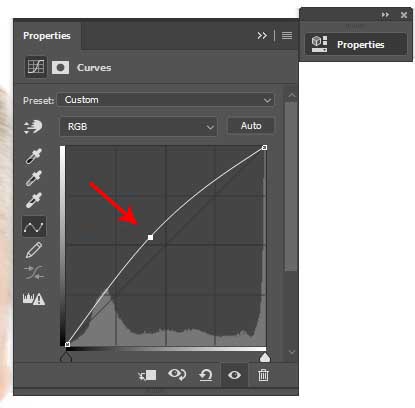
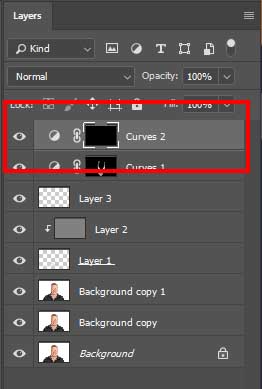
STEP 9. What you need to do first is to create the curves adjustment layer. Go to Layers > New Adjustment Layer > Curves, or use the shortcut button at the bottom of the Layers panel.
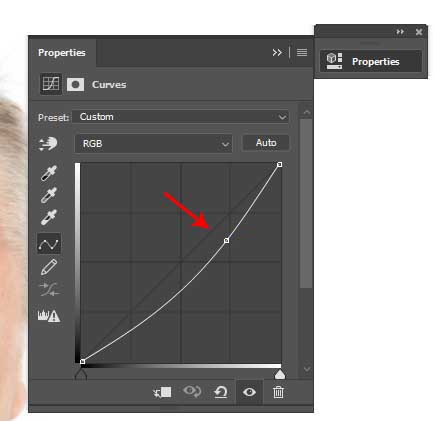
Create a control point and drag it down, just like in the picture below. This will darken the image at those tones.
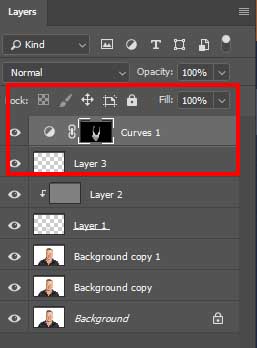
STEP 10. Add a layer mask to this layer. By default, it will be filled with white, so you need to invert it. To do that, go to Image > Adjustments >Invert. Choose Cmd+I (for Mac) or Ctrl+I (for PC) for quicker access. Now, if you look at the preview thumbnail, you’ll see that it’s filled with black.
Start creating the shadows on the chin and neck. The covered area is going to appear white in the preview thumbnail. If at some point you accidentally paint over the area of the photo you didn't mean to, press X to swap your foreground color to black, and simply paint over that area to undo your mistake.
You can tell that by simply darkening certain parts of the chin and neck the picture already looks great!
STEP 11. We are almost done removing a double chin! All that is left to do is to repeat the last two steps for light areas. That means, you need to create the curves adjustment layer again, but this time drag the control point up, just like the picture below shows.
STEP 12. Add a layer mask to this adjustment layer too. Invert it by clicking Cmd+I (for Mac) or Ctrl+I (for PC).
Go ahead and start lightening certain areas. You can see the areas you’ve painted in the adjustment layer preview. Again, don’t be on getting it perfect, as you can easily undo the adjustments.
.jpg)
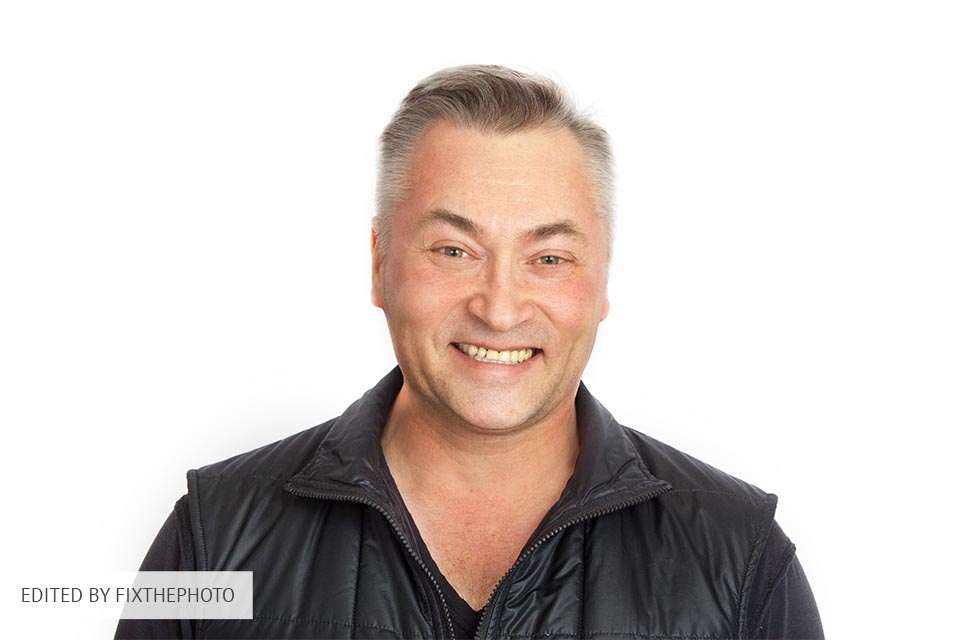
As you can see, it is possible to remove double chin easily. But sometimes it isn`t just necessary. Personally, I don`t do it so often. There are some photographers who try too hard and, in the end, get too unrealistic photos. The clients want to be beautiful in the pictures, but primarily they want to be themselves. Measure is a treasure. Hope, you understand this!
Read about how to whiten teeth in Photoshop to make a Hollywood smile.
Watch more Photoshop portrait tutorials about how to whiten teeth in Photoshop to make a Hollywood smile to make photos pop by means of this popular software.


