When taking photos, you might incidentally overlook wrinkled clothes, which might ruin your image. If a model wears wrinkled clothes, it will distract viewers from the product. To become a professional photographer, you need to learn how to remove clothing wrinkles in Photoshop and give your models a stylish look.
In this article, I will tell you about several easy ways to remove wrinkles and make outfits in your photos look impeccable. You can use these simple techniques regardless of your level of experience.
If it’s too difficult for you to remove wrinkles on clothing by yourself, make sure to contact our professional photo-retouching service. Our photo editors will help you quickly and efficiently remove wrinkles from clothes for a reasonable price.
If you are a newbie, it might be difficult for you to remove wrinkles unless you use this efficient method. The most popular way to cope with this task is to use the Brush Tool and Curves Adjustment Layer. Below, you will find a detailed tutorial that will help you do it.
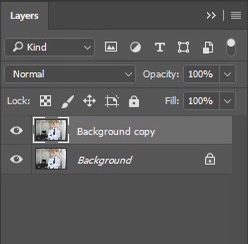
First, you need to open Photoshop. Then, import a photo that you want to edit and create a copy of your background layer. To do it, you need to select Layer > Duplicate Layer. Select a name for a new layer and click OK. If you want to do everything more quickly, it’s better to use Photoshop keyboard shortcuts. For instance, you can use Ctrl+J/Cmd+J to quickly create a duplicate layer.
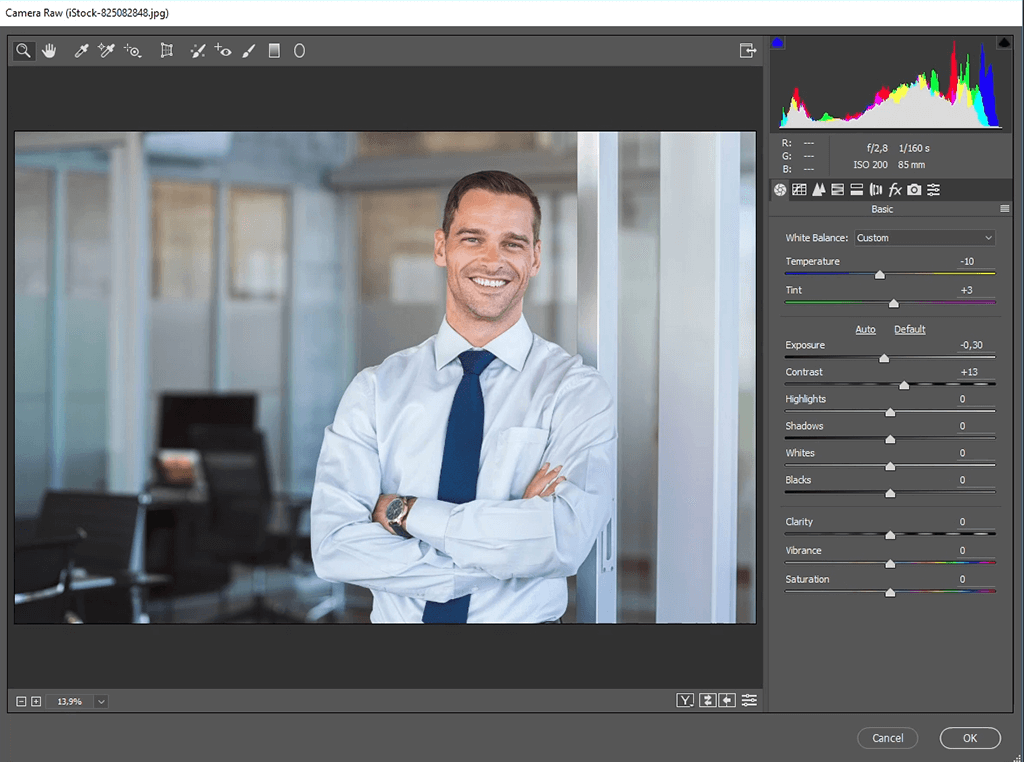
After creating a duplicate layer, you can adjust colors in your photo. To do it, go to Filter > Camera Raw Filter to find a filter that allows you to make colors richer and highlight details. Besides, you can use the Ctrl+Shift+A/Cmd+Shift+A shortkey. To enhance colors, you need to adjust HSL, White Balance, Contrast and Exposure.
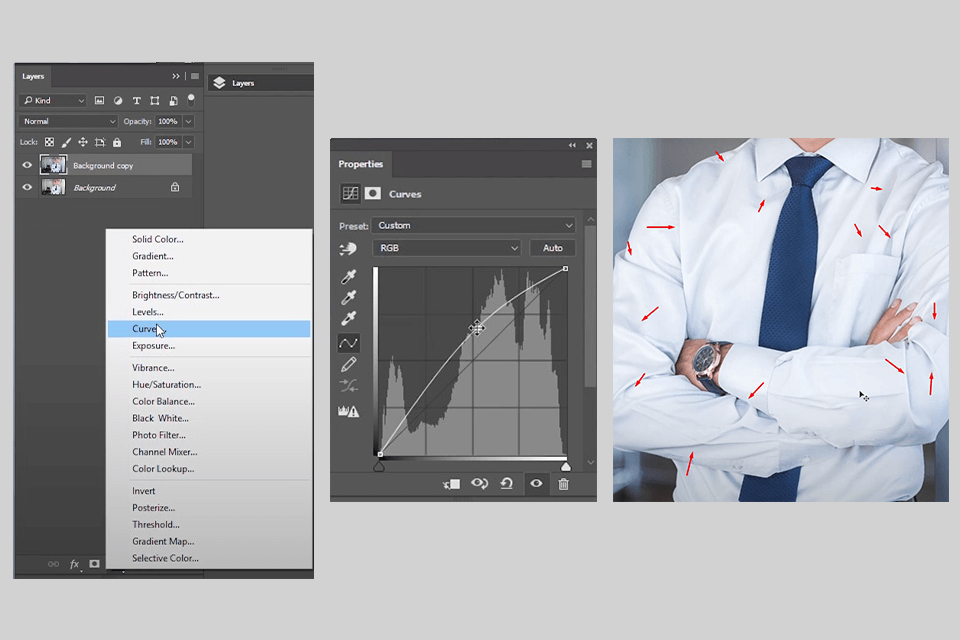
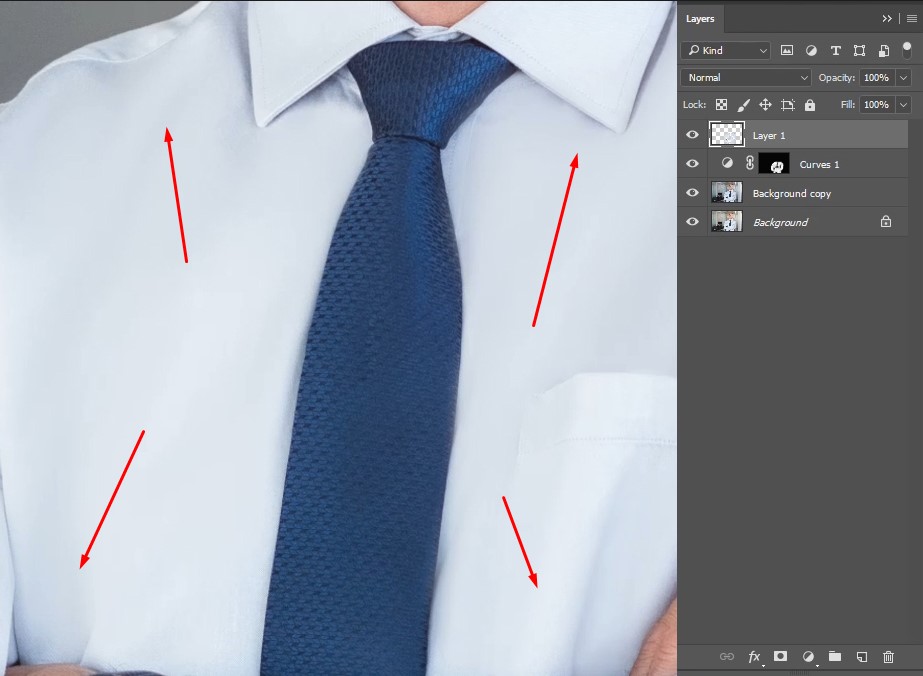
If your model wears a shirt, you can create a Curves Adjustment Layer to make the folds on it look lighter. To do it, you need to find the Curves icon in the Adjustments panel. Alternatively, you can go to Layer > New Adjustment Layer > Curves. Then, you need to click OK when you see a new dialog box. By using the Curves tool, you can lighten any area in your photo.
Use the Ctrl+I/Cmd+I combination to invert the layers mask. Next, you can move the Brush Tool over the wrinkled areas of the shirt. Make sure not to overdo, otherwise, your image will look heavily edited.
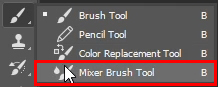
If after using the Brush Tool, you notice that your image looks too bright, you can fix this issue by lowering its opacity. You just need to use the Mixer Brush tool (B) that can be found in the Tools panel. It is just as easy to use as the Brush, Pencil, and Color Replacement tools.
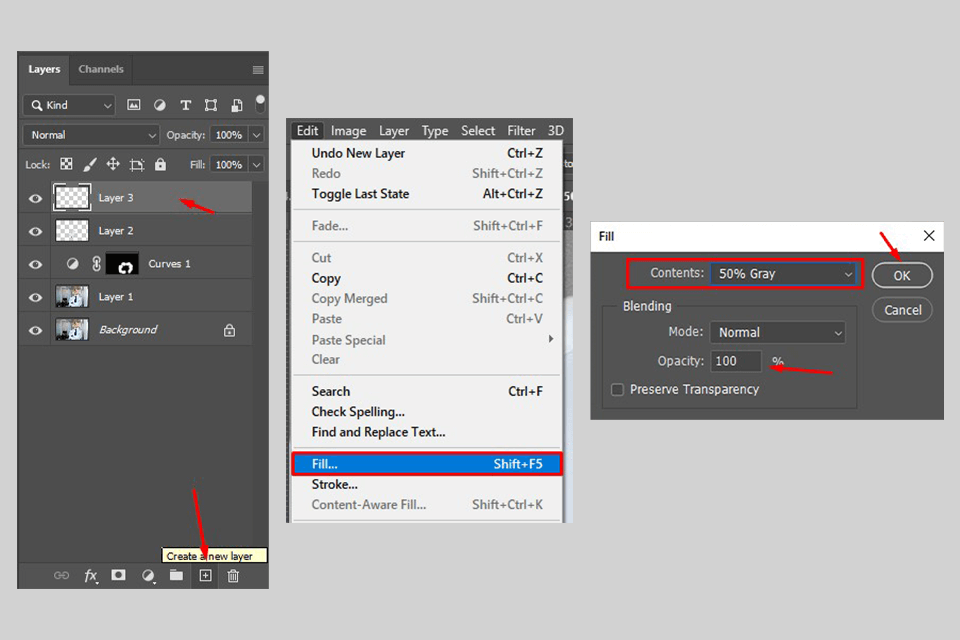
First, you need to create a layer. Click on the Create a New Layer icon at the bottom of the Layers panel. To solve this task even more quickly, use the Shift+Ctrl+N/Shift+Cmd+N shortcut.
For better results, use the same brush values as in the example below:
Now, you can remove wrinkles from clothes step by step by using the Brush tool. If you have ever tried smoothing skin in Photoshop, you won’t face any difficulties with this task.
Create another empty layer. Use the Edit-Fill option or the Shift+F5 shortcut. Set Gray to 50% and Opacity to 100%. Click OK.
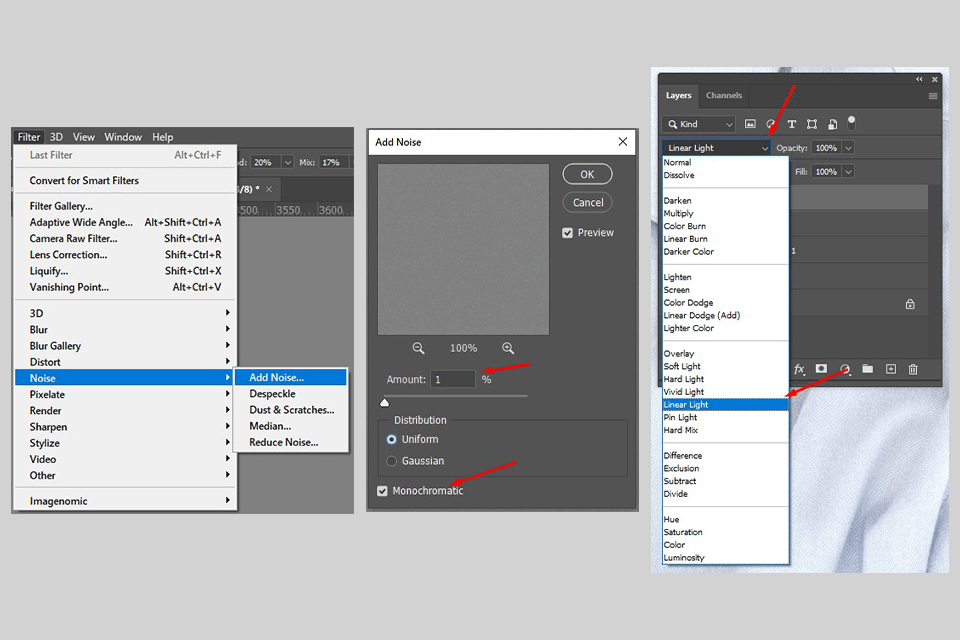
The next thing that you should do to remove wrinkles from clothes is to add some noise. Go to the Filter tab, find the Noise option, and select Add Noise from the drop-down menu. Keep in mind that you need to check the box next to Monochromatic. You need to set its value to 1 and set Distribution to Uniform.
After taking these steps, you need to change the Blend Mode to Linear Light. Select the right option from the Blend Mode drop-down menu.
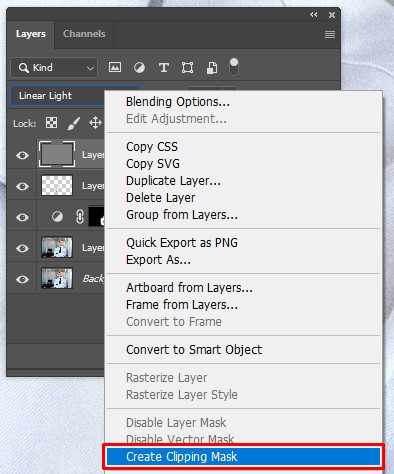
Next, you need to create a Clipping Mask to perform local adjustments in the selected area. Go to the Layers panel and select the top layer. Then, you need to select Layer > Create Clipping Mask. If you have never used this tool before, make sure to learn how to mask in Photoshop.
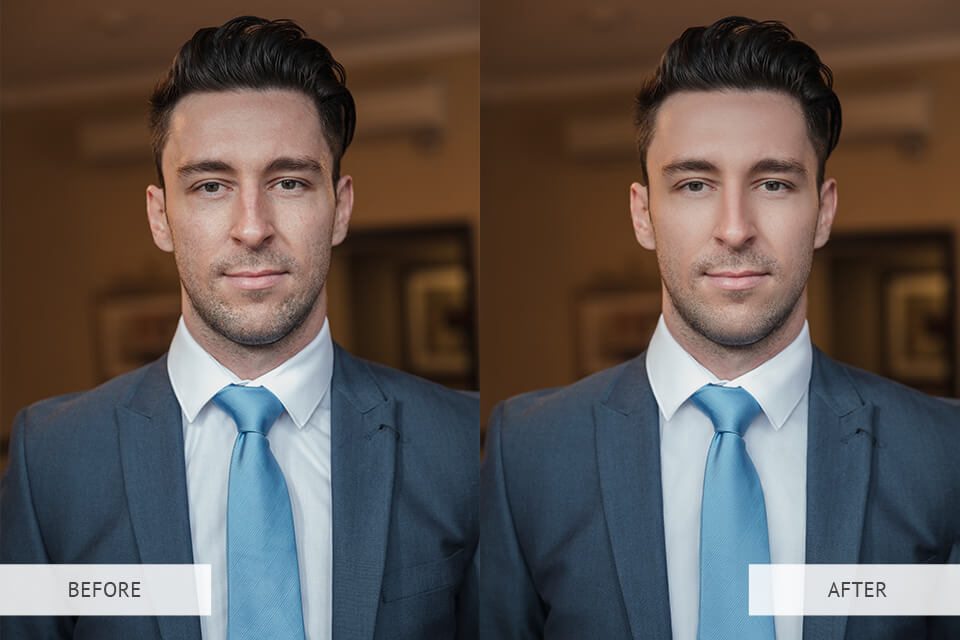
After applying this technique, you will see that the wrinkles on the shirt are virtually non-existent. If you want to edit the portrait even further, try following various Photoshop tutorials. For instance, you can learn how to remove stray hairs in Photoshop to give your photo a more professional look.


Frequency separation is a widely-used, professional technique for photoshopping portraits. If you are wondering how to get rid of wrinkles in Photoshop, you can use this method as well. It allows you to separate your image into several spatial frequencies and edit various details separately. While this method requires advanced photo-editing skills, it’s important to master it to make your photos more attention-grabbing.
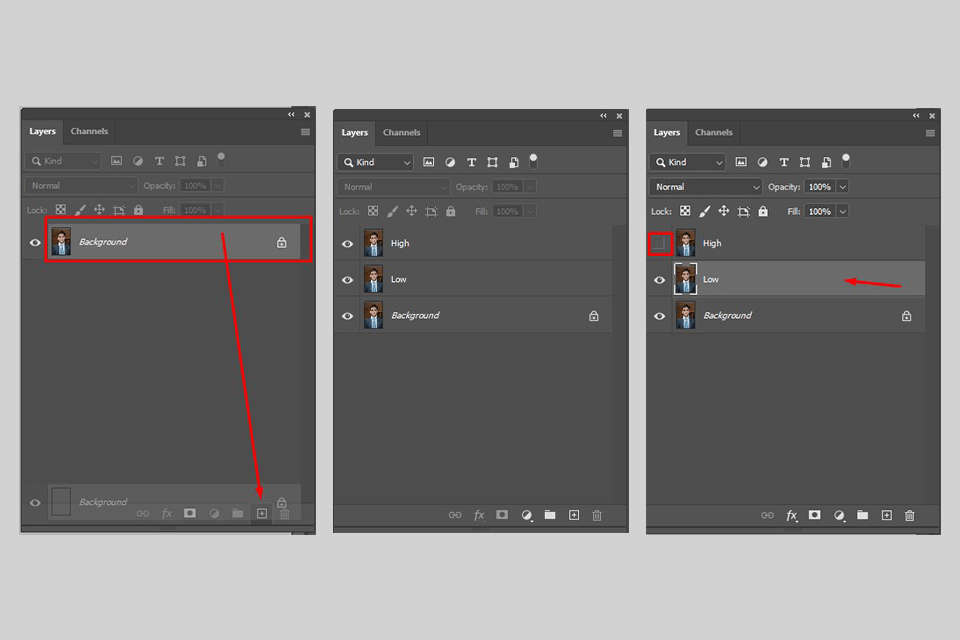
Start performing frequency separation after creating two duplicate layers of the main layer (Cmd+J/Ctrl+J).
It’s better to name your top layer High since you will need to work on textures and details here. To make it invisible while you are solving other tasks, click on the eyeball icon.
You can also name the other layer Low. Here, you will adjust Color and Tone settings.
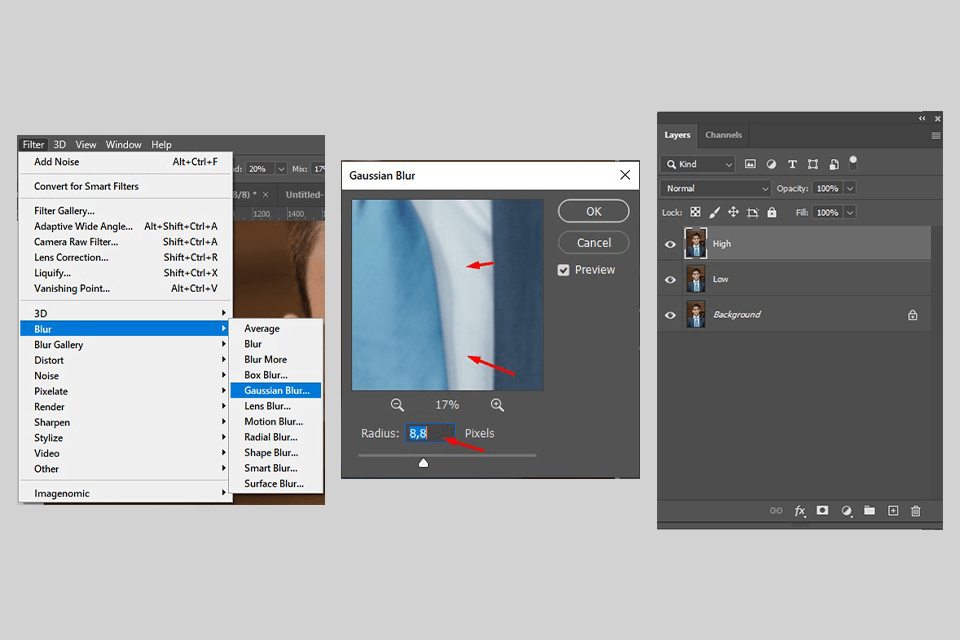
Go to the Low layer and start editing. First, you need to go to the Filter menu and select Blur > Gaussian Blur. Then, make sure to adjust the radius. You need to use a radius that makes small details look slightly blurry. When editing the photo in the example below, I set the radius to 8.8px. After making the adjustments, go to the High level and make it visible again.
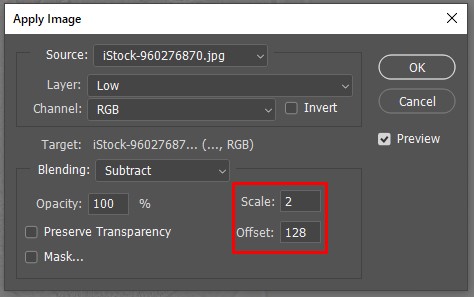
In the Image menu, choose the Apply Image option. Then, you need to select the Low layer and set the blending mode to Subtract.
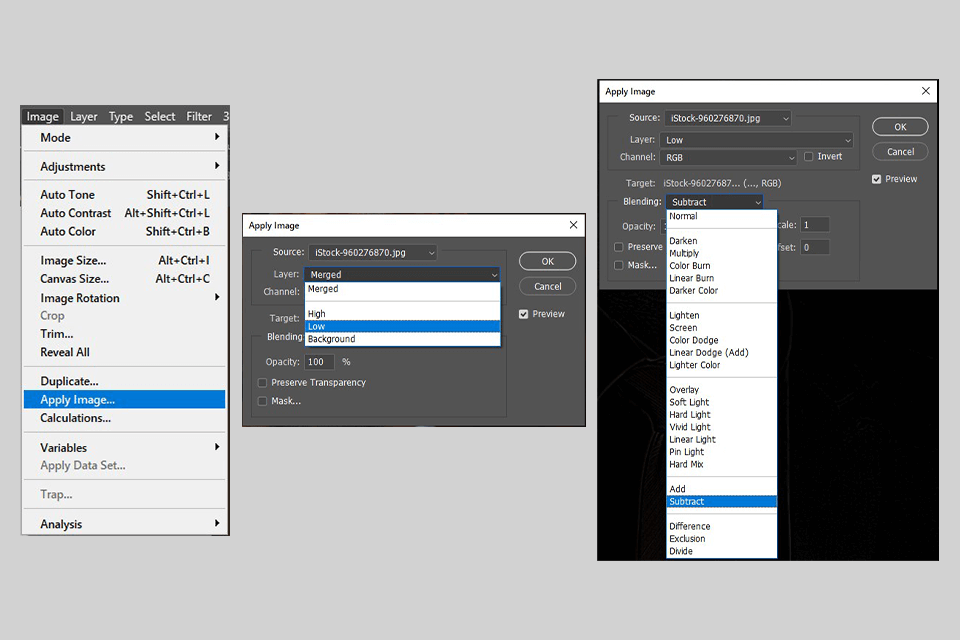
Take a look at the settings in the screenshot below. You can use the same settings when editing your image. Click OK to confirm your edits. Now, you have successfully separated detail and texture from color and tone. At this stage, your image should look like strange gray line art.
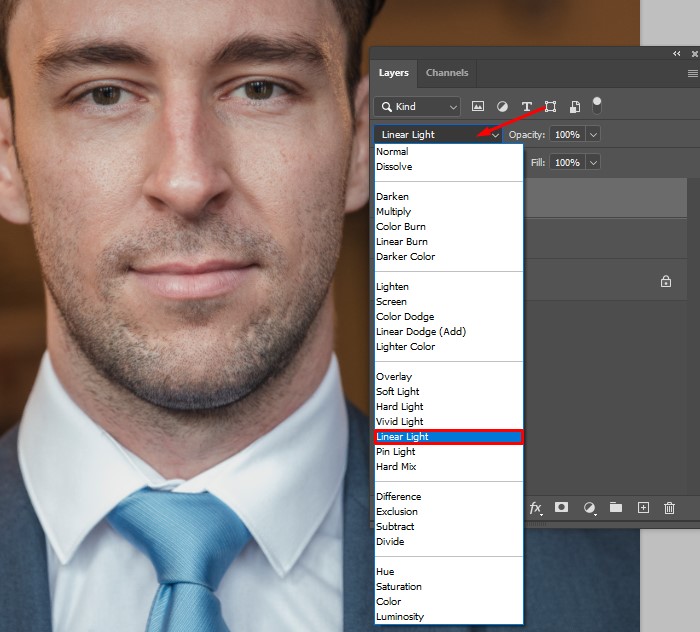
To make your photo look normal again, you need to select the Linear Light blend mode from the drop-down menu. You will find this option above the layers box.
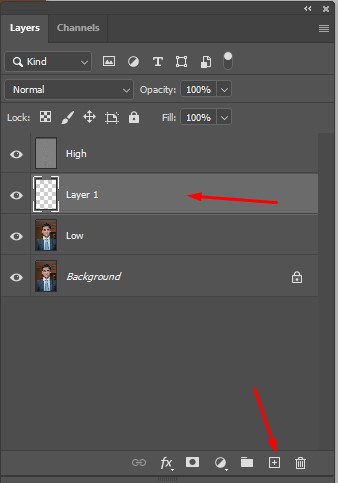
Use the Cmd/Ctrl+Shift+N key combination to create a new layer. Put it between the High and Low layers. You can use this correction layer to enhance your photo even more.
Find the Mixer Brush tool (B) in the Tools menu, and select the following settings:
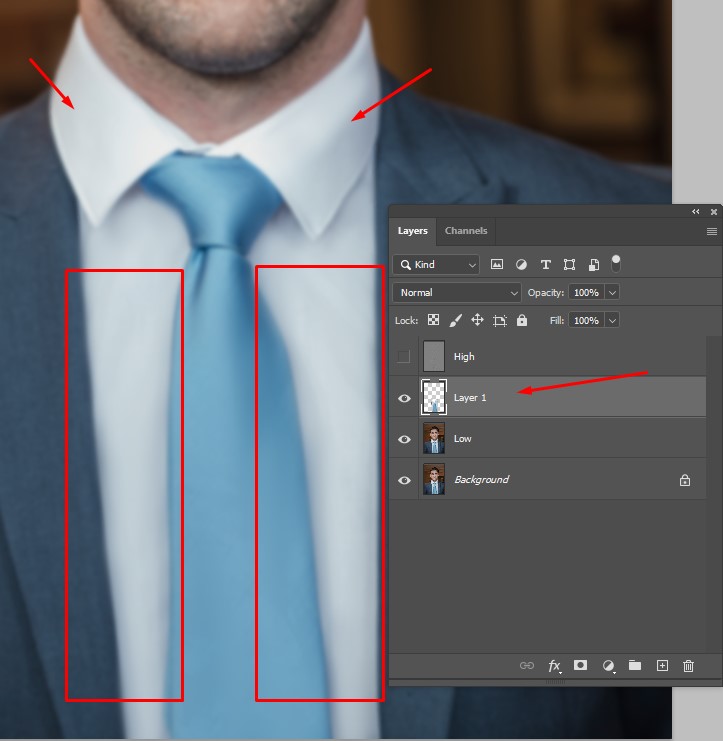
Go to the High layer and click on the eyeball icon to make it invisible again. Then, click on the correction layer and start removing wrinkles. Use the Mixer Brush Tool to make the surface even.
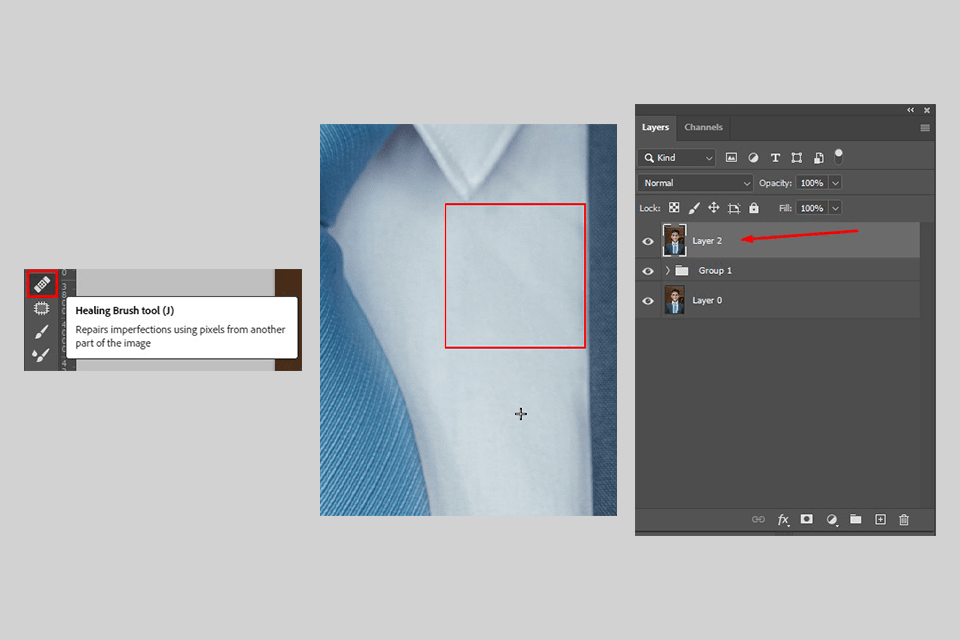
Go to the Toolbox and find either the Healing Brush Tool (J) or the Clone Stamp Tool (S).
Then, start merging layers in Photoshop using one of the methods that you like the most. Use the combination Ctrl+Alt+Shift+E/Command+Option+Shift+E. Once everything is ready, use the Healing Brush to smoothen all the uneven areas and make your photo look perfect.
Well done! You have successfully performed frequency separation. If you don’t know how to remove wrinkles from clothes without making them look too flat, you can use the dodge and burn option to add some volume.
If you are satisfied with the results, you can save your edited photo by selecting File > Save As. In a new dialog box, you can type a file name, then, you need to select a location. It’s better to select a new name if you don’t want to overwrite your source file.
If you want to get enhance your portraits and headshot photos faster, make sure to use these actions. They were created specifically for this task. With them, you can make colors richer, fix exposure issues, and add trendy effects to your photos.