Found in the Filters section of Photoshop, Neural Filters represent a convenient and useful tool for making visually appealing, creative edits and streamlining your photo retouching workflow.
Supported by AI technology and the Adobe Sensei machine learning system, Photoshop Neural Filters rely on algorithms to generate new content for the user-selected areas of your images. As such, you can make non-destructive changes and conveniently try out different creative ideas without sacrificing the original photo.
There are 3 Neural Filters Photoshop categories that you should be aware of. Featured filters are Photoshop AI tools that are available to the public. Beta filters are currently being tested.
Finally, Wait List filters are currently unavailable but might enter the testing phase soon. If you want to check out the upcoming tools, go to Filter > Neural Filters > Wait List and pick an option that caught your eye to learn more. Vote for the filters you’ve liked the most by clicking the “I’m Interested” option.
After opening the photo you want to edit, you have 5 featured Adobe Photoshop Neural Filters that you can choose from. The results provided by these tools are of the highest caliber and meet all legislative and identity preservation norms.
Pick a filter to enhance your image or experiment with all the options to see what result you like the most. To apply a featured Neural Filter, go to Filter > Neural Filters > All Filters > Featured and pick the required option from the menu.
Skin Smoothing

To smooth skin in Photoshop, you simply need to employ the Skin Smoothing filter. You can leverage the provided Smoothness and Blur sliders to ensure elements like tattoos, freckles, acne, and scars vanish without a trace while you barely have to lift a finger.
JPEG Artifacts Removal

Every time you save a JPG image, it becomes a little fuzzier and more pixelated. This can lead to artifacts that are created by compression algorithms, which are used for lowering the file size.
You can restore your photos with the help of this filter while tweaking the results using high, medium, or low levels of blur that are applied to the image.
Style Transfer

As you can guess from the name, this tool lets you copy the style of one photo (its color or saturation) and add it to a different image. The filter comes with sliders like Style Strength, Brush Size, and Blur Background as well as the options to Preserve Color and Focus Subject, which allow you to adjust how drastically the style of the photo is changed.
Super Zoom

This Neural Filter lets you zoom in closer on a subject without making the image lose its sharpness. It can be used for emphasizing facial features, denoising, and getting rid of compression artifacts to ensure the subject looks as appealing as possible regardless of how close you get to it.
Colorize

This tool allows you to easily transform B&W images into colorized photos without having to rely on third-party colorized software. Specify what hues you want to add and the AI engine will automatically apply the necessary corrections. You can also leverage focus points to ensure specific parts of an image have more color to improve its composition.
Other than the featured category, you can also try out the experimental beta Neural Filters in Photoshop. The machine learning algorithms of these tools are still being developed, but you can receive some terrific results already.
To apply a beta filter, simply go to Filter > Neural Filters > All Filters > Beta and pick the option you’re interested in.
Smart Portraits

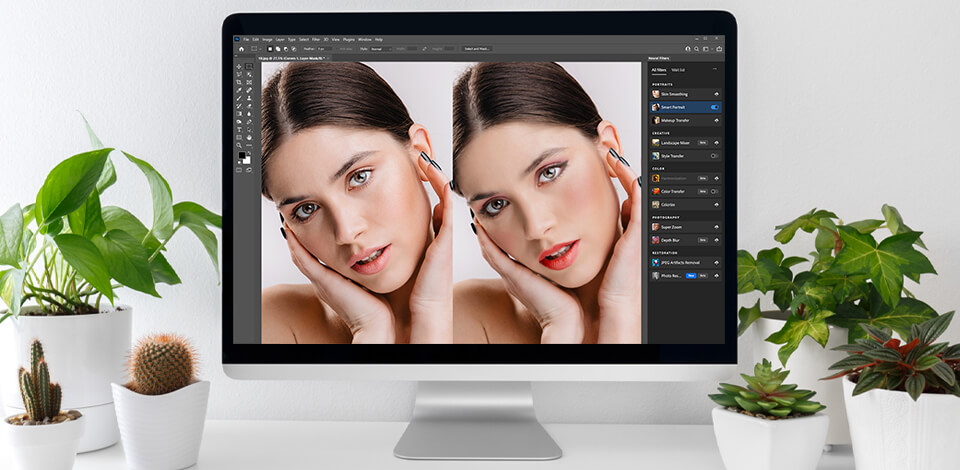
This Neural Filter allows you to alter the model’s facial expression, pose, age, and other visual elements that can be tweaked using the provided sliders. Add and adjust masks that enable you to make both subtle changes and complete transformations.
Thanks to the Retain Unique Details slider, you can ensure the features of your subject that matter the most are preserved.
Makeup Transfer

This tool lets you copy makeup looks from one face to another. Whether you need to add a new makeup style to your subject’s face or tweak some aspects of the model’s look during the image retouching stage, this filter has you covered.
Depth Blur

This option was added to the beta Photoshop Neural Filters section to enable you to add haze to an image and remove noise in Photoshop automatically. Apply a mask to the foreground, add some haze, and customize the applied effect as you see fit. The provided sliders allow you to tweak the amount of haze, its color temperature, hue, contrast, and other parameters.
Landscape Mixer

Combine two beautiful photos to produce a breathtaking, original landscape. Pick one of your landscape images, and then select a reference photo. This filter will take elements from both images to generate a completely new photo.
Employ the Winter, Spring, Summer, Fall, and Sunset sliders to adjust the look, atmosphere, and season of the resulting landscape.
Color Transfer

This Neural Filter allows you to copy the color palette of one image to another in just a couple of clicks. Employ this tool to extract the color scheme of any photo and infuse it into an image of your choice.
Try out as many reference images as you want, check out the available Photoshop color mods, and add a completely new look to your images.
Harmonization

Copy the appearance of one Photoshop layer to a different one to ensure the resulting photo looks natural and visually appealing. This tool examines the reference layer and copies its hues and tonal values to any other layer of your choice. You can freely tweak the sliders, apply a mask, and make other adjustments until you achieve perfect color harmony.
If you want to learn how to use Neural Filters Photoshop, you simply have this brief tutorial:
STEP 1. Open Neural Filters

Go to Filter > Neural Filters. The opened Neural Filter menu allows you to apply any tool included in the All Filters list.
STEP 2. Get the filters you’re interested in from the cloud

Any Photoshop filter that has a cloud icon has to be installed from the cloud before it can be applied to your images. You just need to click the cloud icon to install the Neural Filter you want to add to your collection.
STEP 3. Apply and customize the filter

Apply the filter and adjust the parameters and sliders on the right-side panel to achieve the perfect effect for your needs.

The created effects can be saved using one of numerous methods:
Current layer. Destructively add the filter to the original layer.
New layer. Add filters as a new layer.
New layer masked. Add Photoshop Neural Filters as a new layer that contains a mask with AI-generated pixels.
Smart filter. Transform the edited layer into a Smart Object and add filters as a customizable smart filter.
New file. Save the created effect and image as a new PSD file.
Preview changes. You can switch between the before/after looks for all filters. Simply click the preview icon, which you can find in the bottom left corner of the gallery.
Reset. You can restore the default values of the applied filter by pressing the icon near the top-right edge of the gallery window.
Feedback. Neural Filters employ machine learning algorithms so any feedback that you share about your issues can help Adobe developers improve its tools to ensure you receive better results in the future.
The optimal output option is determined by your project needs. If you convert a layer into a Smart Object, you’ll be able to add filters as customizable smart filters, which is the superior method in most cases.
Other options include saving the output on the selected layer or as a new unmasked/masked layer. Some users even prefer to save the result as a completely new Ps file for increased flexibility.
Make sure your Photoshop is updated to the latest version available in the Creative Cloud application. If that’s the case, then you have access to the entire neural filter collection that is currently available.
You can delete filters by locating them in their file destination. Every subfolder stores one model:
MacOS: ~/Library/Application Support/Adobe/UXP/PluginsStorage/PHSP/23/Internal/com.adobe.nfp.gallery/PluginData
Windows: %appdata%\Roaming\Adobe\UXP\PluginsStorage\PHSP\23\Internal\com.adobe.nfp.gallery\PluginData.