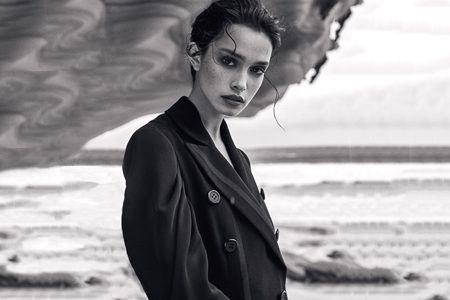
Blurring the background in a photo is a simple but excellent way to make
the main subject stand out. In the past, you needed professional camera
lenses or had to spend a lot of time editing in Photoshop.
Now, Adobe Lightroom has a new tool called Lens Blur that can do this
in just a few clicks using AI. I tried it on different photos - portraits, city
scenes, and more - and it works amazingly well.
Lightroom just got an update that makes it way easier to blur backgrounds in photos. The new Lens Blur tool lets you create a beautiful bokeh effect without needing a particular camera lens or doing complex manual editing. It’s perfect for photographers and retouchers who want to make their pictures look more professional in just one click.
Why is Lens Blur so awesome?
✔️ Smart AI-powered blur - Lightroom automatically finds the main subject in your photo and blurs the background for you.
✔️ 7 new presets - Different styles for portraits, city shots, still life, street photography, and more.
✔️ Manual adjustments - If the AI doesn’t get it perfect, you can easily tweak the blur yourself.
✔️ Save your presets - Create unique blur effects in Lightroom and apply them to multiple photos for a consistent look.
Before, blurring backgrounds in Lightroom took a lot of time using masks and gradients. Now, with AI Lens Blur, you can get a pro-level blur much faster and easier. Plus, you can batch edit in Lightroom, so all your pictures have the same smooth effect, saving time and keeping the quality of the shots high.
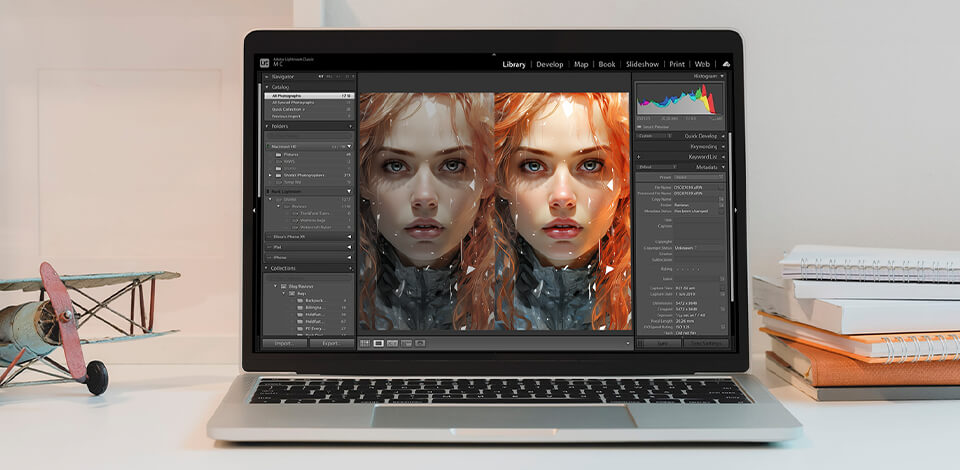
Blurring the background helps make the main subject stand out and gives photos a more professional look. Before, in Lightroom, you had to use masks and do this manually, but now it’s way easier thanks to the Lens Blur tool. It uses AI to find the subject and create a nice bokeh effect. I use this tool all the time, and here’s a simple step-by-step guide to try it yourself.
Step 1: Upload Your Photo to Lightroom. First, import your photo into Lightroom. If possible, use RAW files because they keep more details. If your photo is already in Lightroom, open it in the editing section.
Step 2: Apply Lens Blur. Go to the Lens Blur tab. You’ll see different preset options for different types of photos. For portraits, you might want a soft, dreamy blur. For product photos, a sharper background blur might work better. All you need to do is click on a preset and watch the background blur instantly.
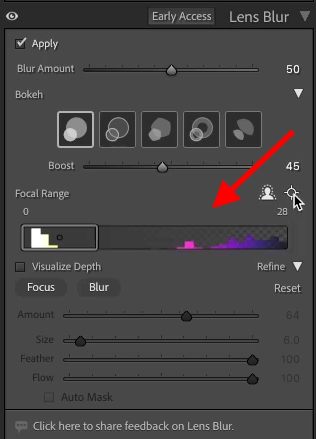
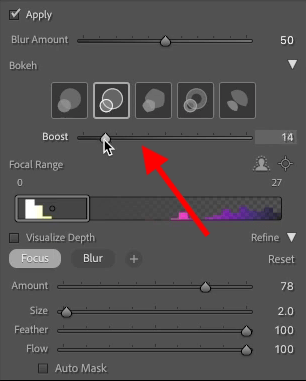
Step 3: Adjust the Blur Area. Sometimes, the AI might not be perfect. If the blur looks off, you can manually edit it. Unlike some Lightroom alternatives, Lightroom has an AI masking tool that lets you select people, pets, or objects more accurately. You can then adjust how strong or smooth the blur is.
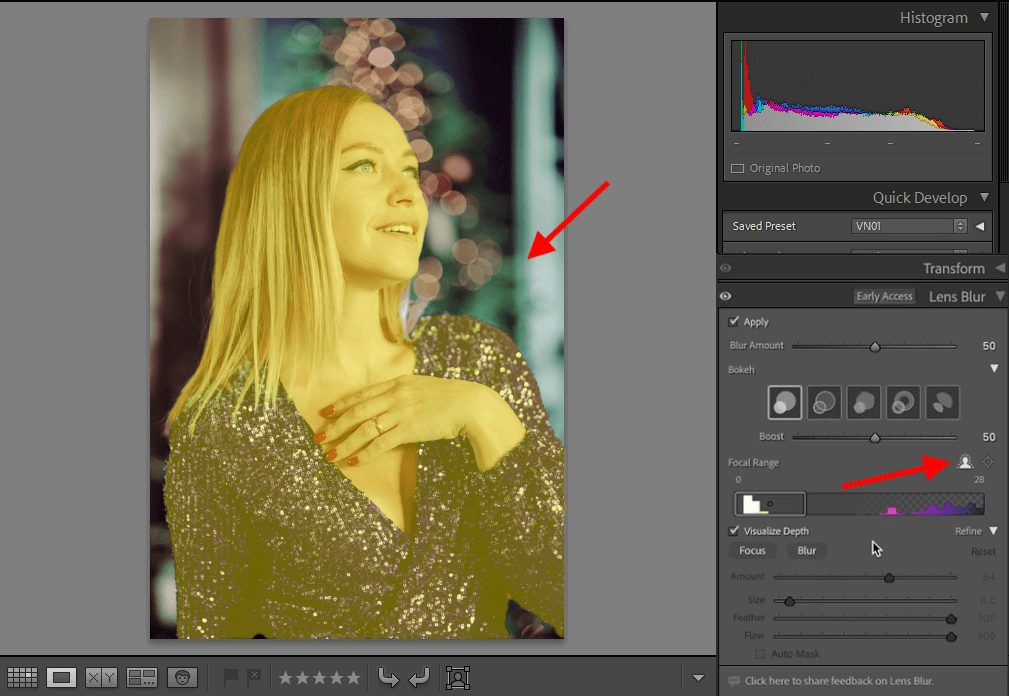
Step 4: Make Final Edits. Blurring the background can slightly change the lighting and colors in your photo. So, I always do some final touch-ups: increase contrast for more depth and adjust saturation to make the image more colorful. Sometimes, I also tune the brightness, so the subject looks natural with the background.
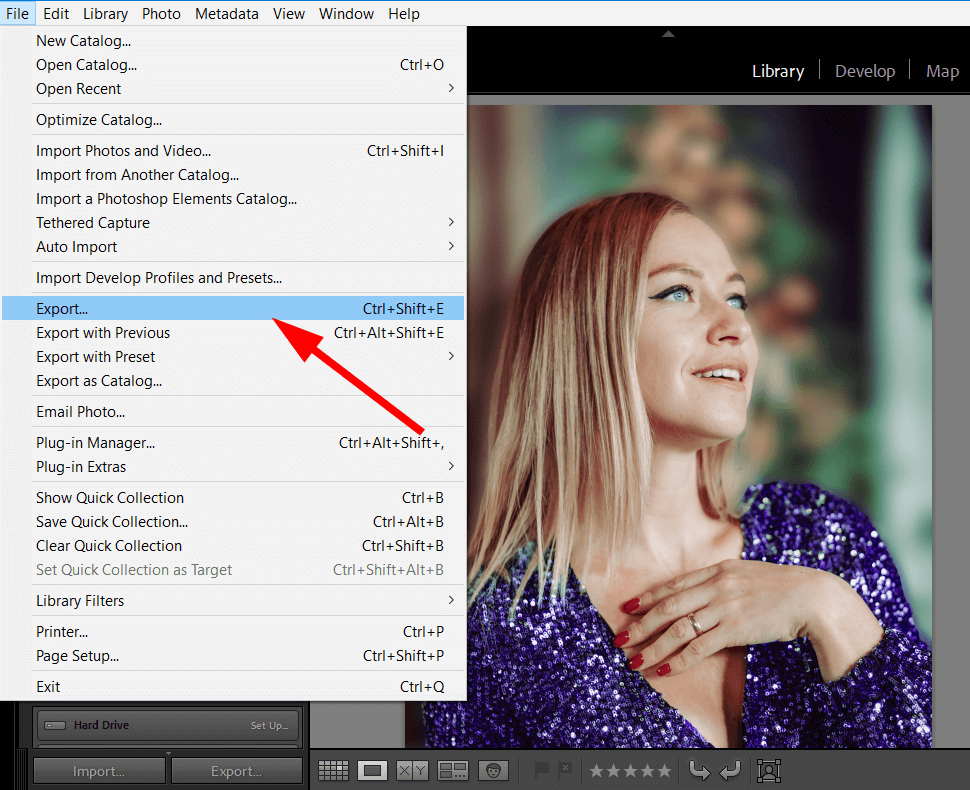
Step 5: Save Your Photo. Once you’re happy with the edit, you can export the high-quality photo or save it to Creative Cloud for later. If you're editing multiple photos in a similar style, create a preset so you can apply the same blur settings quickly to all of them.
Lightroom Mobile also includes a Lens Blur feature, allowing you to edit photos directly on your phone without needing a computer. The process is very similar to the desktop version:
The biggest advantage of Lightroom Mobile is that it lets you edit photos quickly while on the go without losing quality. This is especially useful for bloggers and photographers who want to upload high-quality pictures to social media instantly.
For example, you can edit portraits in Lightroom right on your phone without sacrificing detail or clarity. This makes it much easier to retouch portraits, especially when you don’t have access to a computer.
I decided to compare Lightroom and Picsart because both are popular among photographers and editors, but they have different editing styles. Lightroom is a powerful editing tool used by professionals because of its flexibility and high-quality results. Picsart is a mobile-friendly app that makes editing quick and easy, making it a great choice for those who want a simpler way to create effects.
| Lightroom ✔️ | Picsart ✔️ | |
|---|---|---|
|
Easy to use
|
❌ Harder to learn
|
✔️ Easy to understand
|
|
Control over blur
|
✔️ You change it manually with tools like "Radial Filter", "Brush", or the better "Lens Blur"
|
✔️ Automatic blur in a few steps
|
|
Blur quality
|
✔️ High quality, you can control small details
|
❌ Might not be as sharp
|
|
Other effects
|
✔️ Has extra filters and setting
|
✔️ Has a lot of different filters
|
|
Price
|
✔️ Available by subscription
|
✔️ Free, but with some limitations
|
|
Feature comparison with Blur Pro
|
✔️ More flexible for blurring
|
✔️ Easy to change photos on your phone
|
|
Mobile App
|
✔️Good mobile app but with some limitations
|
✔️ Great mobile app
|
As part of our standard approach to testing, I tried the Lens Blur feature in Lightroom with different types of photos - portraits, cityscapes, and still-life shots. Here’s what I found:
1. Automatic Blur: I started by using the AI-powered blur tool. Lightroom automatically detected the main subject and blurred the background. The result looked natural and accurate. To compare, I also tried blurring the background in Lightroom manually using masks and gradients and I believe the Lens Blur tool was much faster and gave better results without extra effort.
2. Presets: I tested 7 different presets designed for different photography styles. Each one created a unique blur effect that matched the style of the photo. For example, portraits had a soft, natural blur, while street photos had a stronger, more dramatic blur. To make editing even faster, I decided to install Lightroom presets, which let me apply these effects to multiple photos instantly instead of adjusting each one manually.
3. Manual Adjustments: While the automatic blur tool in Lightroom worked well, in some cases, I needed to adjust it manually to get the ideal look. Lightroom made this easy, and I could also save my own presets, which helped speed up my editing later.
Comparing to Old Methods: Before this tool, I had to use masks and gradients to blur backgrounds, which took more time and wasn’t as precise. After testing this new tool, I realized it saves time and is much more accurate. The FixThePhoto specialists also noticed that this new tool makes editing faster and easier.
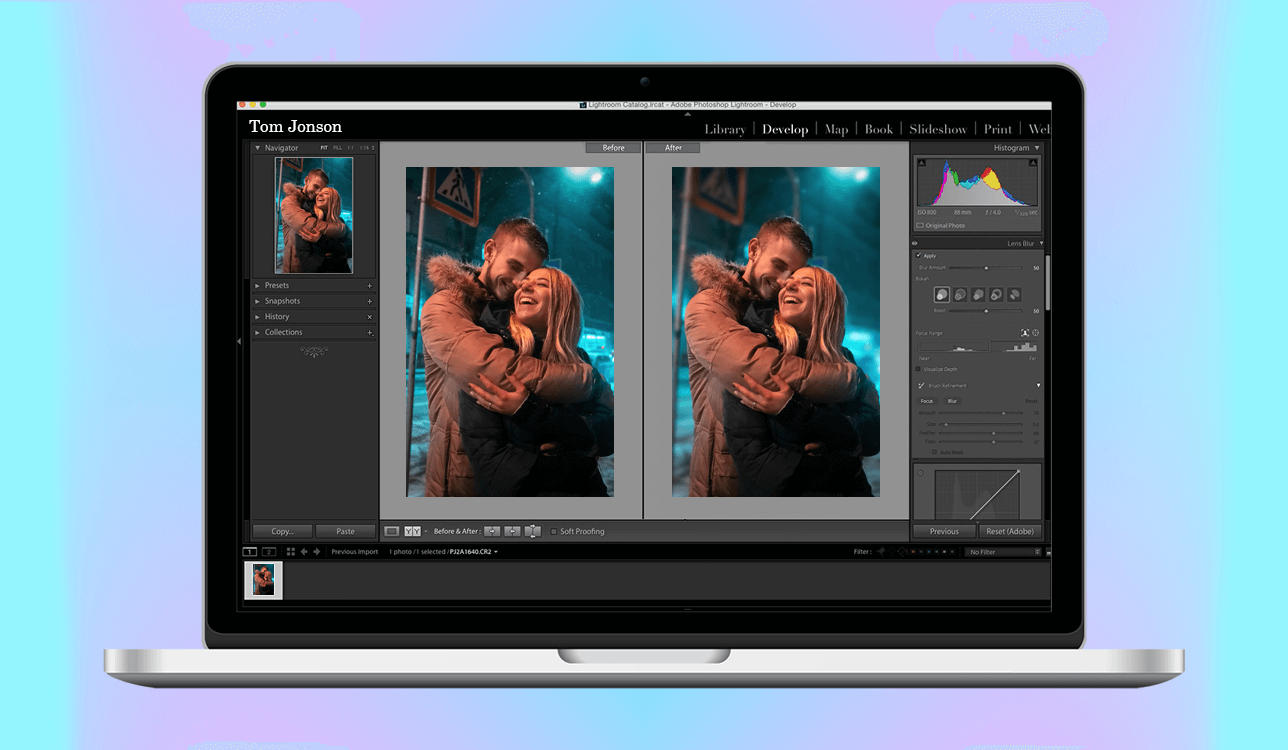
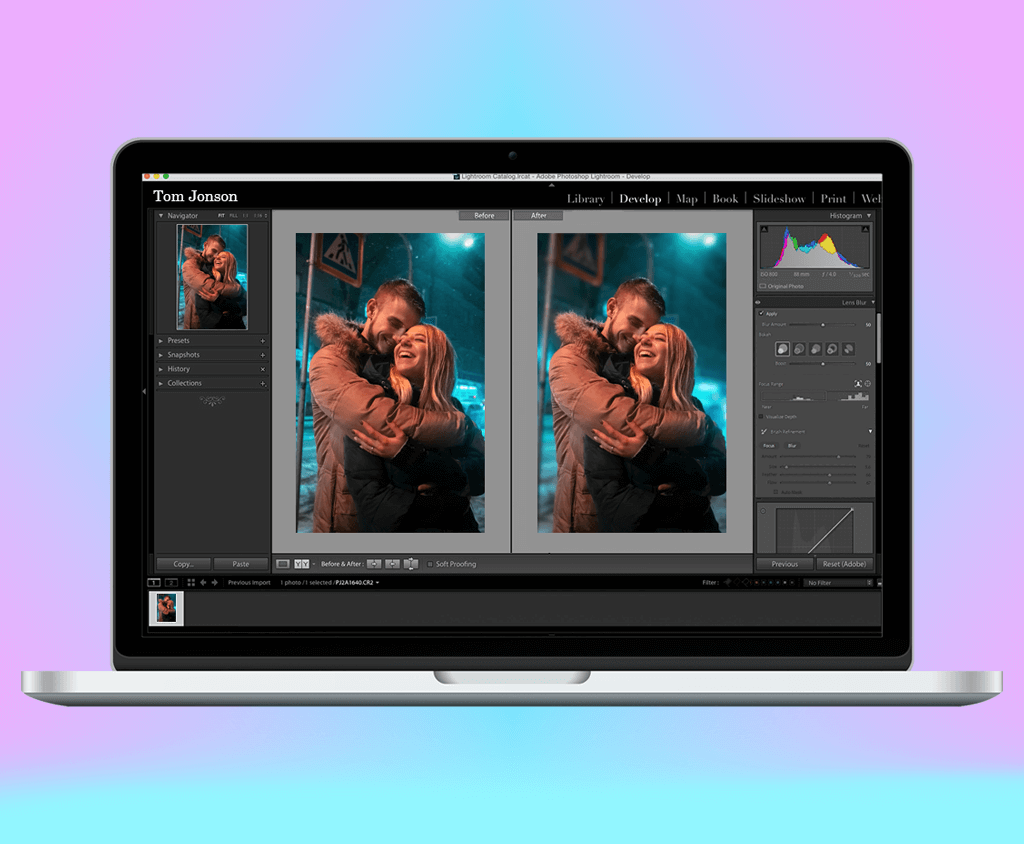
![]() The new AI Lens Blur tool makes blurring the background in Lightroom much easier. Now, you just need to click once, and the app automatically figures out where to apply the blur effect based on the image.
The new AI Lens Blur tool makes blurring the background in Lightroom much easier. Now, you just need to click once, and the app automatically figures out where to apply the blur effect based on the image.