50 Forest Photography Tips for Better Forests Photos (+FREEBIES)
When you purchase through affiliate links on our site, we may earn a commission. Here’s how it works.
50 Forest Photography Tips
The wide variety of flora and fauna opens up incredible possibilities for taking stunning forests photography. Of course, it has its own features and difficulties. Therefore, I have prepared some useful forests photo tips for you to help you capture trees as a professional.
1. Explore Forests' Area

Surely, many of you got into a situation when you start to fuss at the sight of the sunset colors and try to capture at least some part of the rapidly disappearing light. In such a situation, you are doomed to fail.
To avoid this, spend your free time exploring the forests area. Stroll through the woods or along the river, climb higher up the slope. You will definitely find something unusual and beautiful. You can also use the 500 px application for iOS or Android to find the best locations for photography forest.
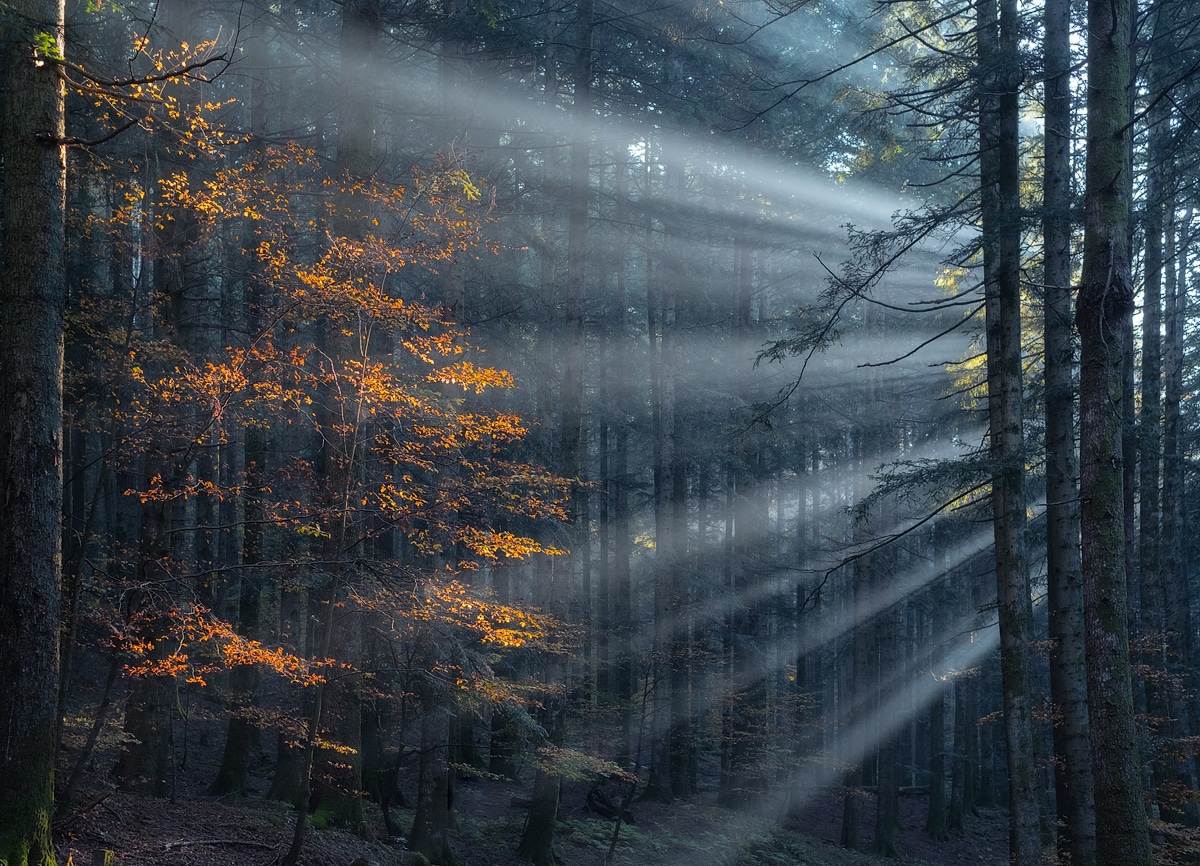
2. Get Up Early

Many landscape photographers state that the perfect time for shooting is the hour before sunset and the hour after sunrise. This phenomenon is called the golden hour, which produces ideal light. Moreover, capturing low raking light streaming through the trees will result in striking pictures with backlight and ideal contrast between dark shadows and brightly lit parts.
To be in time to take eye-catching forest photos with a mist, start shooting early in the morning. Mist doesn’t only look gorgeous, but it also beautifully diffuses light. I recommend using PhotoTime App to calculate when and where will the sunrise and sunset be.
3. Play With Composition
During shooting in the forest, you have a lot of leading lines at your disposal. This term refers to the lines and paths of the composition drawing attention in a natural way. Using the leading lines you can focus on any landscape objects, make the eyes following the sky or watching the road.
For example, when taking forest photos, you can compare how the scene looks through the viewfinder and in reality. A tree trunk can be used as a foreground. The tree point can be located in the middle of the grove or be directed towards the sky.
I advise you to get forest photography ideas from We Heart It App to create a more successful composition in the woods.
4. Play with Forest Silhouettes and Shadows

One of the distinguishing features of forest photography is the interplay of various shadows. Numerous trees cast many shadows throughout the day. Sometimes taking forest photos of this contrasted combination correctly can be quite challenging.
However, this is the beauty of the forest photography genre. Woods are always unique, diverse, and changing. Try to benefit from this feature. Experiment with silhouettes and shadows and you will see how creative and impressive your shots can be.
- Read more landscape photography tips.
5. Mind the Season

Unfortunately, there is no way to manage the weather, so don’t think of forest photography ideas until you arrive at the spot. You won’t be able to stage the desired forest picture if there is something wrong with the weather conditions.
I advise you to adapt to the surroundings and shoot what you see. A forest is a magical place that will guide you in the right direction. If you deal with rainy and cold weather in the fall, convey the sinister atmosphere and capture spider webs or the decay of fungus.
In case you are shooting in cloudy weather in spring, take advantage of tiny flowers appearing on the ground to create a vivid foreground layer.
- I recommend having a waterproof case to protect your camera while taking forest pictures.
6. Wildlife Forest Shooting Requires Silence

When you are going out into the woods to photograph wildlife, remember that you should be silent and patient. Don’t count on seeing plenty of animals the first 30 minutes of walking around the forest.
Be ready to spend some time, pay close attention to every trace, select several places to wait there and don’t produce noise. It is better not to concentrate only on the practical side of photography forest. Try approaching animal photographers on social networks, especially those who shoot in forests you are planning to pay a visit to.
- Use photography filters to make your forest images more vibrant.
7. Use Grid Lines to Balance Forest Photos
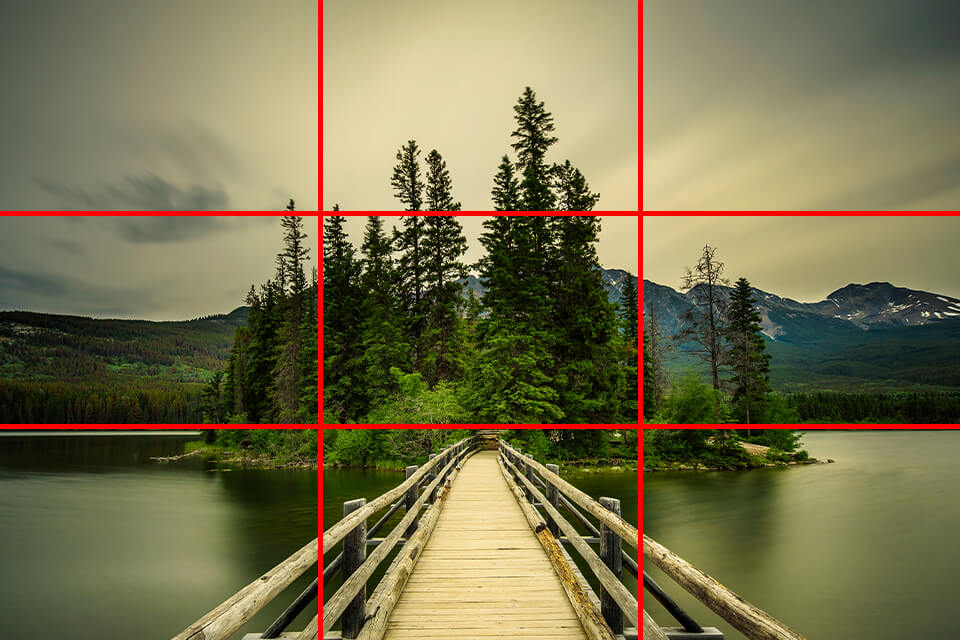
One of the best ways to improve your forest photography is to use camera lines. This imposes a series of lines on the screen of your smartphone or DSLR camera, which are based on the “One-Third Rule”. It is a principle of photographic composition which says that the image should be split into three parts horizontally and vertically.
- Find more information about the rule of thirds in photography.
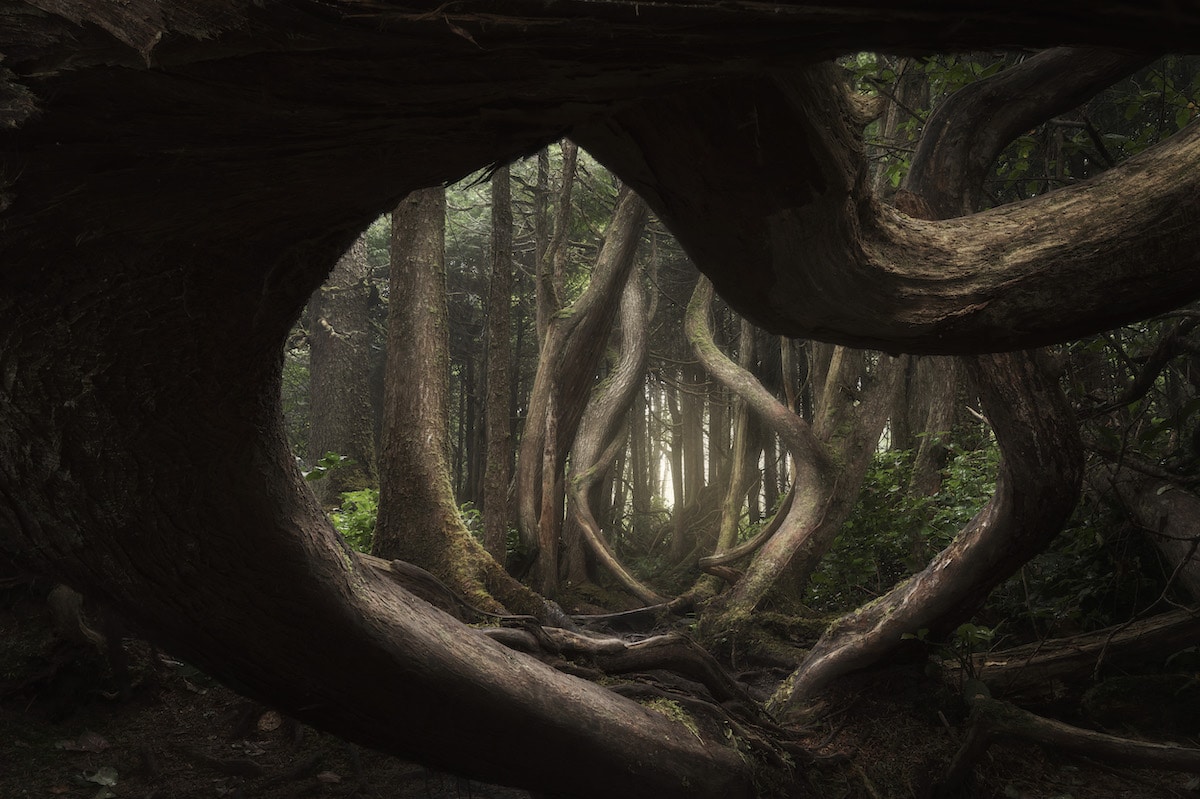
8. Think About Edges and Corners

Thinking of forests photo composition, don’t forget about the sides of the frame. It won’t hurt to look a couple of times through the viewfinder at those parts to check whether they fit into the whole scene and don’t ruin it completely.
Mind that highlights may distract attention from the primary object and the idea you have in mind. If it is your initial intention, that’s fine. Otherwise, I wouldn't recommend involving parts of the sky in the forest picture.
9. Use Vertical Orientation

Many forest photography artists use the horizontal position of the camera or landscape mode and in most cases, they provide beautiful forest shots. However, this does not mean at all that you need to forget about the vertical orientation.
For example, when you photograph tall trees, use them as your main environment, vertical shooting can capture most of the scene. As a result, you add some sense of height and grandeur to your shots.
10. Depth Matters a Lot
To get a deep forest photo, you can set a wide aperture and a long focal length to defocus the background. Take advantage of long shadows or mist. The latter is a great way to add depth to images and convey a mysterious atmosphere.
11. Go Black and White

It often happens that you are trying hard to take a cool forest photo and nothing comes of it. You don’t like the direction of light, colors look weird or you can’t convey the necessary mood. It is a common thing for forests photography.
The combination of colors in different scenes can throw you off while brown and green tones complicate the task of highlighting the subjects. If you choose to shoot in black and white (or use color grading filters at the image post-production stage), you will be able to focus on the movement of light in the shot.
Once you get rid of distracting colors, you can clearly see how light levels influence the scene.
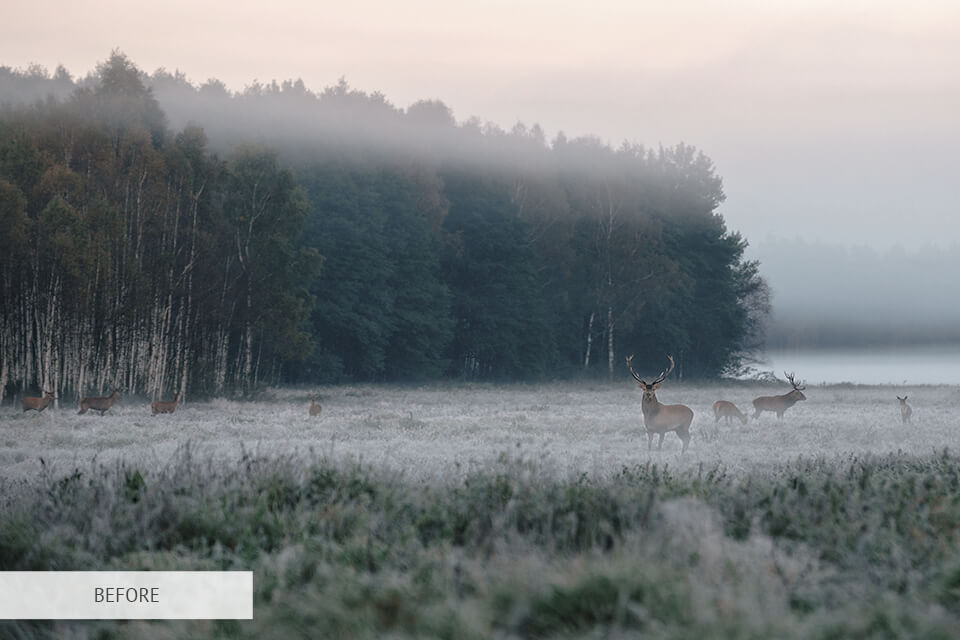
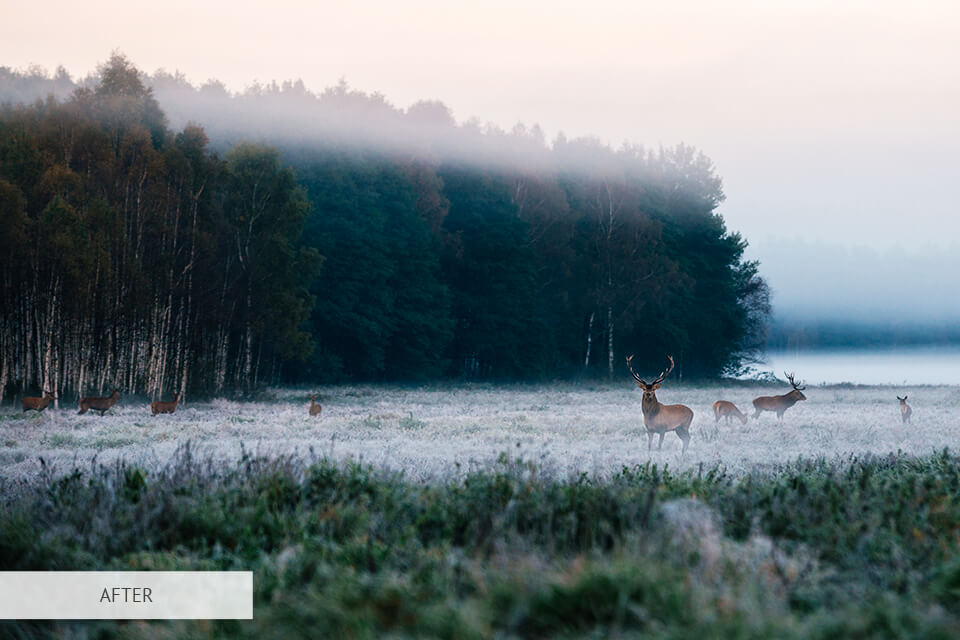
12. Leave Picture Color Correction to Professionals
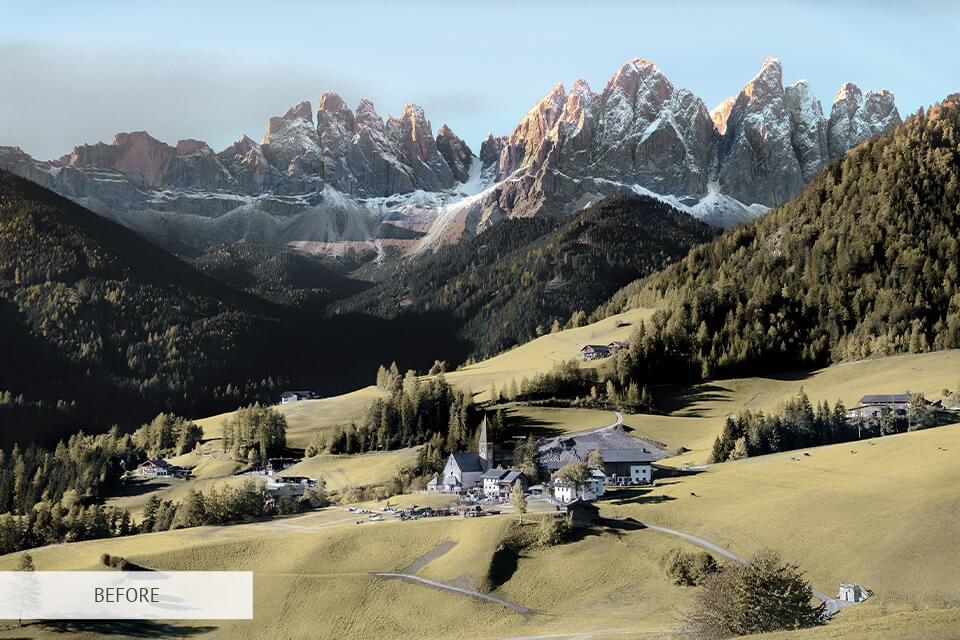
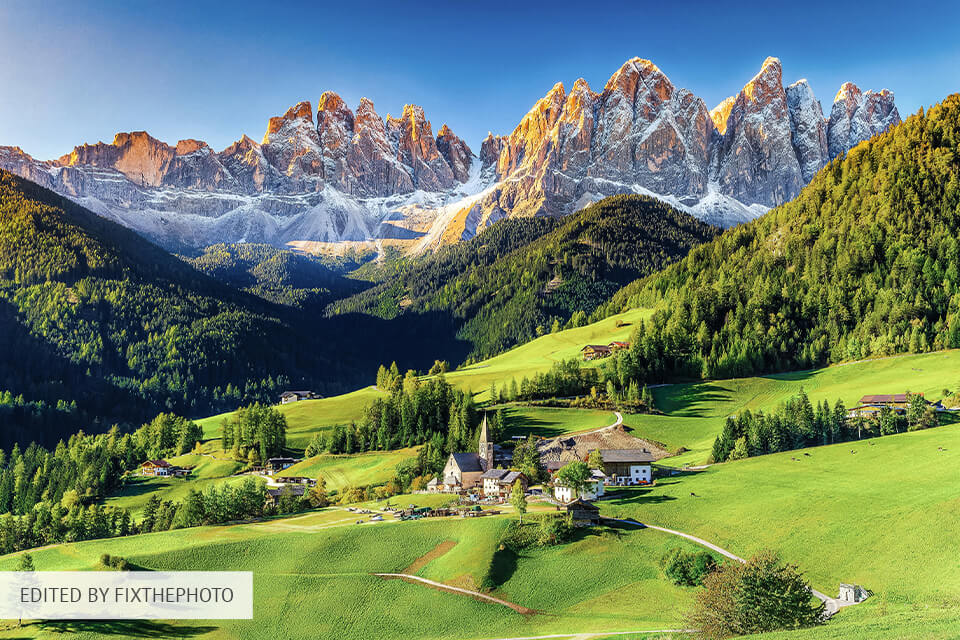
To get truly top-grade forest photography results, I suggest editing shots in Photoshop or Lightroom. Believe me, no one will do it better than professional retouchers. Therefore, delegate the task to FixThePhoto and you are sure to get beautiful forest images.
13. Find a Lightweight Camera

If you’re planning on taking forest photos of truly high-quality, I advise you to choose a great camera with characteristics that match this photography style. I recommend using a mirrorless model suitable for forest photographers who’d like to avoid carrying a big DSLR model.
If you want to print life-sized forest pictures in high quality, you should choose a camera with great image sensor that offers good performance.
- Check out the best mirrorless camera for beginners.
14. Pick the Wide-Angle Lens

All photographers I know have a lens that they like to use the most. However, in this case, I suggest you only considering lenses that are suitable for forest photography.
Any nature photographer should have a 16-35mm lens in his/her gear set because of its extra wide-angle focus range that’s ideal for capturing vast scenery and forests. Besides, shooting on the wide end enables you to focus on the foreground objects to enrich the composition of your images.
15. Don’t Forget to Take Your Macro Lens

You can take a wonderful forest photo if you bring a macro lens to the shooting. Woods and forestlands are full of details, colors and textures which you may not notice in case you only examine an overall scene.
Also, don’t forget about taking a compact reflector since it may be dark at such a small vantage location. An off-flash camera will come in handy as well.
- Check out these amazing macro photography ideas.
16. Shoot with a Telephoto Lens
Most photographers want to capture the entire scene in all its beauty. But if you don’t feel like taking a wide picture of the place and want to bring the background elements forward, you will need a telephoto lens.
It won’t extend the scene too much and the shot will still look complete. With a telephoto lens, all the verticals in your forest photography will stay straight.
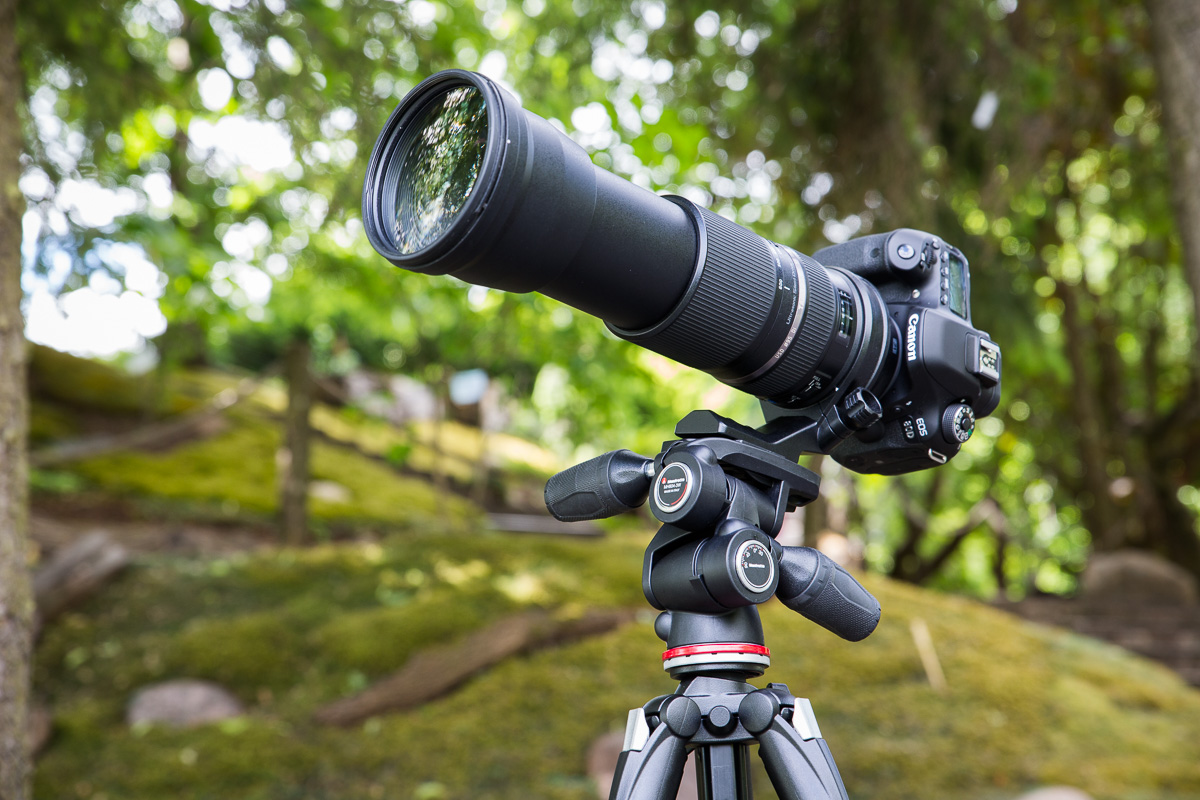
17. Use a Tripod

What is a challenge in photographing forests? “Ensuring that your camera is always stable” would be my answer to this question. That’s why you should bring a tripod with you and I’ve got a model that is worthy of your consideration.
If you have a camera with a telephoto zoom lens, I suggest you purchasing a tripod with a mounting ring to improve the balance of your gear setup. You can attach extra weight to this tripod to ensure better stability.
It’s also possible to tilt the tripod’s legs or have them folded by up to 180-degrees, allowing you to take forest images from various angles.
- Try one of these flexible tripods for taking perfect forest photos.
18. Use Polarizers
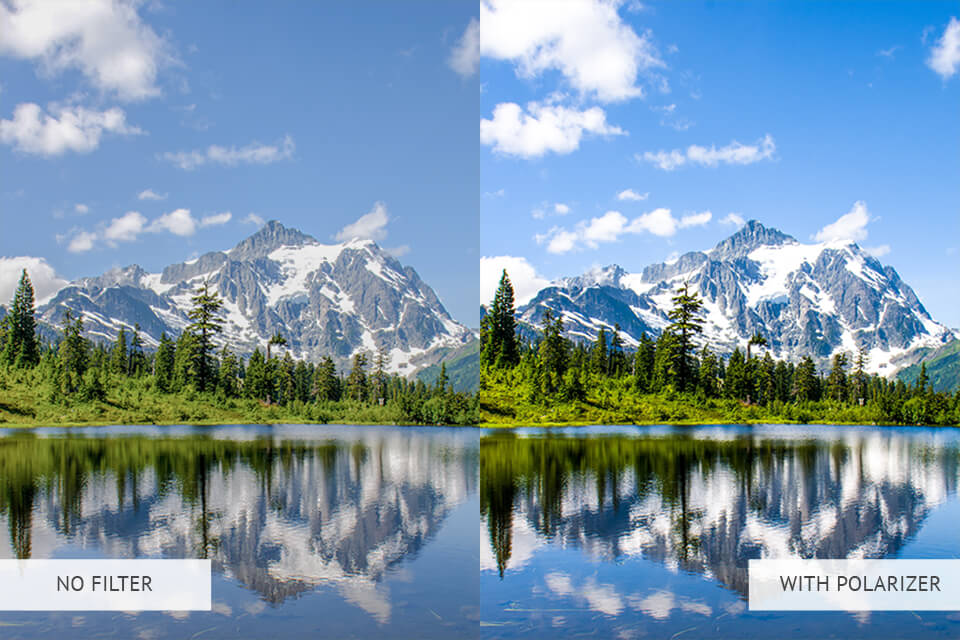
A polarizer can be very useful for adding more texture to clouds instead of having them look like a bland white background. Besides, such a filter isn’t only helpful on sunny days since it can also cut through the haze and help you take tree photography images with crisper, vivid colors.
If you’re having trouble working in foggy or overcast conditions, a polarizer can be a lifesaver.
- Try this polarizer for taking clear forest photography.
19. Discover New Angles Using a Drone
Using a drone to photograph forests and fields is an amazing experience that allows you to explore the scenery from a new perspective. Just make sure you can maneuver the drone in your chosen area safely.
- Try one of these beginner drones for taking aerial forest photography.
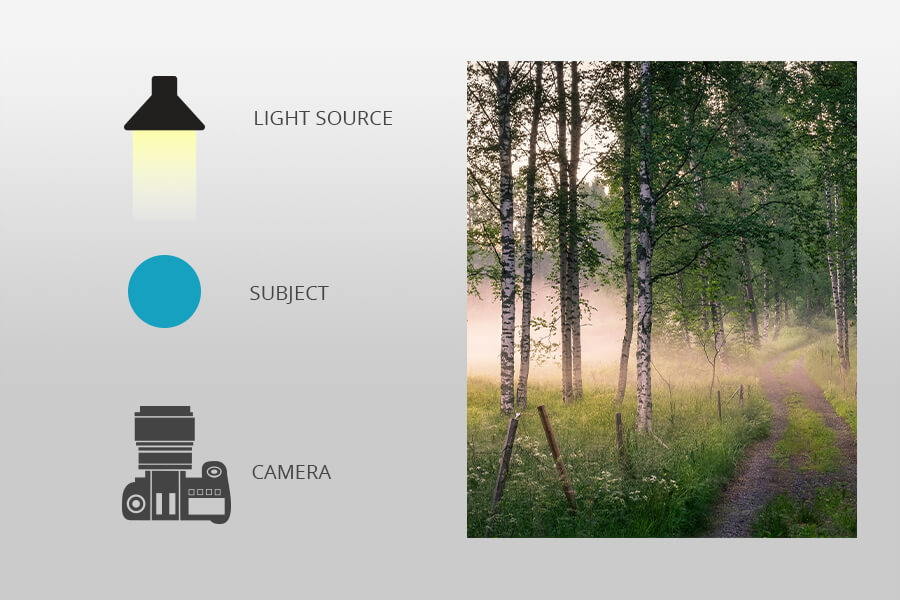
20. Choose Back Lighting
 Taken by Sony A9 + Sony 35mm f/2.8 ZA + Manfrotto Befree Tripod
If you use this type of lighting, the lens of your camera is directed straight at the sun. It is behind the shooting subject. As a result, attractive dramatic silhouettes and fantastic sunny stars appear in photography forest.
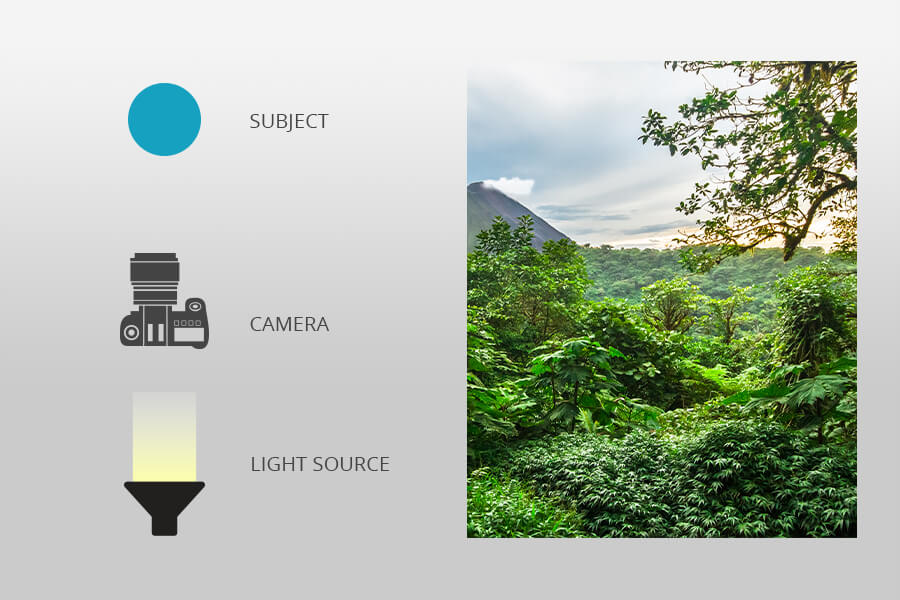
21. Try Front Lighting
 Taken by Nikon D850 + Nikon 50mm F/1.8G + AmazonBasics 60-Inch Tripod
In this case, the sun behind us provides light to the front objects. Since tree photographers are not facing the sun, they get a darker sky. Thus, the contrast of the entire scene is reduced and it is possible to photograph in one exposure.
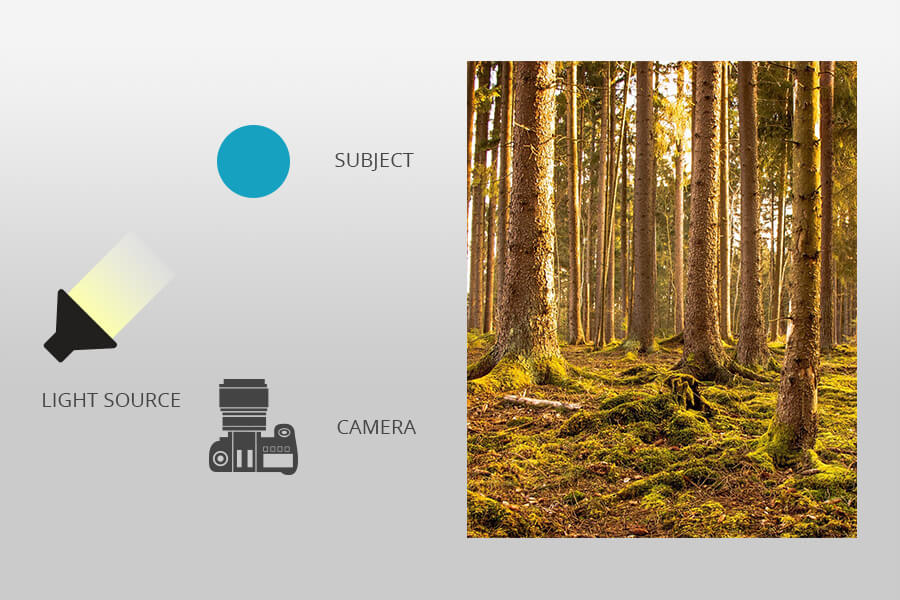
22. Work With Side Lighting
 Taken by Canon EOS R + Canon 85mm f/1.8 + Neewer 63" Tripod
Personally, I prefer this type of lighting. The sun is off to the side of the camera and evenly shines across the scene. Long shadows appear throughout the image. It doesn’t matter what you are photographing; with this kind of forest photography light, you get a better focus on shape and detail.
23. Select the Lowest ISO Possible
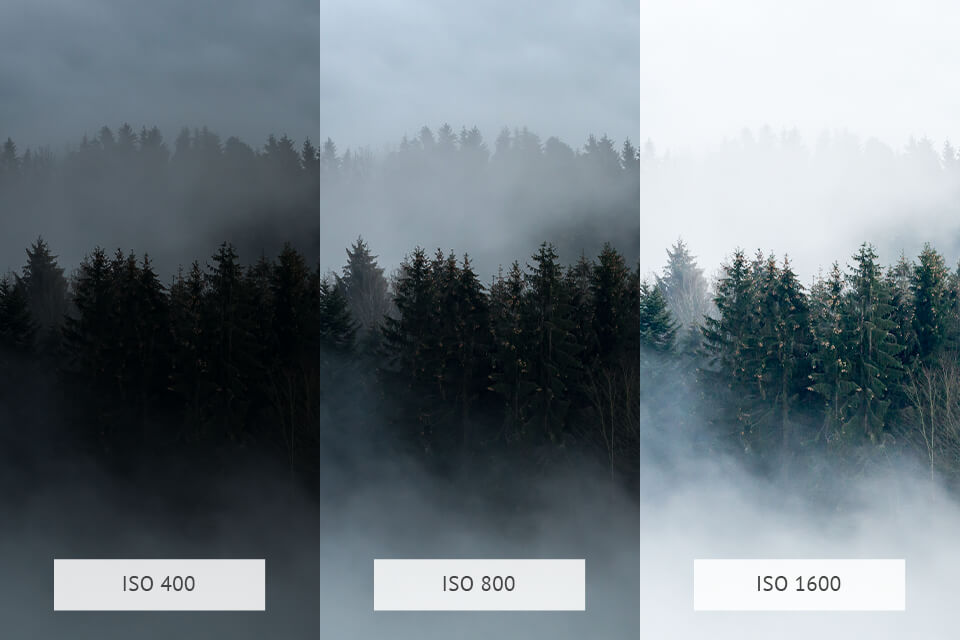
Getting correct forest photography settings, especially the ISO, may be quite challenging. I suggest sticking to the lowest possible value. Keep in mind that ISO indicated the camera’s sensitivity to light.
The sensitivity increases once you set high ISO values. If both shutter speed and ISO are high, it may cause the appearance of excessive digital noise in shots.
To stay away from grain, experienced landscape shooters adjust the ISO from 400 to 800 for still landscape images.
24. Adjust the Aperture
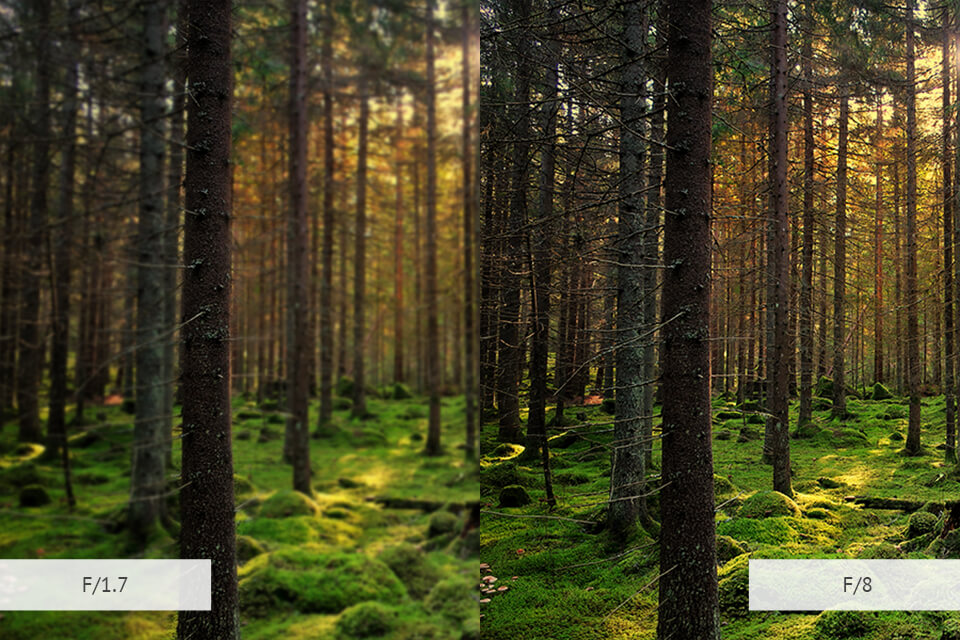
When doing photography in the forest, you need to lower the aperture to values from 5.6 to 11, because our goal is to achieve maximum sharpness and detailization. It is more difficult to keep sharpness across the entire frame with an open aperture.
Besides, most lenses can’t offer maximum sharpness at such values. It means that you shouldn’t take landscape pictures at f/1.7.
25. Use These Shutter Speed Value
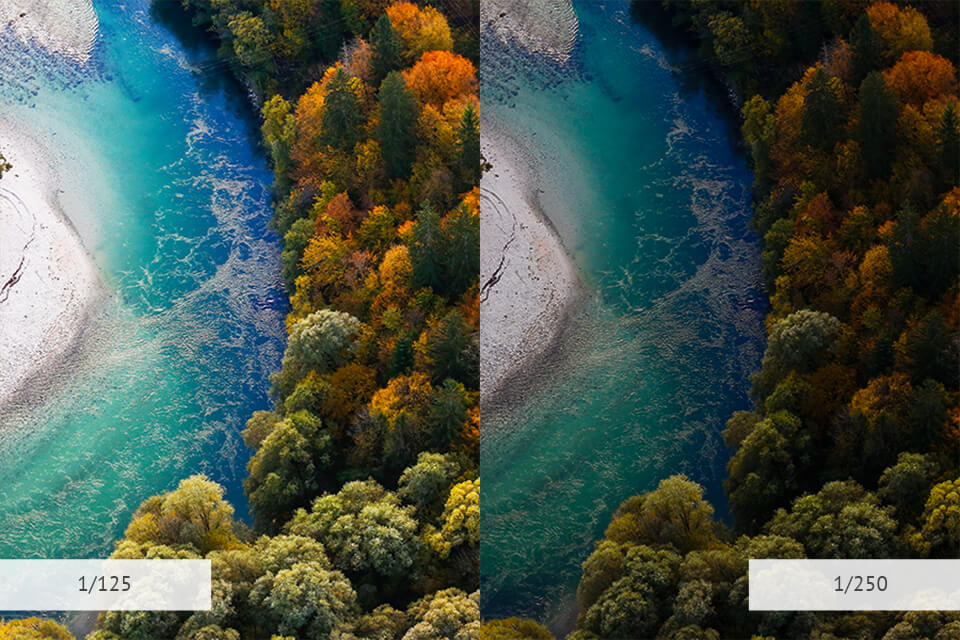
You should set the shutter speed to 1/125 if you want to get a good balance with the aperture and ISO parameters mentioned above.
26. Apply Zooming
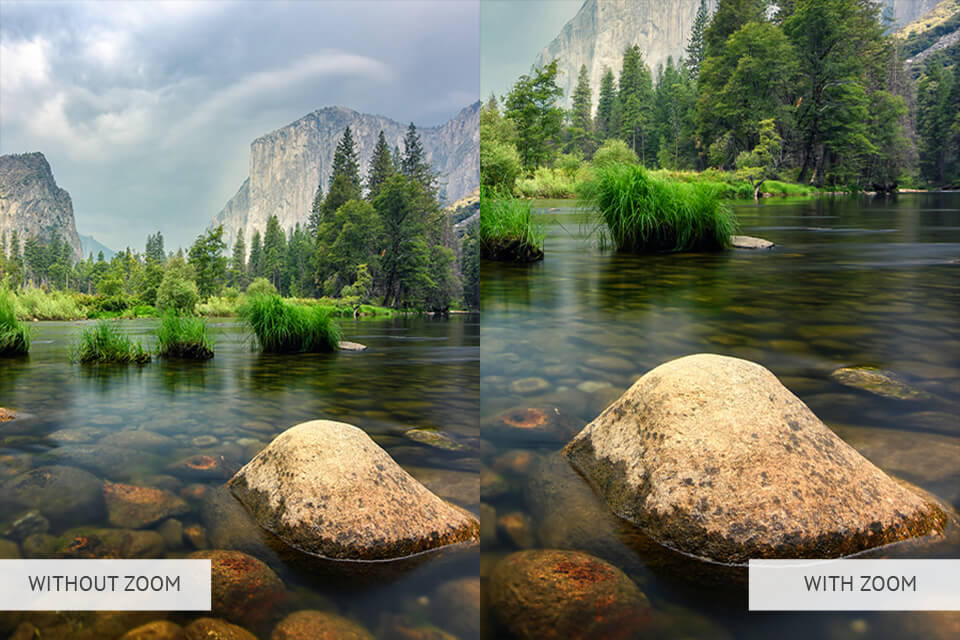
The popularity of drone wood photography has increased greatly in recent years. Despite the advantages of this method, being in the forest and taking pictures on the spot has its own charm.
Capture incredible scenes while keeping the camera at eye level and remember to use zoom from time to time. Of course, photography trees are very attractive and fascinating, but do not miss the opportunity to capture cool flowers, insects, or mushrooms.
27. Select a Focal Point
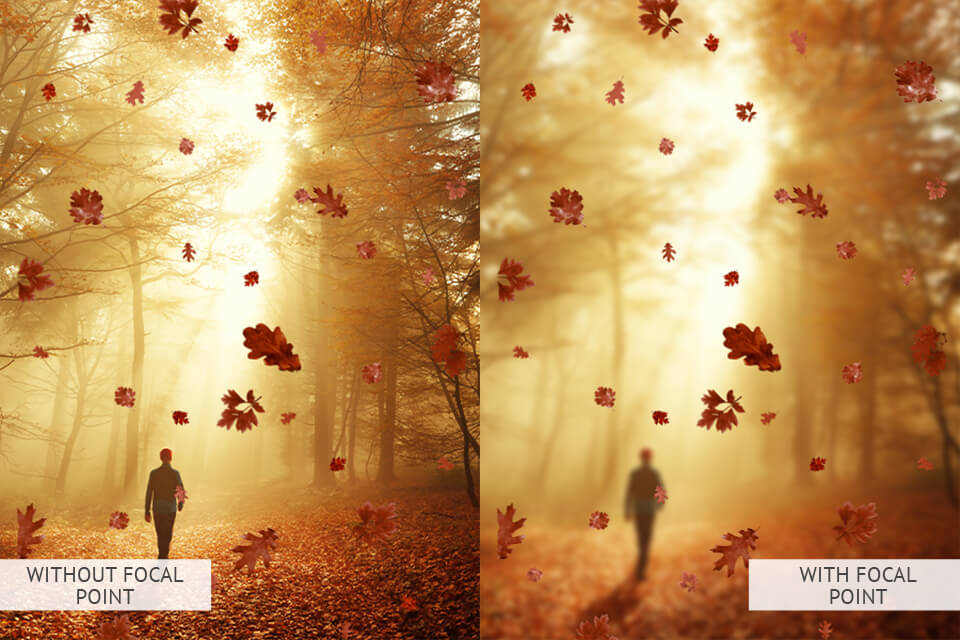
Forest photography can be a bit messy. Many objects falling into the frame can make it harder for you to choose a focusing point. I advise you to opt for the point that will guide the people’s eye.
You can choose any line or place where several lines intersect. For example, this may be the place where the bridge and the small brook converge. In this way, you bring a sense of direction to your photos.
No less effective option is to place the object that stands out from the surrounding nature in the center. These can be ancient trees, unusual shrubs and more. One of the important tasks of the photographer is to create a natural order in the frame.
28. Take Forest Pictures in RAW
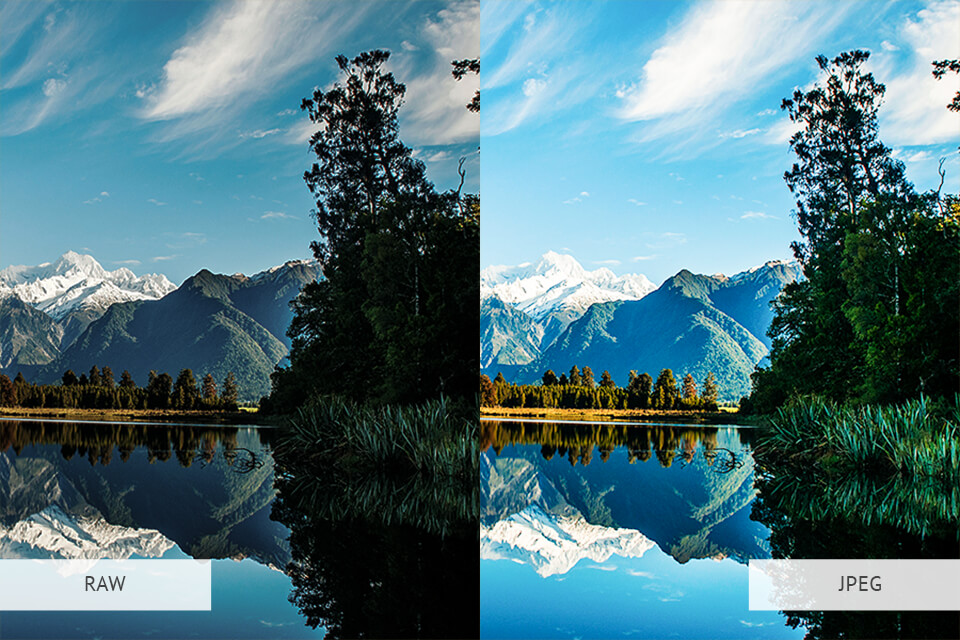
I recommend taking forest photos in this format. Your camera may not always determine the optimal exposure correctly and you will have to customize it. If you were wrong, then correcting RAW format images would not be difficult.
You can also experiment with white balance: take some pictures warmer and some colder. Besides, when processing RAW-files, it is easier to add clarity and sharpness to your forests pictures, make them brighter and more colorful, or, on the contrary, make colors muted.
29. Find Unusual Reflections and Patterns
Take a leisurely stroll through the woods in the early frosty morning! You will surely notice a beautiful pattern on the frozen surface of the stream or frost-covered leaves that attract your eyes. Take a look around and you will find many interesting scenes for forest photography.
30. Test Out Panoramic Shots
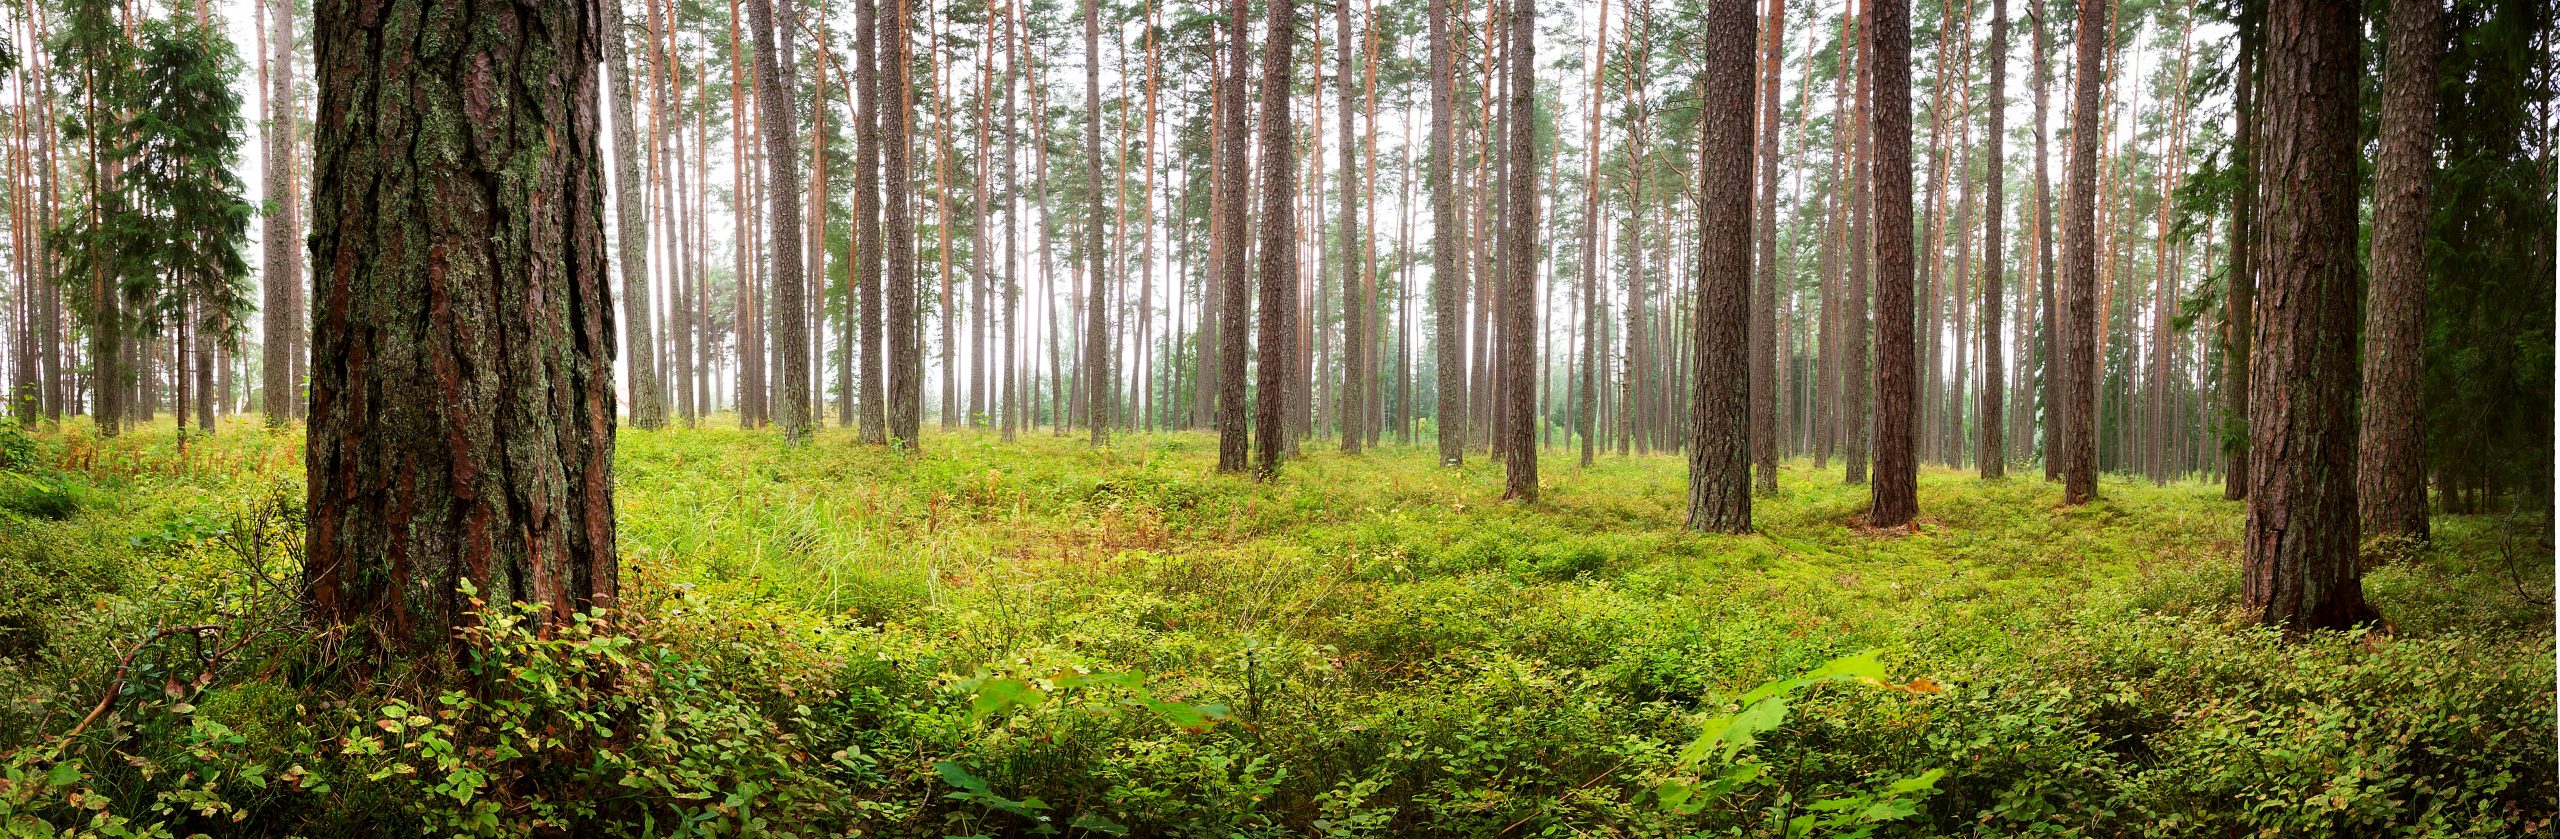
Panoramic shots are one of the best options for tree photography. You get great wide-angle images by taking several pictures and stitching them.
31. Include the Human Factor into the Shooting

It can be both just different human traces (a tent on the lakeside, a pile of firewood, etc.) and a person’s figure. For example, capture a model going away along the forest path in a foggy morning. This can be a great idea for dark forest photography.
32. Morning Forest

Shooting during the golden hour allows you to work in perfect lighting conditions when the forest looks ethereal and magical.
33. Try Out Different Shutter Speeds
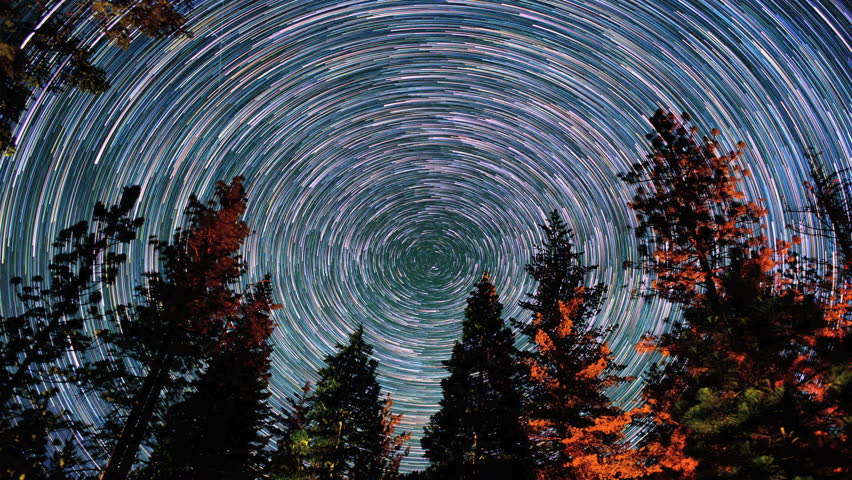
You can try out an interesting technique that involves mounting the camera to your tripod, setting a small shutter speed and gradually rotating the camera upwards.
34. Autumn Waterfall

Taking photos of a waterfall is a great idea regardless of the season, but similarly to other scenery, waterfalls often look best with autumn foliage in the background.
- View more fall photoshoot ideas.
35. Ceremony in the Woods

A wedding shoot can easily be held in the forest. Typical shots include the couple posing in birch or oak groves, glades, and forest edges.
- View more wedding photography ideas.
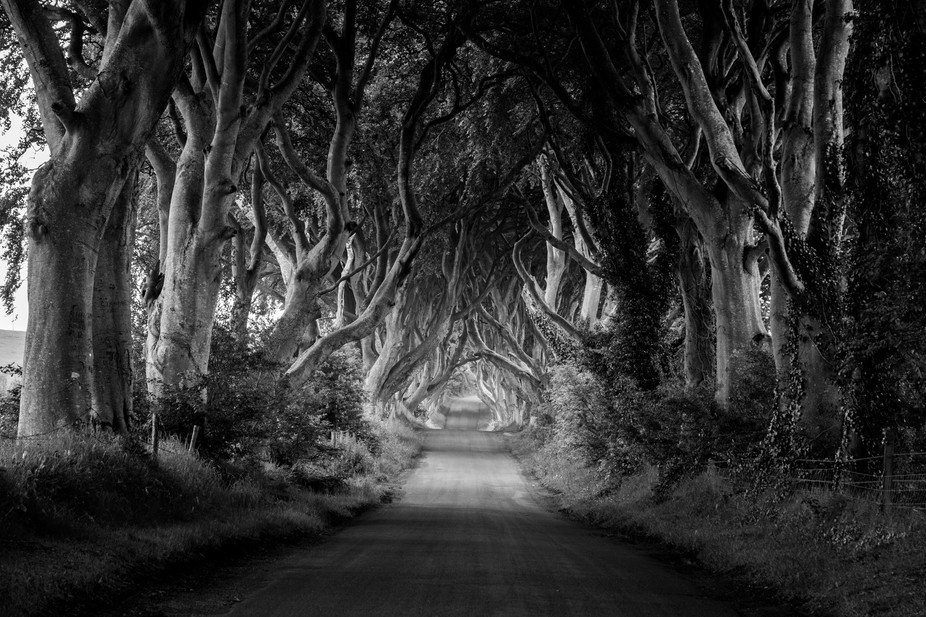
36. Trees Lines

A carefully planted row of beautiful trees can serve for a beautiful forest photo.
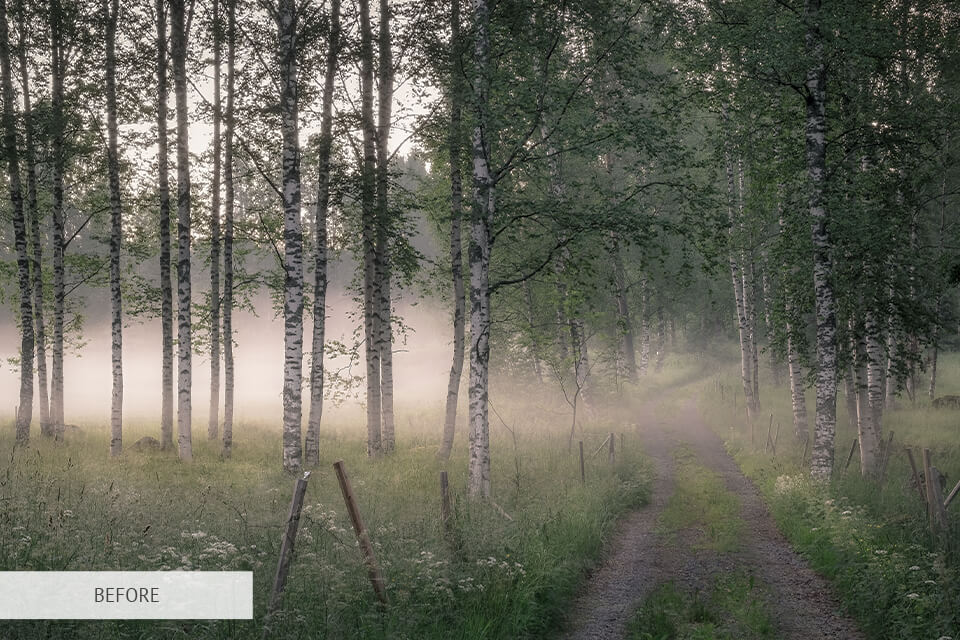
37. Fog or Mist

A forest covered with thick morning fog may allow you to take incredibly atmospheric photographs.
38. House in the Forest

A little house among the trees is one of the most stunning objects for forest photography you can find.
39. Near a Campfire in the Forest

Fire reflections on the faces of the models and in their eyes along with the curly strings of smoke are amazing for conveying a mysterious, moody atmosphere of the forest.
40. Catch Some Sunrays

Such photographs usually turn out to be very vibrant and colorful, making the forest seem more magical.
41. Tree Silhouettes

Taking silhouette photographs of trees is a great idea if you’re a fan of the minimalist approach and desaturated colors.
42. Look for Color Contrast

The lack of color contrast is one of the most frequent problems for forest photographers. The surrounding flora can add the necessary colors. Find red, yellow or even white flowers and they will help improve the contrast in the picture.
43. Shooting in the Rain

I’m a big fan of photographing in the rain and it applies to forest photography as well. Trees serve as a shelter from raindrops and it contributes to the vividness of the overall scene. Wet greenery in combination with a circular polarising filter results in magnificent rain pictures.
- Find out more information on rain photography.
44. Forest Details

Famous forest photographers advise paying attention to smaller parts of the surroundings that can say a lot about the location. With one simple detail, you can tell about the current season.
For instance, a spring bud or a fallen autumn leaf gives you a chance to create a story behind the shot.
45. Fairytale in the Forest

The fairytale atmosphere you get while preparing for the photo shoot takes a model and a photographer into an unusual world, helps find connection with nature and looks absolutely striking in your forest pictures.
46. Forest Nymph

For forest portrait photography, girls can pretend to be a mermaid, fairy or wood nymph in all its glory. Shoot in bright areas with beautiful green trees, lawns with wildflowers. Pictures taken near the bank of a river or other water body will look very impressive.
47. Gothic Photo Session

A fresh idea for dark forest photography, which is actively used by young people, is a Gothic theme. For shooting, choose early spring, when the snow has almost completely gone. But nature hasn’t yet awakened from sleep, the trees are bare.
48. Horse Riding

Here is a great opportunity to realize two great ideas at once. Not every day you are given a chance to ride a horse, but many people are often thinking about it.
49. Sports Activities in the Woods

Nowadays, a healthy lifestyle is the latest trend. That’s why you can go for a run outside and shoot the process for the benefit of the body.
50. Pets

You can get awesome forest photography results with pets, so take a four-legged friend with you for a walk. Beautiful forest and outdoor games with a dog will help take remarkable shots.
Freebies for Editing Forest Photography
If you want to make your forest pictures look truly unforgettable, I recommend you use these free actions and presets. Take a look at these freebies that can help you in your work.
Lr Freebie "Forest Details"
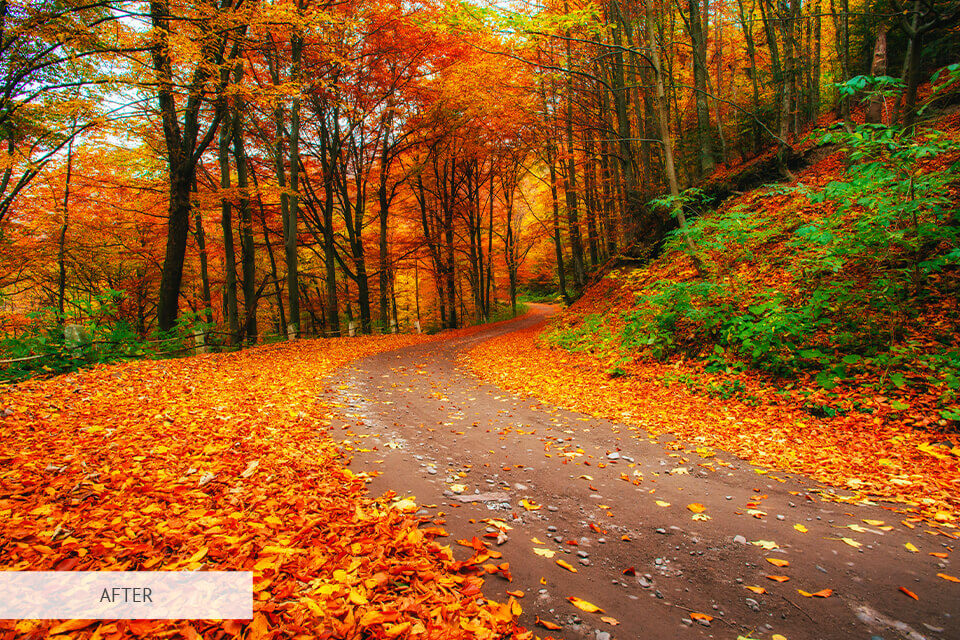
This preset is designed for darkened, underexposed pictures that need to be made lighter, more contrast, and without grey tints on white areas. If you’ll apply this preset to your forest images, they’ll look more natural, warmer, and brighter.
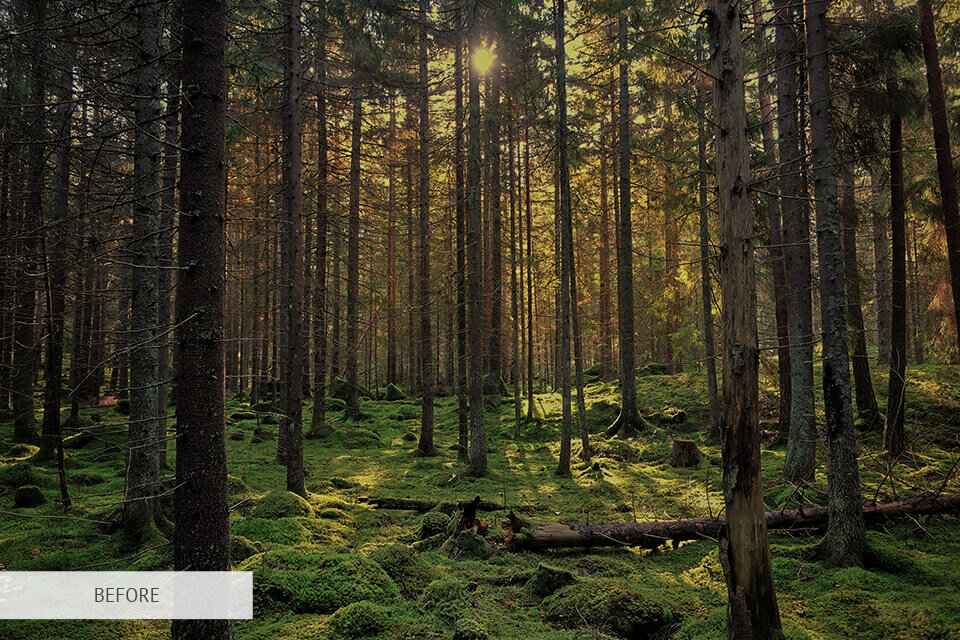
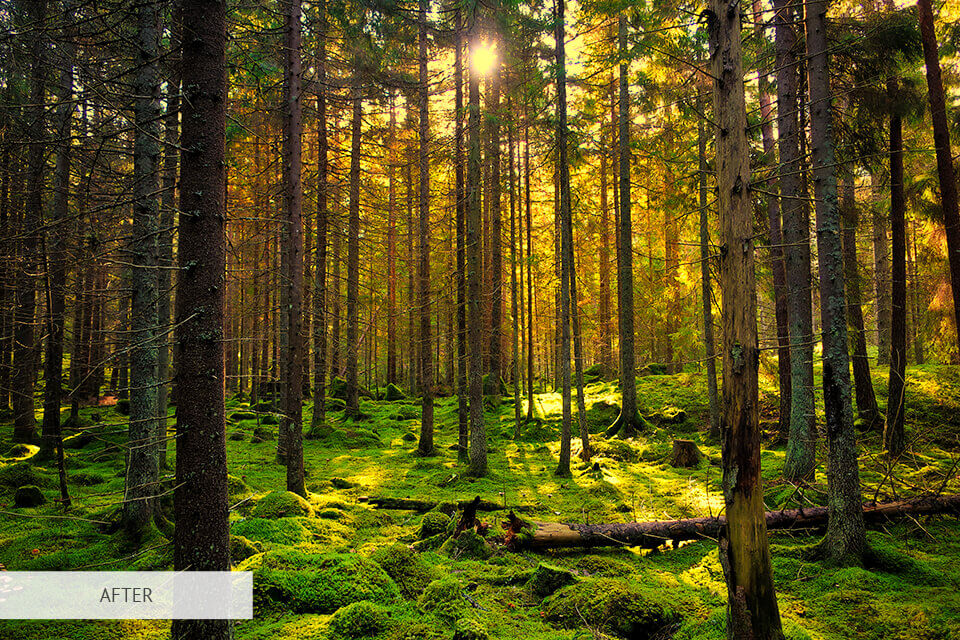
Lr Freebie "HDR Forest"
The primary goal of an HDR preset for forests photography is to make the colors of the images more lively and vibrant. This preset increases the contrast of the photos significantly, making them look breathtaking in just a couple of clicks.
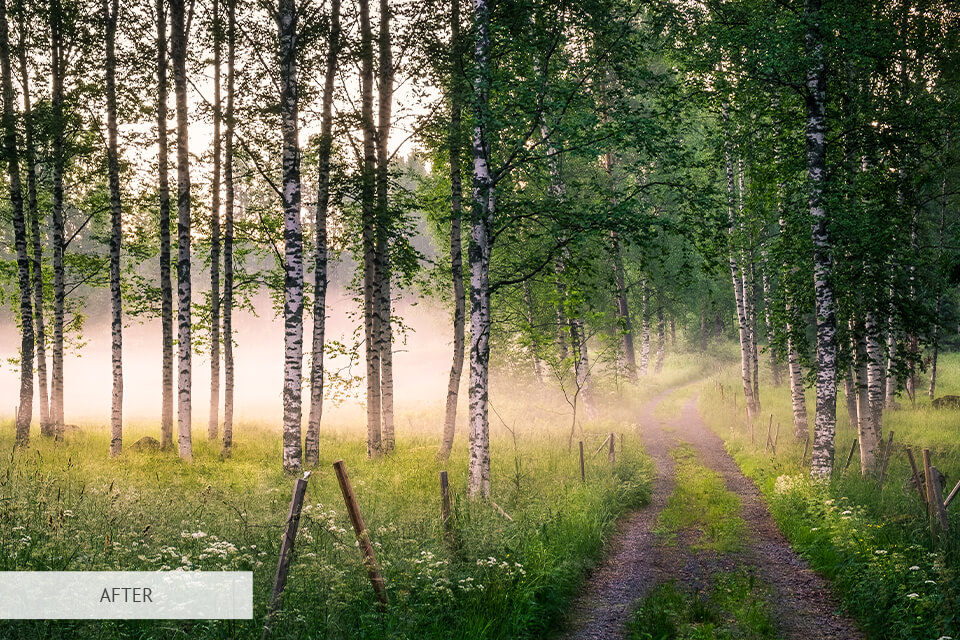
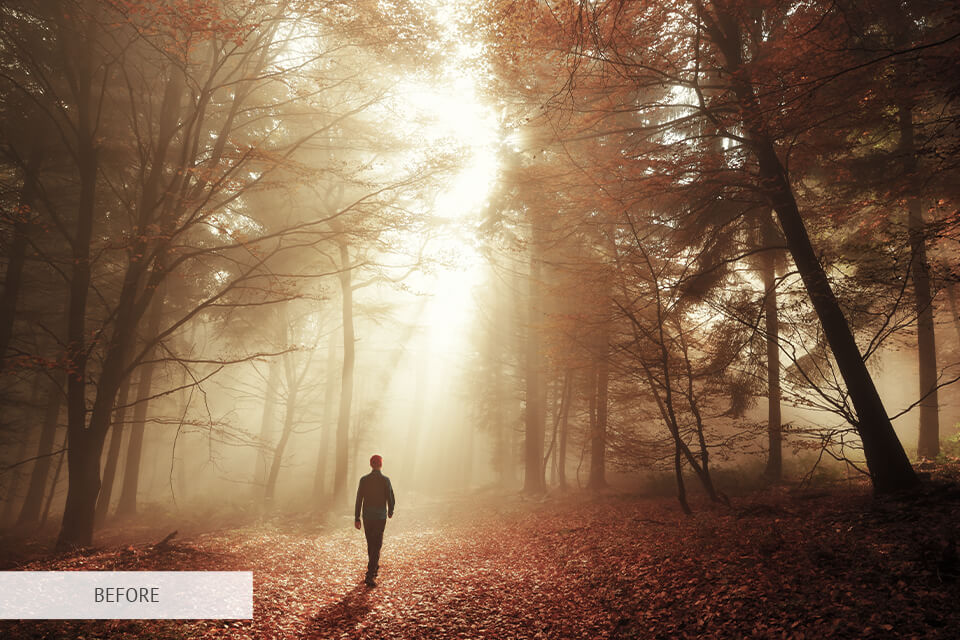
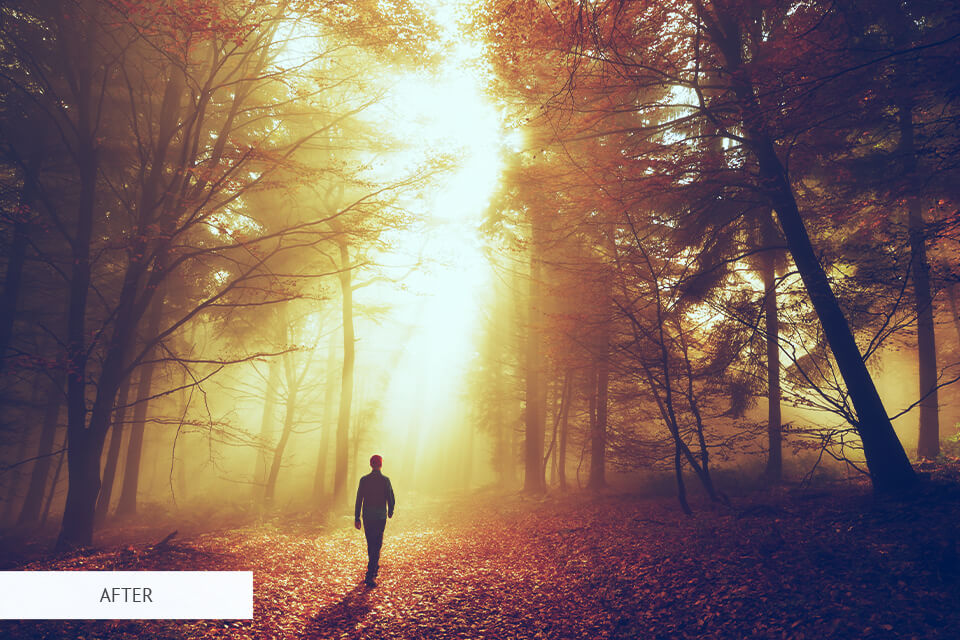
Lr Freebie "Bright Sunrise in the Forest"
This preset allows adding a vignette-like effect to the photograph. It’s great if you want to focus the viewer’s attention on the center of the shot. It’s also useful when you need to apply some finishing touches to an image and highlight the most important details.
Ps Freebie "Colorful Woods"
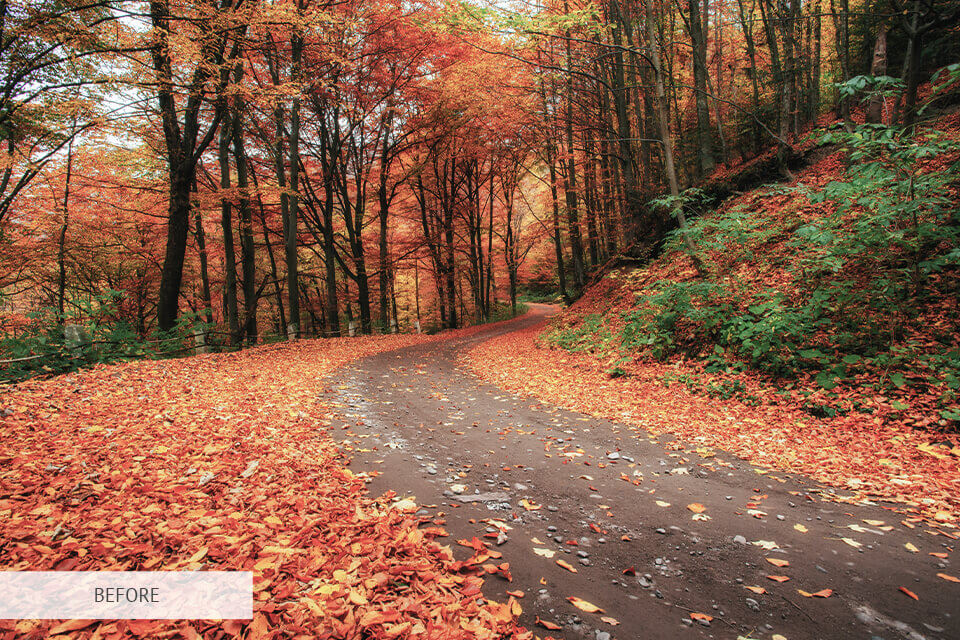
This landscape action mainly works with color effects. It makes the images livelier and emphasizes the beauty of the surrounding nature. The action increases the intensity and depth of colors, enhances saturation and contrast.
Ps Freebie "Cross Processed Forest Colors"
Apply this action to landscape photography trees and mountains. It was developed specifically to satisfy the needs of nature and traveling photographers. The action is also suitable for rainy pictures. With its help, you can create an attention-grabbing shot with striking contrast and colors. The action mostly boosts contrast and saturation. Don’t use it for close-up pictures.


