How To Print Photography
When you purchase through affiliate links on our site, we may earn a commission. Here’s how it works.
File Format
To prepare files for print, you’ll need to bear in mind the specifications of file formatting when you send your photos off to the printers. Think of your printer as a partner who’s there to meet your needs. But in turn, you need to deliver your photos to them with the appropriate print file specifications. Each online printer will have their own instructions on file formats for you to follow, but here are some general tips.

Open formats such as Microsoft Word, Adobe InDesign, Illustrator or Photoshop are typically not accepted by printers, as they can cause a number of problems down the line. For many large format photo printers, it’s advisable to send uncompressed TIFF files or JPEG images.
- Read more about the difference between JPEG and PNG to choose a proper file format for printing.
These are closed (i.e. not open to re-editing), and therefore ready to print. When working with JPEGs on a glossy monitor, make sure you’re using the highest quality setting, otherwise your photos will come out looking blurry or pixelated in print. Sometimes, for storage reasons, you may find that you have to compromise quality and file size. In this case, don’t use a compression level below 8. For most printers, however, the ideal file format is PDF. Like JPEG, PDF is also closed, but PDF is the most versatile file format. That’s because it can contain multiple images in one file and also handles the details of your print job. You can use Adobe Acrobat Distiller to export your photos to PDFs.
Color Management
One of the key differences between a digital photo and a printed photo is the color mode. Any printed image using the offset printing processes will use the CMYK color mode, whereas Adobe RGB monitors and electronic devices use the RGB color mode, which is exclusive to digital.
- View more about what is SRGB and the way it influences on photo color correction.
This means that as your photo passes from its digital form (on screen) to its physical form (in print) the colors will change. As a result, you will need to account for the conversion of color by adjusting the color mode before you print. This is called color management.
- Receive professional photo color correction for an affordable price.
Converting from RGB to CMYK is easy, and necessary. But many people don’t do it and view photos on a matter monitor, are surprised to find that their photos have been printed in a strange coloration as a result. When viewing your photos on your computer, you can set the color mode to CMYK in Photoshop. This will offer you a digital rendering of your printed image in CMYK, giving you a preview of how it will look when it comes to print. You will then have to edit the colors to account for the transition.
You can do this using the Gamut warning tool in Photoshop, which will automatically highlight problematic colors. If a color is not recognizable within the CMYK color space, printers use the expression “out of gamut.” Once your photo looks perfect in the CMYK mode, it is ready to print.

That said, when it comes to printing digital photos, you may want to keep your file in the RGB color mode rather than converting it to CMYK. This is because some digital printers work with 6 colors instead of 4 in order to provide an even more vibrant result. These colors are Cyan, Magenta, Yellow, Black, Light Cyan and Light Magenta. Because the CYMK color spectrum is significantly smaller than the RGB color spectrum, conversion means some color is lost. Thus, if you are using a 6 color printing machine, stay in RGB, and enjoy the broader spectrum of color.
Photo Resolution
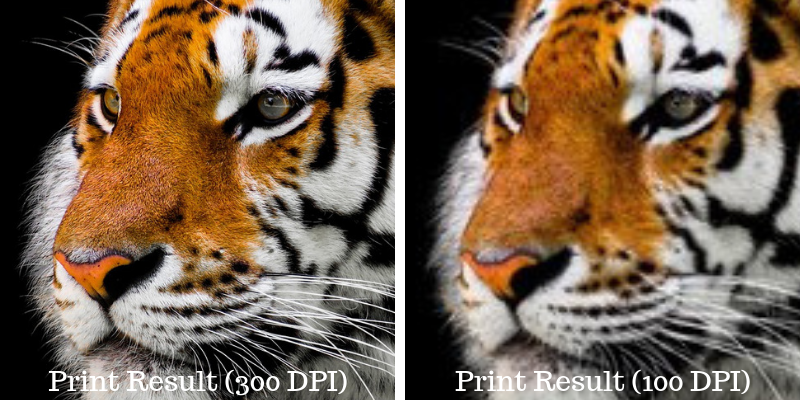
In order for your photos to look as good as possible, your print files need to have a high enough resolution. Using a print file with a low resolution is one of the most common mistakes in online printing. Low resolution will lead to blurry or pixelated images that distort the quality of your photos. When it comes to printing, resolution is super important, as a high-quality image looks beautiful and professional, whereas a low-resolution image looks fuzzy, indistinct and completely unprofessional. A general rule: the higher the resolution, the better the image. You can always scale down in size, but never scale up; at least not without losing quality. Make sure your image has the highest resolution and image dimensions you can get. The only consideration is that you’ll need different resolutions depending on how large the printed image will be, where it will be displayed, and how it will be printed.

For photographs, the golden resolution is 300 dpi (dots per inch). This is the perfect resolution for all printing materials, and since 354DPI is the maximum resolution a printing machine can handle, anything beyond that will only increase your digital file size, with no improvement in quality. The more dots (of ink) that are printed per inch, the higher the resolution of the image – therefore the higher the overall quality in terms of sharpness and detail. Anything lower than 300 dpi can seriously damage the quality of your image. So always aim for 300.
Paper Quality
Now you’ve got the perfect photo, format, color mode, and resolution. So what kind of paper do you want to print your masterpiece on? Should you use a gloss finish or a matte finish? Thick or thin? Coated or uncoated? All of these factors will affect how your printed photos look and feel, and it’s worth pointing out that the most expensive option isn’t always the best one.
Coated vs Uncoated
The difference between coated and uncoated is like the difference between the cover of a book (coated) and a page within (uncoated). Uncoated images will be printed on basic paper, like the type you’d find in your printer at home. It’s simple and unfussy - helpful for certain design purposes, for example to convey an elegant or conservative message.
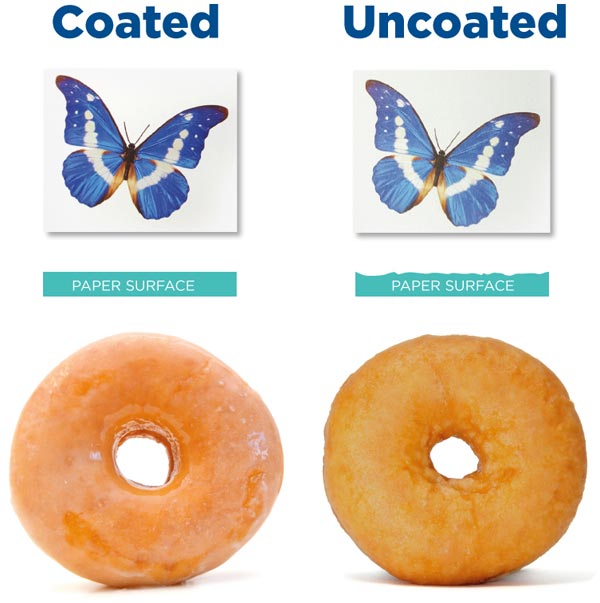
But if you want more vibrant colors, its best to go for a coated finish. Unlike the roughness and papery texture of uncoated paper, coated is smooth and shiny. With coated finishes, the ink stays on top of the paper and only gets lightly absorbed. Thus the ink is held in the layer that’s closest to the eye, meaning it brings out the bolder colors and makes the photo look higher definition. If you want your photos to look as good as possible, use coated paper.
Finish or No Finish?

Adding a coated finish will make your photos look that bit extra special. But choosing the right finish is about knowing the desired effect of your photos too. When it comes to adding varnish, you have two main options; matte or glossy. Matte finish is much smoother and less shiny than glossy paper. It has a soft texture that’s very pleasing to touch.
Matte is best when you don’t have too many vibrant colors, or the feel of your photo is more neutral and discreet. It’s understated and subtle. Glossy, by contrast, is more flashy. Glossy finishes work best with photos that are full of vibrant colors, and lots of high quality details that will catch the eyes of the viewer. Glossy is the texture of postcards. It’s best for razzle dazzle. Neither finish is better than the other, it really depends on your desired effect. Matte equals classy; glossy equals vibrant.
Bleed
Bleed is the part of the image that goes beyond the edge of where the paper will be trimmed. Any part of your photo that lies within the bleed zone will thus be cut off and lost when it comes to print. Bleed is very important - it ensures that all the elements of your image extend right to the edge of the paper.

A print file will consist of the final size (showing the printed photo after trimming) and the bleed area (the section that will be lost). This means extending the original document size by a certain amount to compensate for the cutting process. It’s vital that you set up a bleed section in your print file (InDesign has its own setting for that), and include the bleed when you export or save your print data. Different products might require different bleeds, but in most cases, 0.125 inches will be sufficient.
Options of Printing Your Photographs
When it comes to print, you have a variety of options. You can print at home, or online, using digital or offset printing processes. To help you navigate these alternatives, here’s a brief run down of the pros and cons of digital versus offset.
1. Offset Printing
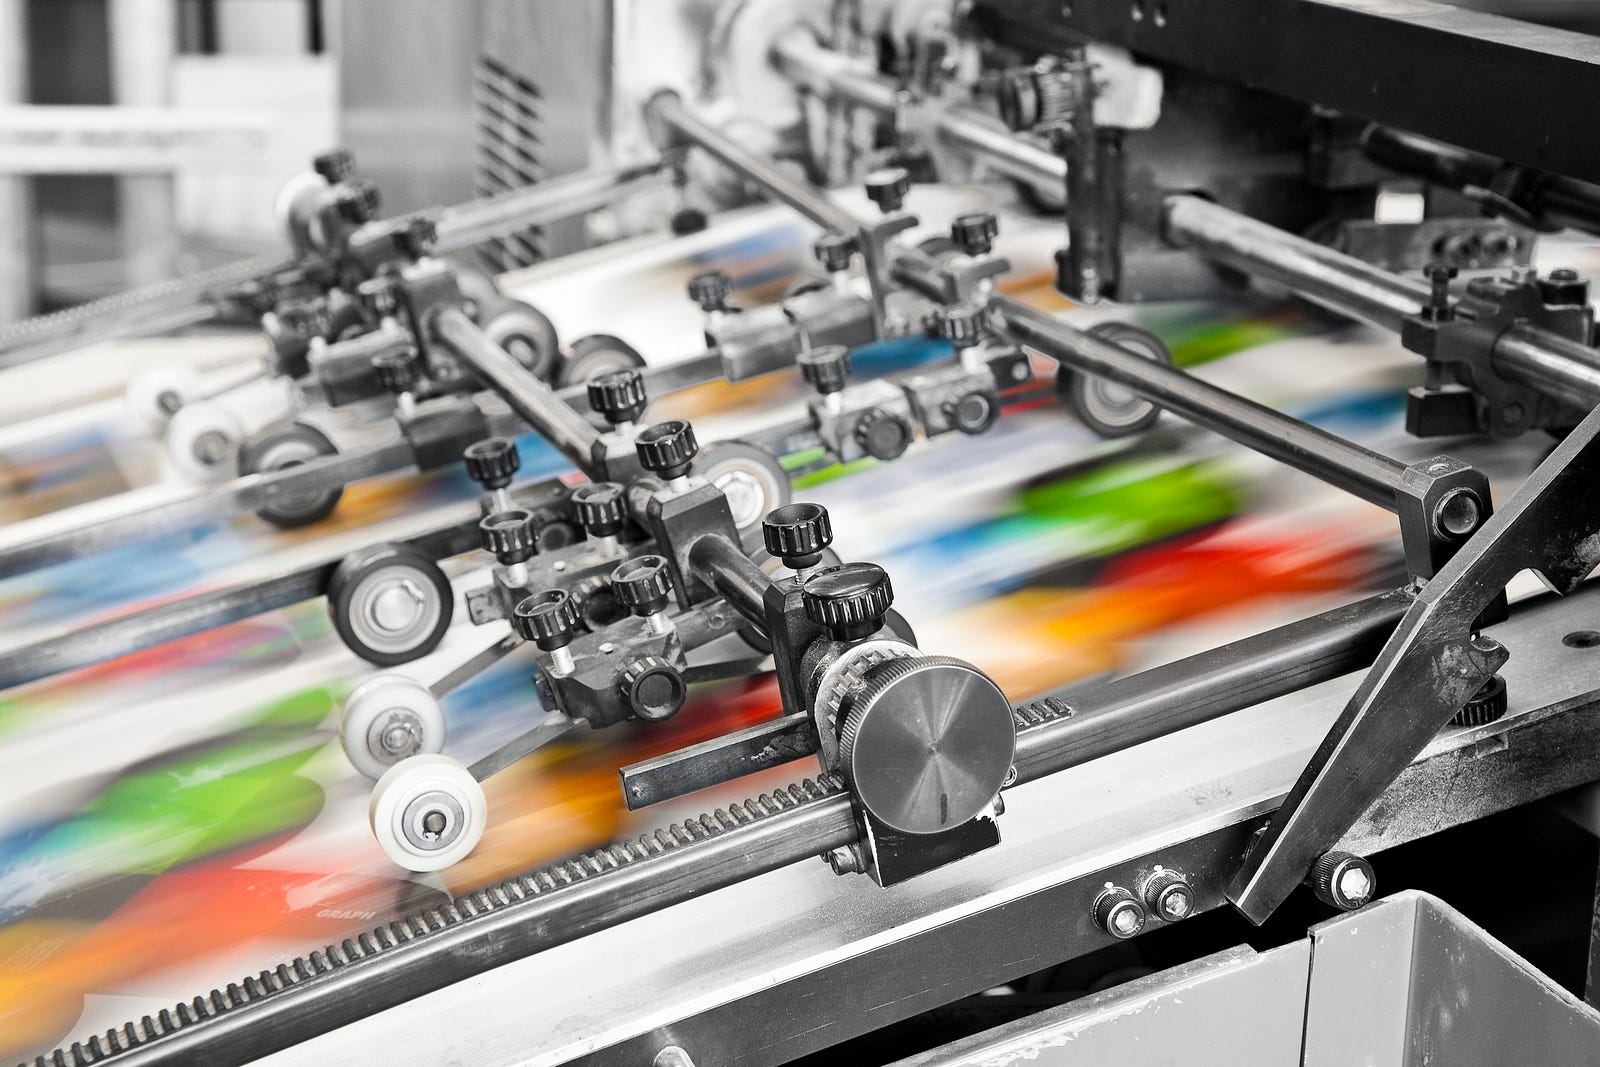
Offset printing is really designed for mass production. The more versions of a single image or design you print, the cheaper it becomes. This is because the ink is first transferred (“offset”) from a printing plate onto rubber, then applied to the printing surface, which requires the image to be burned on a plate. Although costly at first, repeat prints will be simple and effective.
There are many pros to offset printing. First of all, it offers a very high image quality. Despite taking some time to set up an offset printing machine, this process ensures a continuous level of quality. You can expect the first and last sheet of an entire print run to look identical. Moreover, you can use an offset printer to do a follow-up print and expect identical results. If you are printing in bulk, and want consistent quality, offset is the way to go. It enables you to print true colors (meaning you can select a Pantone or HKS color and know exactly what the result will look like).

Whilst offset is ideal for printing thousands of copies of one image, it’s not at all suited for small print runs, or individual prints. If you’re a business that prints thousands of copies (minimum), it’s the method for you. If you’re simply looking to print your own photos, it should be ruled out immediately.
2. Digital Printing

Digital printing is perfect for on-demand printing, and small-scale, personal projects. The process involves sending your print file as a digital image directly from a computer to an all-in-one photo printer. This can be an inkjet or laser printer, or even a thermal printer with special paper or printing wax. Digital printing does not require the high costs or complex setup process of offset printing, as there are no plates involved. As such, digital printing offers a much shorter turnaround. Depending on the size of your print job, with digital printing you can expect a finished product to be delivered on the same day. This approach is especially useful when only a small number of photographs are being printed. Digital printing allows for low volume printing at a much cheaper rate.
If you’re looking for industrial scale printing, digital is not the way to go, as it will rack up huge costs. However, if you’re printing a small number of images, and want to print a variety of photos, it’s the best option for you. Printing holiday photos, professional portfolios, or a selection of different images? Digital is the method you need. Currently, there are many companies that offer high-quality printing services. For instance, you can choose Wallpics, send them your cherished photos, and receive beautiful prints right to your doorstep for free.
Conclusion
As you know, producing the perfect photo doesn’t end at the shoot, or even the edit. Quality is ultimately won or lost when it comes to print. But you have the knowledge you need to help you print effectively.
Remember to consult with your printer, and ensure your images are stored in the right file format - when in doubt, PDF is the highest quality and most versatile option. If printing offset, ensure that your images have been appropriately converted from RGB to CMYK color mode, so that your colors come out as vivid and well-defined as they look on your computer monitor. If using a 6 color digital printer, stay in RGB. If you’re particularly concerned with bright colors, use a glossy coated finish to bring your printed photos to life. If you want your photos to look neutral and discreet, choose a matte coating. Aim for a resolution of 300 dpi, and always print on thick, high quality, high pt paper. Remember to include a bleed area in your print file of at least 0.125 inches, otherwise important parts of your image may be lost when it comes to print. If you’re printing a selection of images for yourself, in low quantities and high quality, use a digital printer. If you’re printing one image in bulk, on a corporate scale, use offset.
Printing can seem complex, but it’s easier than you think. Just follow the steps we’ve outlined here, or consult with your printer, and you’ll be sure to end up with the most beautiful photos you can imagine. To bring out the best in your photos, all you need is a good printer.
Author bio:
“Chris Collins is Head of Marketing at ChilliPrinting, an online printing company that provides customers in the USA with cost-effective, high-quality offset printing products. He specializes in marketing strategy across online and offline campaigns, as well as CRM and customer support.


