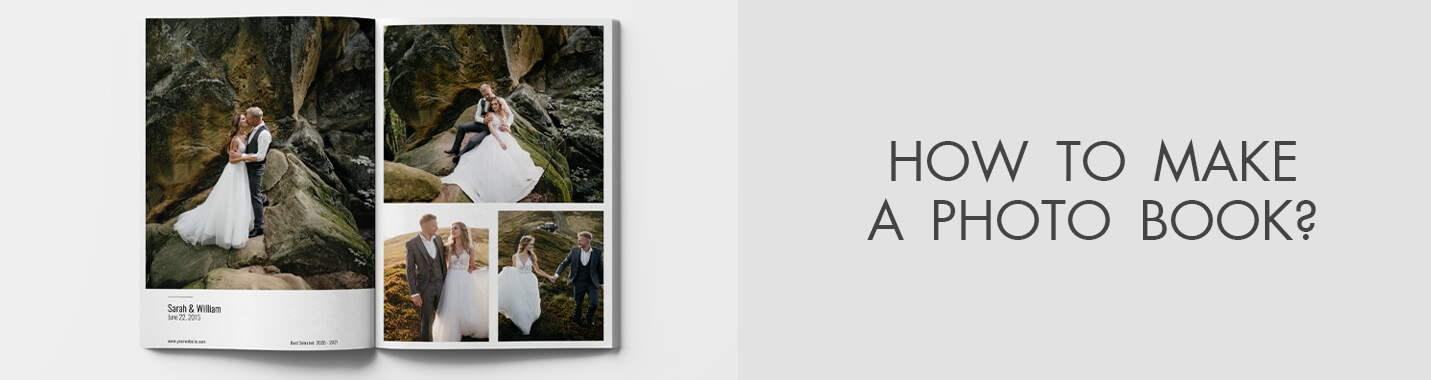
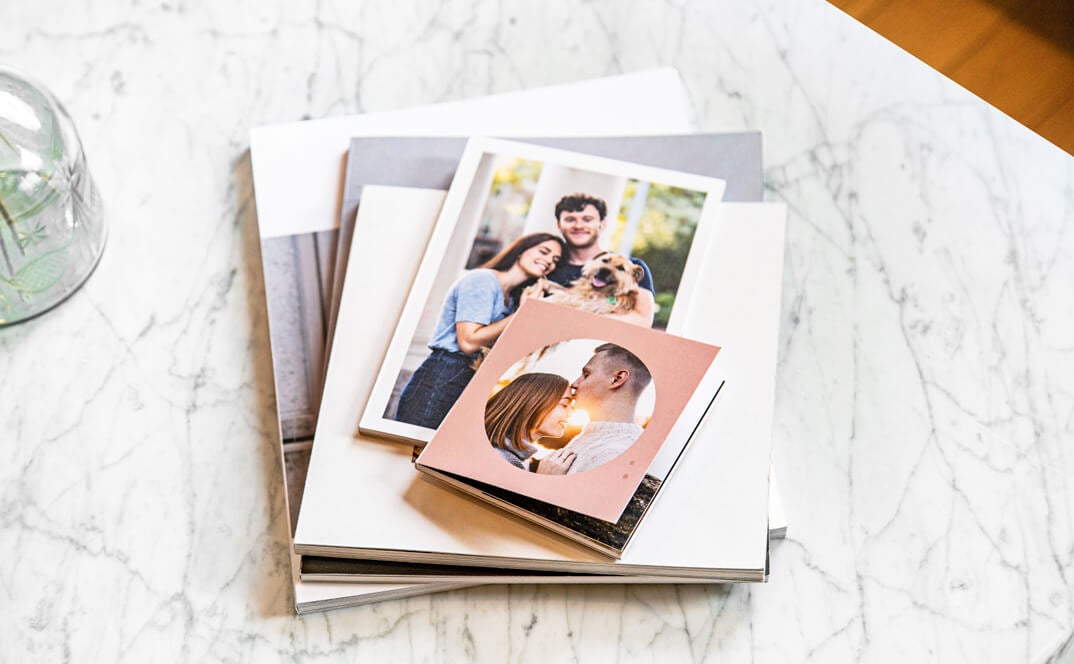
How to Make a Photo Book?
When you purchase through affiliate links on our site, we may earn a commission. Here’s how it works.
Since the inception of on demand printing, it’s easy to create and print your own photo books at a low price. With so many programs to get started with (InDesign, Lightroom, Apple Pages, Smart Albums) and so many printing options, it’s hard to know where to start. In this guide, we’re going to go over steps you want to take before making your photo book, and then information about some of the programs you can create a photo book with.

Preparation Before Making a Photobook
Before using photo album software, you should compile your photos. If you have been organizing your photos up until now, this step should be easy. Here are a few tips to help you get started if you haven’t.
1. Photo Management Software
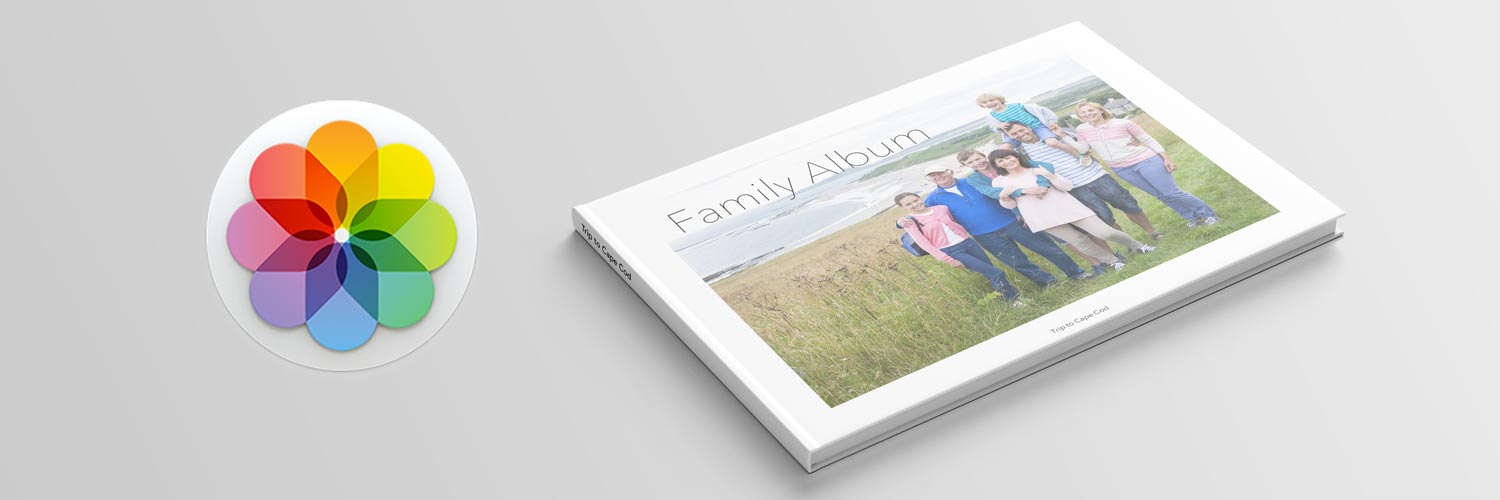
Photo management software can make organizing and looking through your photos quick and easy. It’s a lot easier than looking at small thumbnails or file names to figure out what the images are. If you happen to use a Mac computer, you have access to Apple Photos, which is an extremely competent piece of software for managing your photos. Apple Photos automatically organizes your photos by date, and allows for easy pre-viewing of your images. Create a photo book and collect the photos you want to include for your photo book project. It also allows for simple and easy photo edits directly in the program without using a third party tool like Photoshop for Chromebook or other programs.
- Receive professional about photo editing services for affordable prices.
Another option is Adobe Bridge. It’s free and available for both Windows PC and Mac computers. Bridge offers photo management, as well as photo editing with it’s Camera Raw editor. If you have Adobe Lightroom or Photoshop, it will also allow you to edit your photos in those programs, and either save a new version or replace the original photo with your edited photo. Adobe Lightroom is another good tool to use, but it does cost money to use ($9.99 a month ), and has a more professional bend. One extra advantage for Adobe Lightroom is that it offers a photo book creation option directly in the software, which we’ll touch on a bit more later.

Last, Windows now has a beefier photo management app for Windows 10, called Microsoft Photos. It allows for much of the same features available in the other tools mentioned, like minor photo editing capabilities, organization, and the ability to preview your photos.
2. Do you Have Photos to Scan?
Do you have some old photos that you want to include, but they were taken with a *gasp* film camera? It’s not hard to scan in your photos these days. Scanners are incredibly cheap (~$60, can go up drastically for more professional grade scanners), and if necessary the one you have on your all-in-one photo printer for photographers can get the job done in a pinch. All in one printers with scanners generally are a lower quality: color fidelity is lower, can’t scan at higher DPI’s (Dots Per Inch), and if the image isn’t completely flat on the scanner bed, image distortion and fuzziness can occur (I.E. your photo is stored inside of a book).
Another option is to take digital photos of your printed photos. You just need your digital camera or smartphone, good lighting, and a tripod. If you don’t have a good light setup for photography, taking photos outside or in a room with lots of natural light works wonderfully. Do not leave these old photos outside or in sunlight for any longer than needed, as these photos could easily be damaged by sunlight.
3. What is This Photo Book About?
You’ve got your photos, you’ve got them organized, it’s time to start thinking about the content of your book. A lot of the photo books we print have a central theme that connect them together, like travel photography, or printing a book for each year of photographs you have.
Make a Photography Book
We now have to make some concrete decisions on how to proceed: what size is this book? What orientation is it? What making a photobook tool will you use? This part can really cause analysis paralysis for some creators. Here’s a few basic concepts to keep in mind while creating a photo book.
Photo Book Size, Orientation, and Binding
What size is this photo book going to be? This determines a lot of issues right off the bat, like what program you should use, what service you can use to print, and how big your photos would have to be for your project. Another thing that size determines is orientation. A 8.5”x11” book would be portrait, where as a 11”x8.5” book would be landscape. This is a huge distinction and greatly changes the layout of the book.

Most photo books today are printed in a landscape orientation. Predominantly, a lot of photos are taken in a landscape format, so a landscape orientation for your book makes sense for layout options. You can print a single image across the page with minimal cropping, and place multiple types of image orientations (portrait or square as well) quite easily with minimal compromise.
Square is the second most popular option for Photo books, and rising quickly with the rise of more photos taken in a square format (the Instagram effect). Portrait is a rarity for a photo book. Most books we get in portrait orientations are more geared towards text, not to say it’s never been done. Personally, I would stick away from portrait as an option unless you have a specific design in mind (IE most or all of the photos in the book are in portrait orientation).
Now you need to pick a size. Some book printing companies can print the same book in many different sizes from the same file, but most do not. The most popular sizes we see for landscape are 11”x8.5”, 13”x10” (these two happen to be the sizes of Apple’s landscape hardcover photo books), and 9”x7”. For square orientations we see a lot of 8”x8” or 10”x10” sizes (also the sizes of Apple photo book square hardcovers).

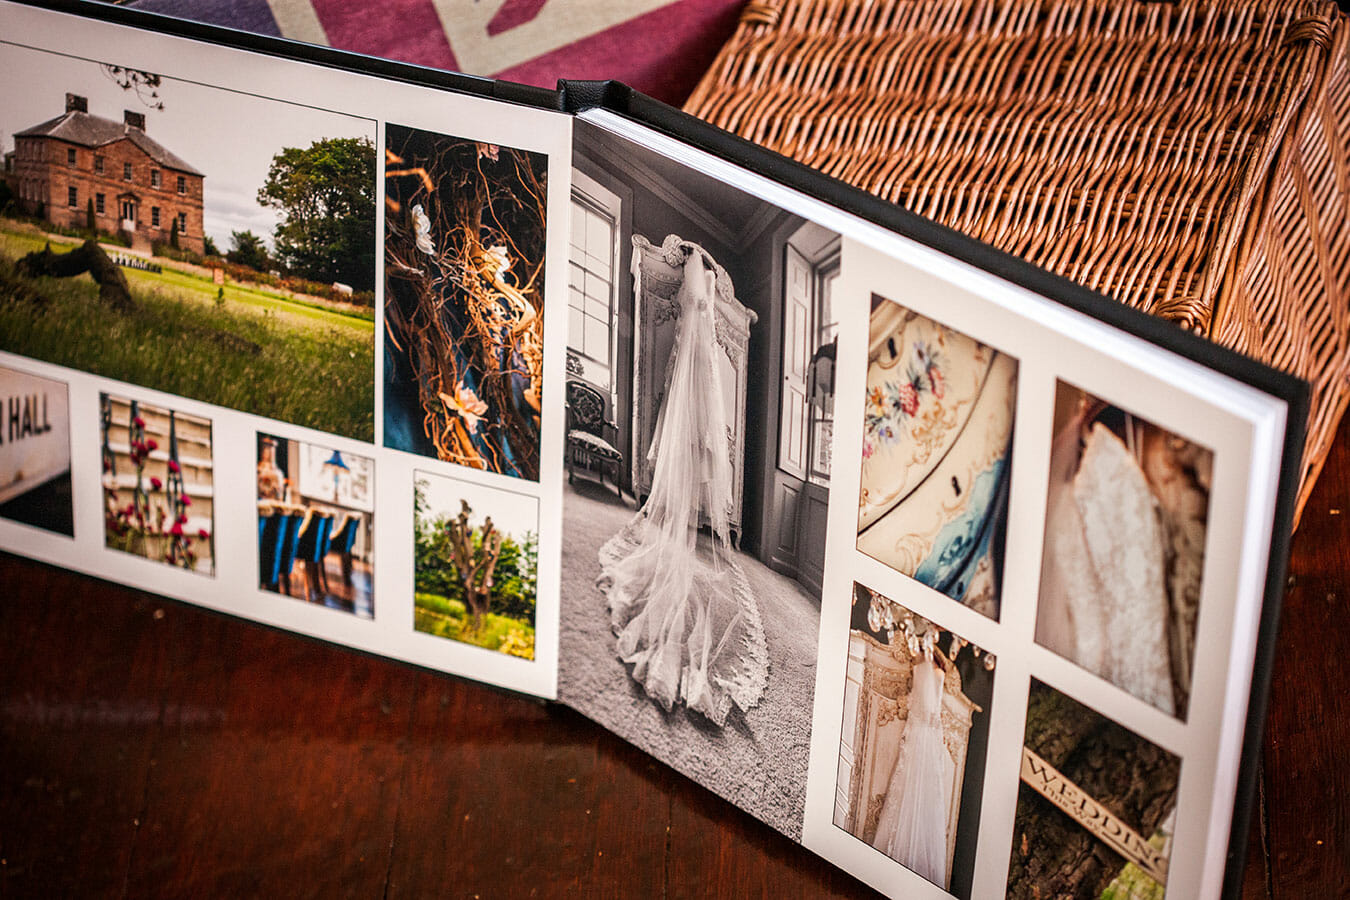
The last decision about the physical book itself is the way you want it bound. You’ve got some standard options, which would be either hardcover (the book is bound with a hard book board wrapped in a printed cover) or softcover (a thicker stock paper is used on the exterior binding of the book block). For most people the decision here comes down to cost, as nearly every softcover book will be cheaper than a hardcover version of the same book. Most book printing services allow for you to change your mind on this part later if necessary, so it shouldn't be as set in stone as the previous choices you made.
There are also options to choose for the interior binding, primarily layflat options. A layflat photo book has the pages in the book block bound to lay flat while open, sometimes referred to as a seamless layflat. Books with standard binding exhibit a page curl when open, which makes certain elements hard to see where the pages meet in the middle of the book. The main advantage of a layflat book besides looking more prestigious in presentation is 2 page spreads (layout where two open pages side by side have content that span across both pages, like a panoramic photo). A more cost effective approach is a hinged layflat, which uses a slightly different binding process (pages are cut and a small plastic hinge is attached allowing the pages lay flat). The trade off here is the plastic hinge, you will see a line in the middle of your spreads the same color as the plastic hinge. If you don’t mind this side effect, it’s a great option at a more affordable price than a seamless layflat.
Basics of Book Design
Cropping
The concept of cropping is a hard one to grasp for beginners. Photo books interior pages are trimmed to achieve the look of an image printed to the edge of the paper. Pages are printed on paper larger than the actual size of the final printed page (this size will vary depending on the printer), and a machine will trim the paper to the actual size. Here is a video to help visualize how paper cutters work. There are three areas on the printed page in the design process to help visualize this.
Hydraulic Paper Cutter:
The first is what is commonly called the safe area (in the diagram, everything inside the purple area). Anything in this area is safe from getting trimmed off. All text and important information should be here. Outside of this safe area is the trim area (the area between the purple and the yellow line), and this is where things could be cropped. If everything goes perfect, it will crop right at the yellow line in the diagram. Due to the nature of printing, elements may not crop exactly on this line, as the paper can shift slightly during the cutting process (normally machines are cutting hundreds of pages at the same time with a large cleaving knife, not each individual page). Because of this, you really don’t want to put anything important in this area.

Between the yellow line and the red line is what’s known as the bleed area, and all of this is going to be cropped off. Nothing important should ever, ever be put in this area (ever). This area should be used for the outer part of images that are intended to print to the edge of the pages (you don’t want faces anywhere near here most likely), or certain design elements should go out to here (background colors of pages).
Another thing to think about for cropping of the cover of the book is how certain hard covers are made. Softcover photo books follow the same process as the one above, so you can just follow that as a design rule. Most hardcovers are handled a little differently: the image is printed on a separate piece of paper, then that paper is wrapped around book board (a hard chipboard material). Follow your chosen printers specifications when designing the cover.
Last, hardcover photo books tend to begin and end with end leaves (piece of paper, normally colored black, white, or gray). This covers up structural parts of the book (how the interior book is connected to the outer cover). Sometimes you can pick the color of the end leaf, but you’ll rarely be able to print anything on these sheets.
Designing Photo Books Apps and Softwares
So now we’re at designing the photo book. This tutorial is going to focus on options that yield a PDF file at the end of the project, as this is the most versatile way to make a Photo Book. You can take a PDF file to different printing providers with no fear of getting locked in to a specific provider. If you use a photo book creation tool from a making photobook company, it will generally save in a proprietary format, which prevents you from moving to another printing company. Let's look at some options:
1. Adobe Indesign

Adobe InDesign is the best option to make a photography book for its freedom in design and layout, because you choose every single option yourself. You can create a photo book any size you want. Put one image or 100 on a page if you like, text anywhere you like with any font you own, do it all. That's where the first caveat comes in: it’s an advanced tool. If you’ve never used InDesign before, there is a lot to learn. If you have used some of Adobe’s software before (Photoshop or Illustrator), you’ll find your way around a little quicker. InDesign is available for both Windows and Mac computers.
Also using this photo book design software, remember you are in control of the Safe area, trim, and bleed. If you do not set these up according to the photo book printers specifications (which vary from printer to printer), printing issues could occur. Some making a photobook companies provide starting templates that include safe areas, crops, and bleeds, but most likely no templates you can drag and drop images into.
To use InDesign you need to subscribe to Adobe Creative Cloud. Just for InDesign, you’re looking at $20.99 a month. If you’re planning on making a lot of photo books, and want the best of the best, then you should buy InDesign, but if you’re just looking to make one or two, you might want to look at some alternatives.
2. Adobe Lightroom

Adobe Lightroom is good option for making a photo album and as a piece of photo management software, and it’s a little cheaper and easier to use for first time designers. You can get Lightroom for $9.99 a month with a subscription (you can bundle Photoshop with this plan as well, which is super handy). There isn’t the same amount of freedom when designing your photo book that you would have with InDesign (limited photo book sizes and layout options) but there should be plenty to satisfy most photo book creators. The sizes they have available for photo book PDF files include:
- Small Square: 7”x7” (18cmx18cm)
- Standard Portrait: 8”x10” (20cmx25cm)
- Standard Landscape: 10”x8” (25cmx20cm)
- Large Landscape: 13”x11” (33cmx28cm)
- Large Square: 12”x12” (30cmx30cm)
- Magazine Size: 8.5”x11” (22cmx28cm)
- 6”x9” (15cmx23cm)
- 5”x8” (13cmx20cm)
Layout options include single or multiple photos, text, and two page spread layouts as well. If you already have Lightroom, I would definitely try this option out first, as it may be the one that works best for photo book beginners.
3. Pixellu Smart Albums
Another professional creating photo books option that’s easy to use is Pixellu Smart Albums. You drag your photos to the photo book spread displayed and it will lay out your photos automatically. You can switch between different design options per page easily, and the layout always looks clean and professional. Choose background colors, add custom text with fonts installed on your computer, choose how far apart they are spaced, and create custom layout designs if the generated designs doesn’t suit your design needs. It also allows you to input the exact dimensions of your book, so you can design a book of any size.
The largest flaw in this program is that it doesn’t take into account covers in book interior file design. Most printing companies have different cropping requirements for covers versus interior page designs, and most people who use this software will generally design their cover in a more design centric program (Adobe Illustrator or Photoshop), which it makes sense why it wouldn’t be in the layout. You can opt to make a separate file in the program to design the cover if you need to.
The last thing to take into account is the price: the program itself can be purchased for a flat rate of $299 generally (with sale prices I’ve seen it at $179), or you can go with their subscription plan which includes Cloud Proofing (easy proofing for clients to give comments and critiques online) for $32 dollars a month (I’ve also seen this price as low as $19 a month). In the long run this can come out to be a cheaper option for some if you buy the program outright versus an InDesign subscription, but you’ll have to decide which option is right for you.
4. Apple Pages

This might seem like a dark horse in the photo book design race. Within Apple Pages you can create multi page documents, any size and layout you like, and then export a PDF file to print with any provider you like. Not just word documents either, fully designed photo books. Import photos from your Apple Photos library or drag and drop from folders, create custom designs and layouts with ease, and have total control over your book design. Most people have just used Apple Pages as a word processor, but it can be a full desktop publishing suite.
Apple Pages is similar to InDesign in that you will start from scratch design wise. If you search for Apple Pages templates online or Mixbook photo book templates, you’ll find a few resources to get you started, but if you want a specific custom size you will have to make them yourself.
There’s also one extra benefit: Apple Pages is free. Well, almost free: You have to have a Apple device (Mac computer, iPad, or even an iPhone). If you are on a Windows PC, Chromebook, Linux, or Android device, this will not be an option for you. For designing a book outright, you’ll want to use a macOS device (desktop or laptop) versus an iOS device (iPad or iPhone), but Apple does give the option of updating design files on the fly. If you save your project in iCloud, you can add a photo from your iPhone, fix a typo with your iPad, and it updates across all devices automatically. If you already have a macOS or iOS device I would give this option a shot first, as it’s free and intuitive to use.
5. Bookemon

Bookemon is a convenient online service for those who want to create high-quality photo books and photo albums with little to no effort. You can create a photo book from scratch, use one of the available layouts or import a file created in other software. Here, you will find a range of design tools, cliparts, frames, and backgrounds that will help you make your photo book more unique.
After creating a photo book, you can view it online, share it on Facebook, send a link to it via email and download it to your phone. Bookemon also allows you to print an unlimited number of copies in high quality.
You can create a photo book for free, however, you will need to pay to print it. After selecting a format, indicate the number of pages and copies. For instance, it will cost you $11.99 to print a softcover photo book with laminated, white pages and perfect bound. A softcover Color Trade photo book costs only $7.99.
Printing Photo Books Tips
You’ve designed and created a beautiful photo book, and now you want to bring it to life. Pause for just a moment and proof your book. There’s nothing worse than ordering 10 copies of a photo book with a typo on the cover. Take a moment and look over your photo book, especially anywhere with text. Typo’s are an easy problem to solve before printing, and one that most printers will never catch before they send it to print.
Another issue could be text outside of the safe area or past the trim line. This text has an extremely good chance of getting chopped off, so just be safe with any text anywhere near the edges of the pages and make sure it falls in the save area. This goes with any important design elements or important parts of photos too. If you have someone who is kind enough to look over your book and has a good eye for detail, see if they can look over your book and see anything you’ve missed. A fresh pair of eyes on a project can easily identify design issues you are missing.
One last thing to think about before making a major order is ordering a proof. Some companies, e.g., FlippingBook will send a PDF proof or an online preview of the book, which is a decent approximation of how it will print and should work in a pinch. You can’t beat getting a copy of the actual final product, as it lays down concretely what works and what doesn’t. Maybe a font is too small on the page but is legible when you were designing it, or maybe there is a page that was improperly formatted and has text cut off, it’s much easier to tell these things with a physical book. Most print on demand services offer the ability to print just one book, so take advantage and proof your book.
Printing Options
When choosing a printing provider, you want to look for a few key things. The first distinction is that they print from PDF, since we’ve made a PDF file to be printed. The second is if they are print on demand versus an offset printing provider. Print on demand allows you to print one copy or thousands of copies of a book, whenever you want. This has been a boon for most, as you can order the copies you need as you need them. Offset printing offers more custom options, with a cheaper price per book, at the requirement of a order minimum. Most offset printing requires at least 250 copies ordered due to the cost of setup of offset printing, which is overkill for most creators projects and a large financial burden. At the beginning for smaller projects, you definitely want to go with a print on demand service. If you move on to larger projects, you can start looking at companies that offer offset printing lines.
Once that distinction is made, you want to make a list of possible options. If you designed the book without a printer in mind, they might not be able to print the size you designed, obviously. They also might not offer certain options you designed around, like a layflat photo book designed with two page spreads and they have no layflat options. Paper stock options is another thing to look into, and most companies provide samples free if you request online or send in an email to their customer service representatives.
large format photo printer, or location. Just choose what works right for you, and if you have the time and money you can even order proofs from multiple providers to see what’s right for you. There are reviewers online that are a great resource to help decide who to choose, so investigate and make a decision. Since you make your photo book yourself instead of with a proprietary photo book software that locks you into their service, you have options.


Author: Tim Weaver
Tim is a North Carolina native, extreme book geek, and sometimes thinks he's an artist. When he's not whipping up amazing graphics and designs for Presto Photo, he's probably sipping a coffee with his cat and organizing his art book collection.


