If you often enhance still-life photos or their specific areas (for example, sky replacement), then you probably wonder how to invert selection in Photoshop. Learn 3 effective methods to invert objects in one click.
Rather than using additional layers with masks and selecting multiple areas in a photo, learn 3 quick methods of how to invert selection in Photoshop.
STEP 1. Import an image and create a new layer.

STEP 2. Use any selection tool and outline the desired object. Make sure the dotted line is closed. If you are working with a simple object like a cup or a backpack, you can use the "Marquee Tool" for automatic selection.

STEP 3. To invert selection in Photoshop, press “Shift + Command + I” (for Mac OS) or “Shift + Control + I” (for Windows).
STEP 4. Now the entire area is selected except for your main object. You can cut it out or lighten it (if you work with still-life photography).
Those who are only learning how to use Photoshop invert selection shortcut to enhance the backgrounds of the pictures should practice a lot.
Nevertheless, if you want to make money with your shots, I highly recommend delegating editing to professional retouchers. They will fix all defects and take your image to the next level. Thus, you can stay on par with Amazon sellers following Amazon strict rules.
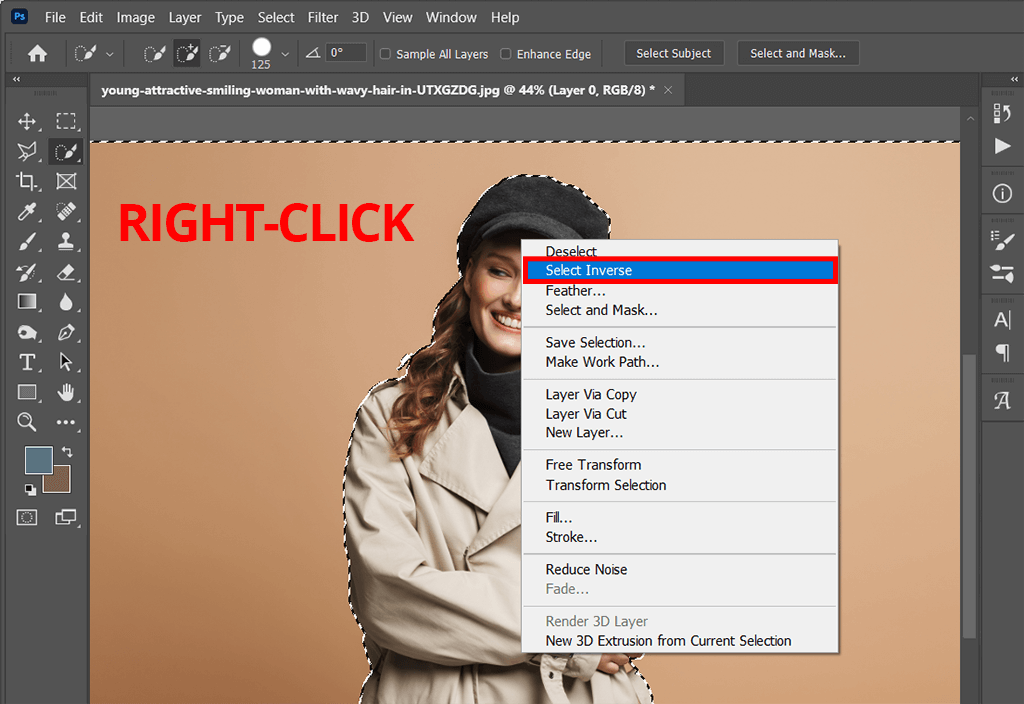
If you use an old version of the software and the hotkeys don’t work for you, you can right-click the image and choose "Select Inversion". It is possible to click this button multiple times to switch between the selected areas.

If you experience Photoshop lagging, and the above-mentioned methods don't work, try a standard option. When you activate a selection, choose "Select" - "Inverse".
Rather than wasting time on redoing or adjusting your selection, you can use the inverse selection option. It switches to the opposite selection area, which allows you to considerably save time. This feature especially comes in handy when you need to cut out objects in your image.
Currently, it is possible to select an object using a variety of tools. The choice depends on the complexity of an object you are working with. The most popular selection instruments are the Quick Selection Tool, Marquee Tool, and Lasso Tool.
If you use an old version of the software and you don’t have the listed selection tools, you can read the quick guidelines and get the latest free Photoshop version.
Use the hotkeys "Ctrl + Z" for Windows or "Cmd + Z" for Mac OS.
When you have chosen a selection tool and outlined the object you want, there should appear a dotted line around it. This means that you performed the selection correctly.

Learn how to create an action in Photoshop to automate the process of inverting and selecting objects if you work with multiple images.
Additionally, FixThePhoto designers have been collecting the most effective Ps actions for 5 years. These plug-ins allow you to tweak your photos in a few clicks. You can replace the background, retouch skin, remove noise, perform color correction, and more.