Many photographers, especially those who have just started out, sometimes receive overexposed photos. This may be disappointing since you seemed to create an ideal composition but failed to adjust three main parameters such as ISO, shutter speed, or aperture. Thankfully, you can correct this defect without hassle in Adobe Lightroom.
When you shoot in RAW, the exposure of an image directly depends on the camera settings. In addition, RAW files include more data than JPEGs. Thus, you can work with more elements during image post-production.
Based on your purposes, you can use 2 methods of how to fix overexposed photos in Lightroom. You can try both to understand which one works for you.
You need to play with several settings in Lightroom to fix overexposure in your image.

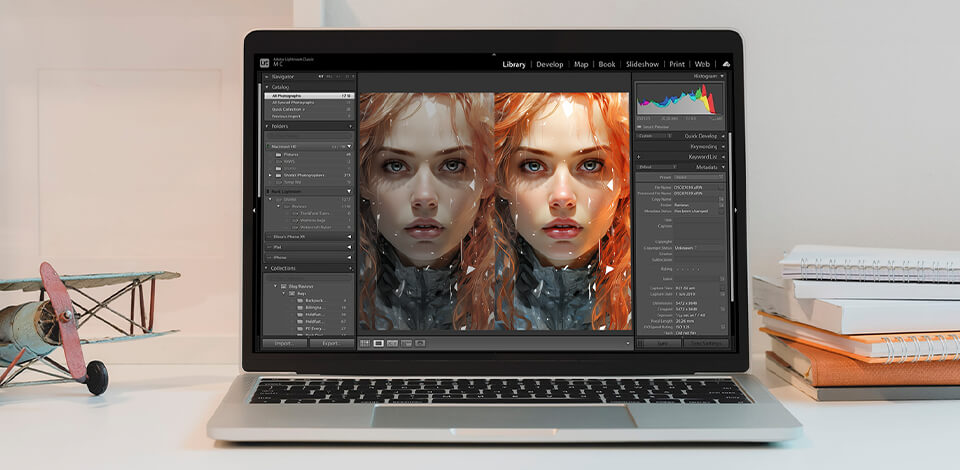
There are cases when the entire image is illuminated, while sometimes, you will need to fix only some overexposed parts. That’s why you should start with identifying the areas in photos that look overexposed. Then, activate the Clipping Indicators by pressing the J keyboard shortcut. By selecting and clicking the Histogram option, you will see that overexposed parts are highlighted in red.

Go to the bottom of the menu and drag sliders to adjust settings. Start with correcting the Exposure. In some cases, it will help. If it doesn’t, use the Highlights option and move the slider left. You will see that the entire photo becomes less bright, with overexposed areas barely noticeable.

If you aren’t satisfied with the result, try to correct Whites. You will need to decrease the value by moving the slider leftward. If you remove white areas, you will reduce the contrast. However, you can easily raise the contrast using this photo editing software.

Once you have fixed overexposure, you will see that the dark parts and shadows in the image become deeper. This produces unnatural and nasty contrast. Once you are satisfied with the outcome, you can adjust the Blacks and Shadows. Experts advise decreasing the Blacks and increasing Shadows to make an image look lifelike.
If you want to get a rich color gamut and accurately correct overexposure, feel free to address the FixThePhoto team.
If the first method of how to fix an overexposed photo in Lightroom didn’t work for your image, you can try to fix the defect with the help of the Gradient option.

Open an image and use the Histogram to identify the overexposed areas.

Fixing overexposed photos in Lightroom, pay special attention to Highlights, Contrast, Shadows, Whites. You may also need to use the Dehaze tool until you receive the desired outcome. You can use the screenshot above as an example of how to adjust the settings.

Select a horizontal gradient; you will see the gradient and a round dot in the picture. Experiment with different positions to adjust the intensity of the effect.

The screenshot above shows how to stretch the gradient across the sky. Move a slider up and down to get the most optimal look. Once you are done, you can adjust other parameters identical to how you fix overexposed photo Lightroom in the previous method. Congratulations! As you see, it is easier than to fix overexposed areas in Photoshop.

Once you learn how to fix a picture that is too bright in Lightroom, you can get down to other edits, e.g., correct other colors in your picture that appear dim and flat. Instead of using complex techniques, you can correct colors and improve your images in several clicks using presets. Download these collections, you can get beautiful colors without much effort.