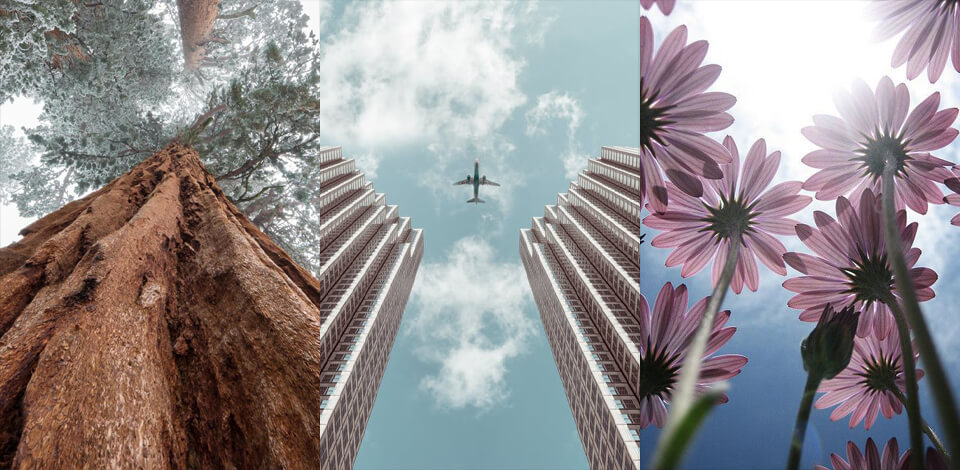
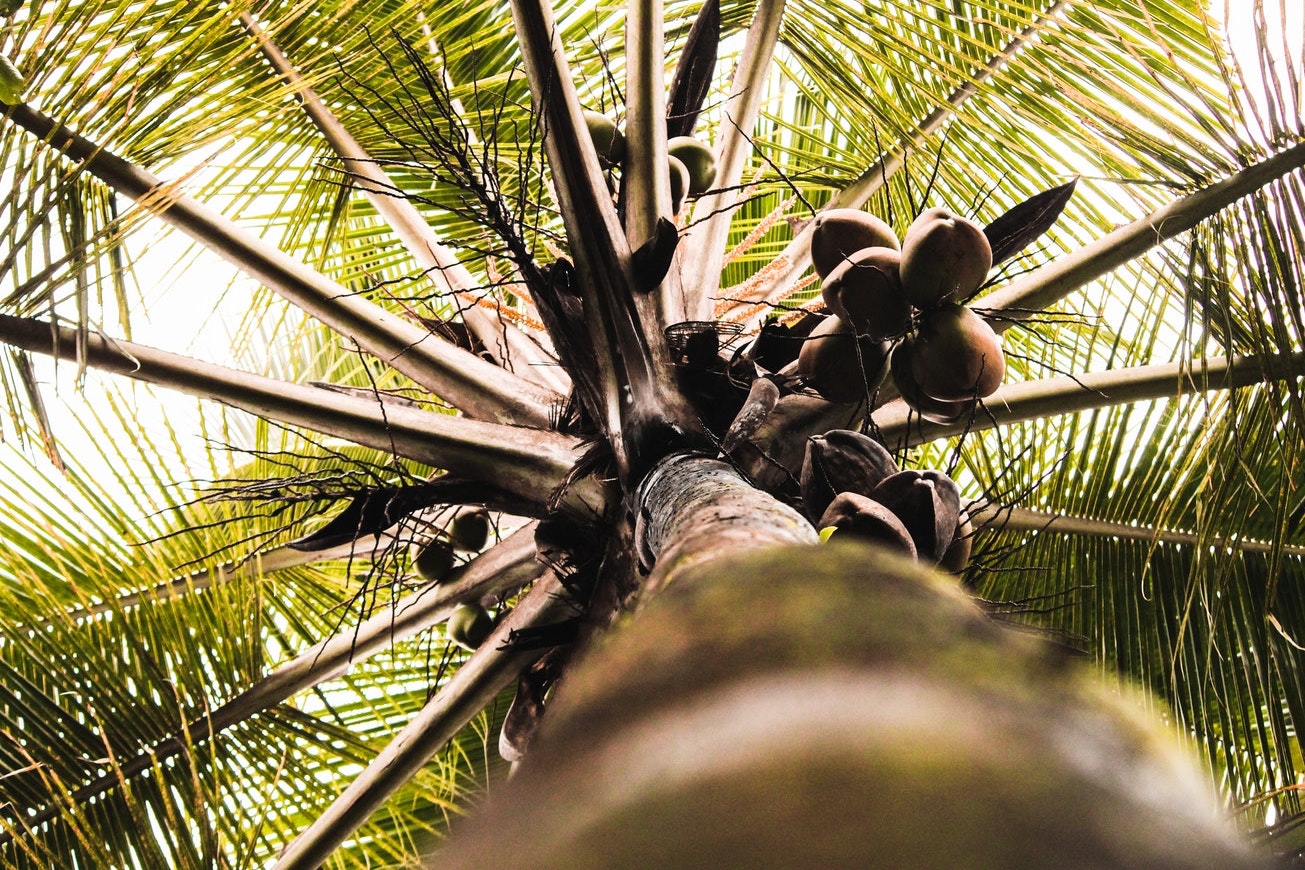
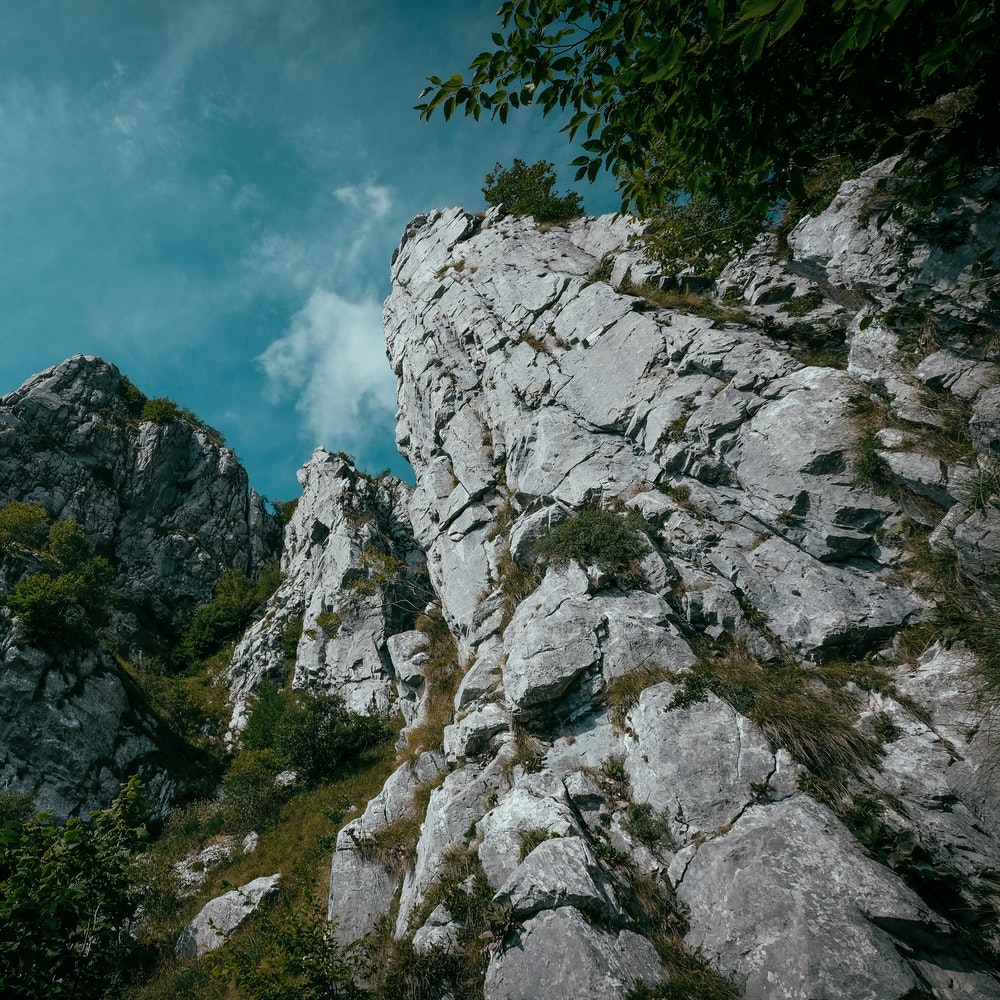
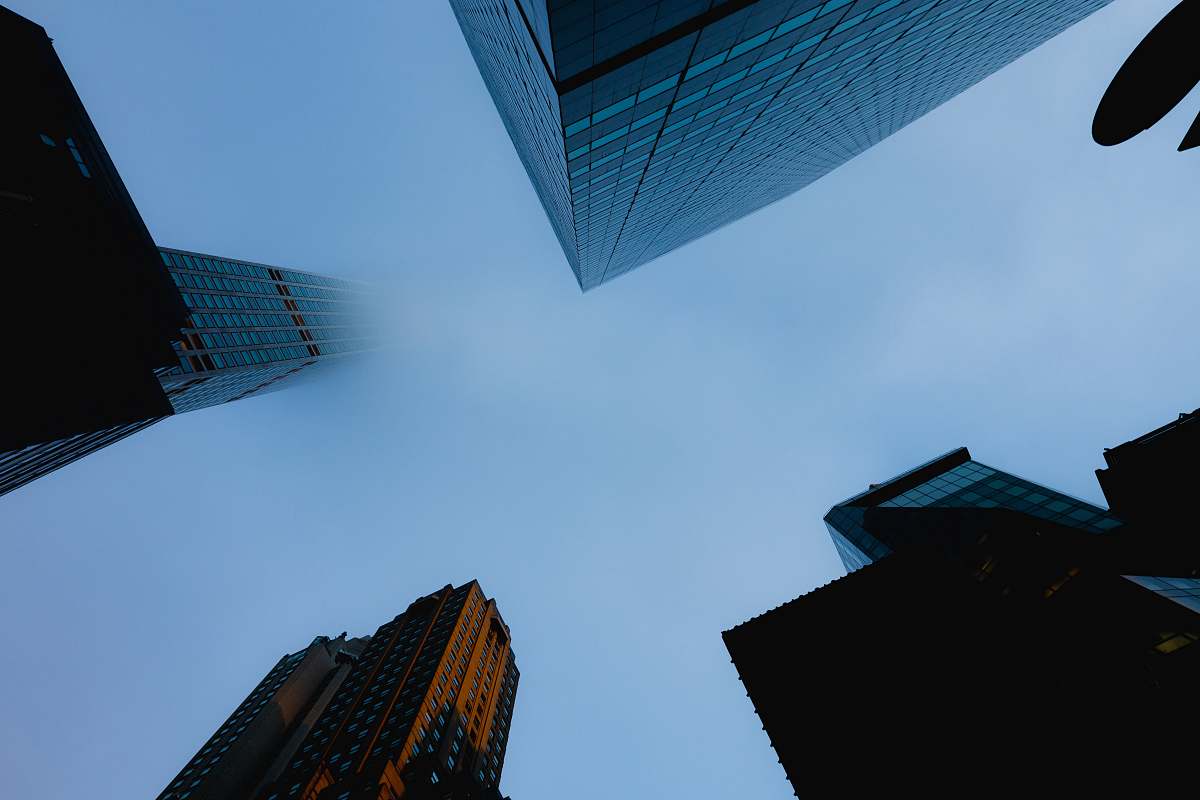
Worms eye view photography that is also known as ant view photography is all about taking photos from the lowest possible angle in relation to the subject. To take such photos, photographers stay at the ground level and point their cameras upward.
By using this perspective when capturing photos of your subject, you can give your pictures a unique feel. Photographers often use this technique when taking long-exposure shots of the stars. However, it’s also suitable for taking photos of plants, buildings, portraits, and wildlife.

When using this method, you need to stand or sit and point your camera at an upward angle to take a photo of your subject from a worms eye view. If you are in the forest, you may even lie down on the ground and snap pics when pointing your camera upward.
Since it might be challenging to use your viewfinder in this position, make sure to buy a camera that supports live view shooting. Besides, you can use a model with a tilting LCD.

To drive a viewer’s attention to your subject, you need to consider the depth of field and the focal point when taking your photos. By adjusting DoF, you can ensure that your subject will remain clearly visible and in focus. When taking photos of flowers, insects, and other small objects, use a shallow depth of field.
A wide DoF is perfect for taking photos of skyscrapers or wide-angle shots. By paying attention to the depth of field, you can emphasize a specific part of your image.
When lying low and holding your camera so that it points upwards, it might be difficult to keep your subject in focus if it’s perpendicular to the focal plane.
To take a photo with your subject in focus, you need to experiment with the depth of field. Keep in mind that one-third of your image will be in front of the focal point while the rest of the photo will be behind it.

DoF is affected by the distance to your object, aperture, and focal length.
If you want to get a shallow DoF, make sure to hold your camera close to the subject and take photos with a wide aperture and a long focal length.
To take pictures with a wide DoF, do the opposite. In case you have never worked with the depth of field, you can use dedicated apps to calculate it. For instance, Photopills allows you to enter any values and calculate the depth of field.
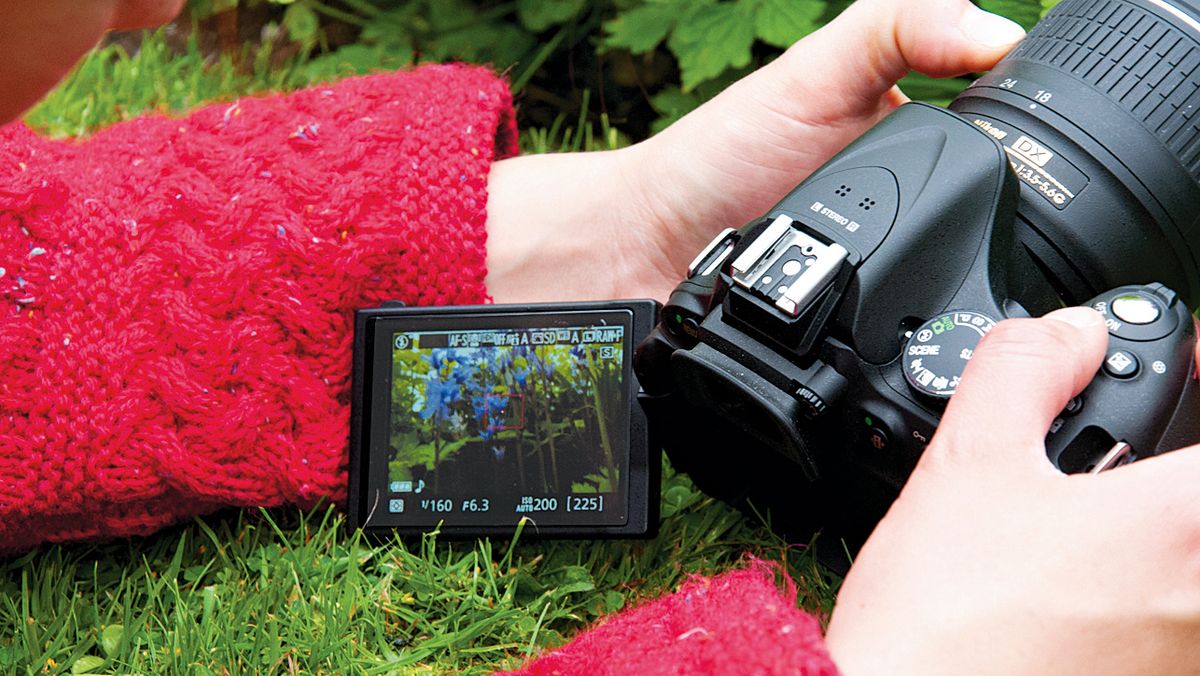
Unless you have a camera with a tilting LCD, it might be difficult to take pictures from ground level. If your viewfinder is fixed, you will need to lie down on the ground to be able to create a composition in the frame.
To take professional pictures, it’s better to use a camera with a flip LCD screen like the Sony Alpha A6100, CEDITA Digital Vlogging Camera, or Fujifilm X100V.
If you want to unlock a new perspective to your pictures, take wide-angle photos at low ISO values ranging from 100 to 400. It will allow you to capture small objects with high accuracy.
When shooting at high ISO, you risk getting grainy images. As the result, you may need to spend more time editing them afterward. Besides, it might be impossible to preserve important details.
When shooting worms eye view pictures, you need to ensure that your objects are in focus. This is why it’s better to take photos at large f-numbers. A small aperture value allows shooting with a high level of detail.
For instance, you can set your aperture to f/8.0 or higher. However, avoid extreme values, otherwise, your picture might look soft and blurry because of the diffraction.

When snapping pics, pay attention to exposure. You can select any aperture that suits your needs. It’s better to set it to f/8 – f/11. It will ensure that your image won’t be overexposed.
However, if you are taking photos in poor light conditions, it’s better to use a wider aperture. By adjusting exposure, you can ensure that your pictures will be perfectly sharp. Otherwise, they might look bleak or overly dark.

It’s recommended to start by adjusting exposure and then create a composition in the frame. When taking photos of buildings or other objects with reflective surfaces, you need to get rid of reflections.

Your choice of a lens will ultimately depend on your subject. If you want to create a well-balanced composition, use a 35-70mm lens. It will enable you to take a realistic worms eye view shot to give your followers and subscribers a unique perspective on things.
To add interest to your pictures, use wide-angle frames that allow you to fit an entire scene. Shooting wide is the best thing you can do when taking photos at ground level. Wide-angle lenses will be especially useful for taking photos of picturesque vistas and magnificent buildings.
Thanks to such lenses, you can fit everything you want in the frame without making your photos look cluttered. For taking wide-angle shots, use 24-35mm lenses. They will let you capture everything in detail without much blur. However, if your camera comes with an 18-55 kit lens, it’s better to take photos in the 18mm-25mm range.

If you want to master professional shooting techniques, then it’s important to purchase a decent 10-20mm wide-angle lens, such as the Nikon 10-20mm f/4.5-5.6G, Rokinon 14mm f/2.8-22, or Canon 10-18mm f/4.5-5.6.
You can also opt for a fish-eye lens, such as the Meike 8mm f3.5 Fisheye Lens, Altura Photo 8mm f/3.0 or Rokinon HD8M-C 8mm f/3.5. Using them, you can take surreal, slightly distorted photos. Such lenses are suitable for those who want to get closer to their subjects and enhance their pictures afterward.
When taking photos of distant subjects, you can also use a telephoto lens, such as the Sigma 150-600mm 5-6.3, Sony FE 200-600mm F5.6-6.3, or Canon EF 75-300mm f/4-5.6. The key advantage of such lenses is that they have a variable focal length.

In some locations, it might be impossible to capture your subject while lying low. In this case, you might need to purchase a Gorillapod.
It will make it much easier for you to shoot at ground level and make a tree or building look giant in the frame.
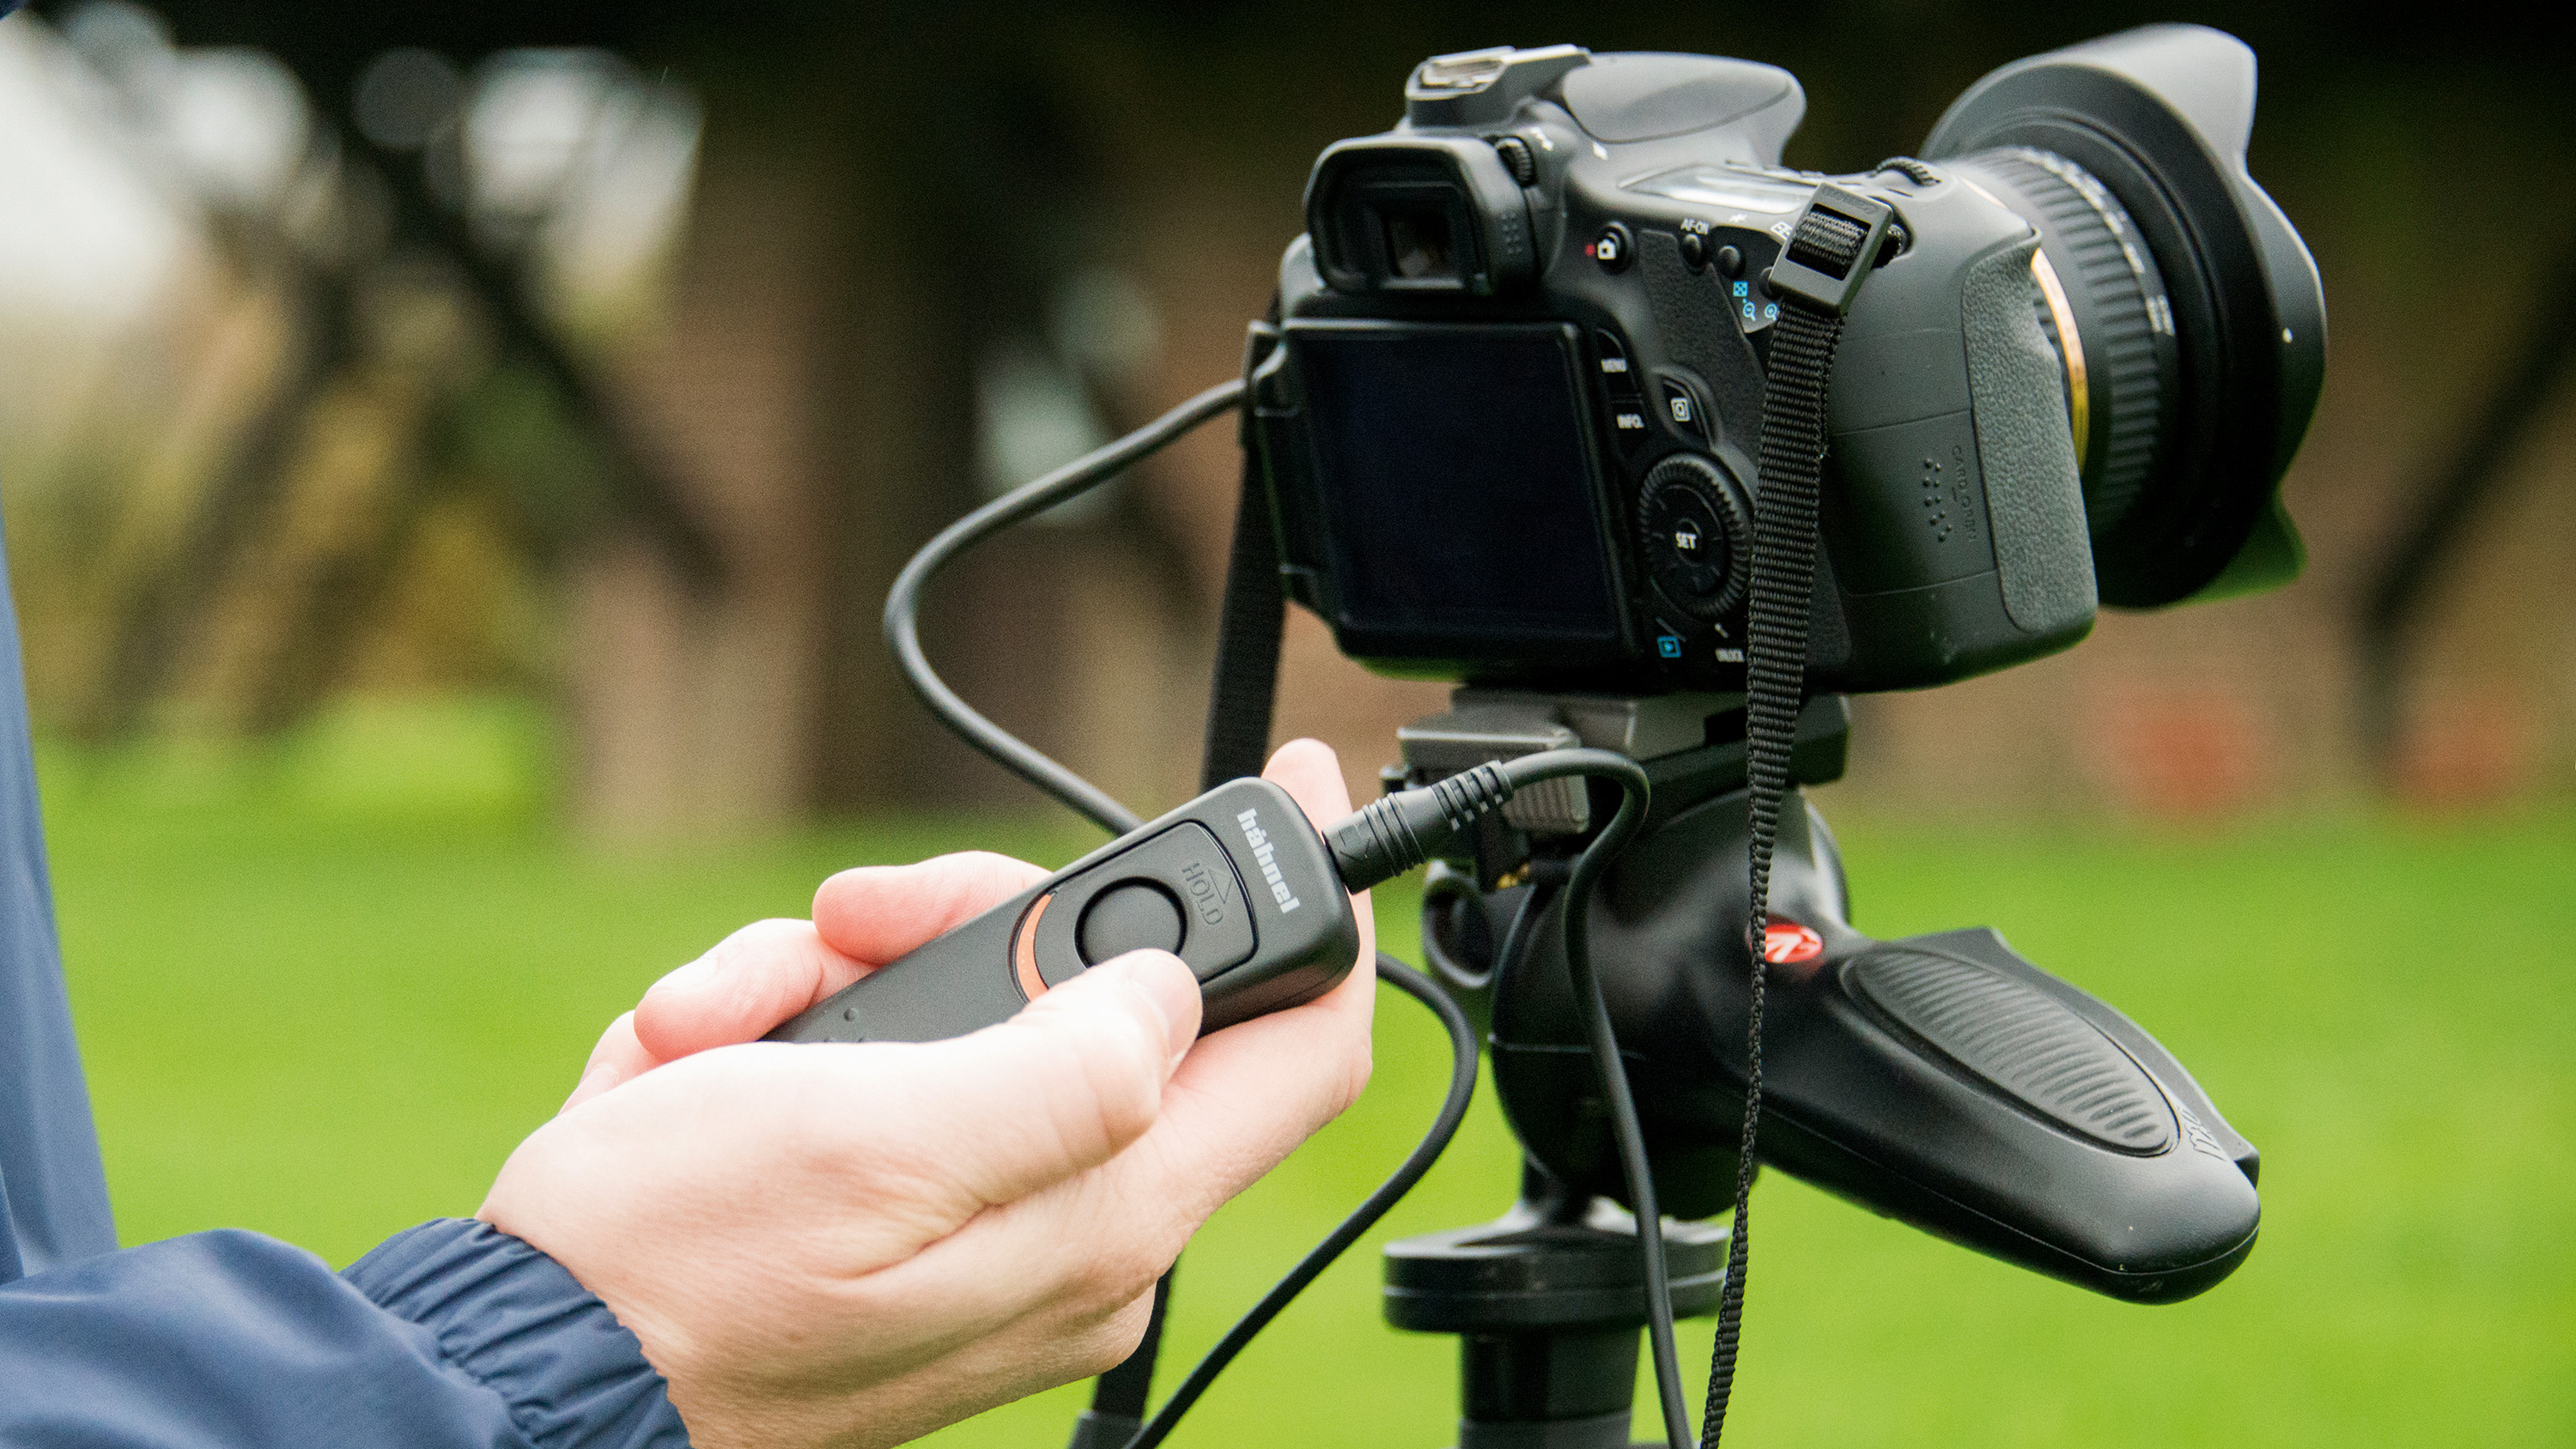
It might be challenging to hold your camera still when you need to take photos from a lower angle in relation to the main object in the frame. To do it, you can use a tripod or monopod designed for stabilizing a camera. It’s better to purchase a tripod with a remote trigger as it will allow you to take photos from afar. Even if you have years of experience, you might still fail to stabilize your camera without a tripod.
Thanks to a remote trigger, you can take clear macro shots without any noticeable blur caused by camera shake. Such triggers will come in handy in the situations when you need to focus on your subject. Besides, they are necessary for photographers who need to take photos of animals without spooking them.

A remote trigger will be useful for those who need to wait for perfect weather conditions or capture the subject at a specific moment. You can also use the in-built camera’s timer to lock the focus.
Some photographers trigger their cameras without being able to preview the objects in the frame. However, it might be difficult to take great shots using this worms view photography technique. This is why it’s advisable to connect your camera to another device via a wireless or cable connection. It will make it easier for you to adjust its settings and snap a photo at the right moment.
When taking pics, remember the rule of thirds. According to it, you need to put your subject in the left or right third and ensure that the other two-thirds remain free. You just need to visually divide the frame into 9 zones. Most modern cameras allow you to work with a grid, which makes it easier for you to place your subject at intersections.
This rule is especially important for those who need to take photos of patterns or symmetrical objects. Using it, you can add a sense of dynamism to your photo. For instance, if you need to take a picture in the forest, you can frame your object using trees and capture unique patterns formed by leaves.
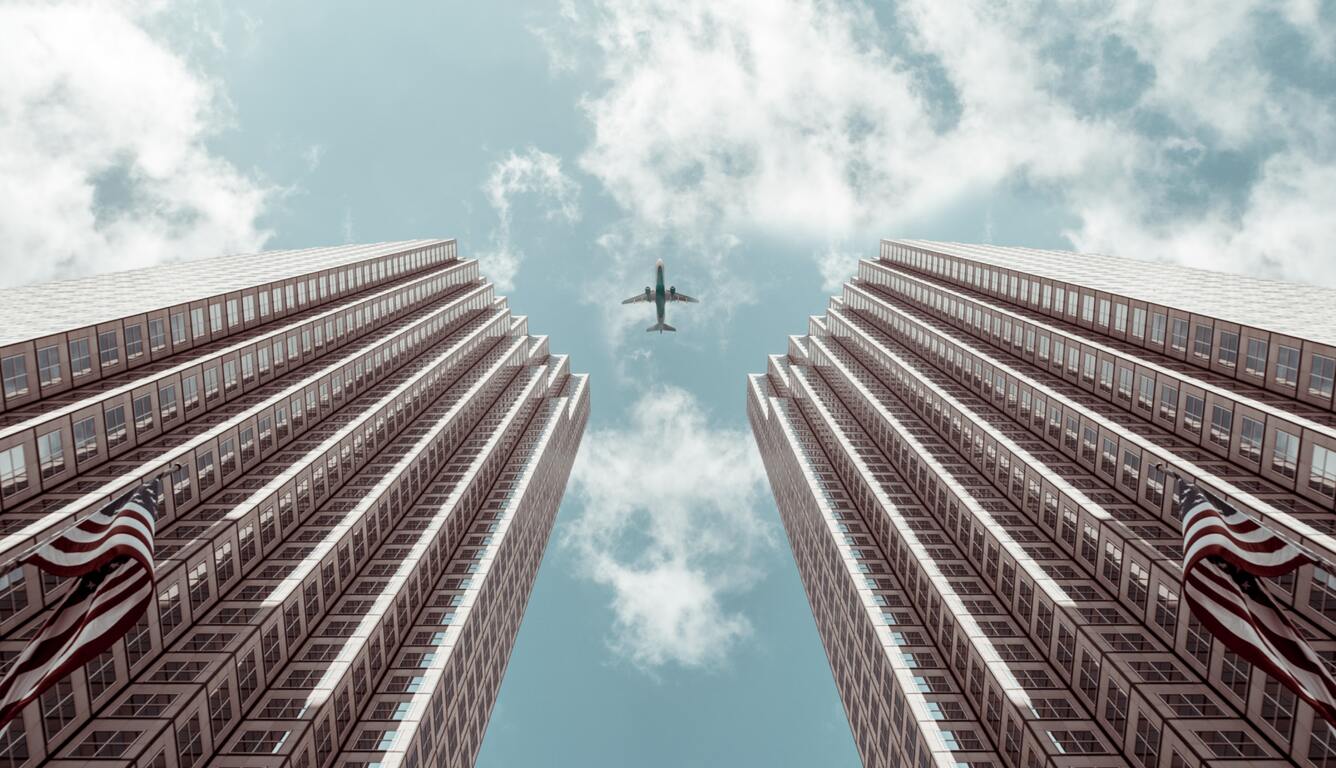
You can also use the upward angle when shooting architectural elements from the ground level. It will allow you to take photos of medieval vaulted ceilings or beautifully decorated walls.

You need to ensure that all the objects in the frame look well-balanced and decide on a point that you want to emphasize. It doesn’t necessarily have to be a specific object. Just find a detail that is worthy of being captured and put your camera lens-up close to the ground to take a photo.

When lying flat on the ground, you can take photos of surreal shapes and patterns that can be found in nature. Some photographers also use this technique to take professional pics of skyscrapers and other buildings.

When working in the city, you can crouch and hold your camera as close to the ground level as possible. Then, you need just to point it up to take a photo.
Many photographers use this method when shooting stills in the forest.

Photographers who specialize in wildlife photography may also attempt the worm’s eye effect and get down as low as possible to liven up their photos. It’s advisable to use the remote trigger. However, if you take photos of wild animals, this perspective could be too dangerous as you will be too close to your subject.
In case you have a remote trigger, you can place your camera in any location frequented by wild animals. It’s advisable to use a wide-angle lens for taking such shots and select a position for your camera where it won’t get noticed by animals. Make sure to use a durable, waterproof housing to protect your equipment.

To capture the best moments, it’s better to use a camera trap. It will take photos automatically when your camera detects some movement nearby.
By getting your camera under your subject, you can take breathtakingly beautiful wildlife photos. This worms eye view photography technique is suitable for capturing pics of plants, birds, and animals.

If you are an avid fan of astrophotography, try taking photos from a low angle to frame the celestial objects using buildings and trees. When experimenting with this technique, make sure to focus on the stars to ensure that they are clearly visible.
You might need to master some advanced long exposure photography or light painting photography techniques to achieve more impressive results.

To take more stunning photos, make sure to select a location without any artificial light sources nearby. The sky should be perfectly dark, which is why it’s not advisable to take photos when moonlight fills the frame.
In addition, you need to avoid areas with street lights, shops, or other buildings. Professional photographers prefer taking such photos in the countryside as it allows them to capture stars in all their celestial beauty.

If you often go on hiking trips and enjoy taking photos of picturesque landscapes, you can try capturing pictures from a low angle to make the composition in the frame more unique. For instance, you may use trees to frame the object that you are shooting.
When taking long-exposure shots, use a polarizing filter to ensure that no part of your photo will be overly bright. Such filters reduce the amount of light in the frame and protect your worms eye view pictures from getting overexposed.

You can also use a polarizing filter to create a dark and dramatic atmosphere in your shots, which makes it perfect for pics of skies and water bodies. Using it, you can make your pic well-balanced and increase contrast in some areas, for instance, to emphasize the clouds.

If you have already taken a lot of attention-grabbing worms eye view photos and see that they require further enhancement, you can apply these color filters. They will help you make the colors in your pictures pop, change the color temperature, and fully transform the atmosphere. You can use them free of charge to highlight the unique details in your photos. Apply them to fix lighting issues, adjust colors, and make other improvements to give your images a more professional feel.


