


Best Portrait Photographers
Photo Editing Styles
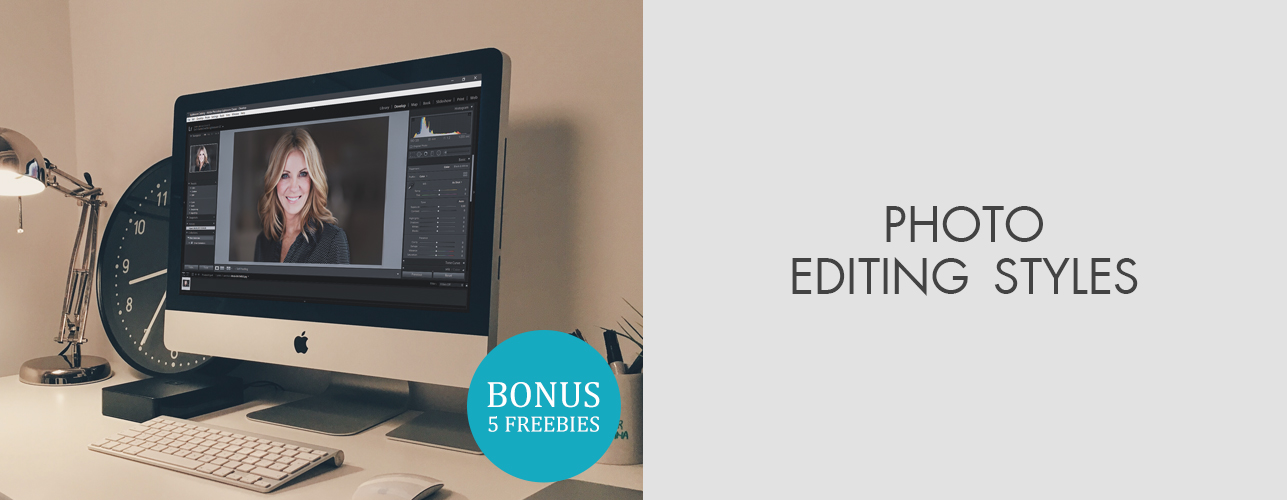
Look through these 8 most popular photo editing styles to find your own one for editing your wedding or portrait photos. Should you edit all photos in the same way or use several photo editing styles?
Contents:
What Is the Best Photography Editing Style?
In this article, I would like to describe each particular look in brief, give several examples, and talk about Lightroom plugins that will help you improve your photographs in several clicks.
Moreover, I will provide instructions on how to create different editing styles manually in Lightroom.
1. Orange and Teal Photo Editing Style


“Teal and Orange” look is widespread among Insta photographers specializing in outdoor lifestyle photography. Orange color harmonizes with teal (dark greenish-blue). They are commonly used for street photography because this combination of colors usually appears in such types of shots. Try to visualize bright yellow autumn trees that stand out against a blue sky or orange sun rays penetrating through the twilight sky.
How to make it in Lightroom?
Step 1. Adjust Settings of Camera Calibration

For deep and saturated look use the settings that presented on the screen above.
Step 2. Perform Color Correction

As the main thing for this effect is color correction in the range of teal and orange, set these settings to achieve the best result.
Though shooters have different photography editing styles, all of them need Lightroom. How to get Lightroom for free and enjoy all the features? Read the article and find several possible ways.
Orange and Teal Lightroom Presets


Try these presets to emphasize the deep shades of brown and orange colors and add a trendy Orange and Teal effect now. Edit any type of photo with these presets from portrait and fashion photos to landscapes.
2. Light and Airy Photo Editing Style


Send you photos to FixThePhoto and receive professional color correction and photo stylization for $0.20 per photo. Give your photos any photo editing style you want.
Light & Airy is one of those wedding photography styles that make the photo fresh, airy and natural. To achieve the best result, you should find a light and clean background that doesn’t include unnecessary objects. This wedding photography editing style works great for photos taken in the garden or by a large window. View more wedding photo editing services to get professional results easy and fast.
How to make it in Lightroom?
Step 1. Adjust Highlights and Shadows

For strong airy effect use these settings for Shadows, Highlights, Blacks and Whites.
Step 2. Perform Color Correction

Use these settings to create beautiful color effect to perform the airy and light effect of your portrait photography.
Wedding Light & Airy Lightroom Presets


These presets will help add the necessary Light and Airy effect and even produce a light skin smoothening with the help of color correction and shadows adjustment.
3. Pastel Photo Editing Style


Pastels give your photo soft and gentle shade. Nowadays such photo editing styles are extremely popular on Instagram, especially among beauty and travel bloggers. To create a similar effect while editing a photo, you will need a bright and light source, for example, the scene in the Scandinavian style or the composition at the seaside. It is necessary to remove too deep shadows and edit the photo so that pink and blue shades become brighter and deeper.
How to make it in Lightroom?
Step 1. Create the Pastel Effect in the Basic Section of the Develop Module

To begin with, you need to make some alteration in the Basic Section of the Develop Module. I recommend setting the exposure to 0.00. However, the adjustments may differ depending on how much the image is exposed.
Next, you will need to slightly increase Shadows to +57 and blacks and whites to +11 and +7. This will make the image even lighter but will affect the dark parts of the photo (through the adjustment of shadows and blacks) more than the light parts.
If you’re looking for a program to edit your photos, I recommend you my overview of the best free photo editing softwares for Mac and the best photo editing softwares for PC.
Then it is necessary to make the adjustments in the “Presence” section. Set clarity to -5. This will give your image a gentle softening effect. It will work great even with the lighter photo and the soft tones that you will add some time after.
Next, set vibrance to -15 and saturation to -25. By changing the image using these settings, you will make the colors a bit dull. Again, you will receive great result working with the soft tones.
Step 2. Change the Tone Curve

And now it is time to adjust tone curve. By doing it, you will lighten the photo again. I recommend making a single change – to increase the left endpoint on the RGB curve a bit.
Step 3. Use Split Toning

You have just lightened the picture and removed unnecessary colors adjusting vibrance and saturation. The next step is adding a pastel effect, using split toning in Lightroom. To adjust the highlights, set hue to 30 and saturation to 40.
As a result, the highlight areas of the picture will be warmer. To adjust the shadows, set hue to 220 and saturation to 60. In this case, the shadow areas of the photo will have a soft blue look.
Pastel Dreams Photoshop Actions


Pastel actions are perfect for those who want to make their portrait photos soft and achieve the effect of pastel. These actions are amazingly suitable for nature portrait photography.
4. Retro/Vintage Photo Editing Style


Retro/vintage look is commonly used in wedding, fashion and makeup photography. Various websites prefer to upload the photos with retro/vintage effect to make their nature or interior images more attention-grabbing. Retro/vintage styles of editing are so appealing because such colors as red, blue, yellow and green become even richer.
How to make it in Lightroom?
Step 1. Open Your Photo

Step 2. Selective Color

At the bottom of the layer, you will see the Adjustment Layer – click on it and choose Selective Color. In the pop-up window, select Blacks and change the black channel to -13. Next, choose Neutrals and change the black channel to -16.
Step 3. Curves

Now it is necessary to add a new adjustment layer. You can do it as you did it in step 2 but select Curves instead of Selective Color. Alter RGB channels in order to reflect the photo below.
Step 4. Selective Color

To finish the process of creating one of the most popular types of photo editing, it is necessary to add a new selective color layer. Change the Yellows, Greens and Blues as above.
For those who don’t want to change manual settings, use this perfect retro styled Lightroom preset collection.
Vintage Love Lightroom Presets


This collection of presets is great for those who are planning to create a soft and romantic vintage effect for their photos. If you like the effect of shooting on an old film camera, these presets will greatly simplify the photo editing process.
5. Muted Look Photography Editing Style


By applying this effect to your photos, you mute the colors giving the image a mysterious look. Keep in mind that it doesn’t mean you should completely desaturate all the colors. The muted look (it is also called faded, desaturated or washed out) works best when you don’t want to make the “muted” image the central focus of the site. To be precise, when you are desaturating the colors, it is necessary not to wash them out at all because in this case, your image will look too gray.
How to make it in Lightroom?
Step 1. Open the Photo

Chose the photo that you want to change.
Step 2. Curves

At the bottom of the layer, you can see a black and white icon. Click on it to add a new adjustment layer. Then choose Curves.
Step 3. Brightness and Contrast

Create a new adjustment layer with brightness and contrast. Move the contrast slider to the left and set it to -50.
6. Monochromatic Photo Editing Style


I want to warn you that you should not confuse this edit style with a classic black and white look. The monochromatic style is about applying one color shades instead of several colors. Most often photographers use purple, blue and red colors to get a monochromatic look. Dark tints are used to replace pastel shades. This style is very popular in the business photography field. Many online stores use it in clothing advertising campaigns.
How to make it in Lightroom?
Step 1. Open the Necessary Image
Choose a picture that you would like to process.
Step 2. Apply Black and White Effect

The first thing you need to do is to make your photo black and white. Then you need to adjust the following settings.
Step 3. Gradient Map

Open the gradient map and make sure that the color values are #e10019 and #6f0303. Change layer mode to Multiply.
Step 4. Apply Gradient Fill

Add colors to your image using a gradient fill. Change the color values to #ffffff and #373737. Set the linear angle to -90 degrees and 117% scale. After that, apply the "Overlay" with 48% opacity.
Sepia Fantasy Lightroom Presets


Do you want to achieve a monochromatic effect without extra time? Use these presets for quick and high-quality results, they are suitable for any type of photos.
7. Black & White Photo Editing Style


For a long time, it was the only photo and video effect before color film appeared and the photo editing sphere started developing. Even today, this style is used in various photography areas. In addition, this is the easiest way to stylize the image.
How to make it in Lightroom?
Step 1. Open an Image
Select the color photo you want to process.
Step 2. Go to Camera Raw Filter

Step 3. Black & White Settings

In dialog window Black & White of Camera RAW Filter set these settings.
Black & White Essential Lightroom Presets


You can make a photo black and white in one click, but it will be simple and dim. Use this set of presets to saturate your black and white photos with soft shadows and highlights.
8. High Contrast Look (Cinematic)


Your photos will become more attractive and trendy with this "cinematic look". Unlike the previous types of photography editing, this look is more complex. It is quite popular in web design and still life portrait photography. Note that the high contrast look doesn't go well with a minimalist design. Use this style only for thematic photoshoots with a high degree of stylization.
How to make it in Lightroom?
Step 1. Open a Picture
Select the picture you want to work with. I do not advise taking a black and white image.
Step 2. Select Camera RAW Filter

For quick and effective color correction use Camera Raw Filter.
Step 3. Choose Settings

Select Contrast, Highlights, Shadows, Clarity and Dehaze by changing the sliders in the selective color layer menu.
HDR Effect Photoshop Actions


To quickly increase the contrast and create a rich effect to the picture, use these actions for Photoshop.
Basic Photo Editing Tips
I want to present you 10 photo editing tips, which will be useful in all popular photo editing styles.
Read my full guide with 20 basic photo editing tips that will be helpful for beginning portrait and wedding photographers who deal with deep color correction and skin smoothing.
Choose Photo Format

Mind the characteristics of your camera and the purpose of your work when choosing the right photo format. Each device has a different degree of sensitivity. Cameras that shoot in RAW format capture the image in its original form and save it to a memory card. This format is ideal for all types of photo edits.
View everything about photo editing for beginners to avoid many Lightroom and Photoshop mistakes.
JPEG images also have some advantages. For example, the camera can carry out basic photo editing on its own. This is an ideal option for people who use only color correction and do not need deep photo retouching. However, you should remember that the JPEG format can cause the loss of important details and result in lower image quality.
Stay Natural

Remember, high-quality photo editing involves getting natural, realistic images. Many novice retouchers make too many changes. As a result, the objects and people look plastic. If you work in portrait or wedding photography editing, emphasize the beauty of natural features, remove skin imperfections and show the real beauty. Actually, this advice is relevant for any type of photo editing.
Crop Photos to Get Rid of Empty Space

Correct cropping is the key to success for novice photographers in different editing styles. It is noteworthy that you do not need to have any special skills to do it correctly. Everything depends on your taste and artistic vision. You can use any basic photo editor for this purpose.
Use Levels for Best Rotation

Beginning photographers often make many mistakes paying no attention to important details. They devote a lot of time to color correction, forgetting about some things that directly indicate the professionalism of a photographer. The point is that when taking many photos, you do not always manage to capture the horizon correctly. I recommend you to use Levels to adjust the Rotation.
Vignetting to Make Photo Pop

Vignetting is a basic tool used in many photo editing styles. It means that some objects will get darker while others will be highlighted. It allows you to emphasize some important details. Most often, retouchers use vignetting for color images. I advise you to use this effect in portrait photography to emphasize the facial features of your models.
Shadows and Highlights to Increase the Beauty

Photo editors call the darkened areas of the image shadows, and the bright parts are highlights. Unfortunately, even the most professional and expensive cameras cannot always reflect the light as a photographer would like. Use "Shadow" or "Highlight" tools to your images, regardless of photo editing styles which you are working in. I recommend you to shoot in RAW mode to enjoy all the possibilities of professional photo editing.
Backlight portrait photography is interesting, but a complicated style that requires the understanding of various photography editing styles. Learn these backlit portrait tips and become a real pro!
Adjust Contrast

This technique is used in wedding photography editing styles very often. Its main task is to highlight bright areas and darken dark parts of the image. It will help you make the boundaries between them more visible. Contrast tool can make your image clearer and sharper. Using this basic method, you may achieve a bright and saturated look.
5 FREEBIES for Different Editing Styles
If you want to learn how to process photos in Lightroom using the above-mentioned types of photo editing, I recommend you to apply these free plug-ins that will help you to edit your pictures in a couple of clicks.
Sepia Deep Shadows
Using this preset, you can create a dramatic effect and emphasize the texture of the image. It is designed to highlight detail and enhance photo contrast. This tool is ideal for portrait (especially for male portraits), architectural or landscape photography.
Feel exhausted editing dozens of shots? Why not use Lightroom presets? Read the detailed guide and learn how to create and use them. The process is simple but the results are awesome.
Contrast Warm
If you want to remove too dark shadows that distract attention from objects, I advise using this Matte Lightroom preset. It is an ideal tool for work with family portrait editing when you work with pictures containing lots of green and blue elements.
Cross Process Cold Feel
If you want to get a photo with a soft texture and light shades, I recommend you to use free Lightroom Cross Process presets. “Cold” LR filter reduces warmth and adds cold tones.
Vintage Darken
This is one of the most universal photo editing styles Lightroom. It is aimed at adding a retro look and glow to your photos. It is good for work with urban and fashion photography because it highlights important details perfectly.
Black and White Look
As I mentioned earlier, the black and white effect is the classic that will never lose its relevance. It perfectly fits all photo genres. Try to mix modernity and retro style, and you will get an incredible result.
YOU MAY ALSO LIKE:
ABOUT US

RECENT POSTS
-
-
Best Photo Editing Software
-
Photoshop Free
-
Adobe Lightroom for Free
-
Cameras for Amateur Photographers
-
Wedding Photography Tips
-
Real Estate Photography Tips
-
Fine Art Nude Photography
-
Photoshop Online
-
Illustrator Online
-
Download Lightroom Online
-
Watermark Remover Online
-
Free Adobe Software of 2025
-
Best Free Graphic Design Software
-
Best Free Drawing Software
-
Best Motion Graphics Software
CATEGORIES
- Retouch Tips
- Guides
- Photo Editing Tips
- Professional photography
- Software Reviews
- Cameras & Lenses
- Software reviews
- Ann Young
- Photo Tips
- Comparisons
- Discounts
- Create with Adobe
- Wedding Photography
- Lightroom Tips
- Lighting & Studio
- Julia Newman
- Tech tips
- Photography Tips
- Amateur Photography
- Photoshop Tips
- Hardware
- Kate Gross
- Business Tips
- Photography Gear
- Editorial Photography
- Camera File Formats
- Graphic Tablets
- Eva Williams
- Photo Contests
- Inspiration
- Portrait Photography
- Capture One Tips
- Tripods
- Video Editing Tips
- Tata Rossi
- Photo Events
- Product Photography
- On1 Tips
- Bags
- Tani Adams
- Most popular
- Newborn Photography
- Photo Accessories
- Services Review
- Robin Owens
- Apps and Software
- Vadym Antypenko
- Drone Photography
- Drones
- File Formats
- Tati Taylor
- Jacqueline Dornbusch
- Deutsch Blog
- Tetiana Kostylieva
- Nataly Omelchenko
- Real Estate Photography
- Monitors
- Elisabetta Ferritto
- Italiano Blog
- Kate Debela
- Lifestyle Photography
- Computer Mouse
- Marcos Mancebo
- Food photography
- Spanish Blog
- Binoculars
- Luna Rebelo
- Photography storage
- Portuguese Blog
- Keyboards
- Nicolas Ardouin
- French Blog
- Kamata Miyuki
- Headphones
- Scanners
- Japanese Blog
- Phatchara Kanjanapas
- Projectors
- Chinese Blog
- Cui Jin Pau
- Speakers
- Arabic Blog
- Hamdi al-Kazmi
- Extenders
- Korean Blog
- Akshey Jadhav Chopra
- SD and Graphics Cards
- Turkish Blog
- Kerem Kurt Altınay
- Printers
- Thai Blog
- RAMs
- Polish Blog
- Roksana Kasza
- Modems
- Russian Blog
- Routers
- Hindi Blog
- Nagy Éva Rakoczy
- Thunderbolt
- Vietnamese Blog
- Madalina Iordanescu
- Microphones
- Czech Blog
- Adriana Vlasáková
- TVs
- Hungarian Blog
- Irene Angelopoulos
- Security Cameras
- Romanian Blog
- Pin Tae-Ran Kwon
- Additional Gear
- Indonesian Blog
- Greek Blog
- Vladimir Fokin
- UK Blog
- Tri Farida Sudjarwadi
- Dutch Blog
- Lourens Wilmerink
- Danish Blog
- Elena Nissen
- Australian Blog
- Mirjeta Sapunxiu
- Albanian Blog
- Gayane Melkonyan
- Armenian Blog
- Ali Hassan
- Azerbaijani Blog
- Nedim Sabanovic
- Bosnian Blog
- Salza Stoeva
- Bulgarian Blog
- Kong Samnang
- Khmer Blog
- Blaženka Slavić
- Croatian Blog
- Aleksander Mitt
- Estonian Blog
- Abeba Goytom Gabra
- Antivirus Reviews
- Amharic Blog
- Elma Niemi
- Finnish Blog
- Otar Kobalia
- Georgian Blog
- Serena Halldórsdóttir
- Icelandic Blog
- Gedeon Kagan
- Hebrew Blog
- Umoja Abebe
- Kazakh Blog
- Swahili Blog
- Moke Douangmala
- Kyrgyz Blog
- Lao Blog
- Sedriks Rozītis
- Latvian Blog
- Violeta Leketaite
- Lithuanian Blog
- Aleksandra Mitreska
- Macedonian Blog
- Mathis Ravatomanga
- Malagasy Blog
- Rose Pulmano
- Chichewa Blog
- Sophia Oletta
- Maltese Blog
- Bugurul Ganbat
- Mongolian Blog
- Naveen Pokhrel
- Nepali Blog
- Annette Dammen
- Norwegian Blog
- Emilijan Pešić
- Serbian Blog
- Elisa Bešiæ
- Slovenian Blog
- Peter Egnell
- Swedish Blog
- Nazar Antonyuk
- Tajik Blog
- Samat Kapanov
- Turkmen Blog
- Aiza Aydarova
- Ukrainian Blog
- Rustam Karahanov
- Uzbek Blog
- Idris Aksoy Alimov
- List of Authors at FixThePhoto
- Oumri Manzurova
- Tống Xuân Cung
- Mario Petrone
- Photographer
- Shannon Harris
- Allen Gray
- Nicky Sullivan
- Tina Baker
- Tina Parker
- VPN Deals & Reviews
Get New & Fresh Content From FixThePhoto

