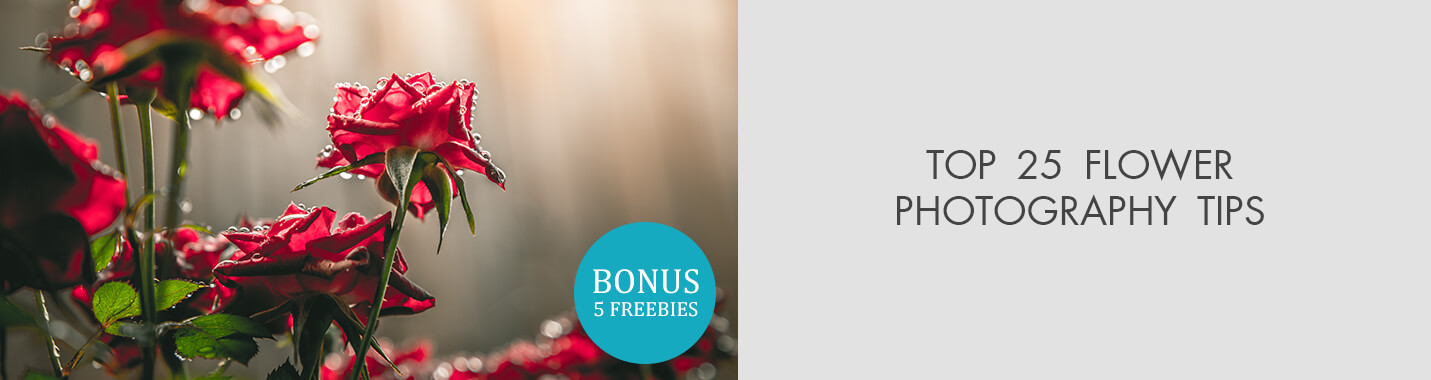
26 Flower Photography Tips: Creative Flower Bouquet & Macro
When you purchase through affiliate links on our site, we may earn a commission. Here’s how it works.
Flower photography is probably the most popular type of shooting among amateurs. But very often the resulting floral pictures look disappointing. That’s because a photographer doesn’t understand the difference between what a person sees, what he/she imagines and what the results are.
In this article, I will tell you how to get beautiful photographs of flowers from the first try in all weather conditions.
Top 25 Flower Photography Tips
Flowers are ready-made objects that are meant to be photographed. This is obvious, because every day you see countless images of flowers on social networks and in photo galleries.
As in any genre of photography, there are universal rules and recommendations, as well as tips and tricks for getting the best floral pictures.
1. Shoot with Natural Light in the «Blue Hour»

The first tip for taking pictures of flowers outside is not to use flashes as they flatten the frame. It is better to highlight the dark sides of the flower with a golden reflector, which gives a warm shade.
The light sensitivity shouldn’t be raised above 100, since there is always enough light in the open air, even in cloudy weather. On sunny days, I suggest shooting an hour after sunrise or an hour before sunset, during the so-called «golden hour».
To track this period of time, you can use special applications for Android and iOS.
2. Backlight Will Make Your Flowers Glow
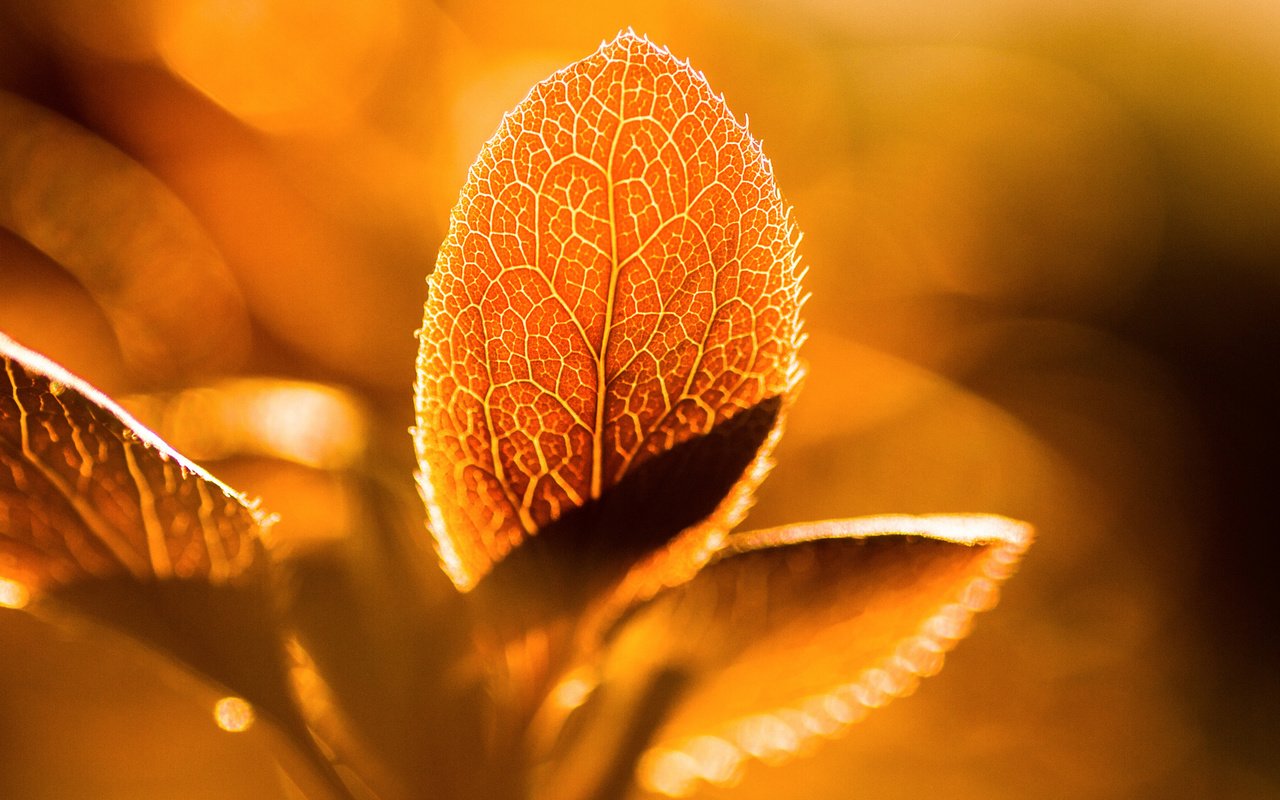
Backlit flower photography is a great way to capture the beauty of the flowers. You can get a backlight when the sun is straight in front of you, illuminating the flower from behind. Because of the translucency of petals, backlight creates a glowing effect on flowers.
It is recommended to shoot backlit flowers in the late afternoon or early evening, with the sun being closer to the horizon. As a result, it will produce soft warm light on the entire shot. If you try, you can even capture light rays shining through the trees.
Also, I would like to note that you may use fill flash behind or below the flower in order to illuminate it better.
3. Eliminate Camera Shake and Blurring in the Frame
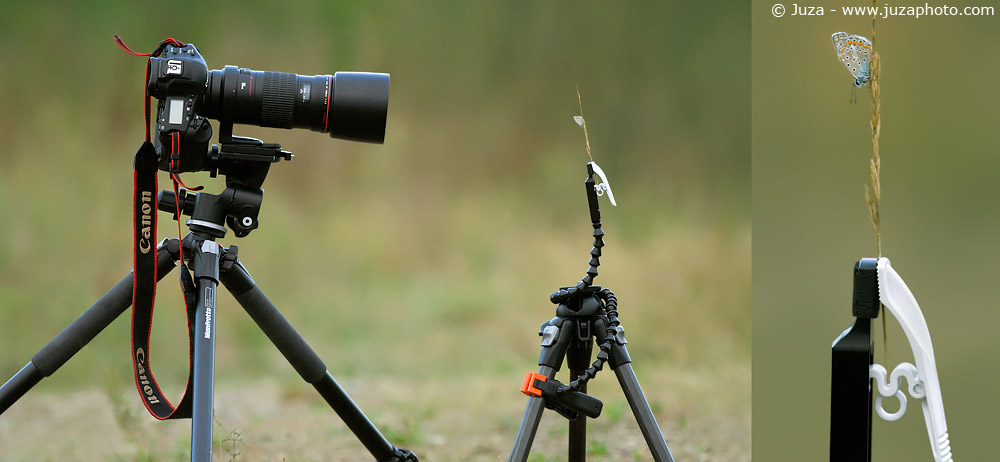
The biggest challenge when photographing flowers in the wild is the wind. It wiggles the flowers, leaving a blur in the photograph. To avoid this, shoot at fast shutter speed, for instance, 1/500. If the wind blows, you can turn on the tracking focus (for example, in Nikon cameras, this function is called AF-S). It will keep the waving flower in focus more confidently.
With the 3D tracking function, the camera can follow an object even if it leaves the area of the focus point. Also, use a helping hand to which you can attach a flower and prevent any shaking.
4. Shoot After Rain
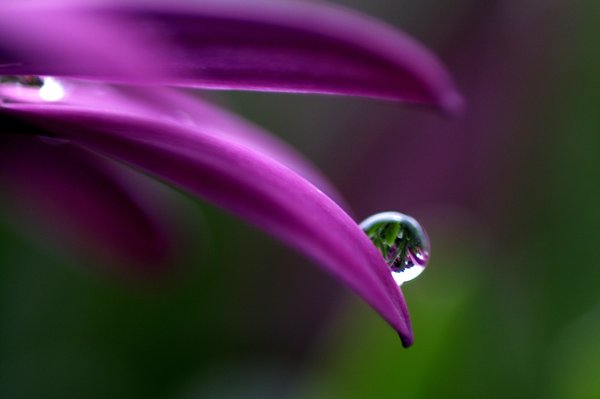
This period of time is especially winning for flower photography. Take pictures when the clouds haven’t yet disappeared, and there are raindrops on the petals of flowers. Be careful not to shoot directly in the rain, because you will have to put a lot of effort to protect the camera and yourself from drops.
The moment after rain is also suitable to use a macro lens. When shooting with a macro lens, it is necessary to capture raindrops on the flowers’ petals and stems. They fully reflect the richness of the colors of the surrounding world.
5. Try Imitating Rain
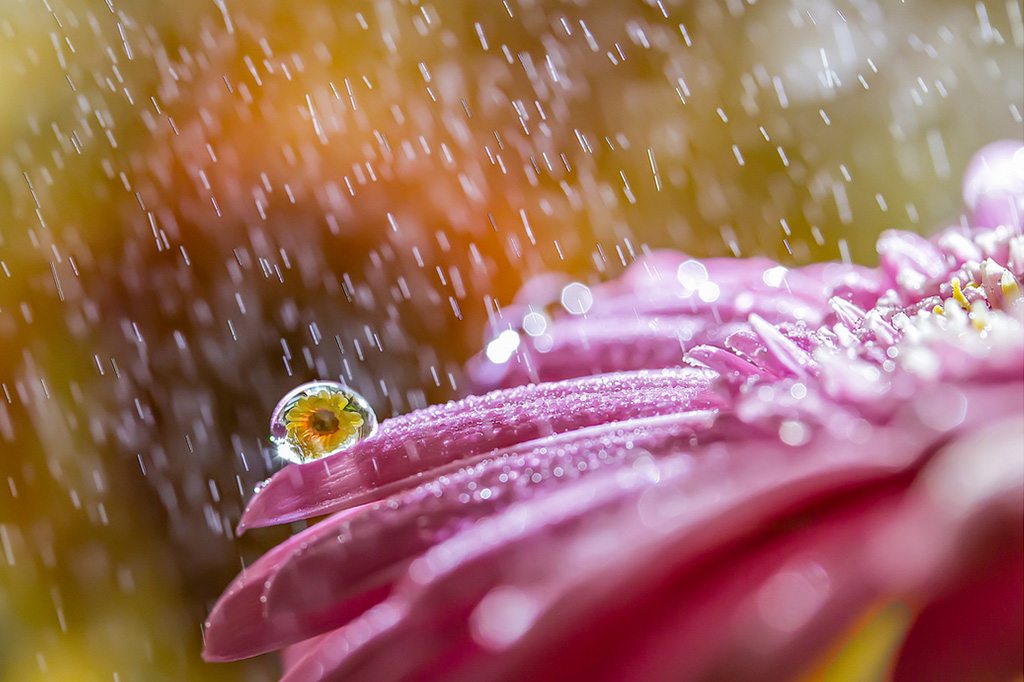
Don’t wait for the rain – imitate it. At first, it seems ridiculous, but the results will exceed all expectations. Instead of waiting for a rainy day to do flowers photography, bring a small spray bottle of water and sprinkle the flower.
Do it just a few times, and the petals will be covered with wonderful small drops of water. Looking at the shots you’ve taken, no one will guess that you haven’t waited for mercy from mother-nature but have done everything with your own hands.
6. No Need to Use a Professional Camera

I do photography of flowers using all possible devices – from full-frame DSLRs to compact cameras. Let me remind you that even though I prefer DSLRs, it is only a mechanism that doesn’t mean a lot.
What or who really matters is a photographer. He/she is the one, who takes amazing photos of flowers, not the equipment.
I carry a small compact camera in my pocket all the time. Most modern compacts can focus on objects that are literally a couple of centimeters away from the lens.
Sometimes I use a Micro 4/3 camera format for which, by the way, you can select micro four thirds lenses. Such a camera never stops me from getting a flower photograph of the quality I want.
You just need to get used to the tool that you now have in your hands. Because the best camera is always the one that you hold at the moment!
- Read more about the best cameras for macro photography.
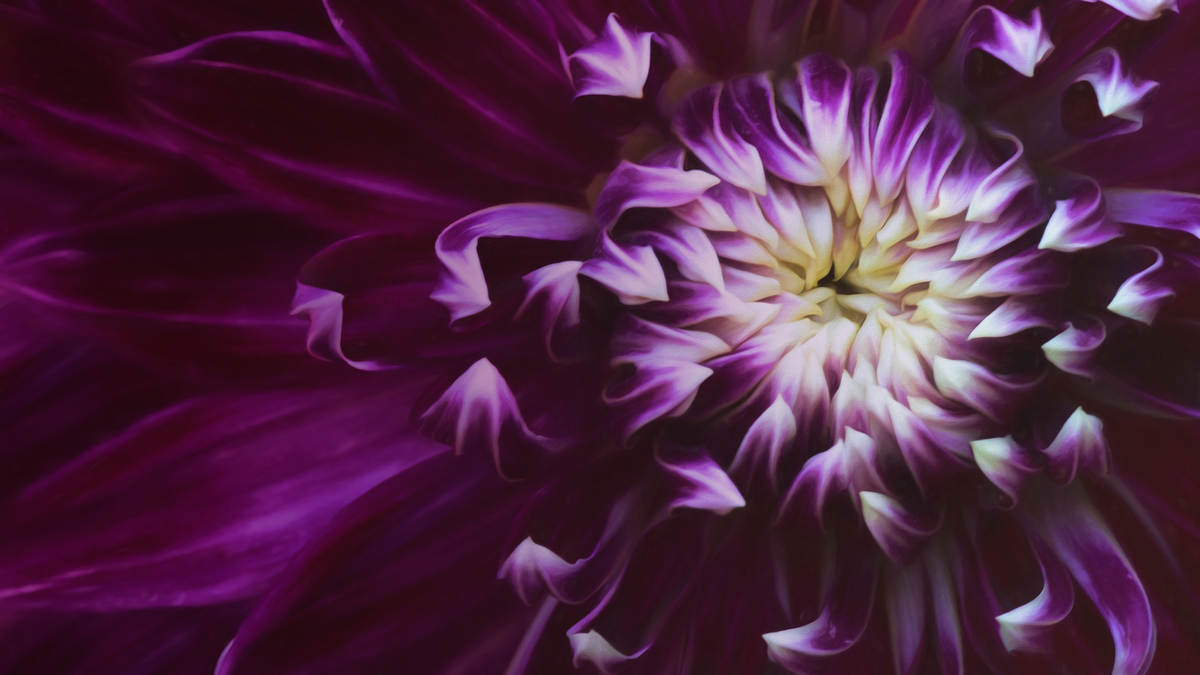
7. Use a Macro Lens

The most optimal lens for floral photography is a macro one, which will provide you with stunning results and a minimum focusing distance. Using a macro lens, you can get an image of the object being photographed at a scale of 1:1.
It is possible to bring the object so close only with the help of such lenses. The depth of field of macro lenses is so small that when shooting a rose, its petals in the background may be blurred.
Note that I’m not talking about a bouquet of roses in a vase, but about a single flower. When photographing bouquets, it isn’t obligatory to use a macro lens, you can shoot with a regular zoom lens.
8. You Can Also Use Zoom Lenses
When doing flower photography, it isn’t necessary to use only lenses for portraits or macro rings. A zoom lens also has its advantages.
For instance, you can bring the inflorescence as close you need. A shot where a bouquet fills practically the entire frame will look pretty good.
Also, you may try making the background blurry by focusing on the heart of the plant. To do this, you need to open the lens aperture to the maximum.
I recommend leaving in focus only one flower or inflorescence, where the buds are located at a small distance from each other. Thus, you will get the only main subject, which will immediately draw the viewer’s attention.
9. Get a Tripod

A tripod isn’t needed when you take regular floral shots. However, for close-up or macro flower photography, focus stacking techniques, a camera and the lens require a stable surface from an efficient tripod brand.
While taking this kind of pictures, a photographer typically resorts to the minimum focus distance of the lens, zooming in closer, setting a rather small depth of field.
Shooting with the camera in hands is possible, but even in decent lighting conditions, you may still get blurry shots because of camera shake.
The main benefit of photographing flowers from a tripod is that it makes you not hurry but ease up on arranging the composition for the frame.
Moreover, if you use a wireless trigger or a wired cable shutter, you are free from touching the camera to snap the picture, which often leads to camera moving and vibrating.
In case there is no wireless trigger or a cable release, you can use the self-timer mode in the camera for the identical effect. Remember to change the timer’s default 10 seconds to 2 seconds. Otherwise, the process of taking shots will be a long one.
10. Open the Aperture Wider
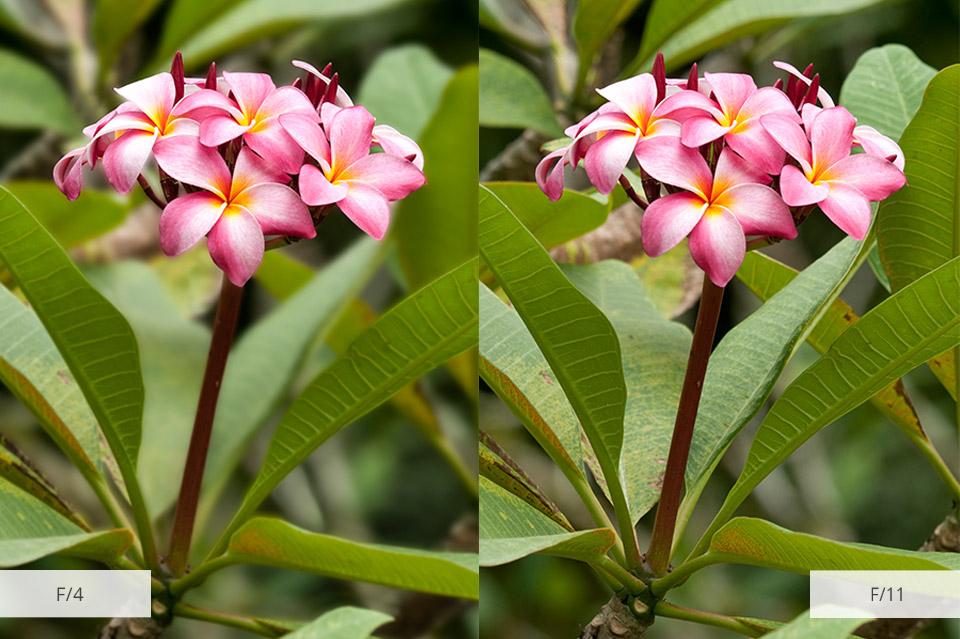
To separate the flower from the background, or even highlight one bud of the inflorescence, you need to control the depth of field of the depicted space.
The aperture is responsible for blurring the background: open it wider, that is, use its small values (for instance, f 1.2, f 4), and focus on the object you want to highlight. Then the flower, bud or even one petal will be expressive and clear, and the background will be nicely blurred.
If you learn how to photograph flowers with a phone or point and shoot camera and it is impossible to set the aperture, focus on the flower and snap a picture. Then blur the background while editing photos.
To control the viewer’s attention, you should always separate the flower from the background so that the shot doesn’t look like a mess of flowers, doesn’t cause dizziness and nausea.
11. Use Single Point Focus for Sharper Photos
A focusing process is quite a complicated one because of the shallow depth of field a macro lens produces. The slightest movement may mislead it.
That’s why, while snapping pictures of flowers, use a single point focus. It will let you identify precisely what area of the subject should be in focus.
However, a single point focus doesn’t always work perfectly. Sometimes, the camera may be unable to focus, for instance, due to the active movement of the subject. In this case, turn off the camera’s autofocus and change it to the manual one.
No need to think about the lens focus-tracking feature. Check whether the flower photograph is in focus with the help of a zoom button. Carefully examine the zoomed-in shot and see if the subject is sharp enough.
12. Use Focus Stacking for Your Flower Photography
Even though you set a small aperture, the lens will continue producing a rather shallow depth of field. It happens because of the close shooting distance. Moreover, it may cause the shot to turn out blurred.
For the subject to be fully in focus, you may try a focus stack approach, which is often used to realize flower photography ideas.
According to this technique, the shots are taken from different focus distances. Then you should stack these shots together and get one sharp picture.
13. Experiment with HDR
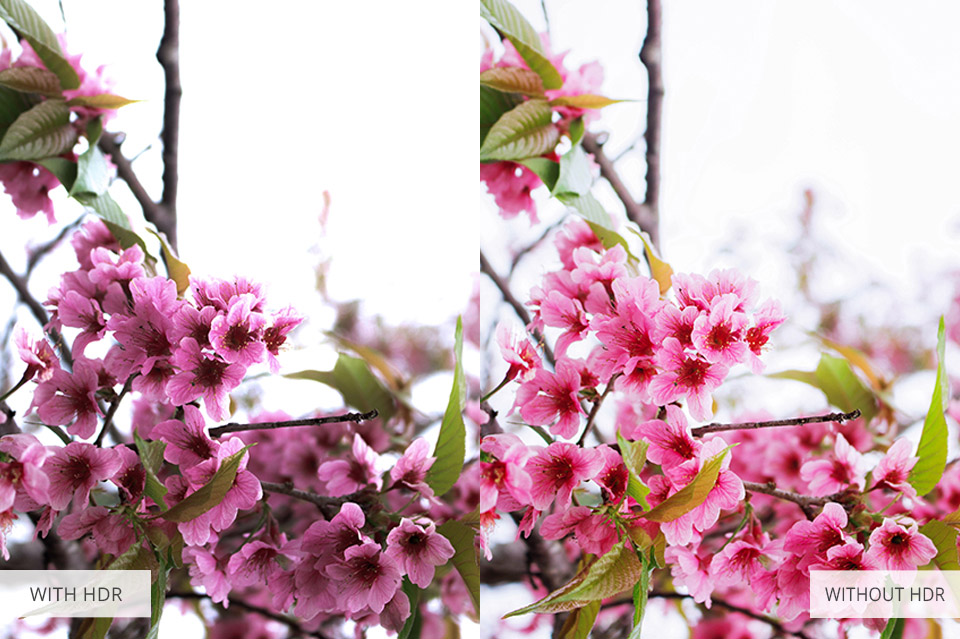
There are situations in which dynamic range is too big for a single image. In this case, photographers usually take a series of shots with different exposure values and mix them in a single image during image post-processing.
This method is called a high dynamic range or HDR. It has a bad reputation because it is very easy to go overboard and get a low-quality image in the end.
If done properly, however, HDR can become an excellent tool for creating the desired image in flowers photography. Nobody will ever tell how the shot was created in reality.
Many modern cameras allow you to take 3, 5, 7 or even 9 shots with different exposure values. Set the camera on a tripod, adjust all the settings and focus, and press the shutter button.
14. Don’t Photograph the Flower from Above
These shots don’t usually turn out nice. Even though there may be some good-looking images if the composition is right.
When we walk in the garden or field among the plants, we usually look at them from the top down. It’s the most usual angle and, thus, the most boring one. Just squat down (even better lie on the ground) and the shot will immediately acquire an unusual shade of meaning.
Try photographing flowers at the bud level. Amateur photographers rarely use this approach.
Tulips and poppies, for example, can be photographed from the ground to have the bottom view in the shot. These two flowers look great from this angle, even though some flowers shouldn’t be shot this way.
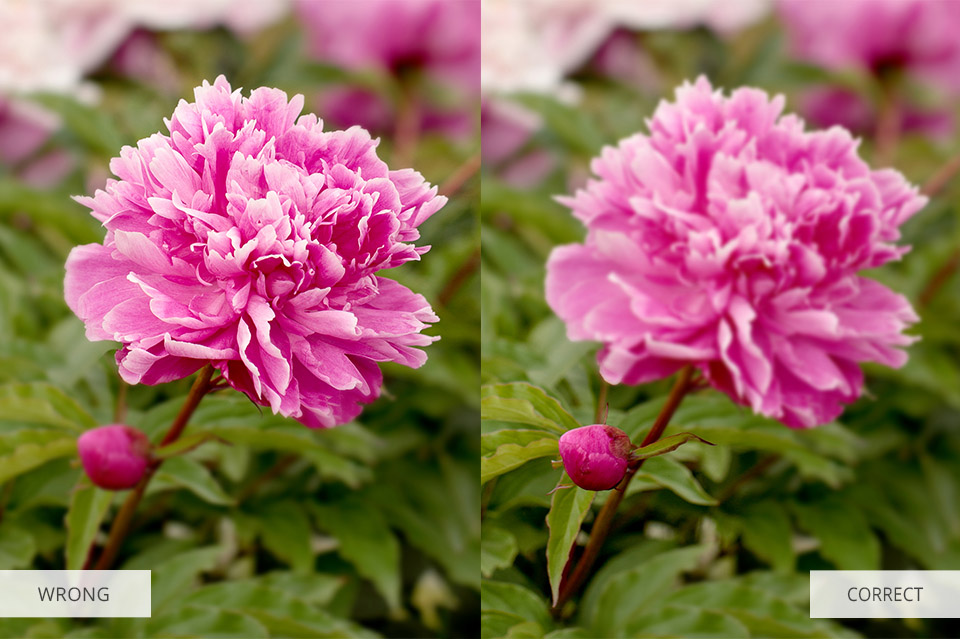
15. Isolate the Main Object

This one of the simplest flower photography tips but it’s something you shouldn’t ignore. We have all seen photos with ugly or cluttered backgrounds. The main object is lost against the mess, the photo has no effect on the viewer and looks chaotic.
Mind that distractions can be very different. For example, a large area out of focus, unusual colors, over-exposed areas. The eye of the viewer will wander around the photo, which leads to loss of interest.
Problems like these, however, can be fixed with the help of Photoshop. If you are afraid you won’t be able to get the most natural look, you can always find professional photo editing help.
16. Use a Contrasting Background
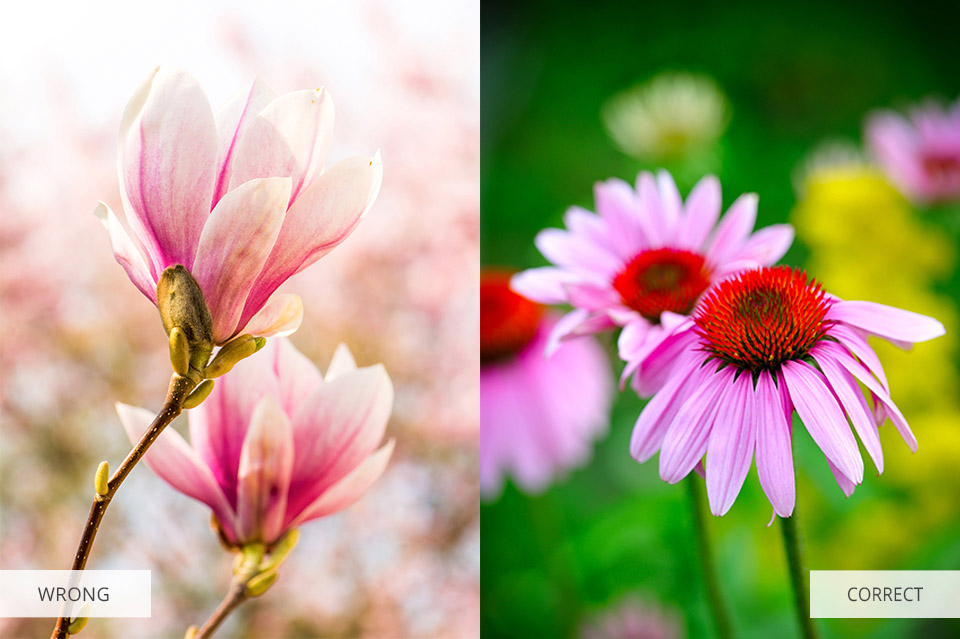
Using the background of a color different from that of the main object, you can point out what is the most important thing in the picture. In case the ‘main hero’ is lost in the background, you need to change it. This applies to floral photography too.
Kneel or lie on the ground, try to see how the object interacts with the environment. Even the prettiest of flowers will not be perceived well without the correct background.
17. Use the ‘Rule of Odds’
An odd number of similar objects always looks better in a photograph than the even one. Three flowers are better than two or four, and five are better than six or eight in a flower photograph.
When you have an odd number of objects, one of them is always between two others, and that attracts more attention. This technique is often used in advertising photography.
Another point to consider is the composition. It isn’t too difficult, just try different angles, depth of field, play with shadows and light to find the best variant.
- Don’t forget about the rule of thirds in photography.
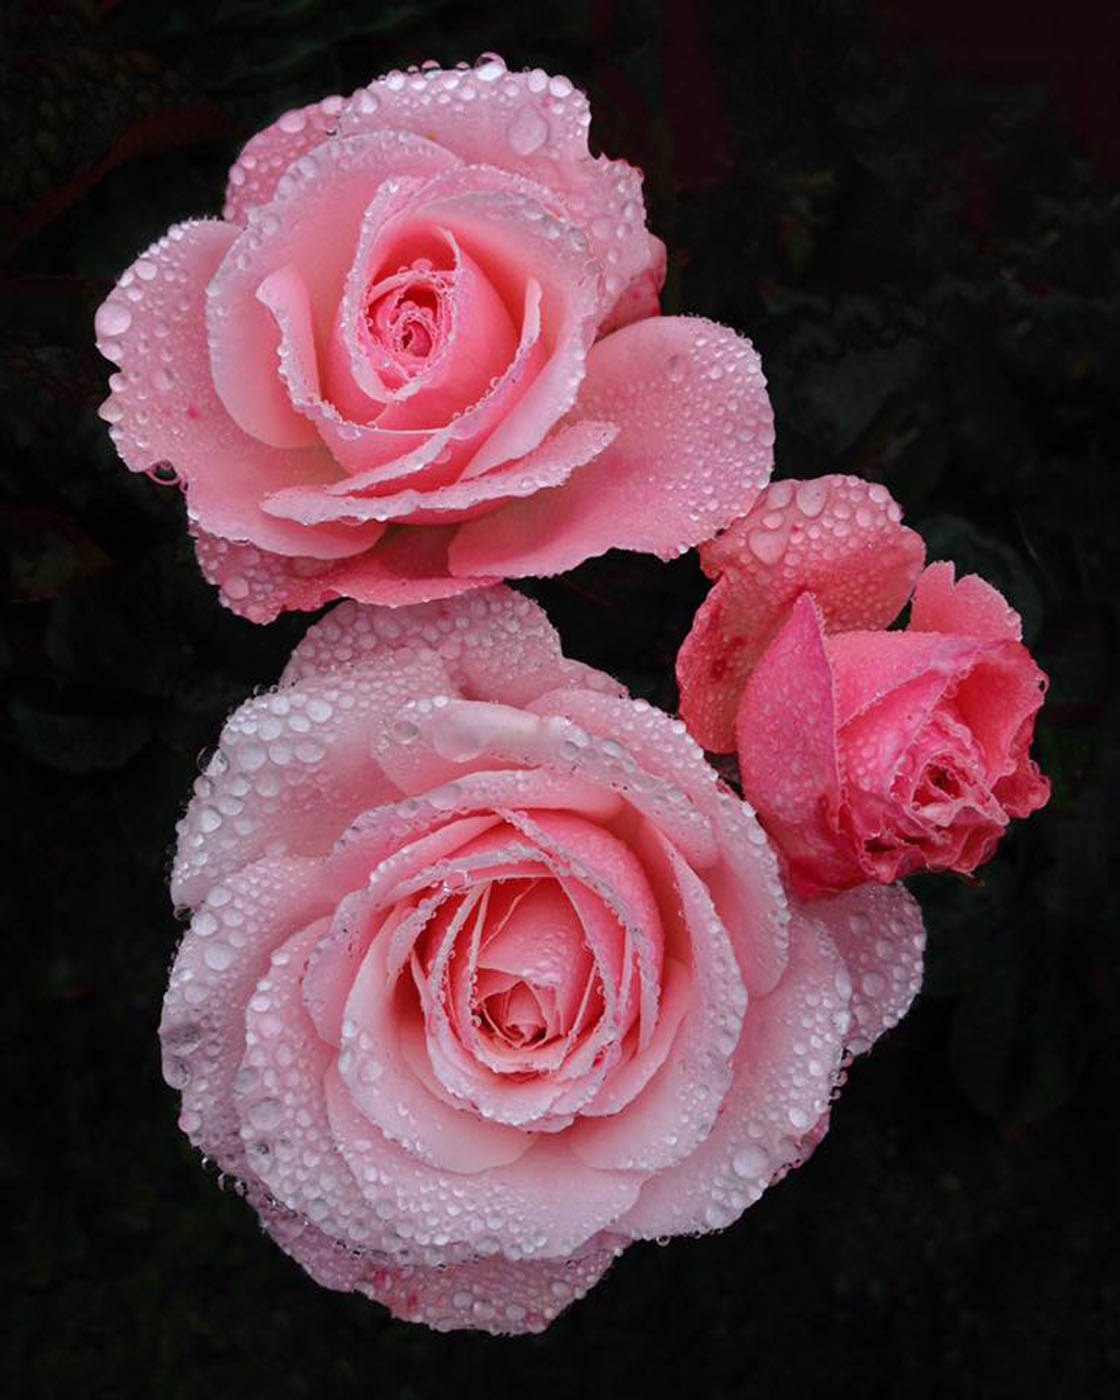
18. Use Black Background

You will get the most attractive composition when you shoot a bouquet against the black backdrop (or when you make a black background layer in Photoshop). One of the easiest flower photography ideas is to use a piece of black fabric, like velvet, behind your object.
This background should be not far from the flower. This way you will let the light reflect and the black will look even more intense. Shoot at a close distance and, voila, you have practically a masterpiece!
19. Or a White Background
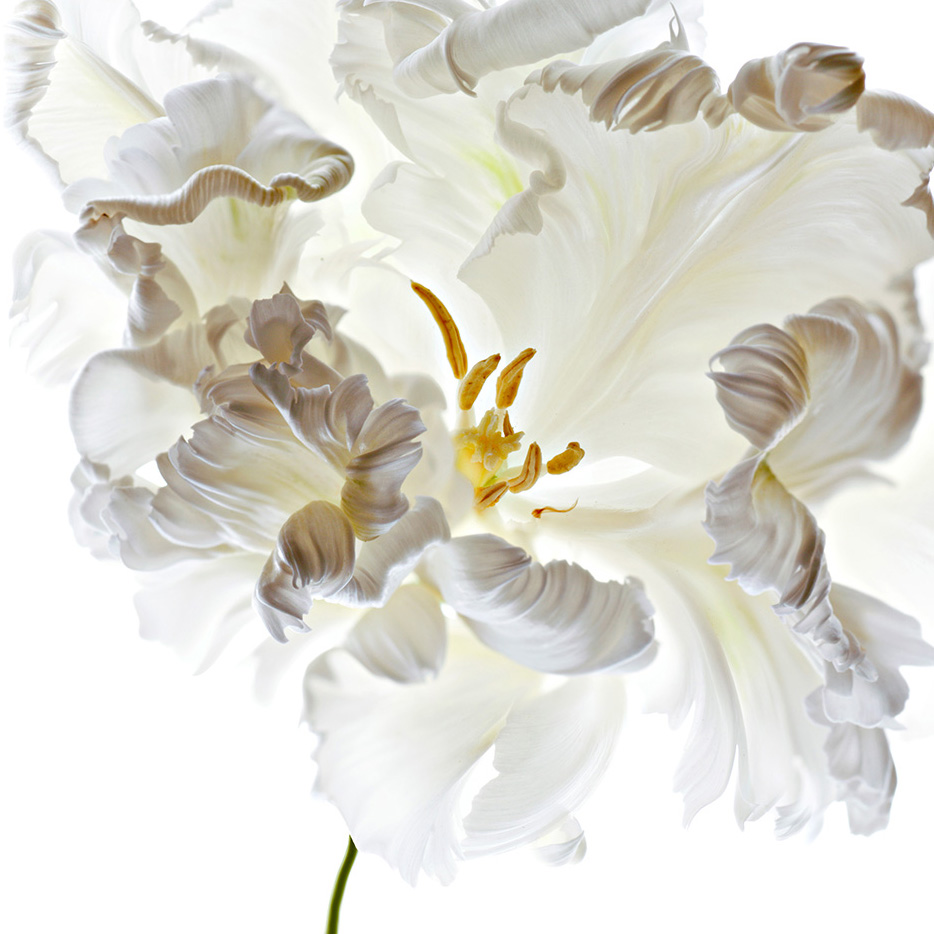
A white background is just as good an idea as the black one in the photography of flowers. A large sheet of white paper or cardboard will do the job (the latter will be even more convenient).
Take two pieces of cardboard – one to be used as a background and the other as a natural light reflector to illuminate the object. It’s that simple!
You can literally follow the steps from the previous tip – just place the flowers not far from the background and get an amazing photo for your portfolio.
I, personally, love to shoot flowers against their natural background. Always pick the background that will contrast with the bouquet. This way it won’t be lost and draw the viewers’ attention.
20. Show Flowers in Motion

It’s not necessary to keep the object in flower photography completely steady. Instead of blocking the wind, you can use it to make a more creative image of the flowers.
Set the camera onto a tripod, set your aperture to the lowest setting to get the relatively slow shutter speed. Depending on the wind force and how much light is available, you may need a neutral density filter to slow down the shutter speed and show the movement.
Having adjusted your camera settings, take a shot and examine it on the display. Make changes to increase or decrease shutter speed if needed to get the desired result.
The shutter must be open for 1 or 2 seconds when the wind is blowing. As a result, you will get a more artistic and dynamic image with slightly blurred flowers.
21. Use the Sun

It will be simply perfect if you take pictures around the sunrise or sunset, when it is the closest to the horizon and the light is perfect for this kind of photography.
Place the flower between the camera and the sun to use the rays to create a star in the shot that is showing from behind the petals. You need to set the f-stop value to f/16 or f/22.
A tripod, a live view mode to control composition and focus are a must in order to master how to photograph flowers during this time of the day.
Be careful not to look at the sun directly through the viewfinder or you will damage your eyes. Also, don’t forget about the beautiful colors of the sky during this time.
- Here are some sun photography tips.
22. Show the Life Cycle of the Flower

Another great way to tell the story with the help of a photo is to choose a flower and show its life cycle by taking a series of shots during the growing period. Start with a shot of the flower when it has just been planted and starts growing.
As time passes, take photos every other day or weekly to show the transformation of the flower when it just starts blooming and then when it’s in full bloom, and, finally, dies at the end of its life cycle or when the weather changes.
Depending on the number of final images, you can even create a video or try and make a flower time-lapse video.
- Check out these best time lapse apps.
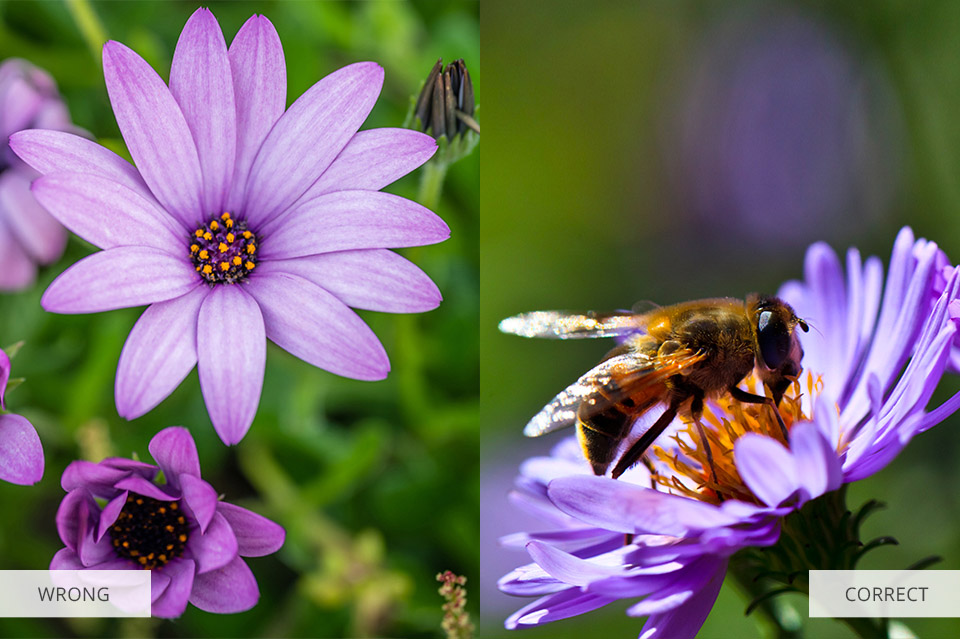
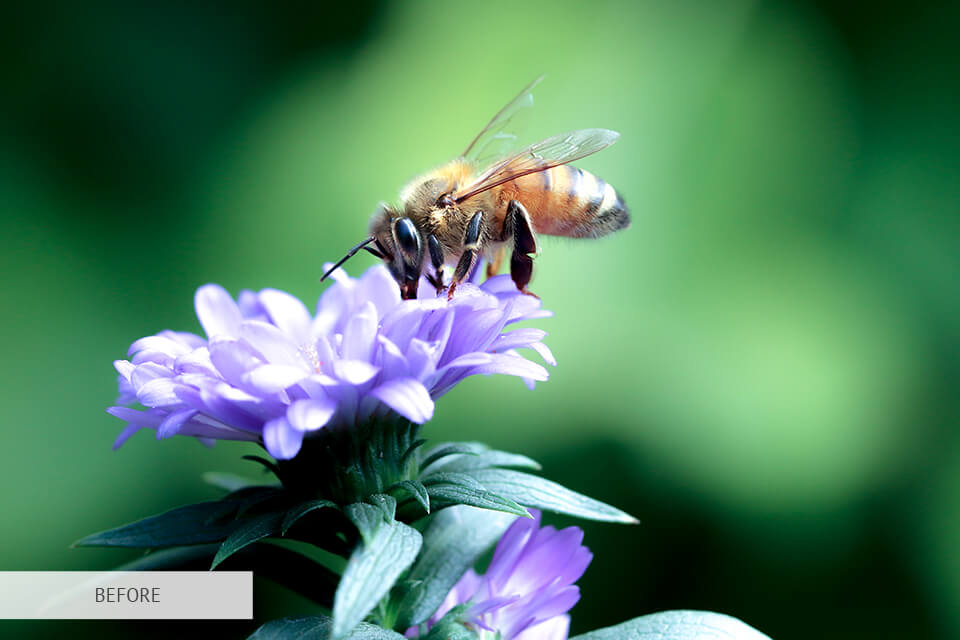
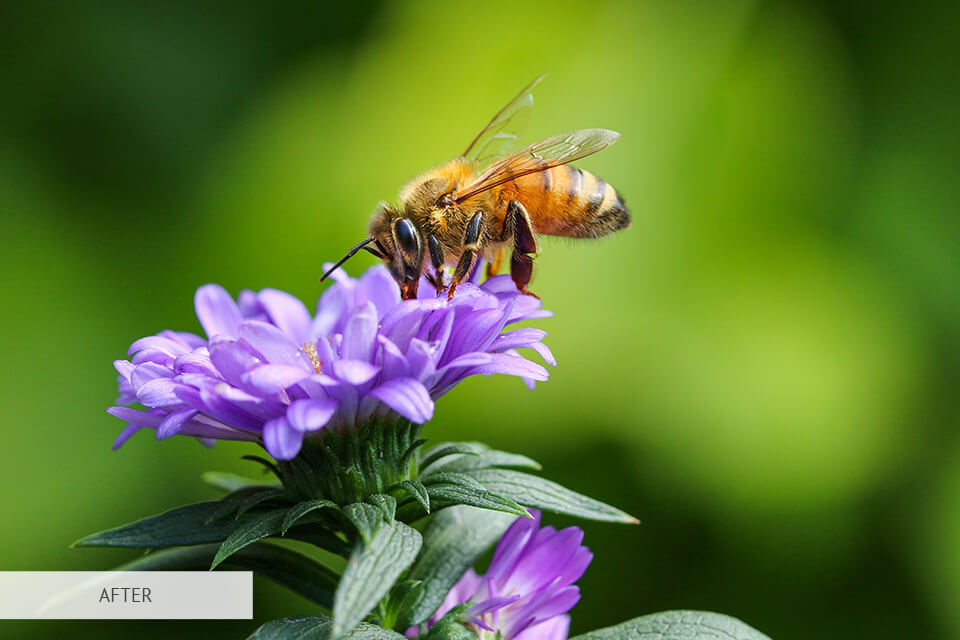
23. Liven Up Your Pictures with Butterflies and Bugs

For a more natural appeal in your flower photography, try including butterflies or other insects in the shot. It is not always that easy to find an insect on or somewhere near the flower. But you have better chances with flower beds or areas with a lot of flowers in one spot.
To catch an insect, consider using bait. For example, make a sugar and water solution and spray it on the flowers, use fruit or some perfume (there is a risk the perfume will attract mosquitoes, though).
As soon as everything is ready, start shooting with the burst mode. This way, you will definitely get a good shot in the sequence.
- Check out these creative macro photography ideas.
24. Try Black and White

When you can’t get the colors right, how about trying black and white photography? It will work great if the flower is white or another light color and the background is dark. The contrast you get in the image will look great.
- View these black and white apps.
25. Use the Shade

One of the main mistakes that can be made in flower photography is shooting them in the bright sun. As a result, you may get an overexposed photo with harsh shadows.
Find flowers that are already in the shade or simply use your own body to create one by standing between the sun and your object. You will be getting softer light and an opportunity to use shadows as a creative element of your photo.
- View more shadow photography tips.
Tip 26. Create a Flower Photography Portfolio
After you experiment with flower photography, you are ready to create your portfolio. As a beginner, you may wonder what is the best hosting platform for creating a portfolio. The answer is WordPress. It is definitely the most flexible website builder and it will help you showcase your work.
Freebies for Flower Photos
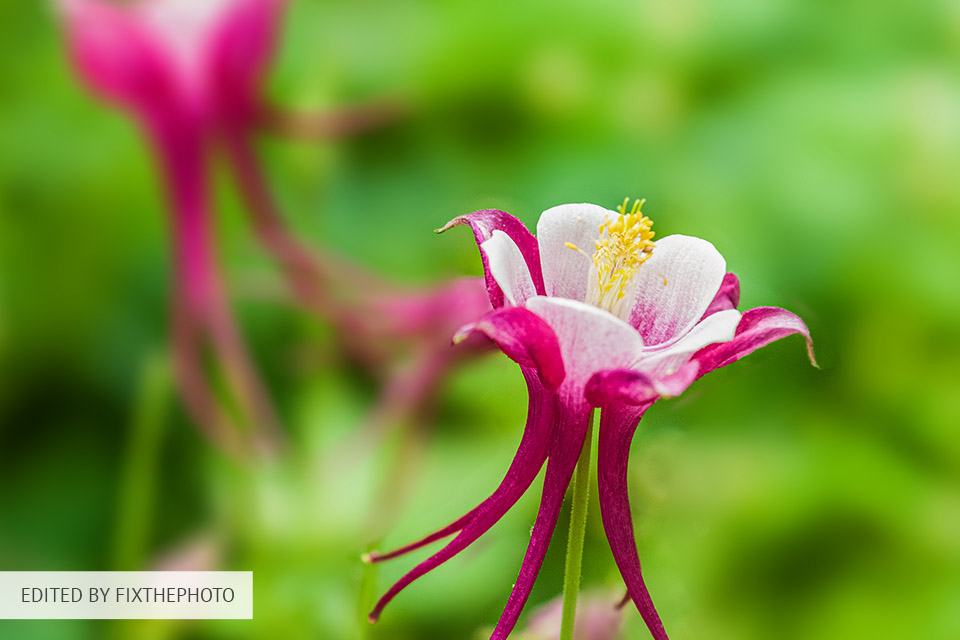
Once you’ve learned how to take pictures of flowers, you can now move on to image editing. It can significantly improve their quality and turn even the simplest shot into a piece of art.
You just need a few handy tools and a clear plan. Freebies below are going to help you with it.
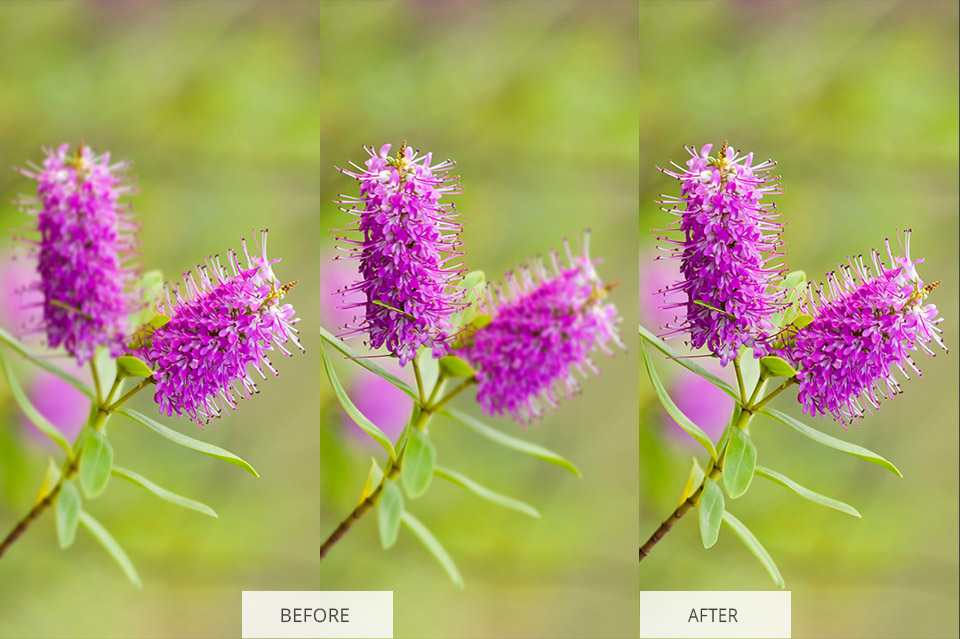
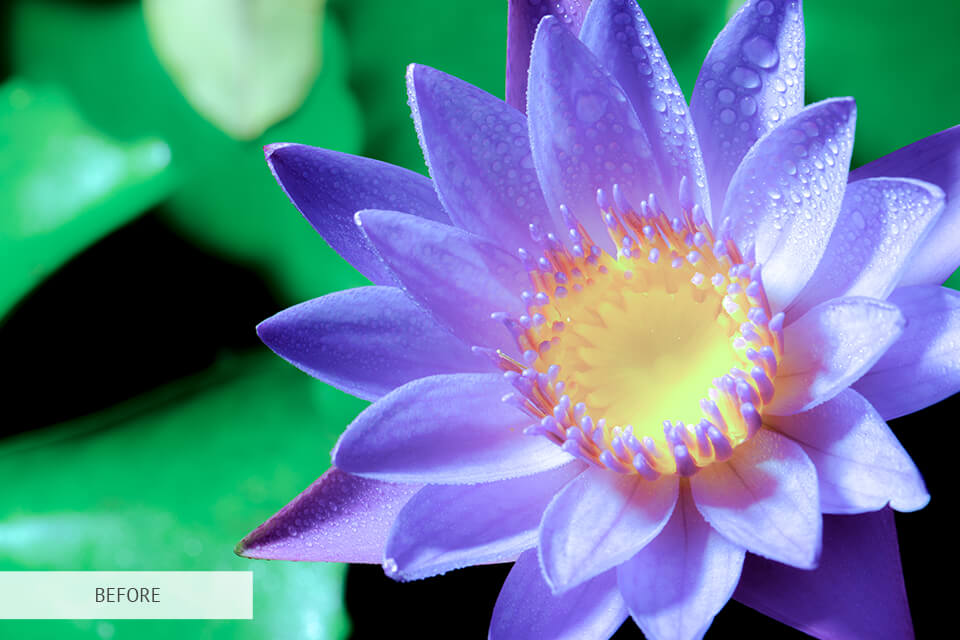
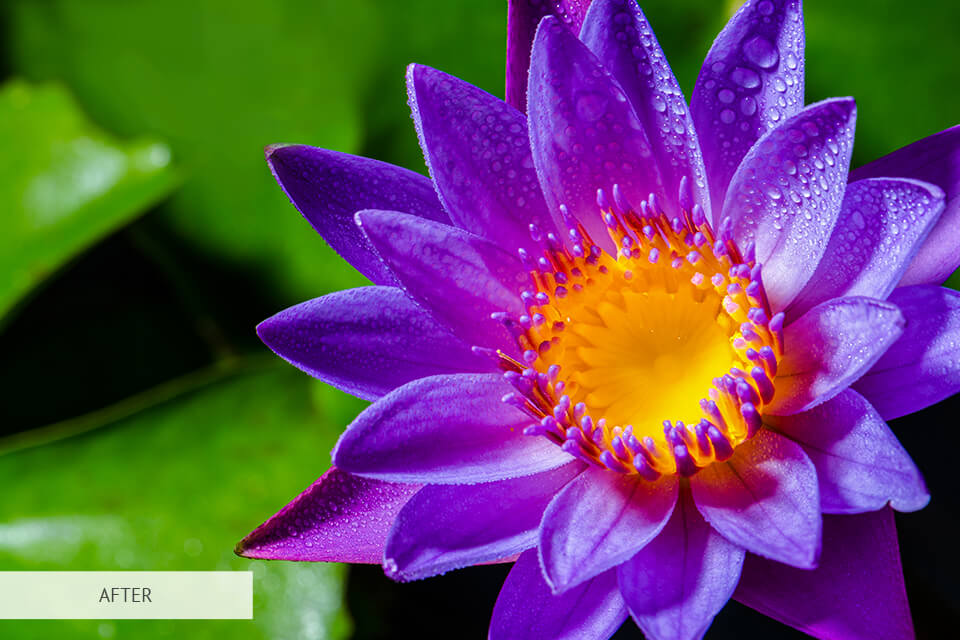
Light HDR
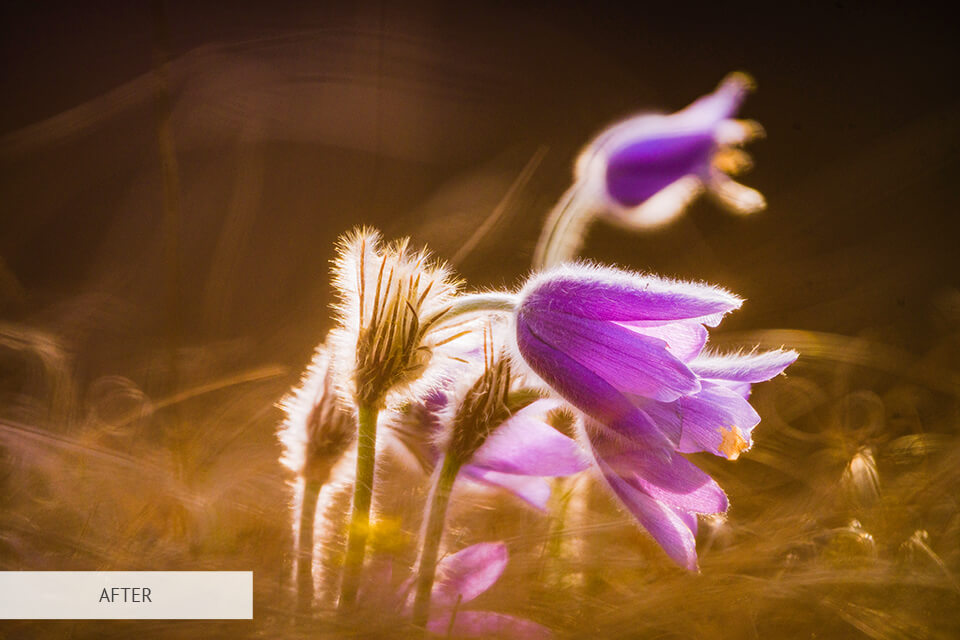
This free tool will noticeably improve the white balance to make lighting more even and clear. The action also guarantees a brighter and more saturated color rendering of each element of your flowers in the photo.
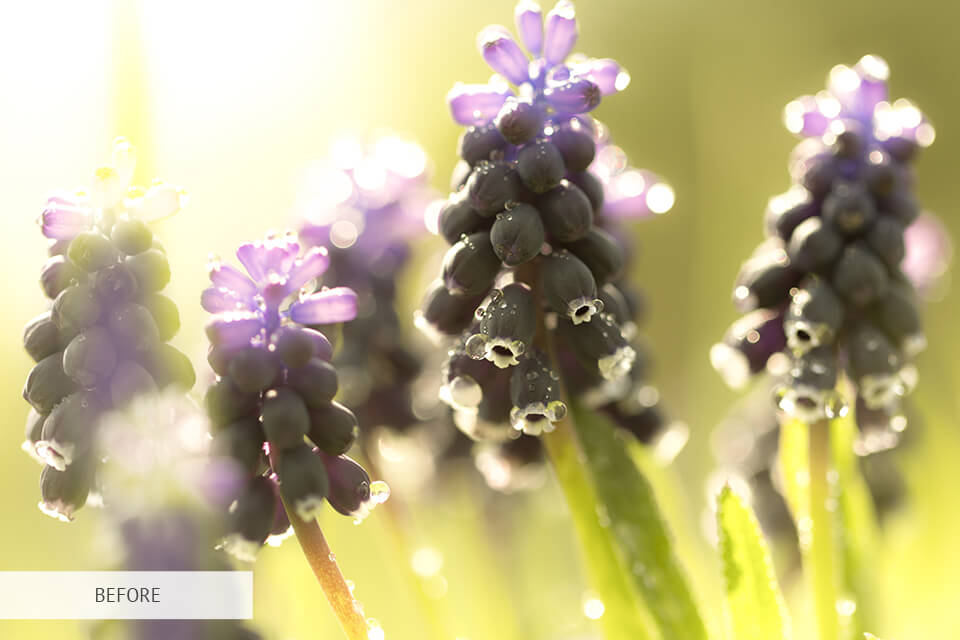
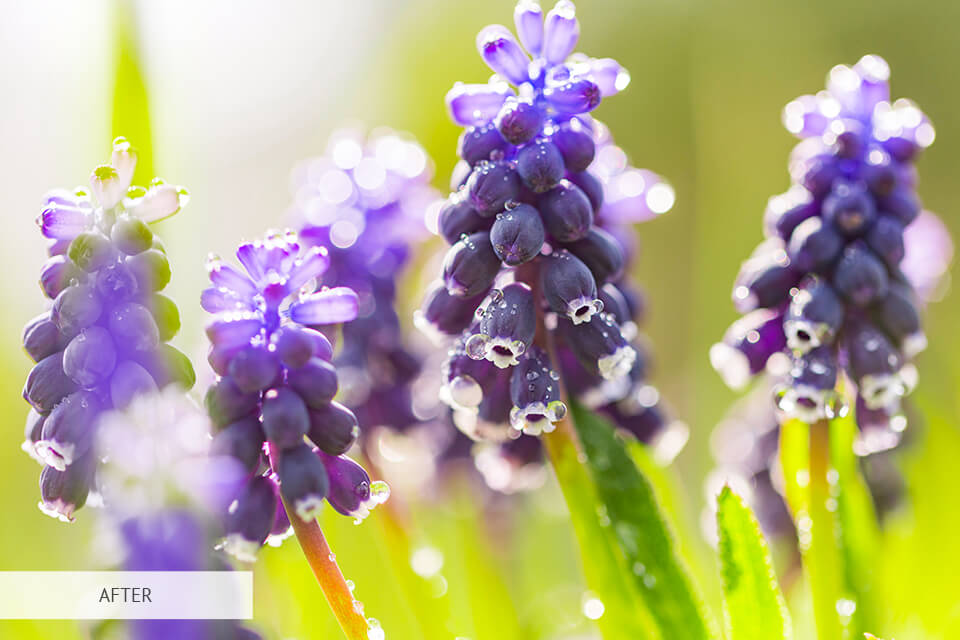
HDR

This action will adjust colors and add saturation to them, making all the elements more defined and noticeable.
Cold
This preset will be perfect for photography taken in fall or on overcast dull days. It removes extra warm tones and makes the textures soft.
Contrast
This preset helps improve the contrast of the photos in order to make details in the image more defined, make the difference between colors and textures more visible. Additionally, the photo will get a soft artistic vintage look.
Sunny Day
This tool will turn your photos into bright, saturated and warm art pieces. It can be used for color correction and adding soft sunlight.


