By Tata Rossi 19 days ago, Professional photography
The art of photography has many different secrets and techniques that help to decorate your photo and make it more interesting. In this article, I will tell you about sub framing photography in composition – a technique, the essence of which is to frame one or more objects in the picture with another.
By doing this, you can achieve the effects of depth, isolation, and volume for your subject, as well as make it stand out and draw the viewer’s attention exactly where you want. The framing is divided into 4 types – architectural, natural, geometric, and light/shadow and can be of any shape.


You can add some originality to your shot by filling the space with various objects in the foreground. At the same time, try a large aperture – this will make the photo softer. The important thing here is to position your subject as close to the camera as possible, making sure it doesn’t obscure the entire frame. This sub framing photography trick will keep the viewer focused on your main subject due to gentle blurring around it.
If you want more detail for your foreground, then a smaller aperture and stepping back a couple of steps are fine. Thus, the foreground will be blurred, but more clearly than in the above case. This technique is often used in wide-angle shots to capture more elements and vibes.
The foreground does not require any complex elements, the simplest ones will do, depending on the preferred genre. Portraits, for example, would look great with flowers, while branches or leaves would make a great addition to landscapes or real estate.

In addition to focusing, bright elements also do a great job of drawing attention. When shooting on a sunny, bright day, make sure your ISO is set to no more than 200 instead of 800. Once you’ve got your ISO in order, move on to aperture. As you know, the smaller the f-stop value, the more light the camera will capture. By overdoing the light, your sensor will likely overexpose your photo. Therefore, close down the aperture to take a better-exposed photo.
After setting the desired values for ISO and aperture, move on to shutter speed. To reduce the brightness of your photo, increase the shutter speed. In case it doesn’t mess up your other settings, 1/600 would be the optimal value to achieve this subframe photography trick.

Proper focus is a must. Focus on your main subject, as it should take the viewer’s attention. The foreground elements that frame your subject should be out of focus and blurred to accentuate your subject, not detract from it.
Switch your DSLR to landscape mode and tap the image to focus on the desired subject. That way everything will be in focus. I recommend using f/8, f/11, or f/16. When shooting a portrait with these settings, you will most likely end up with only the subject in the foreground and a blurry background, losing the middle ground.

As for the distance between your foreground, middle ground, and background, there is no strictness here. Do it the way you like it or according to your genre. If these are landscapes, then even less worry, because nature has already done its best for you.

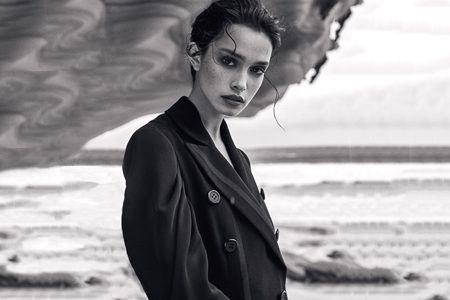
The point of view is one of the most decisive factors because it affects the composition and sets the mood for the whole picture. By choosing the right point, you can achieve the effect of reducing or increasing, draw attention to an object or vice versa, and also create sub frames. For example, to make a portrait even prettier, it’s best to shoot just below the subject’s eye line.

This is important to remember when photographing children, otherwise, it threatens a large head against the small body in the picture. If you want the model to be more imposing in the frame, try the ground angle. This technique is often used by fashion photographers who want to lengthen the model’s legs.

If there is nothing around to help you implement the photography subframing technique, do it yourself with your hands. Try to set the timer for the right time, direct the shot and you’re done.
If you have portrait images, your model can do this herself. This will help draw attention to her face, emphasizing what you need.

One of the easiest yet impressive ways to achieve sub framing photography in composition is to use real frames, doors, or windows. You can shoot through them, placing your main subject in the background, or vice versa. They will perfectly frame both people and landscapes.

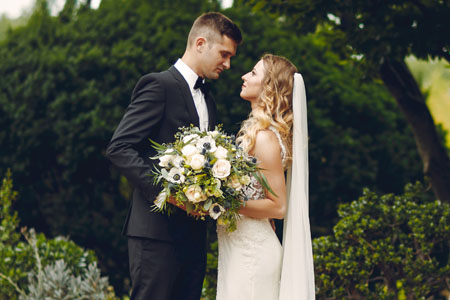
With such frames, you are practically unlimited in ideas. Try shooting beautiful scenery through a window by blurring it, or shooting a model standing in front of a window. Take a regular photo frame with you to your landscape photo session and highlight its beauty by directing the viewer’s eye where you want. A photo booth frame can come in handy at a wedding – take some funny photos, adding unusualness and a pleasant atmosphere to them.

Symmetry in the composition is always a good idea. They complement each other perfectly, creating amazing vibes in the picture. To prevent symmetry from causing frame overload, simply take a couple of steps back from the model or object. The fundamental concepts of symmetry will be enough to create a wonderful shot.

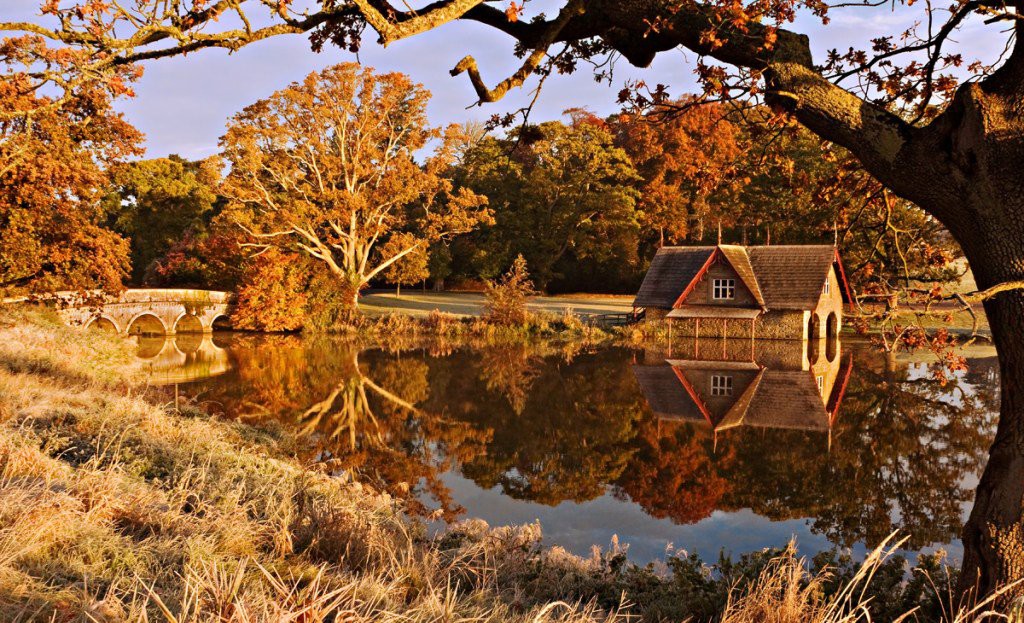
What’s more, some special props or a whole studio with a symmetrical interior are not necessary. There is a lot of symmetry in everyday life, you just need to look around. Roads, buildings, bridges, and of course, reflections in water bodies – that's half the battle.
To get a harmonious shot with symmetry, your model or subject must be in or near the center. Try not to overdo it with symmetrical elements; however, do not be afraid to get an imperfect shot.

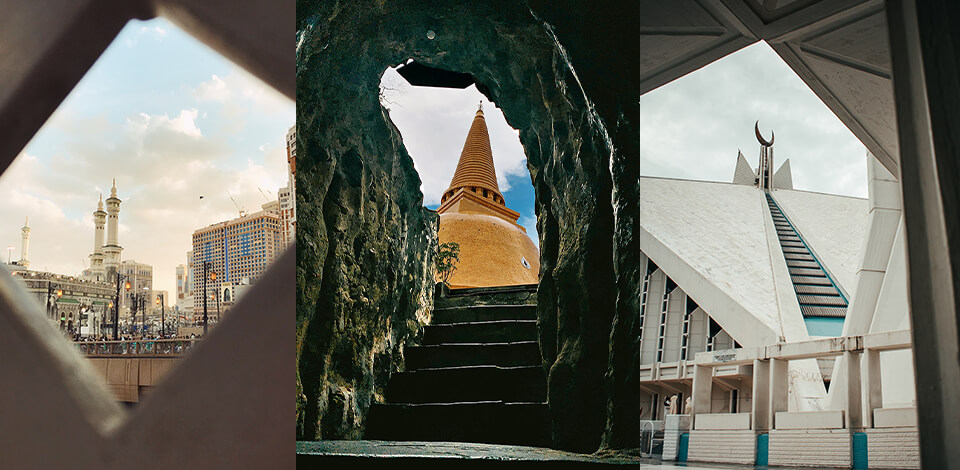
Using architectural objects is perhaps the easiest yet most effective way to create sub framing photography. Simply find eye-catching arches, antique doors, and windows in your city and use them as a frame for your object or model. Bridges are one of the most commonly used architectures for these kinds of shots. All you need to do is place the model between the bridge supports.

By paying close attention to the contrast in your architectural photography, you can achieve stunning results. Try experimenting with the contrast of light and shadow on a clear, sunny day.
You can get an attractive graphical effect by combining some parts of a building that are illuminated and others hidden in the shadows. Color contrast will also help to add harmony and originality to the picture. To get it right, turn to the color wheel to get familiar with contrasting hues and use that in your composition.
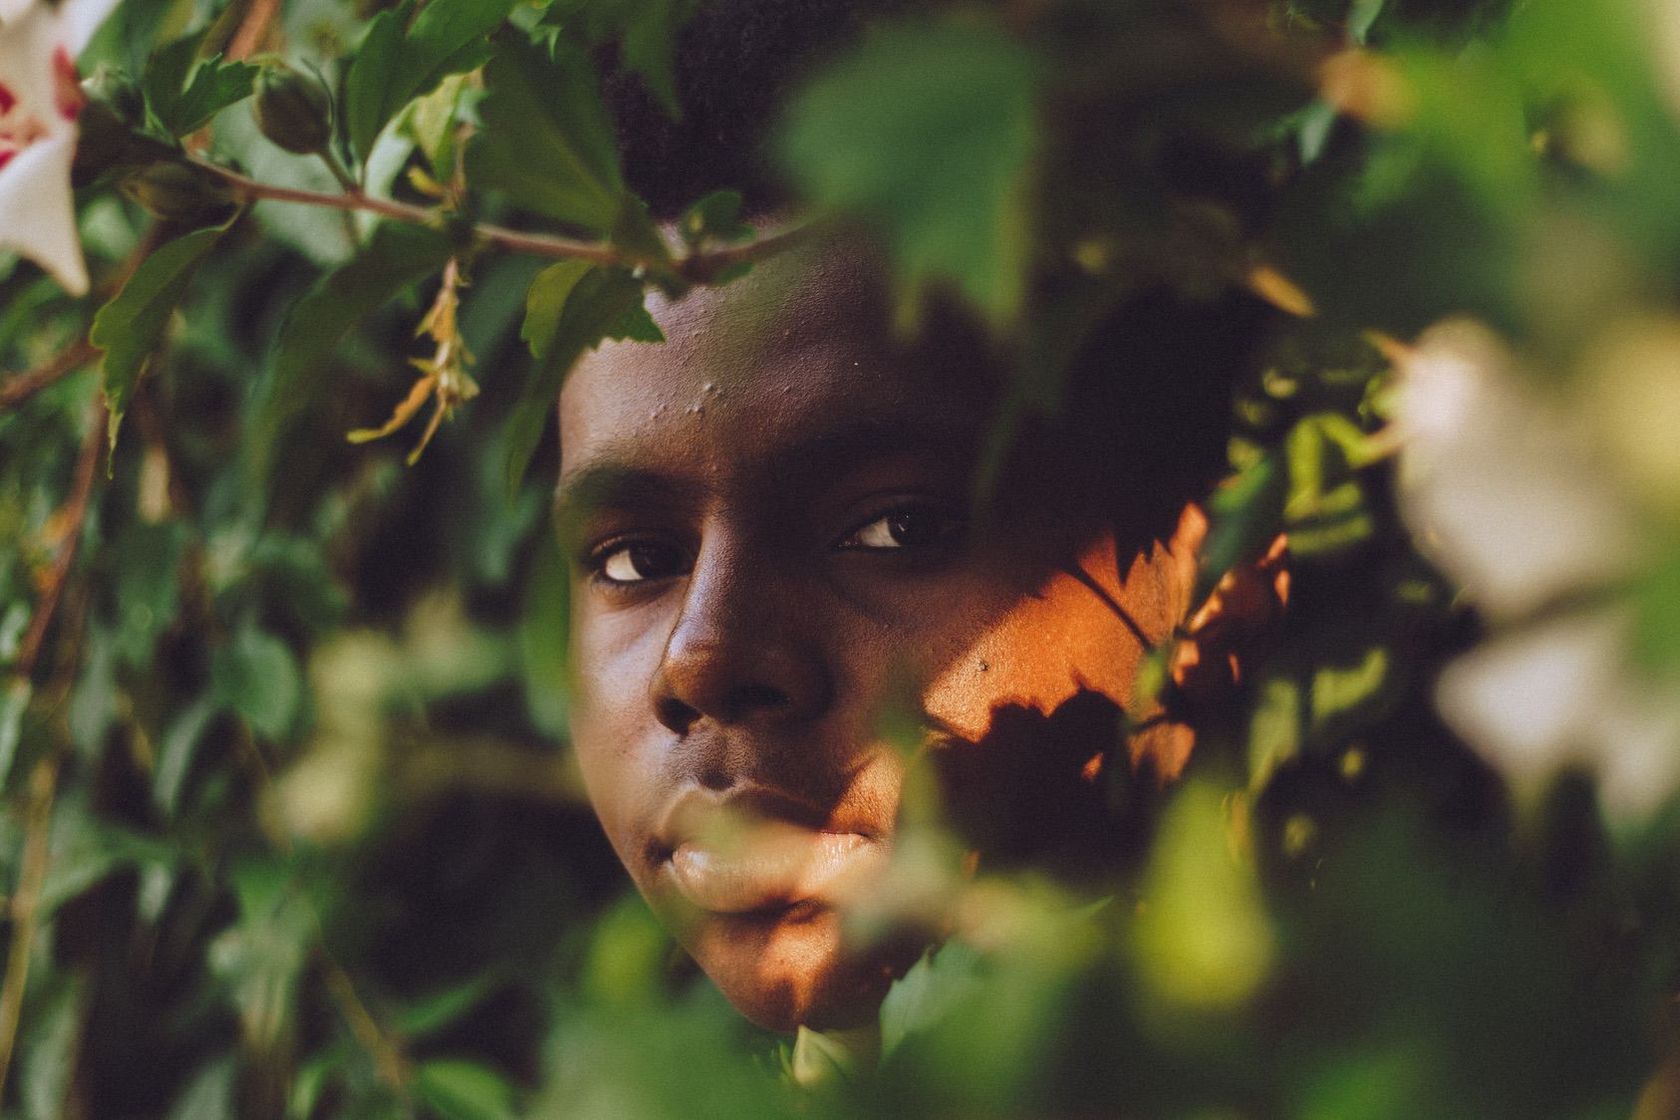
Nature is a great helper in the implementation of subframe photography ideas. Take a look around – tree branches, lush bushes, colorful flowers, sandstone formations – all this and more can help you create a beautiful photo and capture the viewer’s attention. Weather phenomena can also come in handy – with fog and rain, you can get attractive frames. A good example is the photo below, where the ground and tree branches form a triangular frame that focuses the viewer’s eye on the center and gradually moves to the mountains above.
By shooting through flowers or tree branches, blurring the foreground, and focusing on a model or subject, you direct the eye of viewers, drawing their attention. Human eyes are so arranged that we see first what is in focus. An additional dimension, in our case a blurred foreground, will create an attractive depth effect. Pay attention to natural objects that can decorate your frame within a frame photography.

To make the picture as pleasant as possible for the audience to perceive, do it following the rule of thirds. It controls the placement of objects in the frame along an invisible grid. All you need is to visually divide the frame into 3 horizontal and 3 vertical lines to make 9 parts. Often cameras already come with this built-in grid to make it even easier for photographers to stick to this rule.

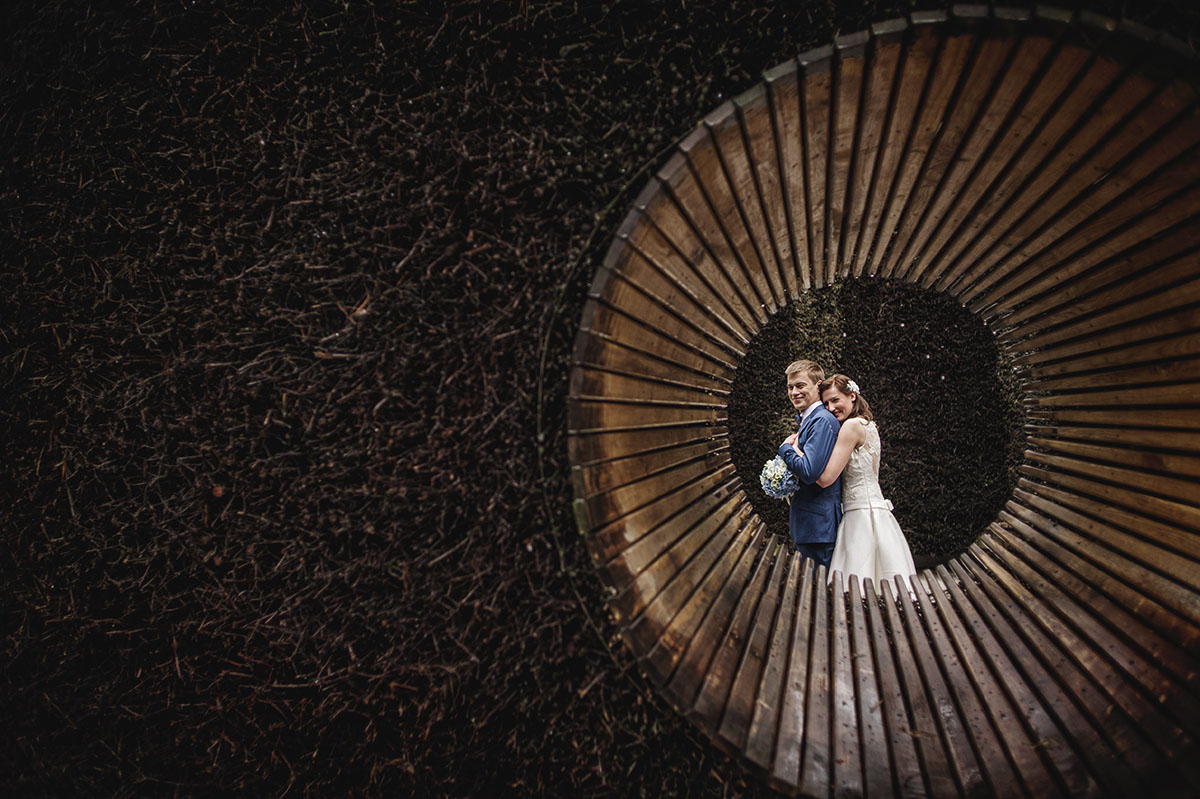
Frames in a photo can be of any shape. The first thing that comes to mind is a square, a circle, and a rectangle. However, they will look less impressive in the frame. Try a spiral – it will perfectly cope with the direction of the viewer’s eye, for example, to the corner of the frame.
You can draw inspiration from photography genres such as minimalism, fine art, and fashion. Photos on the street with the addition of geometry look especially impressive and striking. It’s not difficult, because if you look around, you will see a lot of buildings and architecture in the city that can give you the geometry you need.
Don’t forget about the leading lines – they also direct the viewer’s attention. Horizontal and vertical lines will help determine the orientation of the image. What’s more, the line can be not only an assistant in building sub frames but also a central object, conveying your mood and message.
Don’t just look for solid elements when trying to embody the photography subframing technique. Play around with light and shadow to make your photo even more mesmerizing. This is best done at night or outside. Street lights are a great way to frame images.
To date, bokeh is trendy, with which you can also advantageously frame a photo. Lighting in the background or foreground will lead the viewer’s eye to the subject with a shallow depth of field.
As for the shadows, you can arrange a photo session under the roof during the day. Find a lighted area for your model so that everything around is in shadow except for her. This will provide an amazing effect.
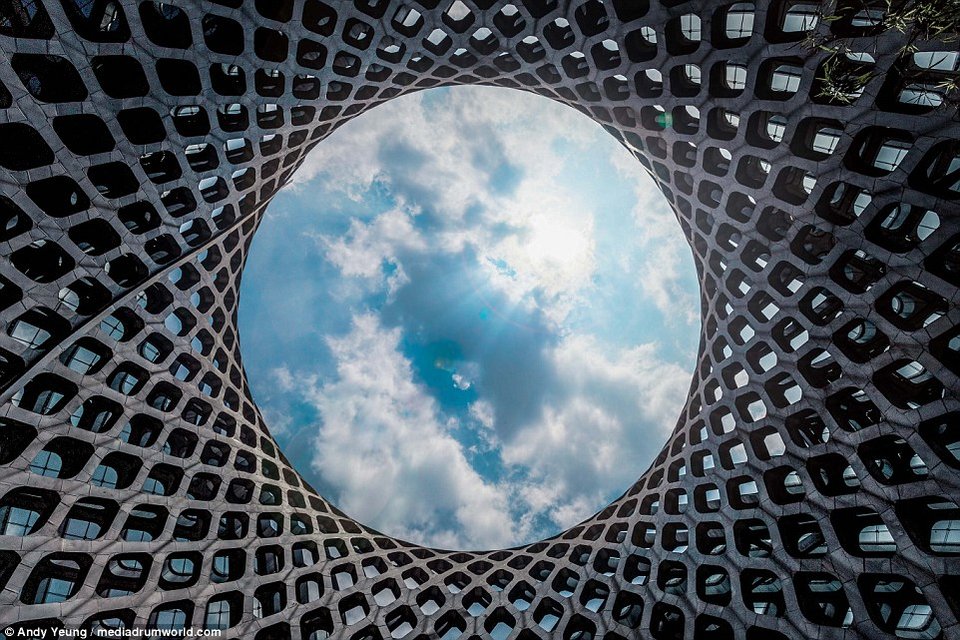
The sky is an endless, fast-changing canvas. Almost every one of us tried to capture the celestial dynamics and bizarre cloud patterns. Decorate your sky photos by framing them with natural elements or props to give them a whole new look. Turning your frames into silhouettes is also a good idea.
Reflections in windows are a great way to implement sub framing photography in composition. They are a great addition to any genre, and if you prefer minimalism, then you should definitely try this. In the case of portraits, the model must be behind the window. Never stand directly in front of a window, because you will be in the reflection. Look for the best angle for the spectacular shots.

Reflection is something about neutrality and abstraction, which means that if you try, you can hide or emphasize some elements or features of the face. Work with the reflection as a blurred foreground. Try also capturing stunning landscapes in reflection for a slightly distorted, abstract look. Add some symmetrical elements to such a frame – it will look attractive. It is also easier to achieve a surreal look with reflection, as in the photo below.

You can decide that the frame has 4 symmetrical sides. However, a frame consisting of two or three sides looks no less profitable and attractive. They do a great job of highlighting your model or subject by directing the viewer’s eye to the missing side of the frame. That is why such shots with one or more missing sides look even more interesting and eye-catching.

Of course, to work with sub framing photography, it is important to know and adhere to the fundamental rules. However, by breaking them, you can achieve a dramatic look and unusual photography composition.
If you don’t frame your subject properly, making it look like it’s escaping, it adds dynamism and thus makes the photo more interesting.
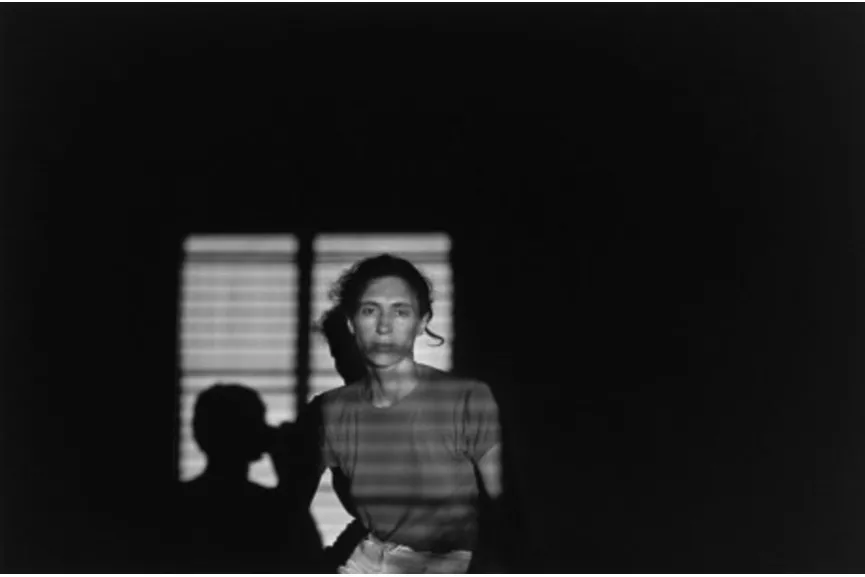
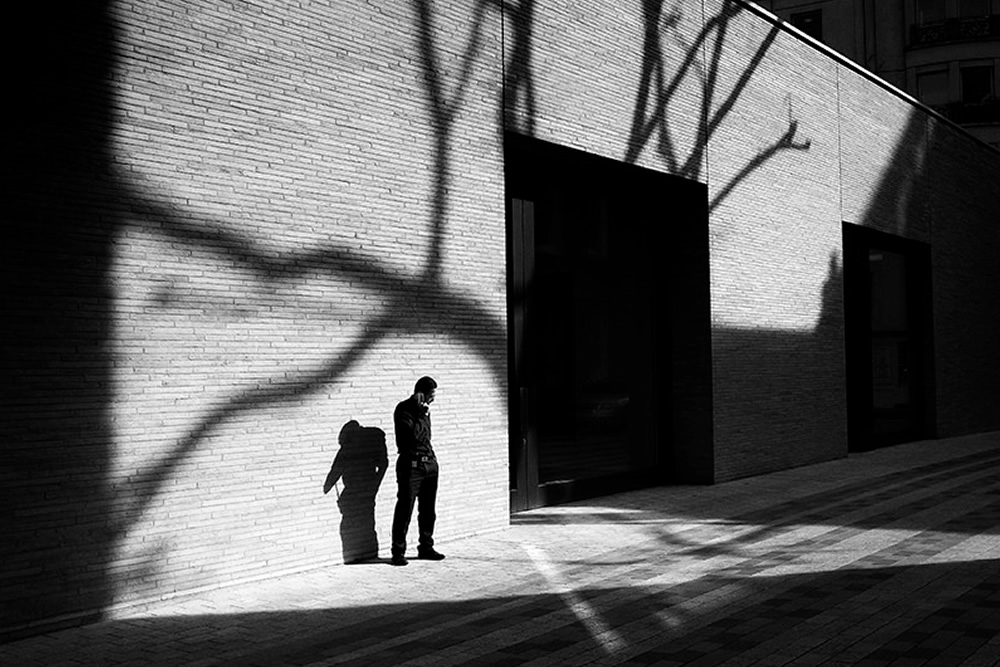
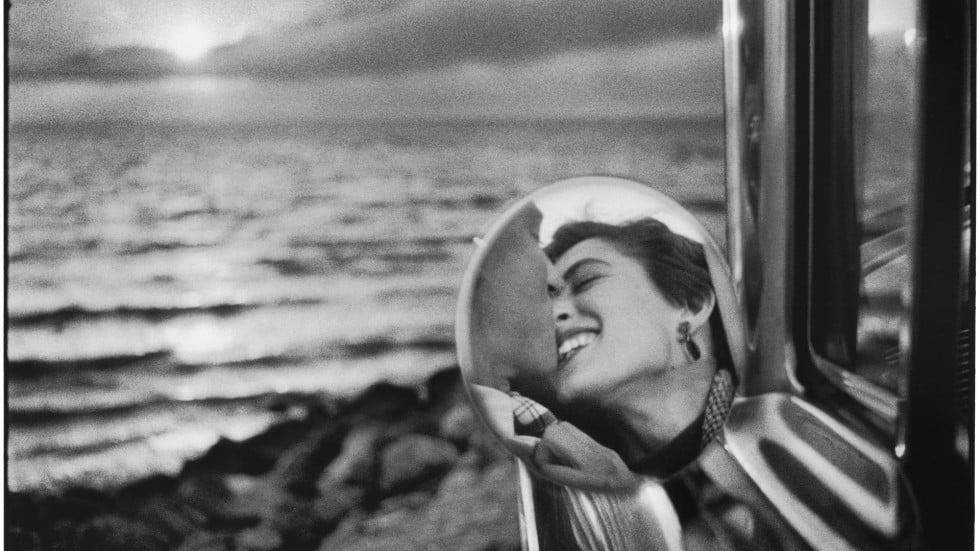
Get inspired by the work of pro-level photographers to create your own unique shots. For example, Lee Friedlander with his famous America by Car collection. He traveled the country by car and took many framed shots with car windows and other items. In the photo below you see a great example of light and shadow framing. Using strong light and a sharp shadow, he isolated the woman while leaving the rest of the frame completely black, creating a powerful and stunning shot.

Among the famous examples of framing is also a compelling self-portrait of Arthur Felling. He and his camera are in the police van, where the picture was taken from. He attracts the attention of the viewer, telling his unusual story thanks to the objects and surroundings imprinted around him.

One more wonderful subframe photography sample is the work of Henri Cartier-Bresson. He captured a riding cyclist, framing him with a ladder on both sides – below and on the right. He left the top of the picture and the left corner free. Artist chose an unusual view from above, also capturing a curving road along which a cyclist rides.

After shooting your beautiful sub frames, you need to do their post-processing. Try this Lightroom preset pack to quickly enhance your shots without much skill. General photo enhancement, color, and light correction, applying various effects – all this is available to you effortlessly with this package.
Don’t worry if you don’t have the proper experience, as all you need to do is upload the collection and add your favorite preset to your RAW image. The collection comes in .xmp and .Irtemplate formats.