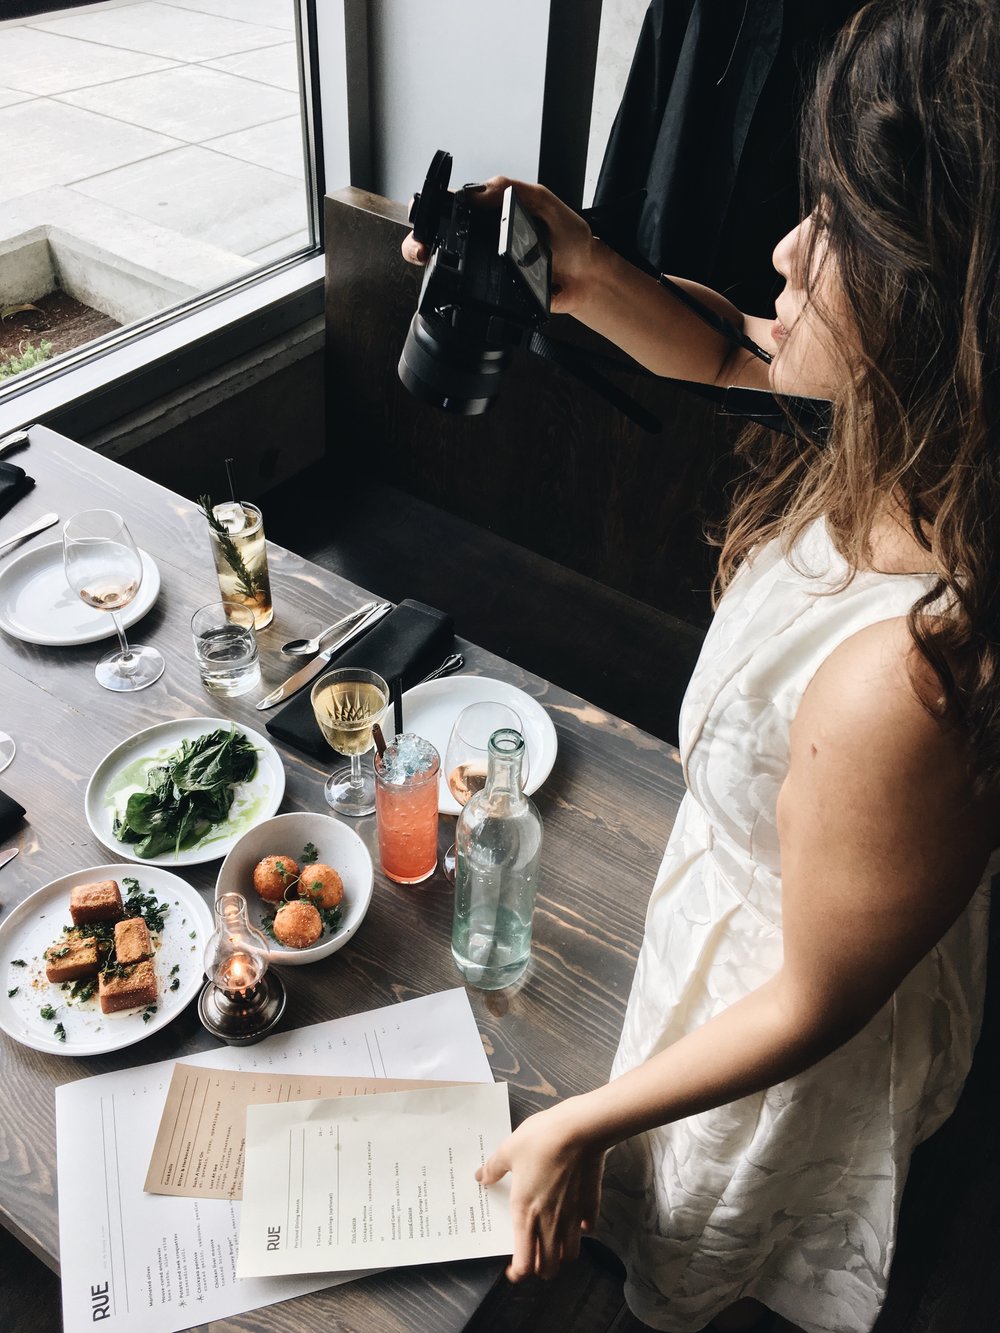
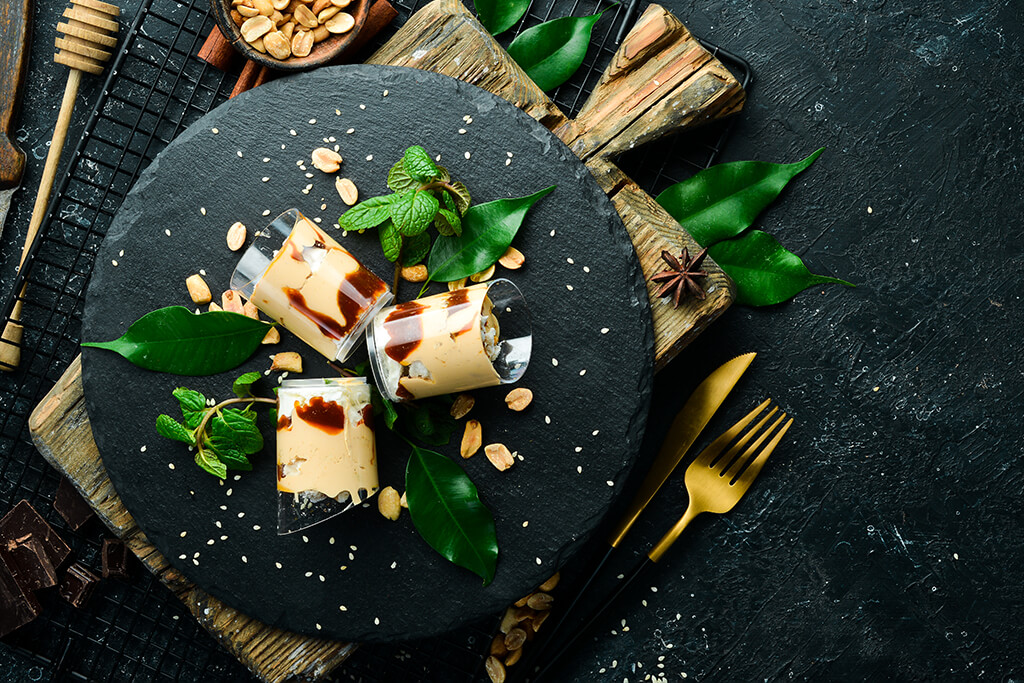
Dark Food Photography
When you purchase through affiliate links on our site, we may earn a commission. Here’s how it works.

Dark food photography has become the most popular food photography trend over the past few years. It is also called “chiaroscuro” photography, a borrowed term from the art sphere. It means “light-dark” when you use strong contrasts between light and dark.
In this article, I will tell you how to make your food photos pop with the help of dark food photography ideas.
40 Dark Food Photography Tips
In fact, working with dark food photography is easy. You just need to mind some important composition and lighting tips. So let’s see the ways of applying chiaroscuro style to your food shots.
1. Use Dark Backgrounds
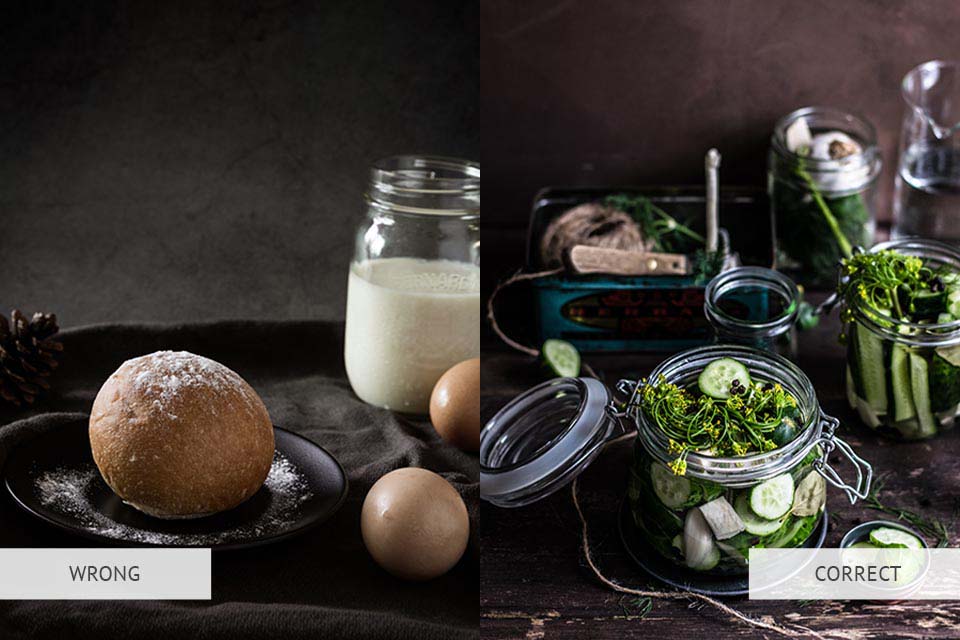
The main idea of food photography trends is to draw viewers' attention to the central subject while keeping the background in shadow. That's why you need to choose muted surfaces, dark props and backgrounds.
Otherwise, light or even white dishes will distract viewers' attention from the main subject due to the available contrast.
2. Gather Necessary Props
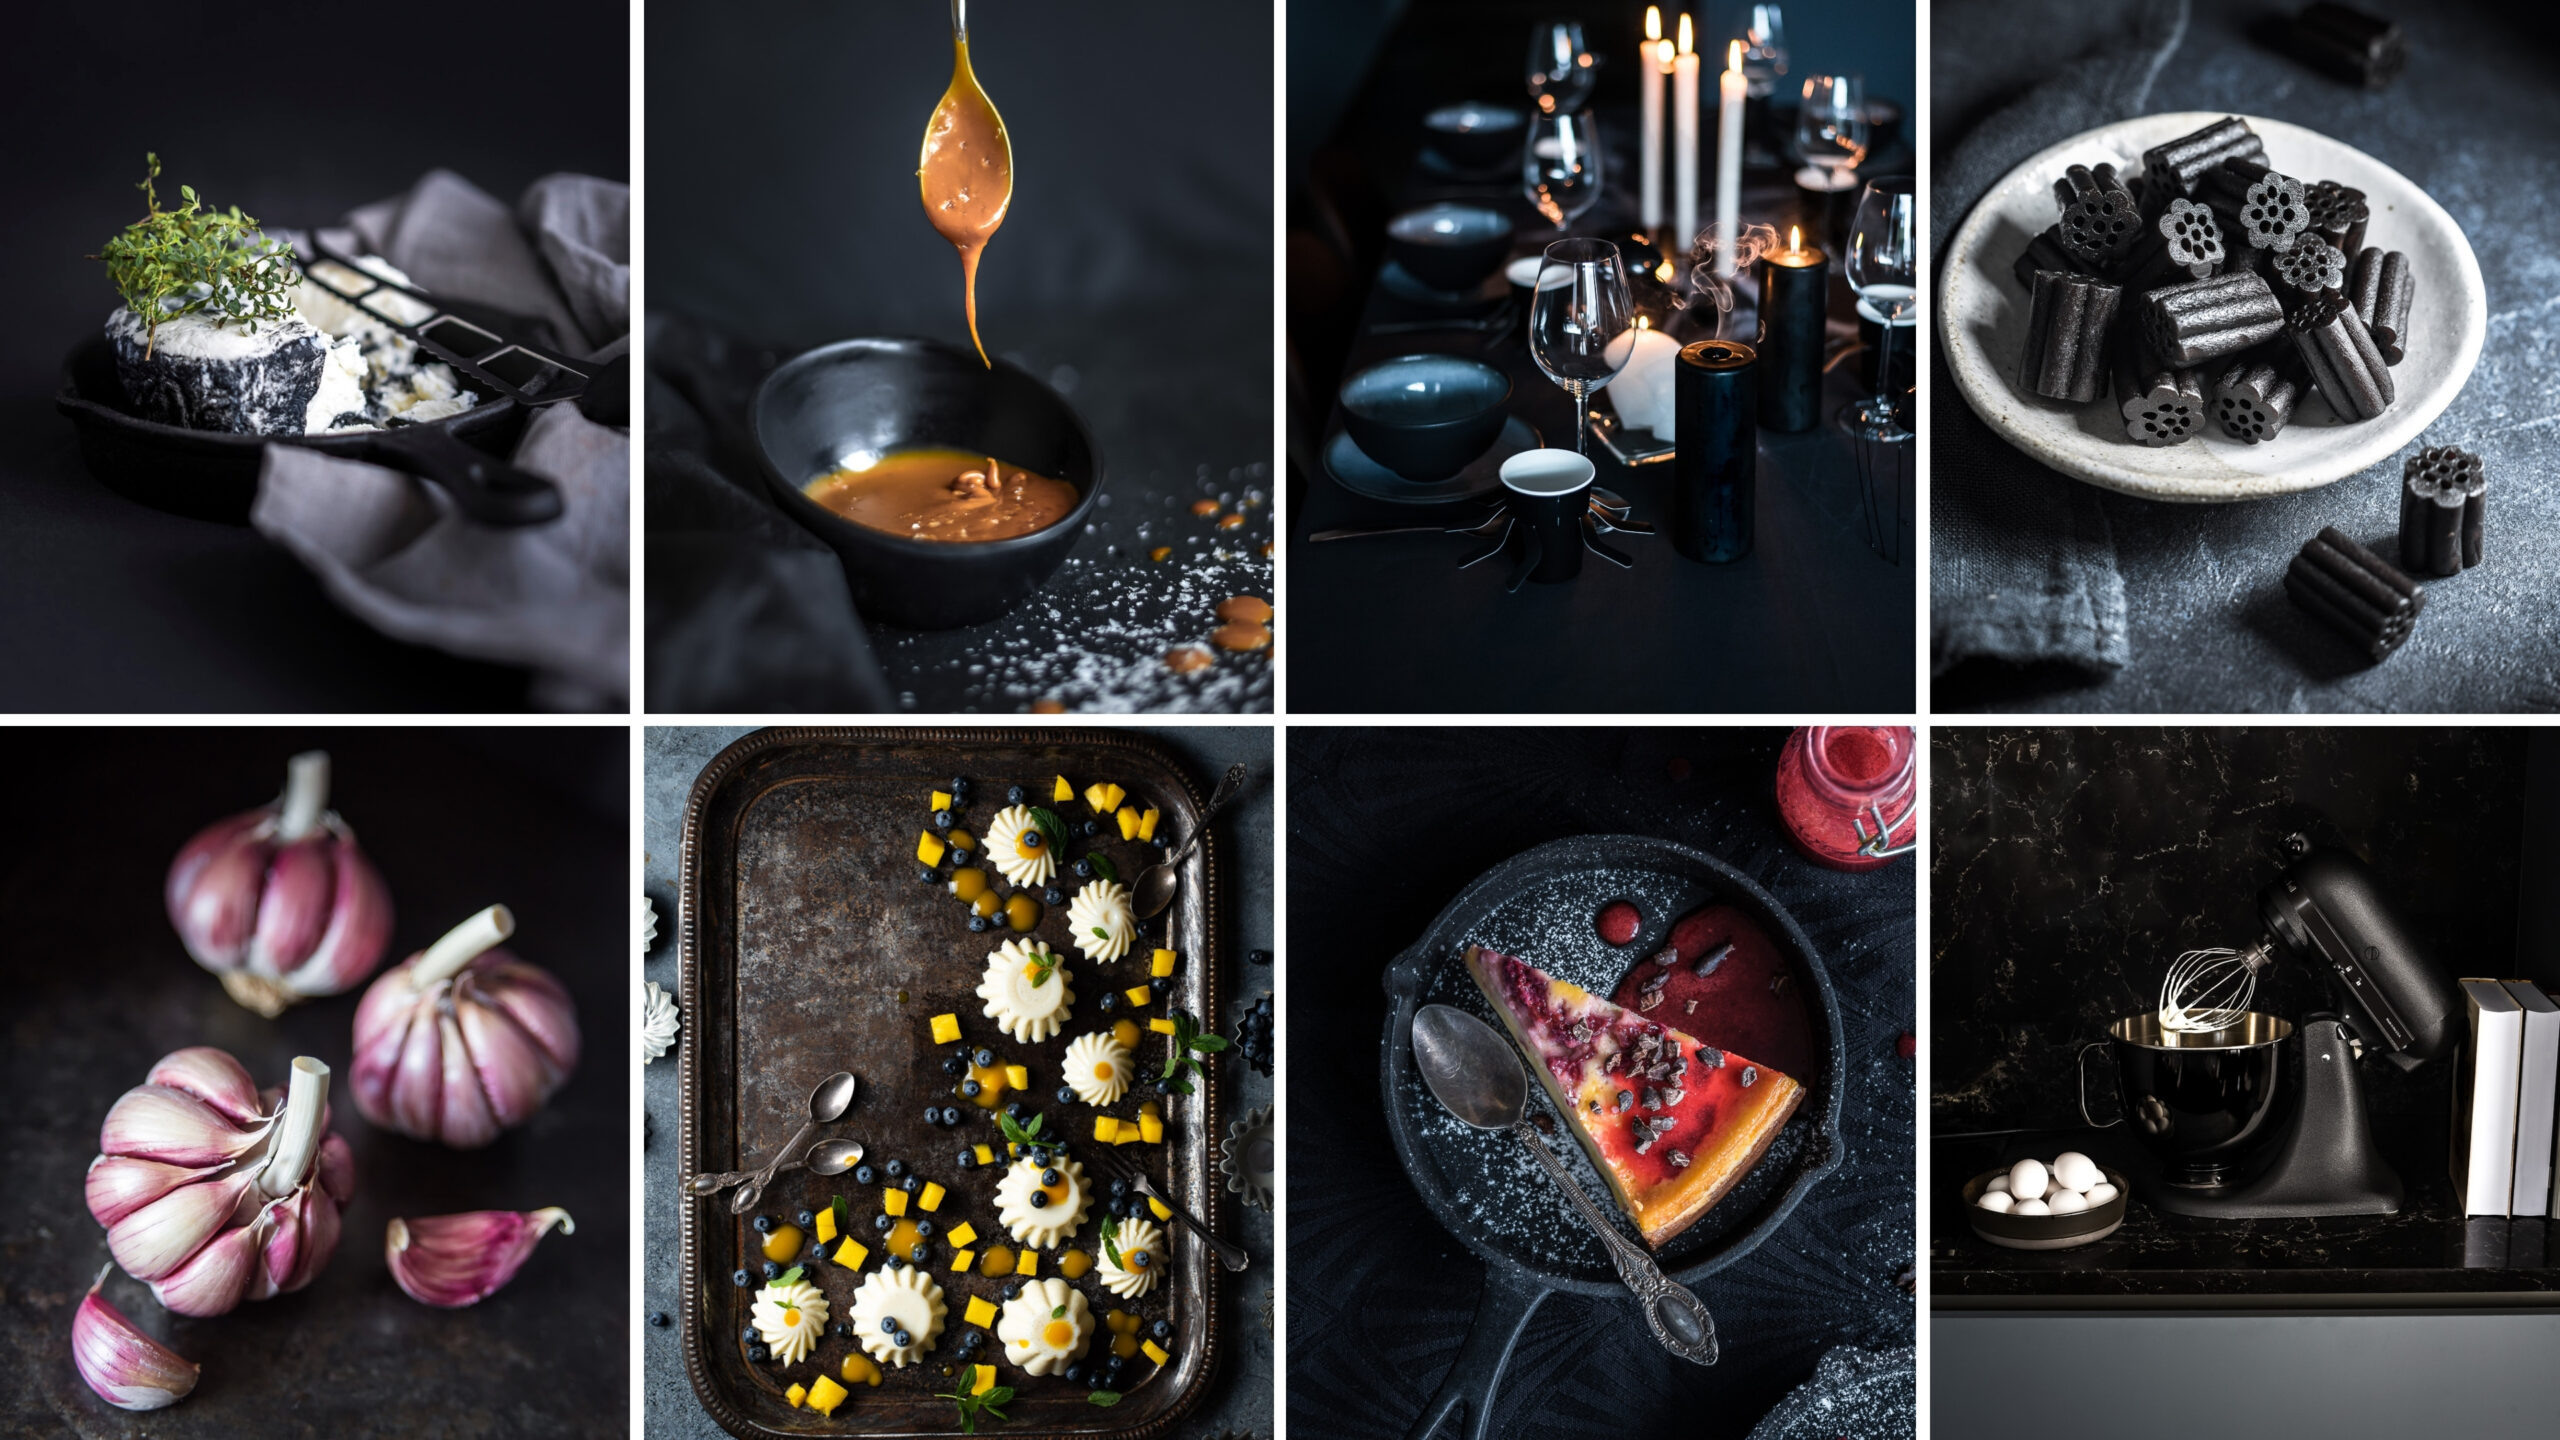
You need to stock up on appropriate props to create a particular atmosphere in the frame. Only in this case, your dark food photography will be more attractive. You’d better use the effect of antiquity, retro design, imitation of scuff marks or their real presence.
When choosing props, you’d better not go to a trendy store with expensive dishes, but to the market, an antique shop, a souvenir shop or on Amazon. Personally, I advise you to use dark light cloth.
You may put it under the dishes, brown paper or cutting boards. By the way, you can place some bright ingredients on these boards to create contrast.
- Check out basic and creative food photography props.
3. Choose Attractive Plates
Beginning shooters often make mistakes when selecting dishes for dark food photography. Give preference to the dark tableware. Retro plates and cups with scuffs or aged ones will be a perfect choice. Additionally, you may take antique metal plates in combination with retro fine cutlery into consideration.
- Check out creative food photography blogs.
4. Remember Composition Rules
There is one very important rule of moody food photography. You must place the subject in the brightest part of the frame. This means the viewers will pay attention to it at once. Moreover, you should choose supporting elements of other sizes so that they can counter-balance each other.
In such a way, you will apply the Rule of Odds which is used by visual artists. According to it, the main accent is made on the subject placed close to or on one of the intersecting lines of the Rule-of-Thirds grid.
- Read more about food photography.
5. Think of Food Styling

The most popular food photography trick is making the dishes look realistic. It shouldn't appear artificial. You need to create a proper atmosphere in the shot so that viewers believe they can sit at the table right now and enjoy the meal.
So, feel free to put some crumbs or use half-eaten dishes. All such things bring pictures to life. However, be careful. It is very important not to overdo. Otherwise, the food will not look appealing because of a mess.
- View more food photography tricks.
6. Have a Compact Camera
You also need to have a proper camera to realize creative food photography ideas. It must have manual settings and support RAW format because it is very important for image color correction.
This can be both a DSLR and mirrorless camera with a large matrix for clear and more detailed pictures. Besides, it will be more convenient to work with equipment that has a rotary display. This is especially important if you plan to share the results on social networks and are looking for a good camera for Instagram.
- Check out the best cameras for food photography.
7. Use a Macro Lens
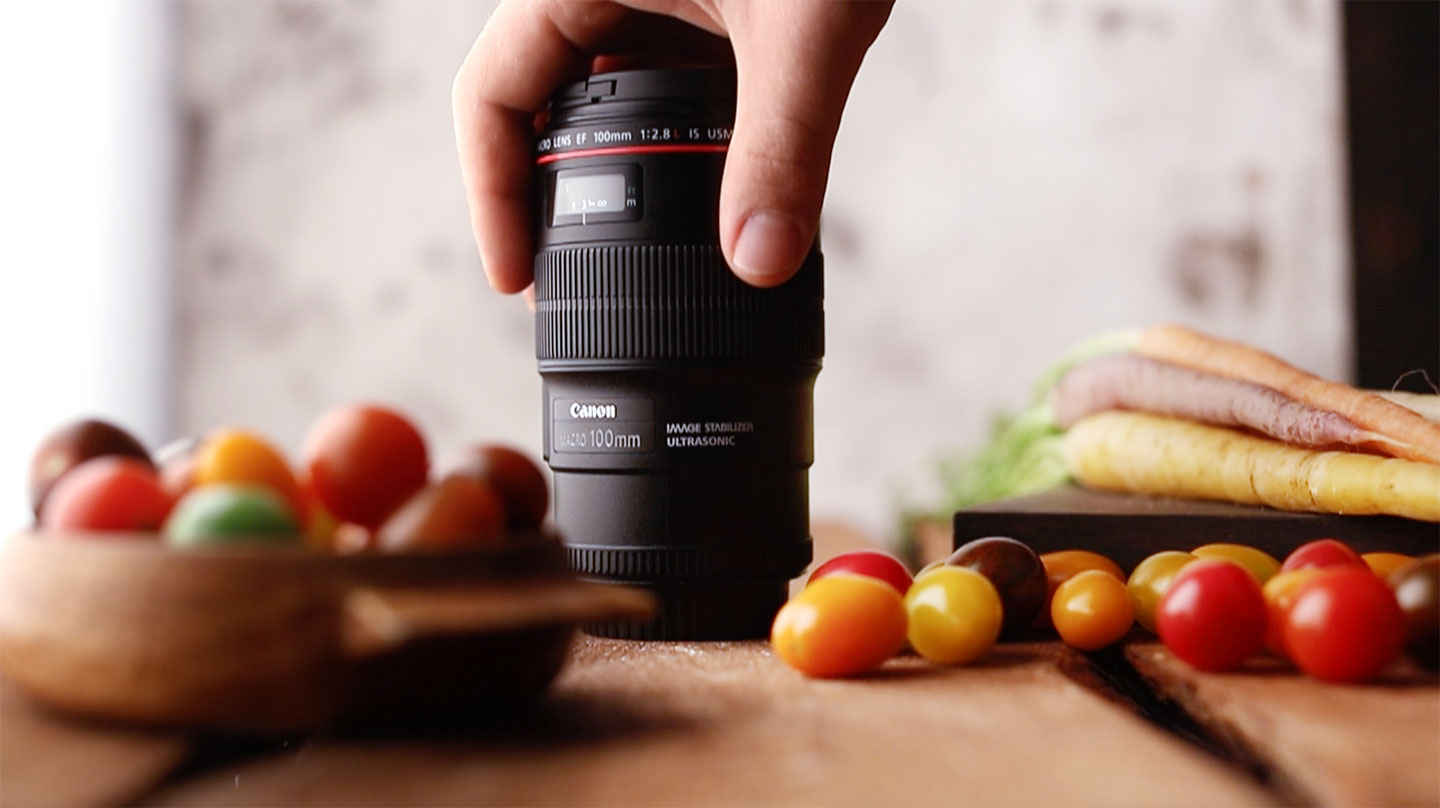
The choice of optics for high contrast food photography is a matter of individual taste. The lenses with a focal length of 50 or 80 mm perfectly cope with the task of professional food shooting.
The equipment allows you to experiment with depth of field, take clear pictures and get a beautiful bokeh effect. Additionally, I advise you to pick a macro food photography lens for larger frames.
8. Tripod is a Great Helper
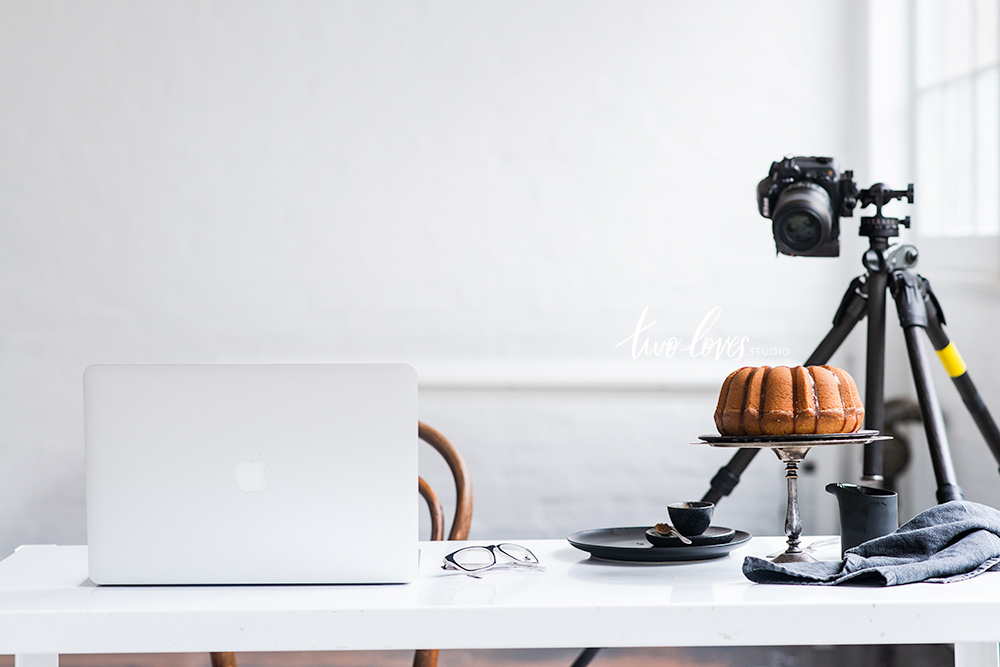
Always use a tripod especially when working in the style of Mystic Light. You will not have to raise the ISO in poor lighting conditions, which means that the photo will not be too "noisy."
It is enough just to increase the shutter speed. The tripod will provide good stabilization and eliminate blur. Manual focus will make the food photo clearer.
- View more the best tripod for dslr.
9. Set ISO Correctly
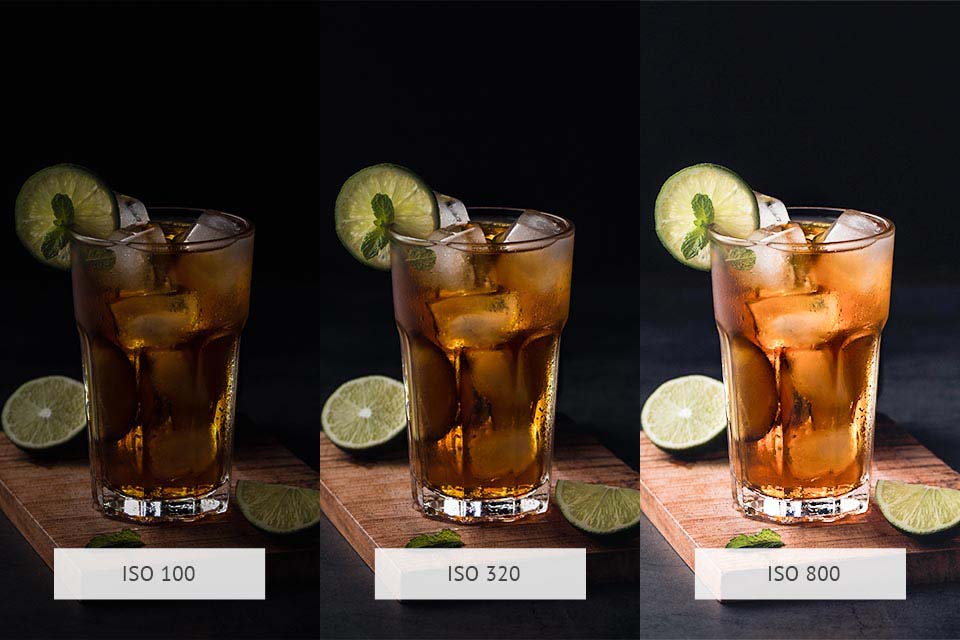
ISO is one of the most important food photography camera settings. Choose a minimal value of 50 or 100 in accordance with your camera capabilities. It will let you take a high-quality shot without grain from a lack of light.
If there is no tripod, then the maximum value that I advise to choose is 800 on average cameras. If you set a higher value, the grain will be visible even on the phone screen.
- Check out how to become a food photographer.
10. Use a Delay Timer
A delay timer for 2 seconds is one of the very useful settings to avoid blurring in rustic food photography. Even a small vibration of the camera from pressing the shutter button can give a blurred photo.
You can only notice it on the computer when the picture cannot be repeated. Such blurring is hardly distinguishable on the camera screen.
- Read more about how to take ice cream photography.
11. Be Careful with Aperture

Every mystic light food photography tutorial emphasizes the importance of a proper aperture. You need to set it in the range of f/5- f/7 or even higher. There is no sense in blurring the background, which is dark and poorly discernible according to the initial idea.
Mind that this setting will not give more mystery, but the sharply depicted space may diminish. As a result, it may not have a positive effect on the frame in low light. Experiment, watch and decide what your preferred aperture values in dark food photos are.
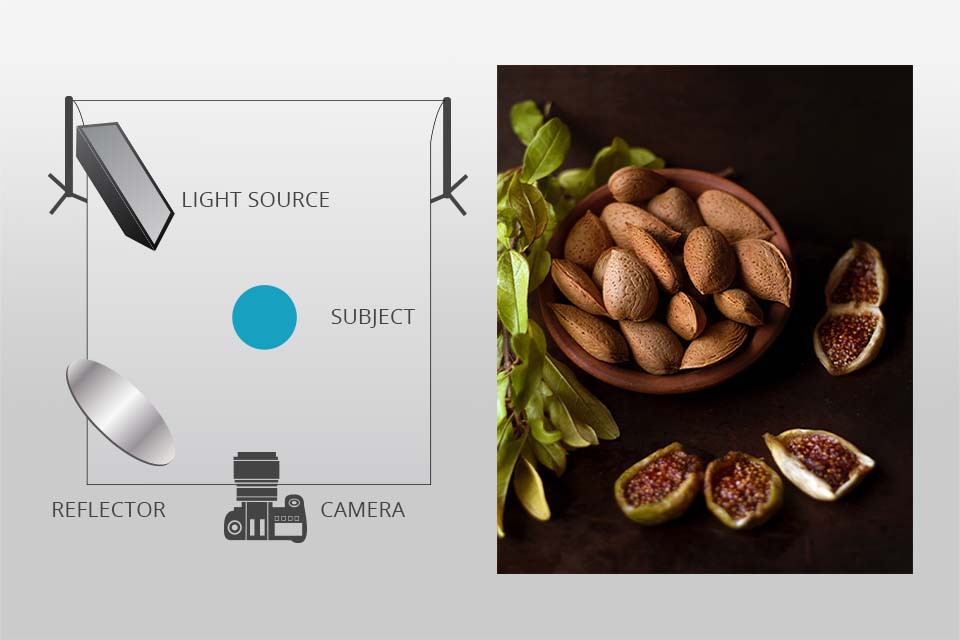
12. You Don’t Need Much Light

Dark food photography doesn’t require a lot of lighting equipment. It is better to use one or two sources. It may be natural light coming from the window. As for artificial light, I avoid bringing the softbox. Instead, I use a monohead with a dish reflector and a honeycomb grid.
I also choose a large diffuser and place light far away from the subject. As a result, the diffuser becomes a light source but not my monohead. Try this technique if you want to achieve eye-catching contrast, create long shadows and stunning highlights.
13. Compose a Frame Correctly

As a rule, some shooters are eager to underexpose the image in the camera a little bit when it comes to chiaroscuro food photography. Your pictures may have either deep shadows or don’t have much contrast.
Anyway, the art of food photography requires placing the main subject in the brightest part of the frame. Only in this case, it will attract the viewers’ attention first.
Do your best in order for the highlights not to be blown out. Shadows also should not be too black without any details.
14. Create Darkness Everywhere

Your main goal in dark food photography is reducing the amount of fill light that you reflect around the subject. It is any light that reflects off white or bright surfaces and fills a shadowed area in your scene.
To achieve this goal, it is necessary to reduce the number of white walls (if you are shooting at home) that surround the scene. Just get dark sheets to absorb light.
- Learn more about photography light bulbs.
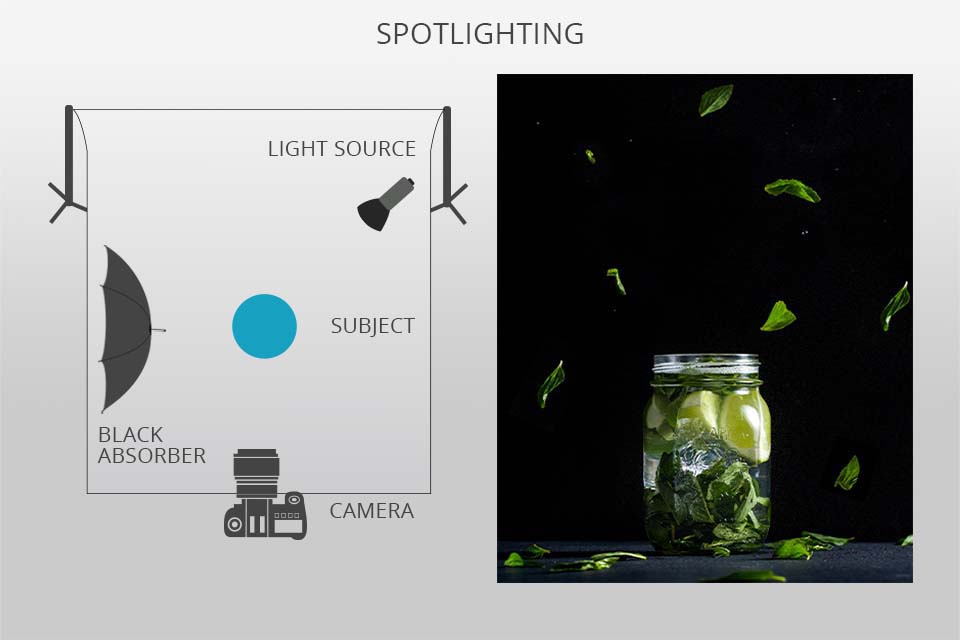
15. Use Spotlighting Scheme
 Canon EOS 77D + Canon 100mm f2.8 Macro USM
In this scheme, I use a point constant light. I place it at an angle to the object and direct it more towards the black absorbing surface nearby.
In this way, a contrasting shadow can be achieved on one side of the object. The other one can be slightly brightened and the main focus will be of food.
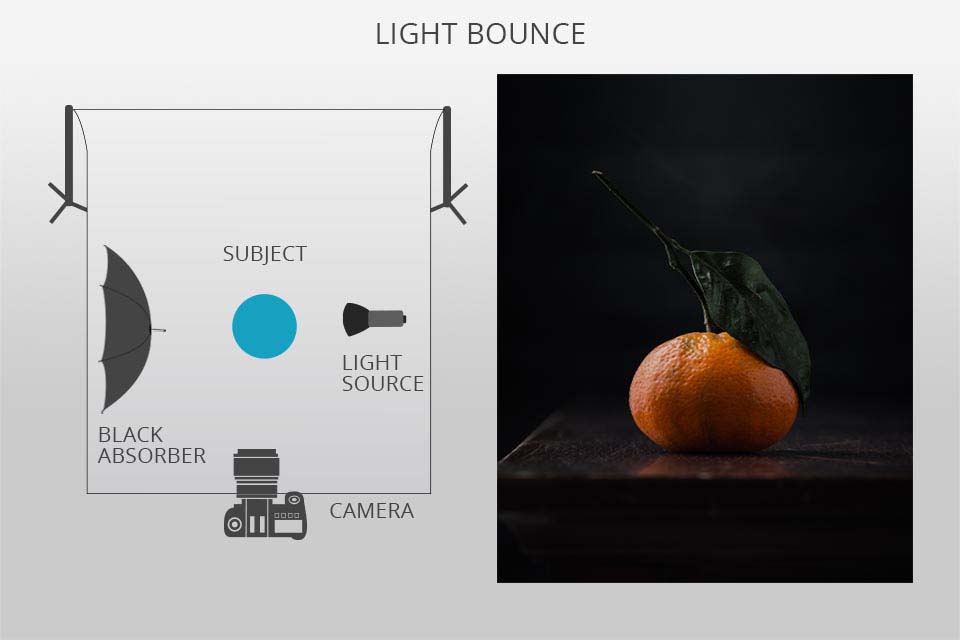
16. Use the Light Bounce Scheme
 Pentax K-1 Mark II + Pentax SMCP-FA 28-80mm f/3.5-5.6
It is almost identical to the previous scheme of dark photography light. The only difference is that the light source is now directed at the object itself, and not at the absorbing reflector.
With this method, you can achieve greater illumination of the main product in the photo.
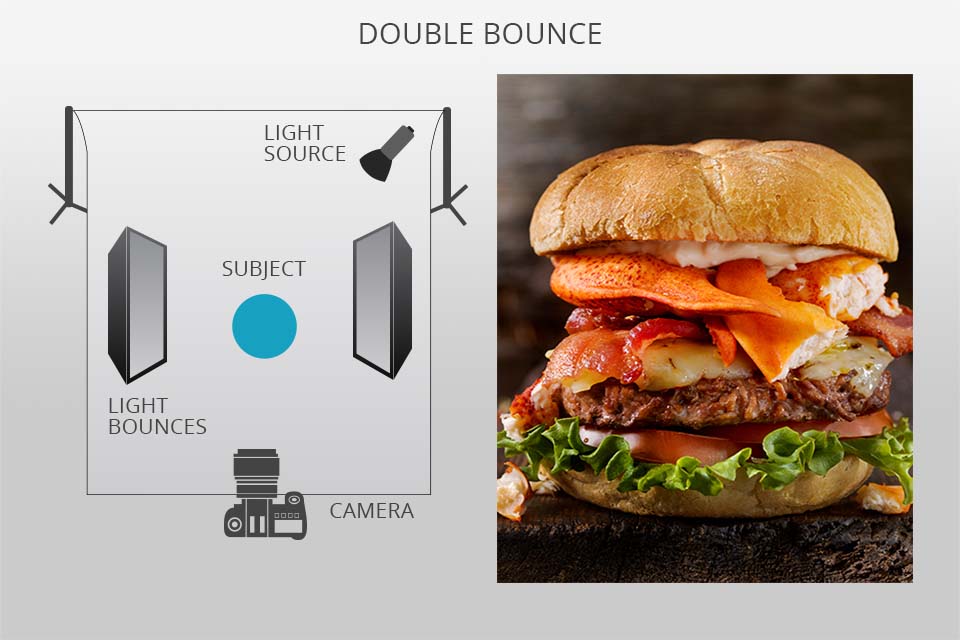
17. Use Double Bounce
 Nikon D7200 + Nikon AF FX DC-NIKKOR
If for the selected composition it is still necessary to use brighter illumination, but you do not want to completely deviate from the idea of dark food, then you can use this method.
Place light bounces on any side of your subject. As a result, light is bounced between them and onto your object, decreasing shadows and even brightening the background and foreground.
18. Don’t Forget about Backside Light
 Canon EOS REBEL T7i + Canon TS-E 135 mm f/4L
I like backside light very much. This lighting option perfectly illuminates greens, gives a beautiful glow, "separates" the object from the background and is great for drinks.
Of course, it is not suitable for all objects and often requires compensation for deep shadows in front. A reflector helps me cope with this task. The bigger size it has, the better the second light source is.
19. Make Photo Editing
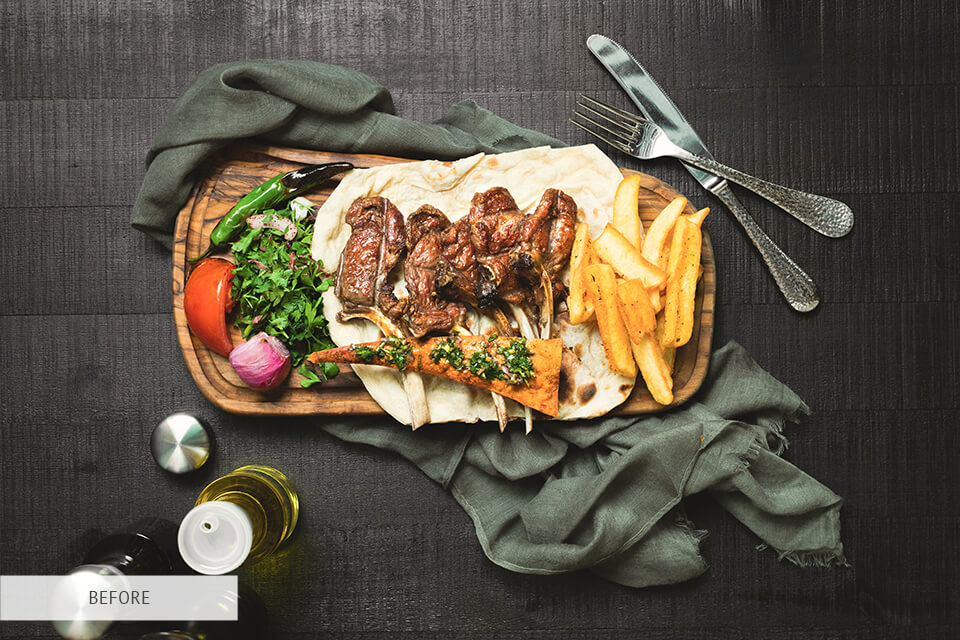
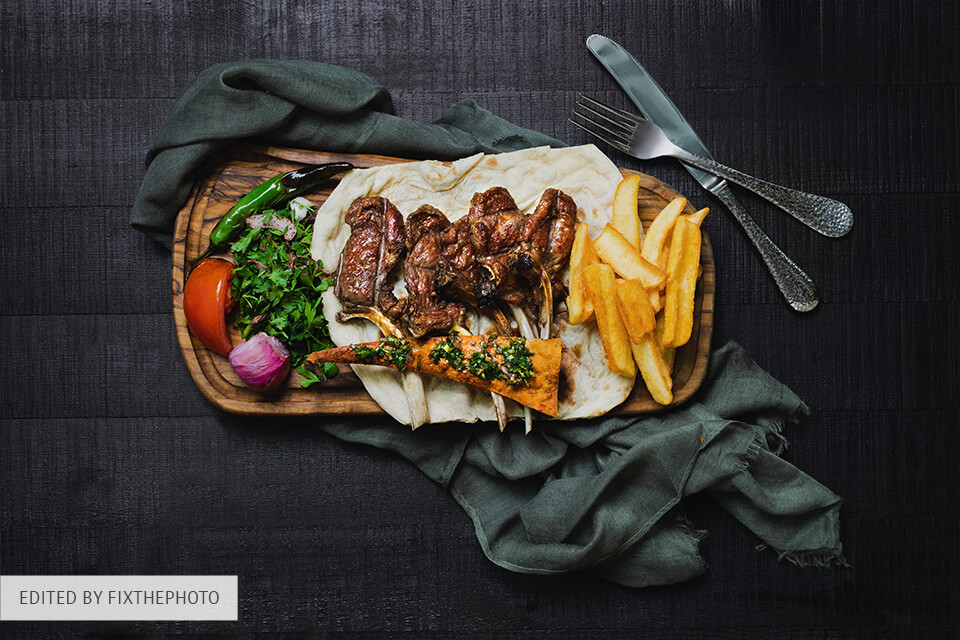
All food photography tips recommend making food relatively bright but not fully dark in the entire frame. It will help improve the picture with ease. Apply either local or global adjustments. Try not to overdo with the exposure. Otherwise, you will get flat shadows.
Give preference to luminance sliders in Camera RAW or Lightroom to brighten colors separately. As for saturation sliders, they require advanced skills and practice. Tint and white balance may be more creative as you are not going to use white tableware.
Experiment with split-toning, the balance of cool and warm tones to produce a three-dimensional feel. Finally, I suggest adding some vignetting. It will enhance food photography shadows and draw attention to the food.
- Read more about how to edit food photos.
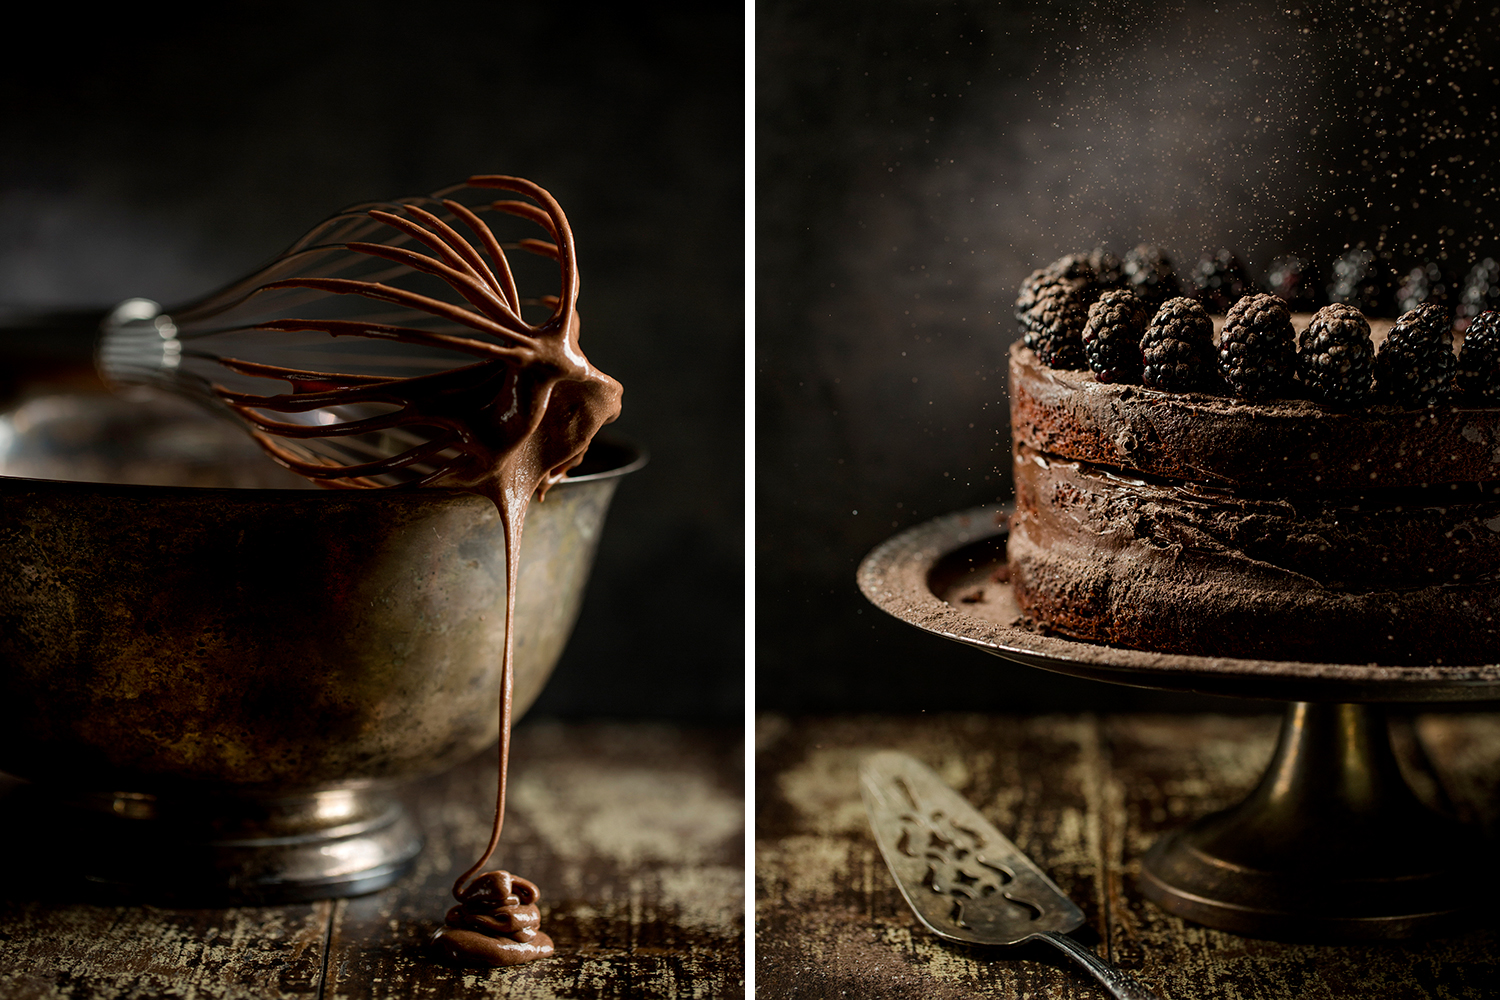
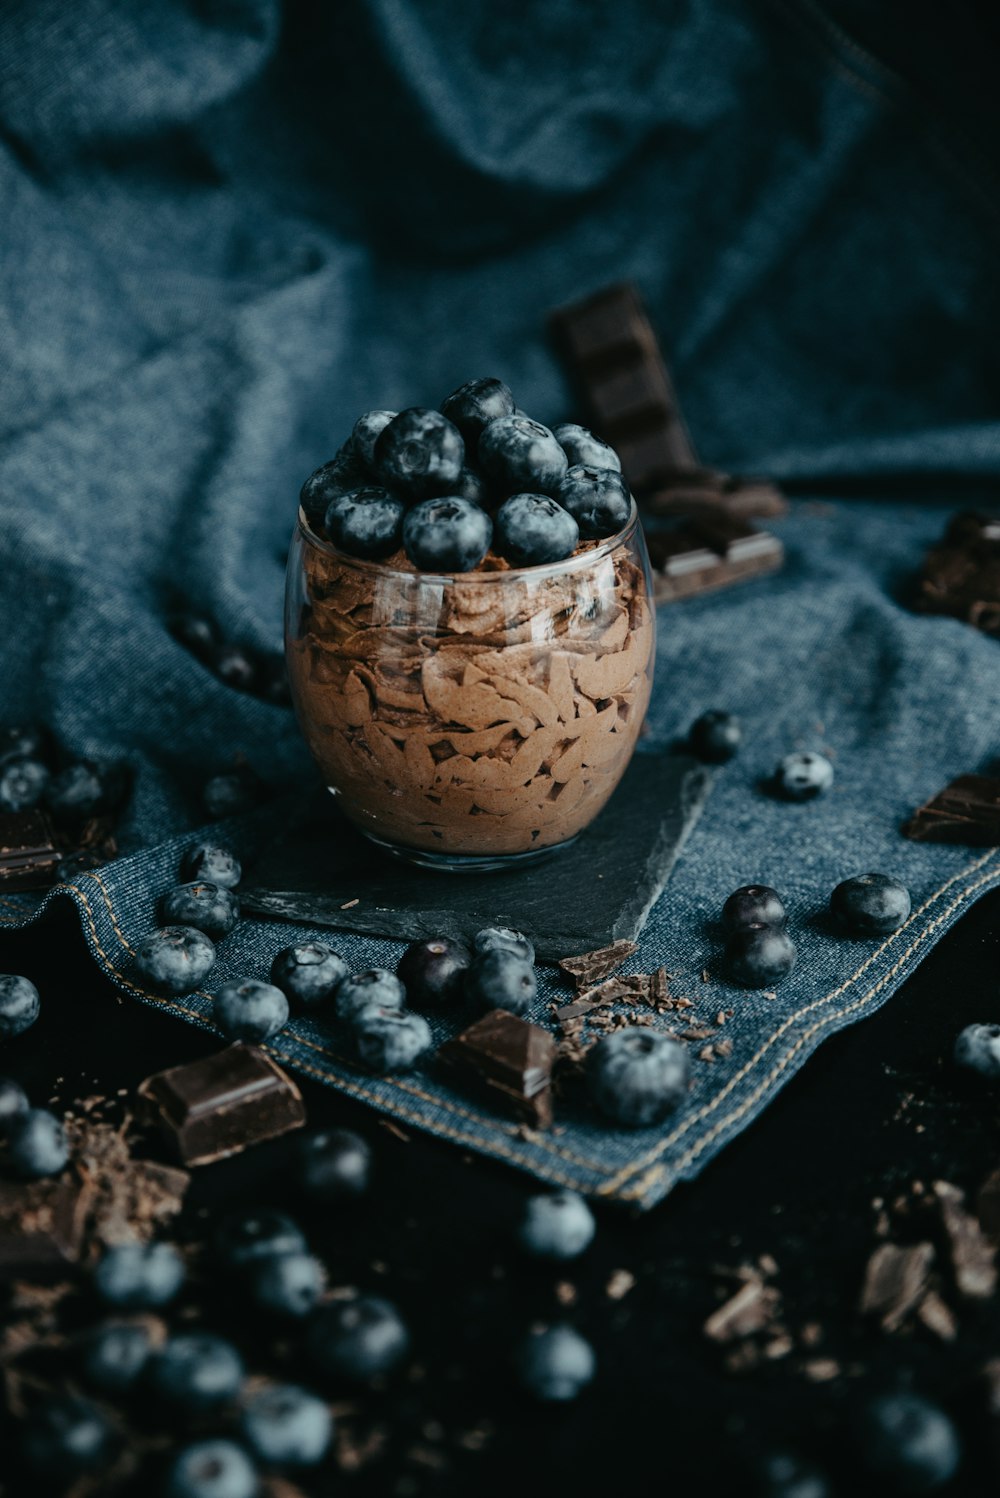
20. Cupcakes and Spoons

Using any desserts in molds, you can create different geometric patterns on a dark moody background. Also, you can take some pieces of chocolate, coffee beans and various flatware.
21. Create Still Life
Try to create a still life composition highlighting the main object and placing it above the rest. Furthermore, you can put some fruit, flatware, books and various light fabrics on the table.
- Read more about fruit photography.
22. Take a Picture of the Tea Brewing Process

Shoot the process of pouring boiling water for tea. This will make the photo more dynamic and the tea more appealing to the viewer.
23. Shoot the Company of Friends Having Dinner
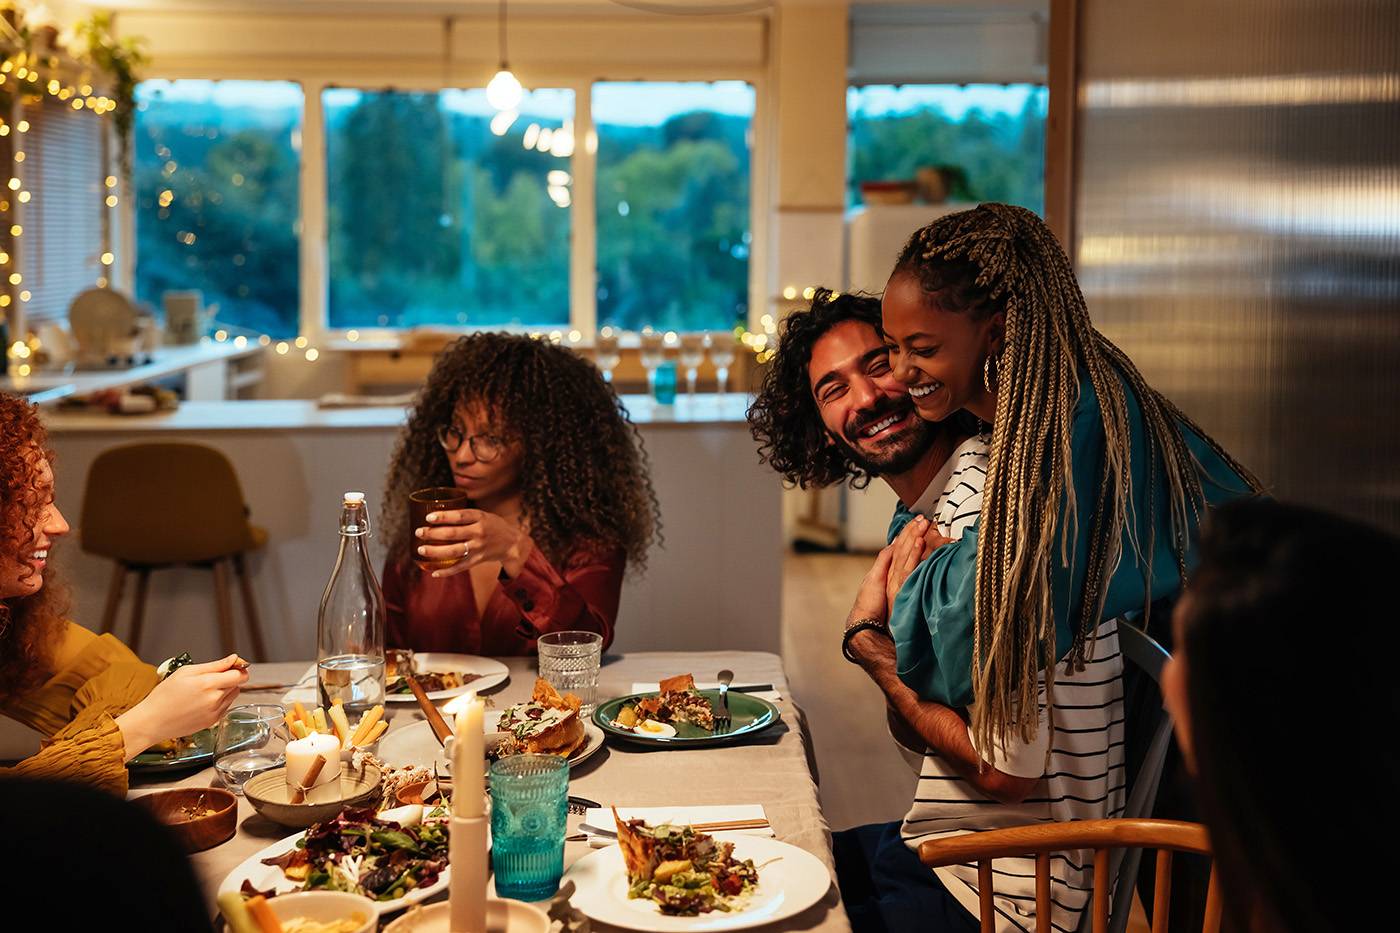
You can get interesting dark food photos by photographing a company of friends having dinner. Arrange ready-made meals, accessories and flatware near vintage chairs to create a “live” frame.
24. Use Powdered Sugar

When shooting dark desserts in a dark food photography style, add bright accents, like powdered sugar or other contrasting powders, to them.
25. Shoot Spices

These are creative and rather inexpensive dark food photography idea, which will suit beginners in this genre. Put the spices of contrasting colors on the flatware and experiment with the composition.
26. Shoot Monochrome Ingredients

To receive a more eye-catching result, you can add not only contrasting ingredients but also the ones of similar colors to your composition.
27. Add Honey to Pancakes
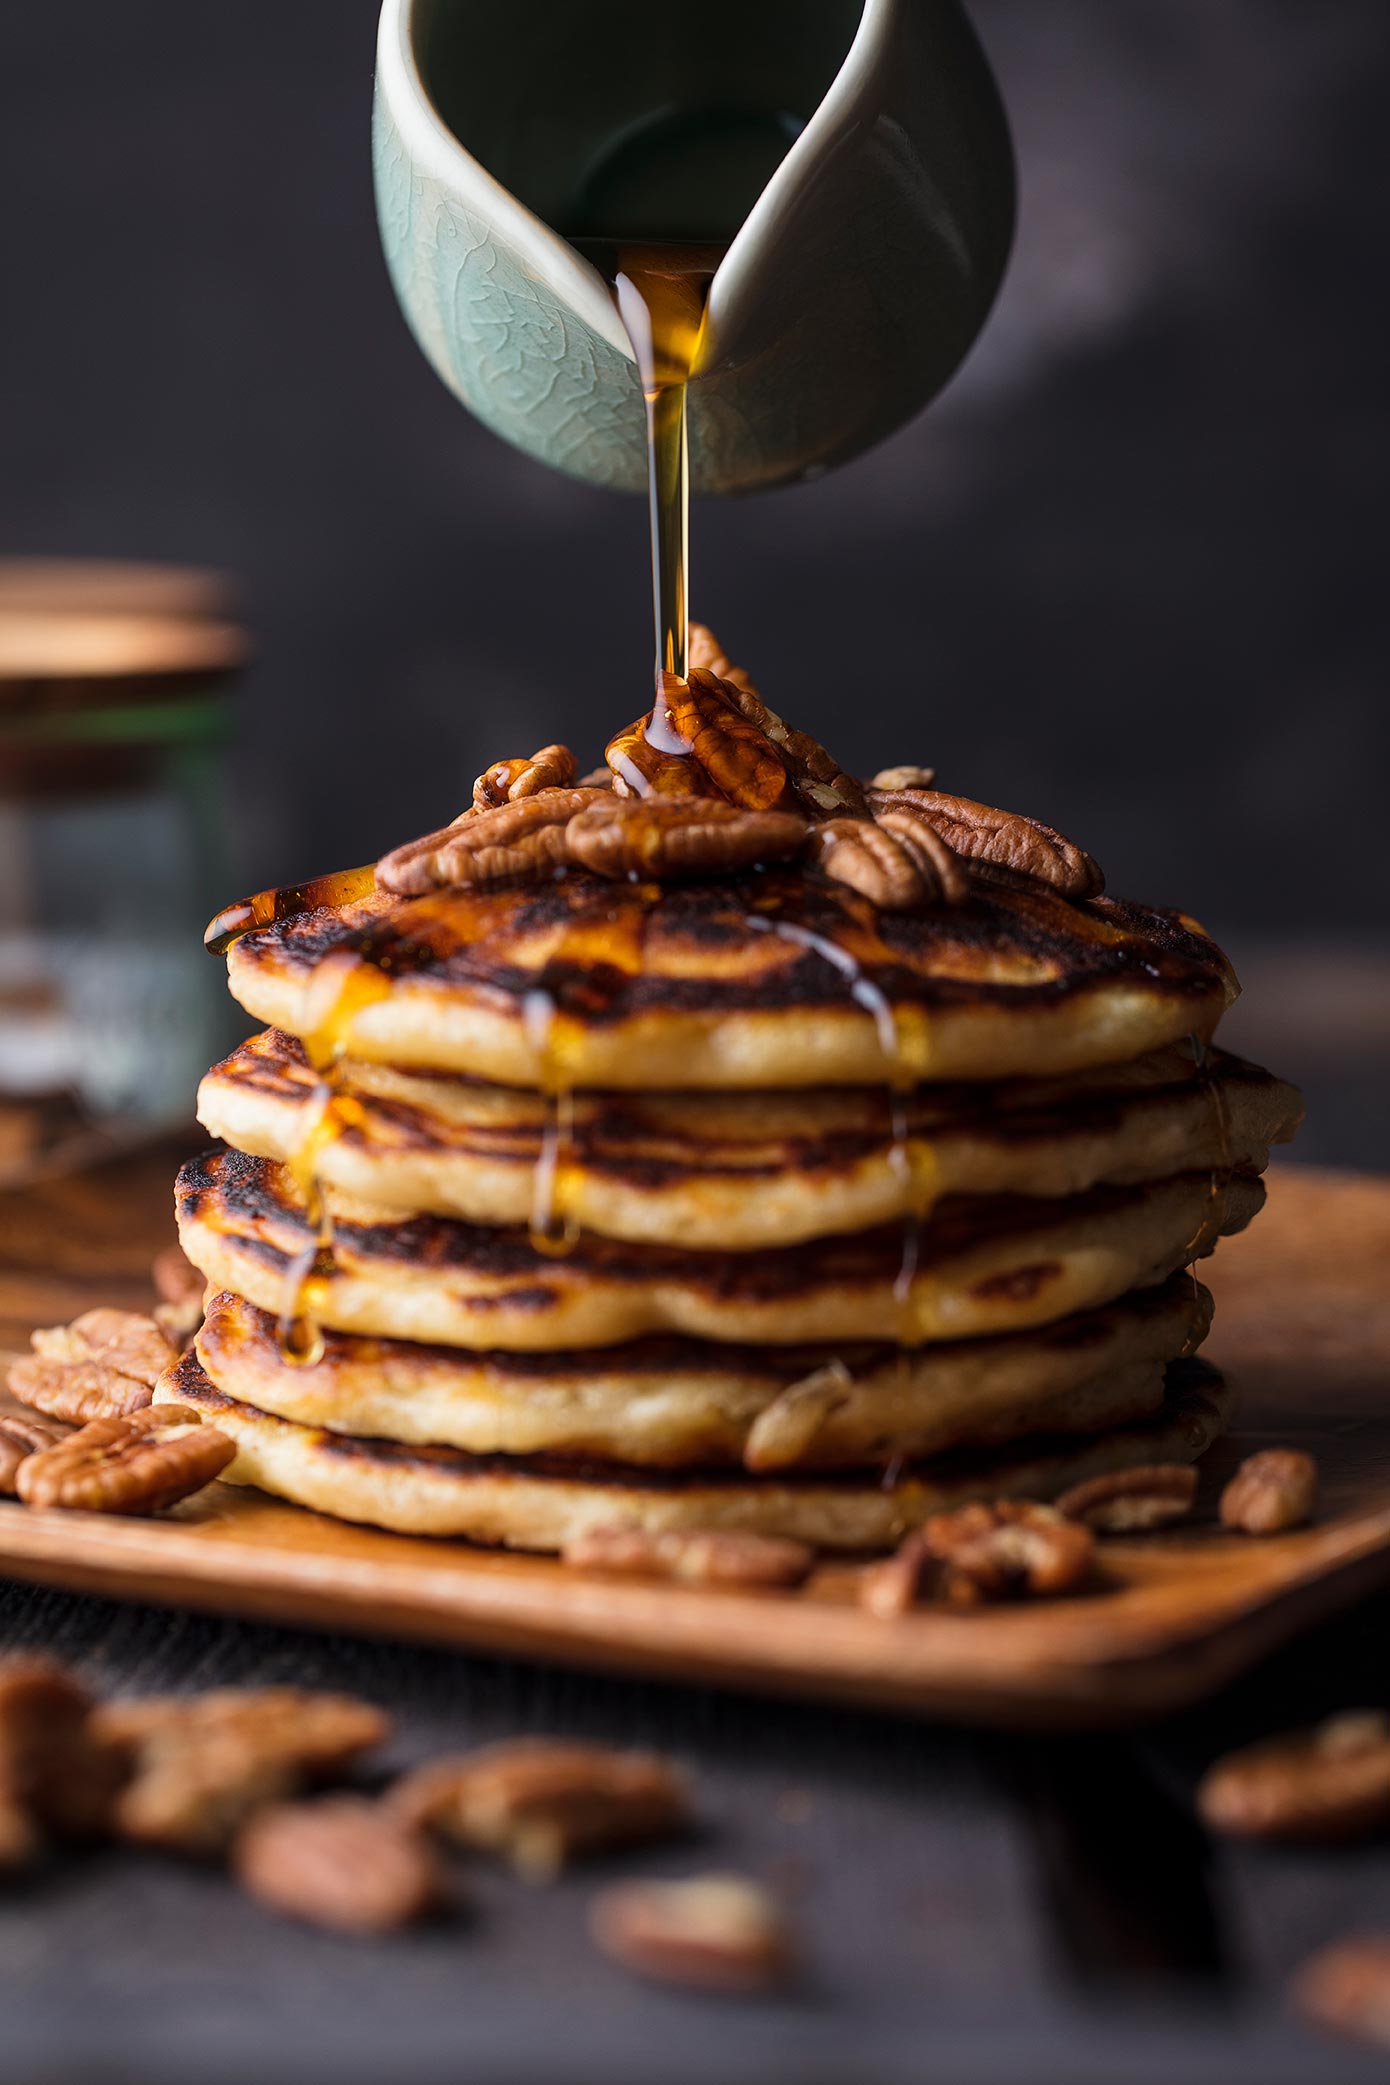
Do not miss the opportunity to take a “tasty” picture of adding honey, liquid chocolate or jam to the main meal.
28. Use Water in Dynamics
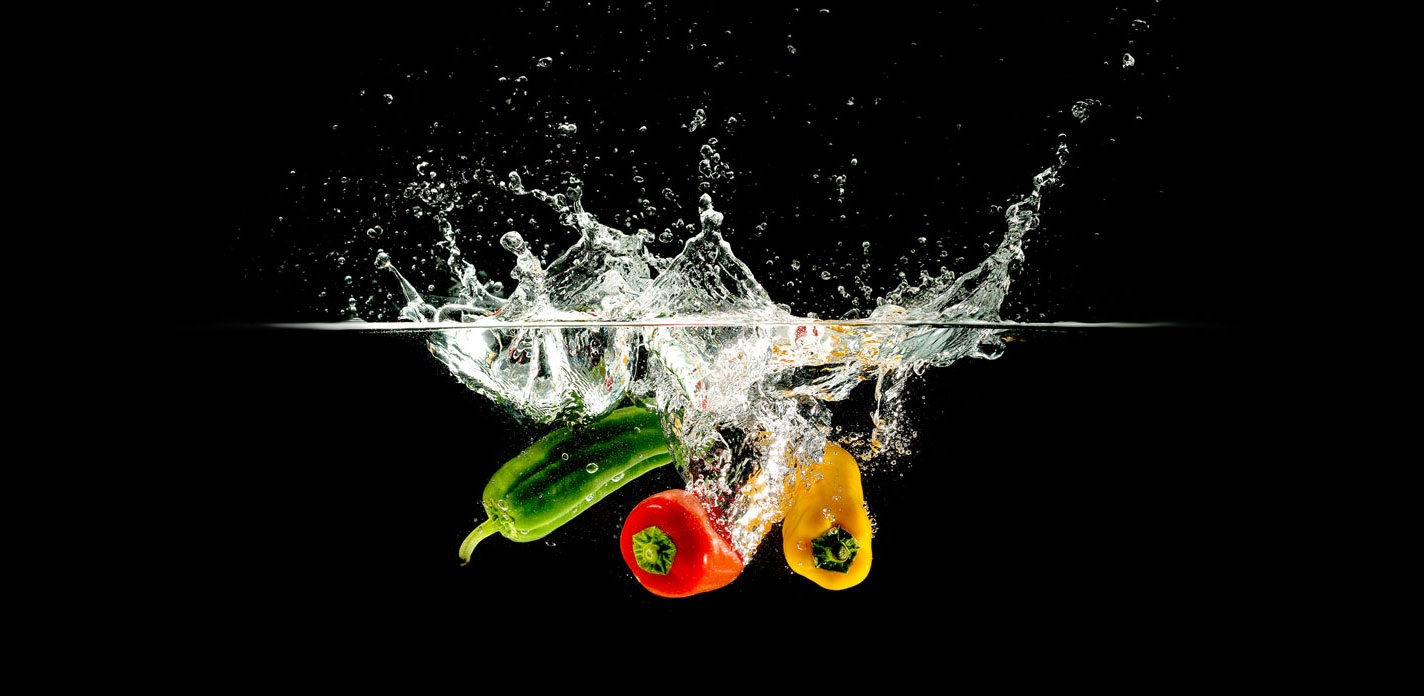
Place a transparent bowl of water against a food black background and shoot the process of putting vegetables or fruit into it.
As a result, without adding many accessories to the frame, you can still take a bright photo. It is possible to remove unnecessary elements in Photoshop.
29. Take "Homey" Photos
When you prepare a dish for a photoshoot, you shouldn’t immediately take away the dishes or flatware that you used for cooking. Use them as an interesting photography dark accent.
30. Shoot from Different Angles

Take a picture of breakfast or dinner on a dark plate and put the emphasis on a particular ingredient. Here, for example, the focus was on a doughnut, and from a particular angle, everything else can become a blurred background.
31. Place the Ingredients in an Unusual Way
In moody food photography, it is possible not only place the ingredients on a dark background but also arrange them in a straight line.
They can be either of the same or different colors. For example, you can put a contrasting ingredient in the middle.
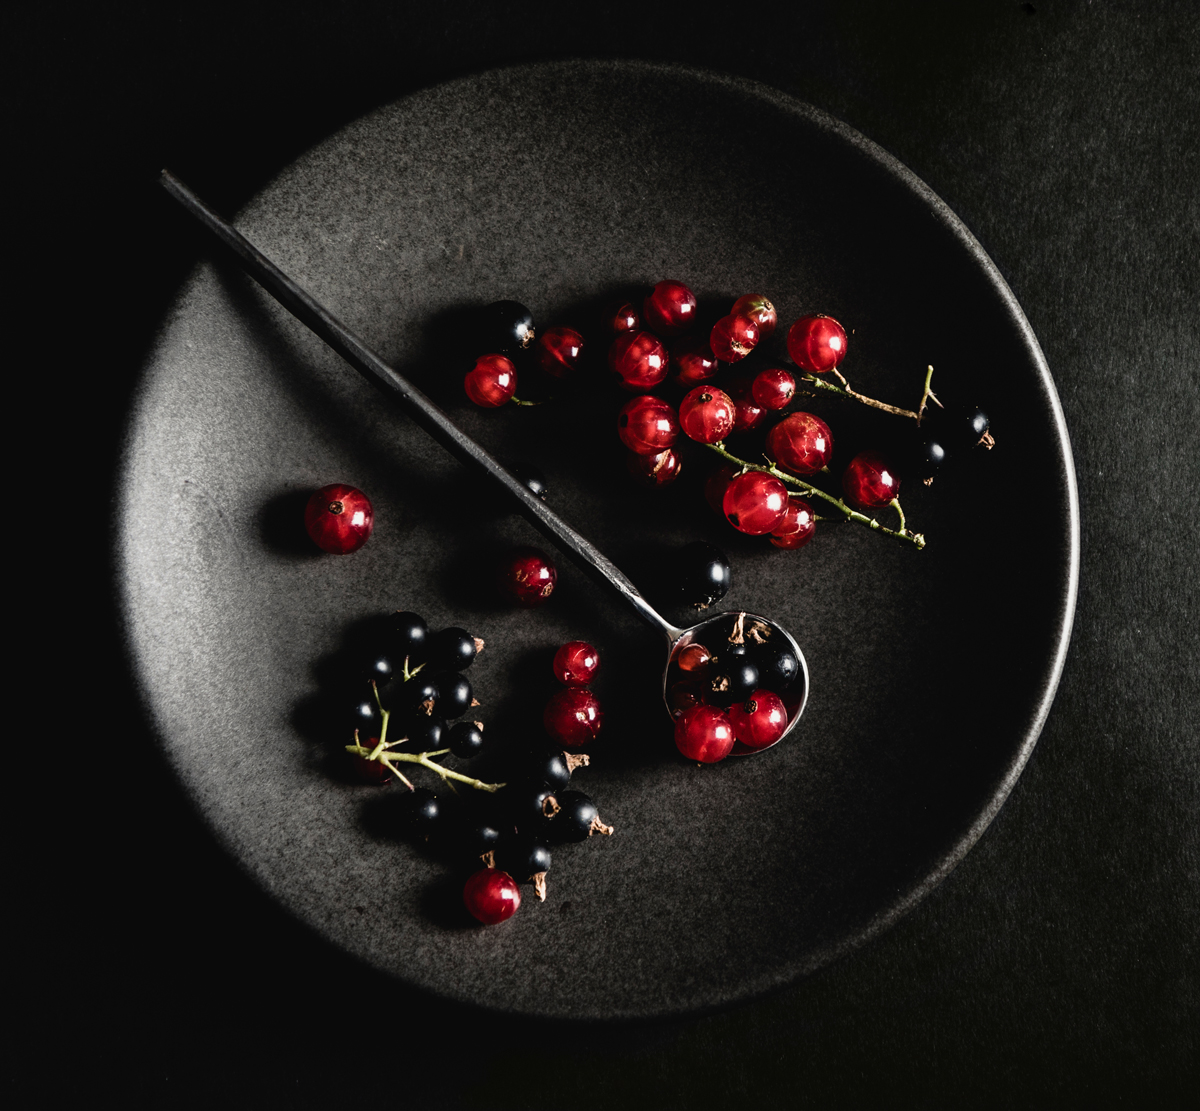
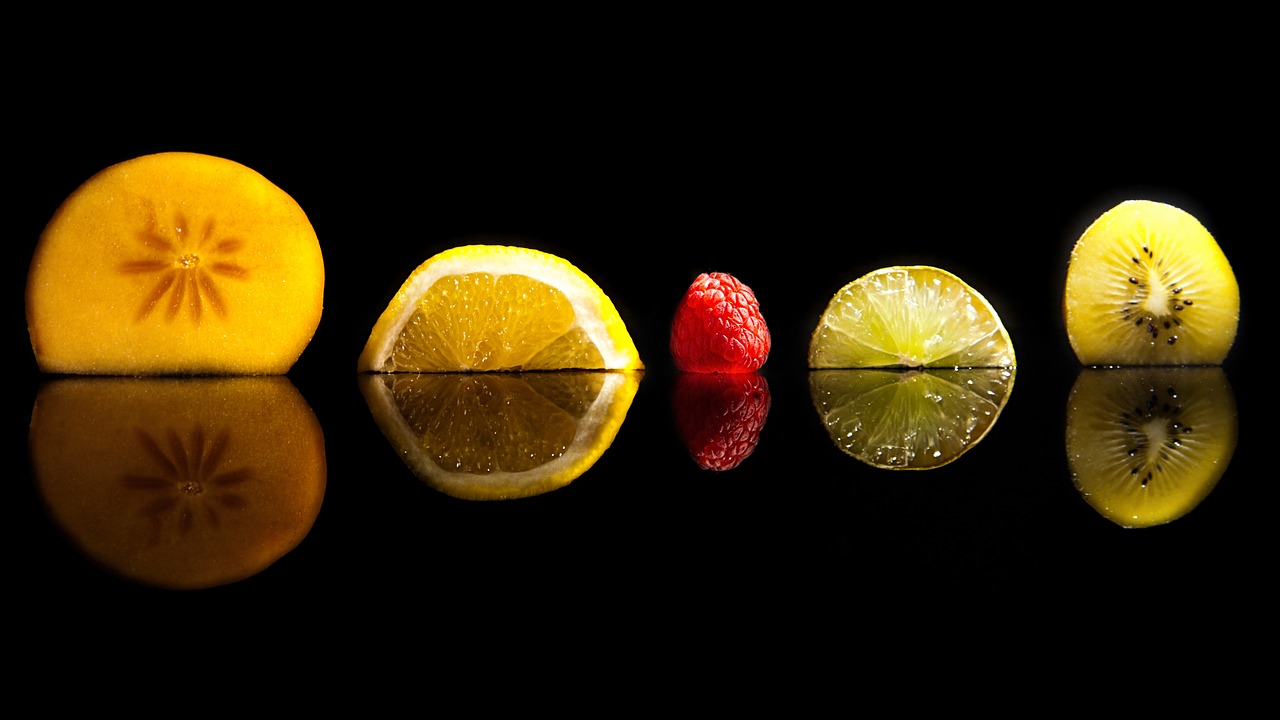
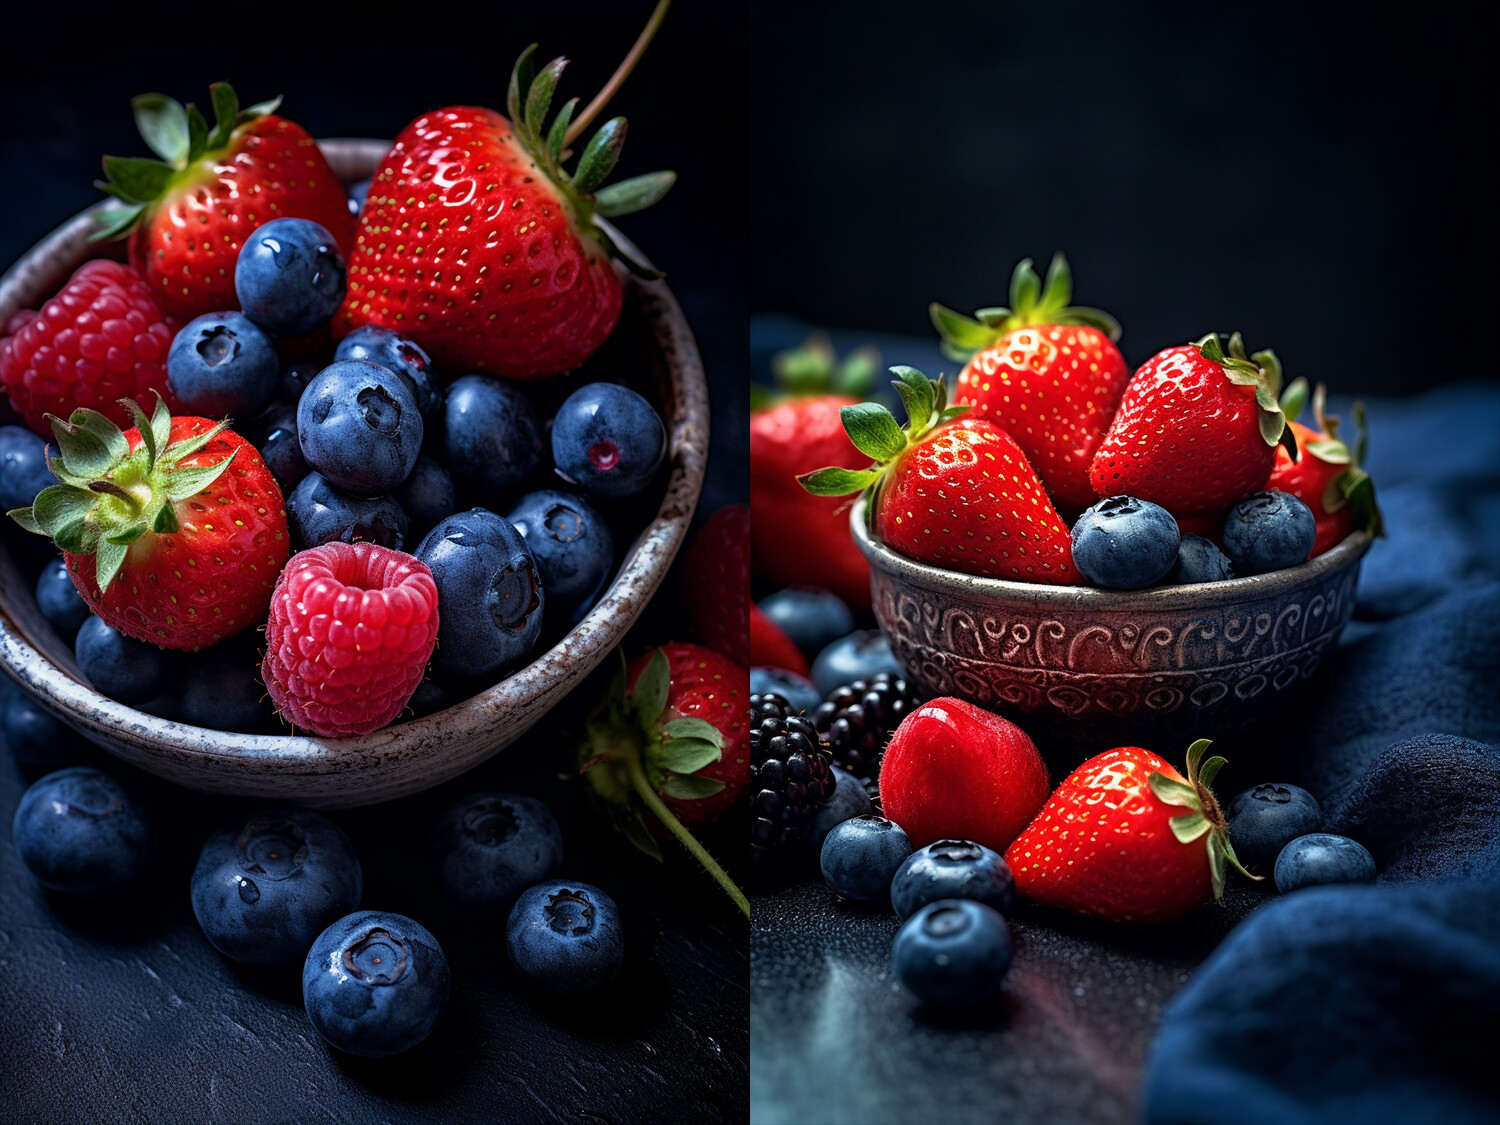
32. Use Different Berries and Fruit
Use berries, fruit and vegetables of different colors in your composition. They may be grouped into different parts of the frame or mixed together. Also, you can add a green note such as mint.
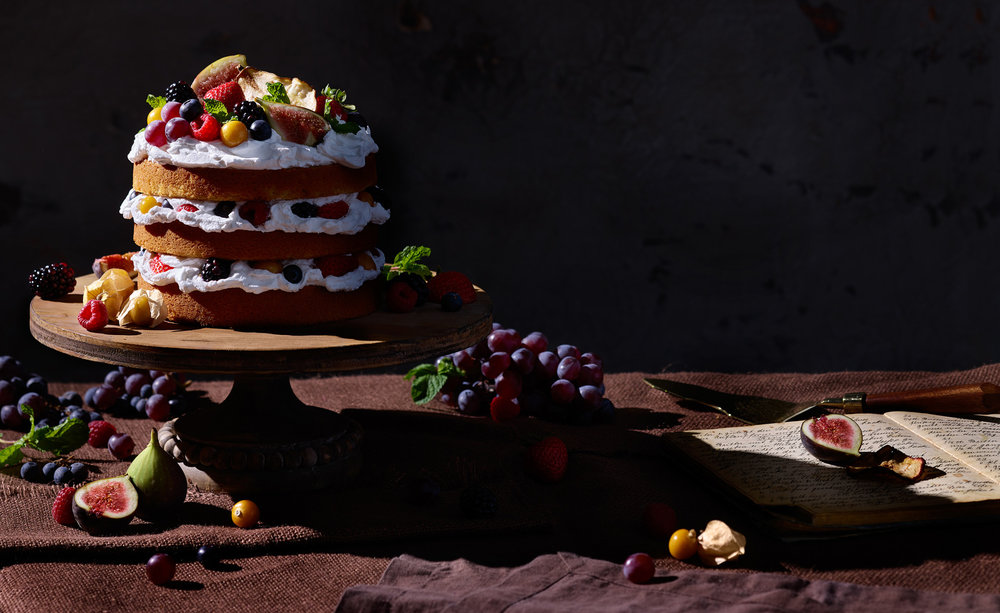
33. Shoot Desserts
A chocolate cake on a dark background and a couple of additional retro details will always look advantageous.
Also, you can place a piece of cake on a plate and create a bite effect to make a dark food photo more natural.
- Read more about wedding cakes photography.
34. Shoot Before Cooking

You can photograph a dish placing all the products in the frame before you fry or roast it. Put the main ingredient in the middle in the lightest point of the composition.
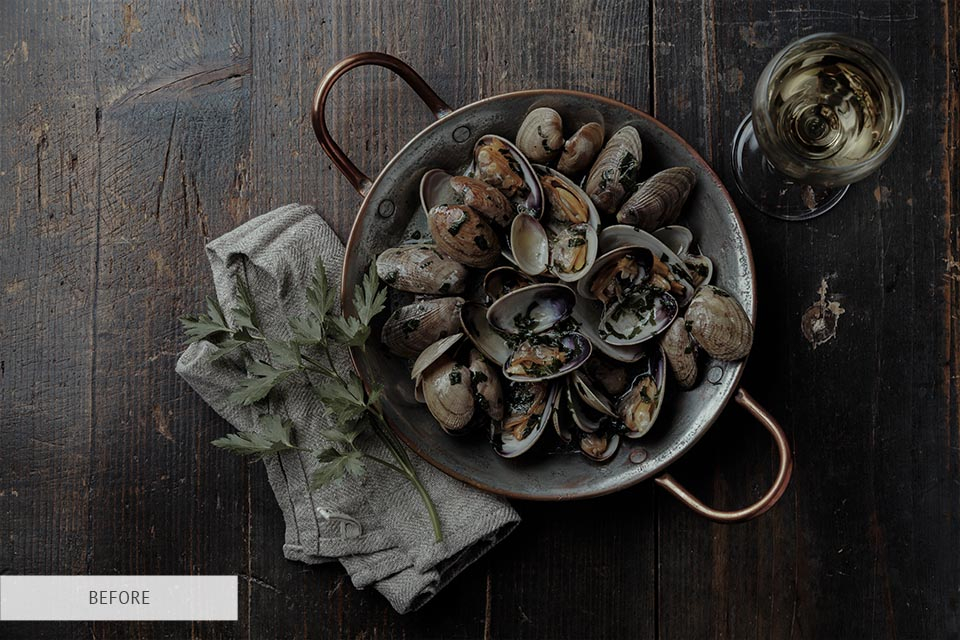
35. Take Photos of Seafood

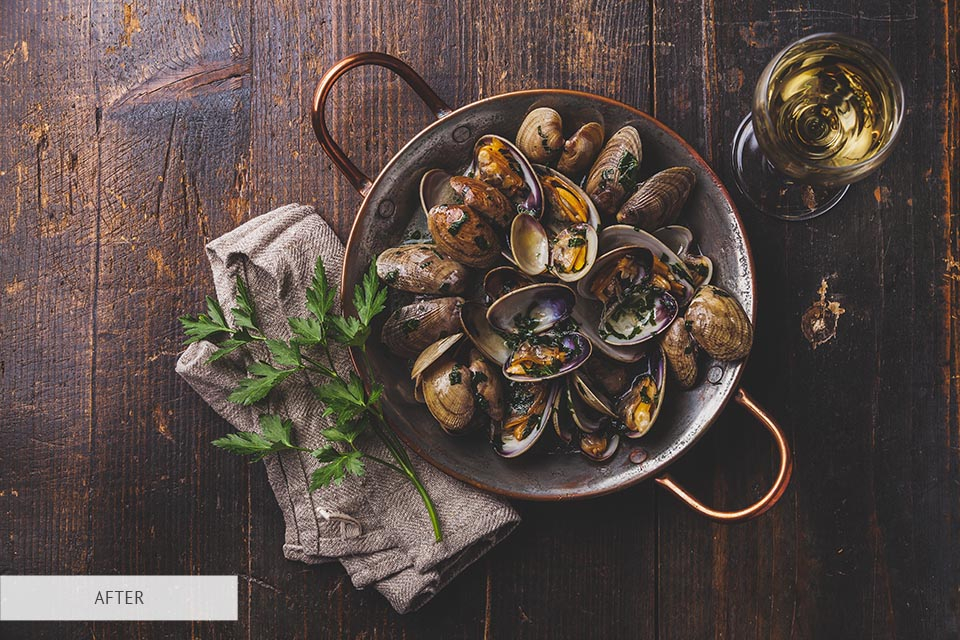
In dark food photography, not only meat dishes but also seafood is popular. It will look spectacular on a dark background. Additionally, you can use ice and the appropriate flatware.
36. Don’t Let Food Get Cold

If you have just cooked something for a photo session, shoot the moment while steam is coming out of the dish. If you capture this moment, the meal in the photo will look even more mouth-watering.
37. Cut and Arrange Food

You can cut the meat and put it on the dark background. Place the products, which you have used for cooking around. In addition, spill the spices and add trimmings.
38. Shoot the Process of Cooking Pizza

In dark food images, it is possible to show not only the ready-made dish but also the process of cooking it. You can take a picture of the dish that is being baked in the oven. In this case, you will get the bright light parts in the photo from the fire.
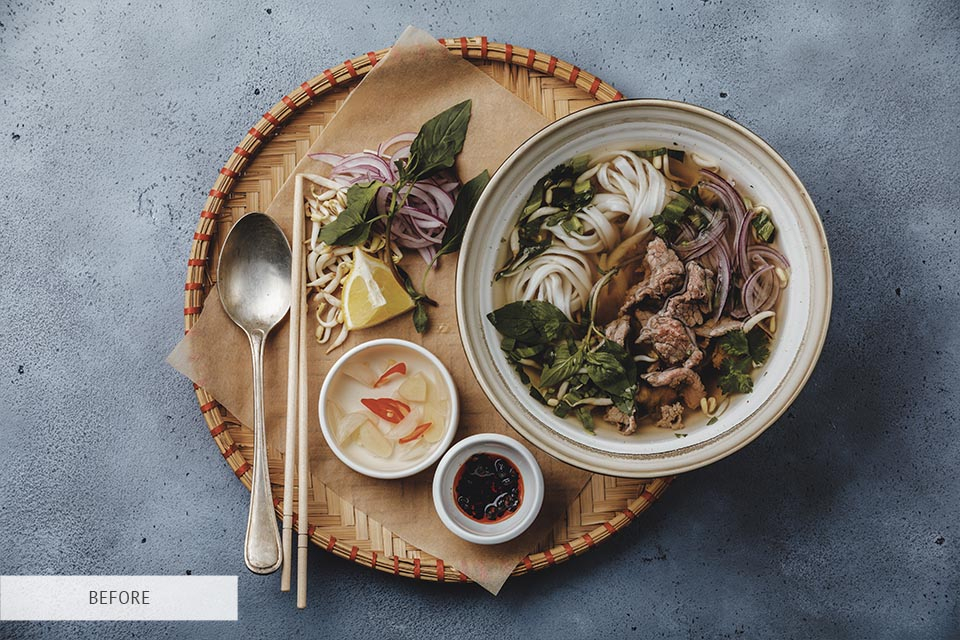
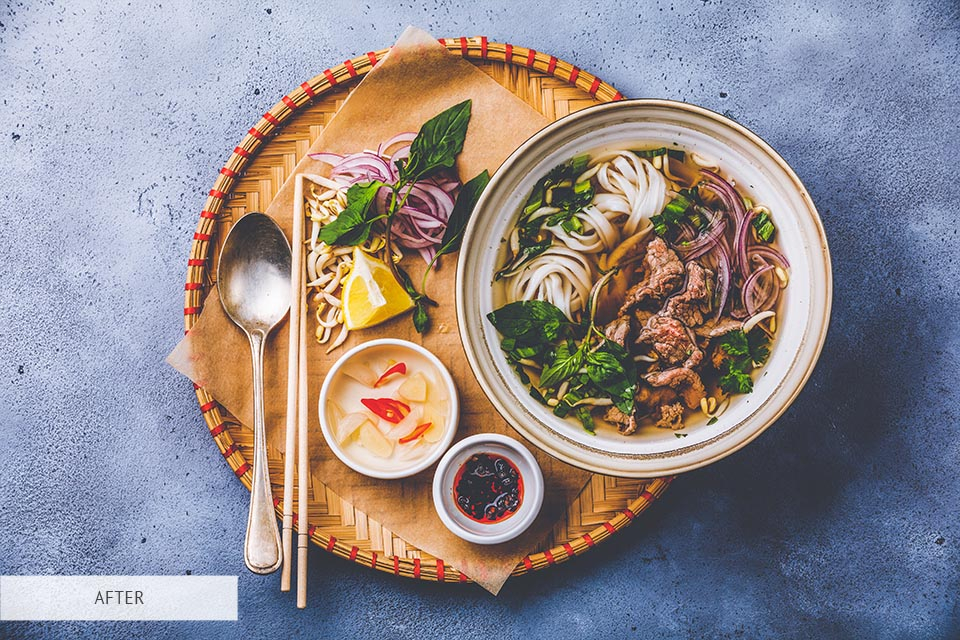
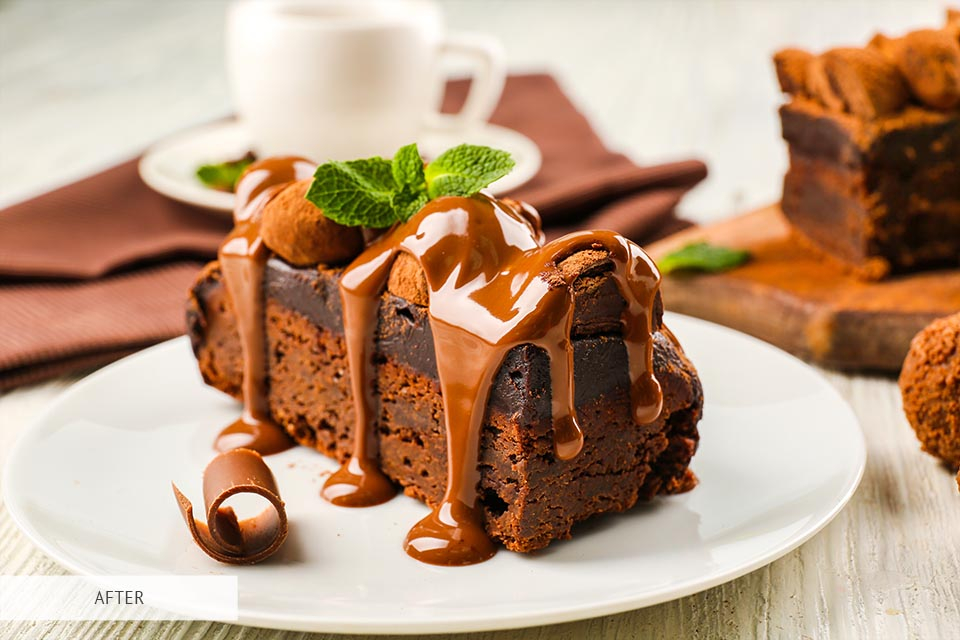
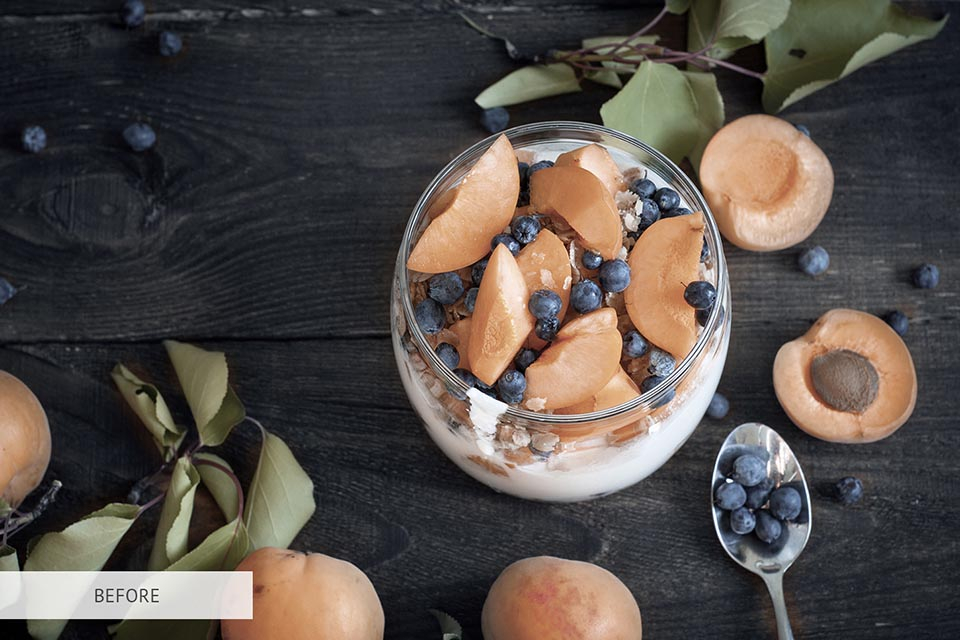
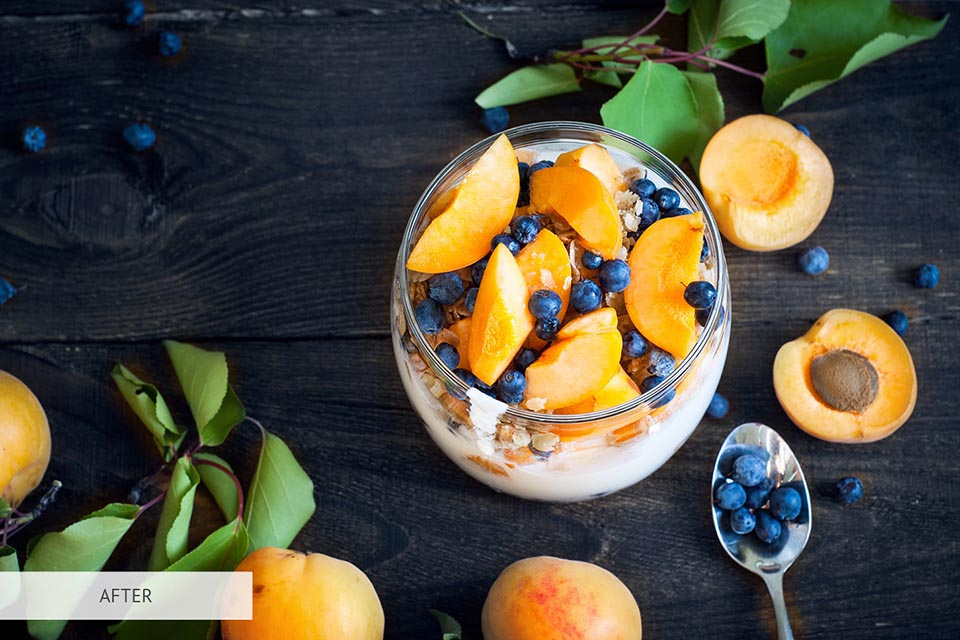
Freebies for Editing Dark Food Photography
I collected some free image editing filters to make dark food photo editing faster and professional. They will increase the contrast and saturation of your dishes, as well as add the original look to each picture.
Free Lr Preset “Reduce Bright”

This preset will add your dark photography a unique style and elegant appearance due to the color tint. Also, it increases the saturation of each dish and enhances their colors.
- Check out the best free Lightroom presets.
Free Lr Preset “Magic”
Magic preset will add more brightness to your food photos in order to get bright accents on the dish. You will have the opportunity to increase the shadow professionally with the help of this preset.
Free Ps Action “HDR”

"HDR" action is quite versatile and enhances saturation, making the image more beautiful. It also adds the volume to the photo and increases the contrast in order to draw more attention to the main objects in the picture.
- View more about how to use Photoshop actions.
Free Lr Preset “Contrast”

This preset can easily help you increase the contrast and improve color correction in dark food photos.
Free Ps Action “Colorful”
This action is capable of enhancing the colors of the dishes in your food photos and making them more appetizing. It also increases the contrast and slightly changes the brightness of the picture.


